Parkeristruggling
Participant
July 4, 2018
Question

Help!! Photos are grainy AFTER I save them to .JPG from RAW

  • July 4, 2018
  • 3 replies
  • 20316 views

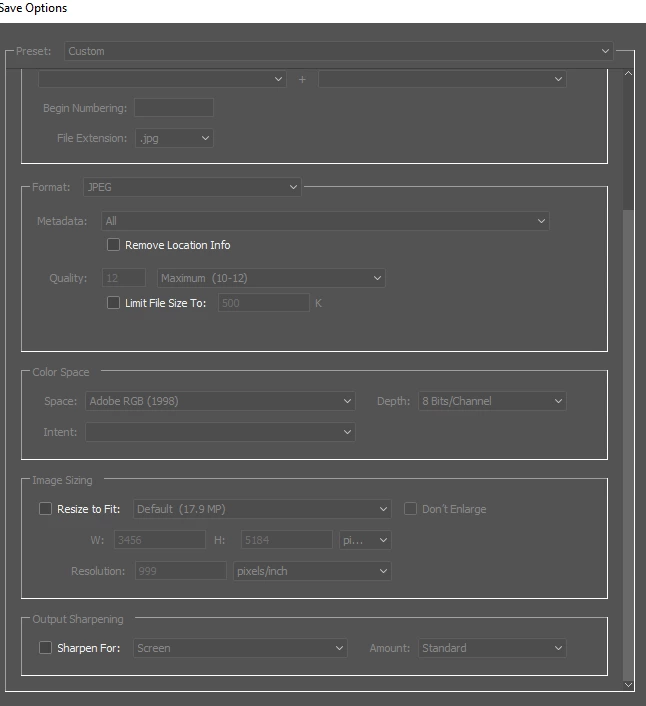
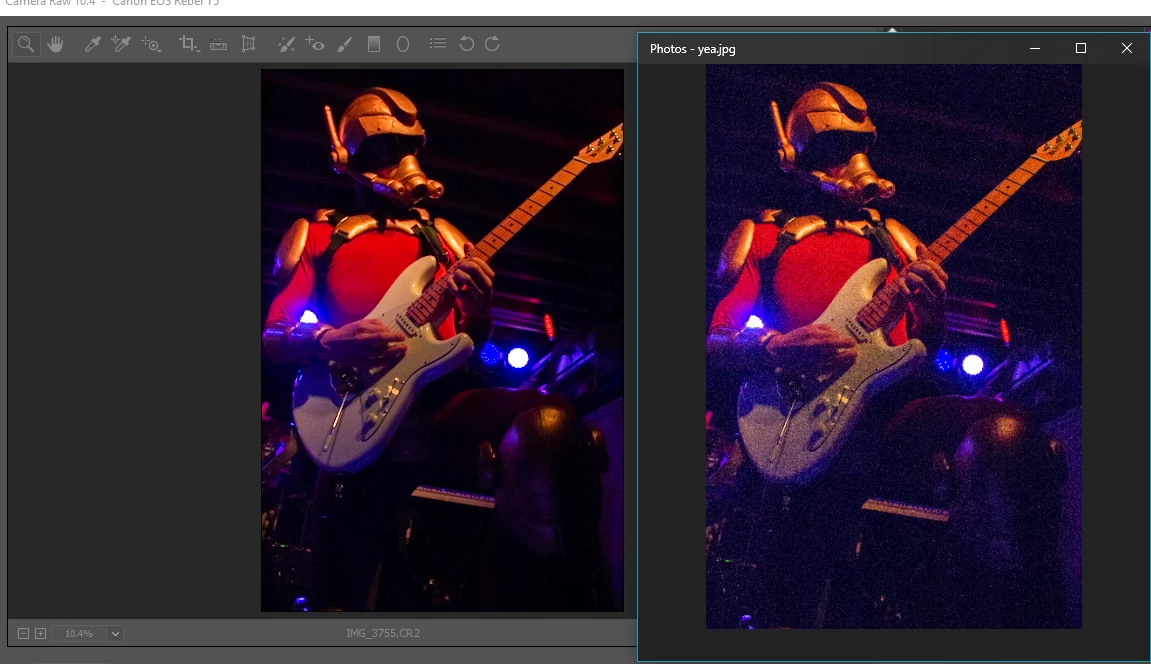
I didnt have this problem before when I was taking classes, but my teacher did help me adjust settings when needed. I'm doing a trial of photoshop CC 2018 and I'm having the most fusterating issue of the photos looking awesome when im editing them and horrible after I save to .JPG I've included photos of my save settings and the results I'm getting while editing. Thank you for the help!!!

    This topic has been closed for replies.

    3 replies

    Participating Frequently
    August 12, 2019

    Hey everyone! I was having this same issue. My photos looked wonderful in Lightroom and Photoshop but once saved to my desktop, Windows Viewer would display them are extremely grainy. Turns out (because I married I genius... An IT guy) we both did some research and it's because the file was too big and the computer couldn't compress it correctly, thus making it very grainy. Once I saved my photos as a smaller file, they looked perfect. It had nothing to do with my ISO settings, nothing to do with improper lighting, it was all about the file size. Bigger isn't always better.    Hope this helps everyone!

    Participant
    October 10, 2019
    This really helped me, Thank you.
    Parkeristruggling
    Participant
    July 4, 2018

    Per Berntsen
    Community Expert
    Community Expert
    July 4, 2018

    Noise and sharpening can only be accurately evaluated at 100% view - where one image pixel is represented by one screen pixel.

    Any other view will be inaccurate and misleading because the image has been scaled.

    Different applications use different algorithms when scaling images, and the Photos app seems to apply a lot of sharpening.

    If you compare the two at 100% view, they should display identically.

    Some general advice about sharpening and noise reduction:

    • Always work at 100% view
    • If the image has noise, use the Masking slider (Detail tab in Camera Raw) to protect flat areas from sharpening.
      Flat areas is where noise will be most visible, and you don't want to sharpen it.
    • Hold down the Alt key while dragging the slider to see the effect. White areas will be sharpened, black areas will be protected.
      Noisy images may require a high setting, like 70 - 90.
    Participant
    March 26, 2020

    Thank you. Im very new to Photoshop and this helped me tonight!

    Thanks again

    Theresa J
    Community Expert
    Community Expert
    July 4, 2018

    The save options screen capture doesn’t show any settings. Are you resizing the image when you export it? The grain looks like it could be noise. Do you see this in the raw file if you zoom way in?

    Parkeristruggling
    Participant
    July 4, 2018

    It is probably noise since it was a dark concert, and I do see noise when I zoom in wich isn't really an issue for me. The image sizing is on default (17.9 MP) and thats never been a problem before (at least I don't think) would the resolution, metadata  or color space affect the way this image is turning out at all? I will try to add a better image showing the save option settings snipping tool seems to make the settings darker when I try to screenshot for some reason.