

- Home
- Photoshop ecosystem
- Discussions
- Help with best way to remove lines from a photo
- Help with best way to remove lines from a photo

Copy link to clipboard
Copied
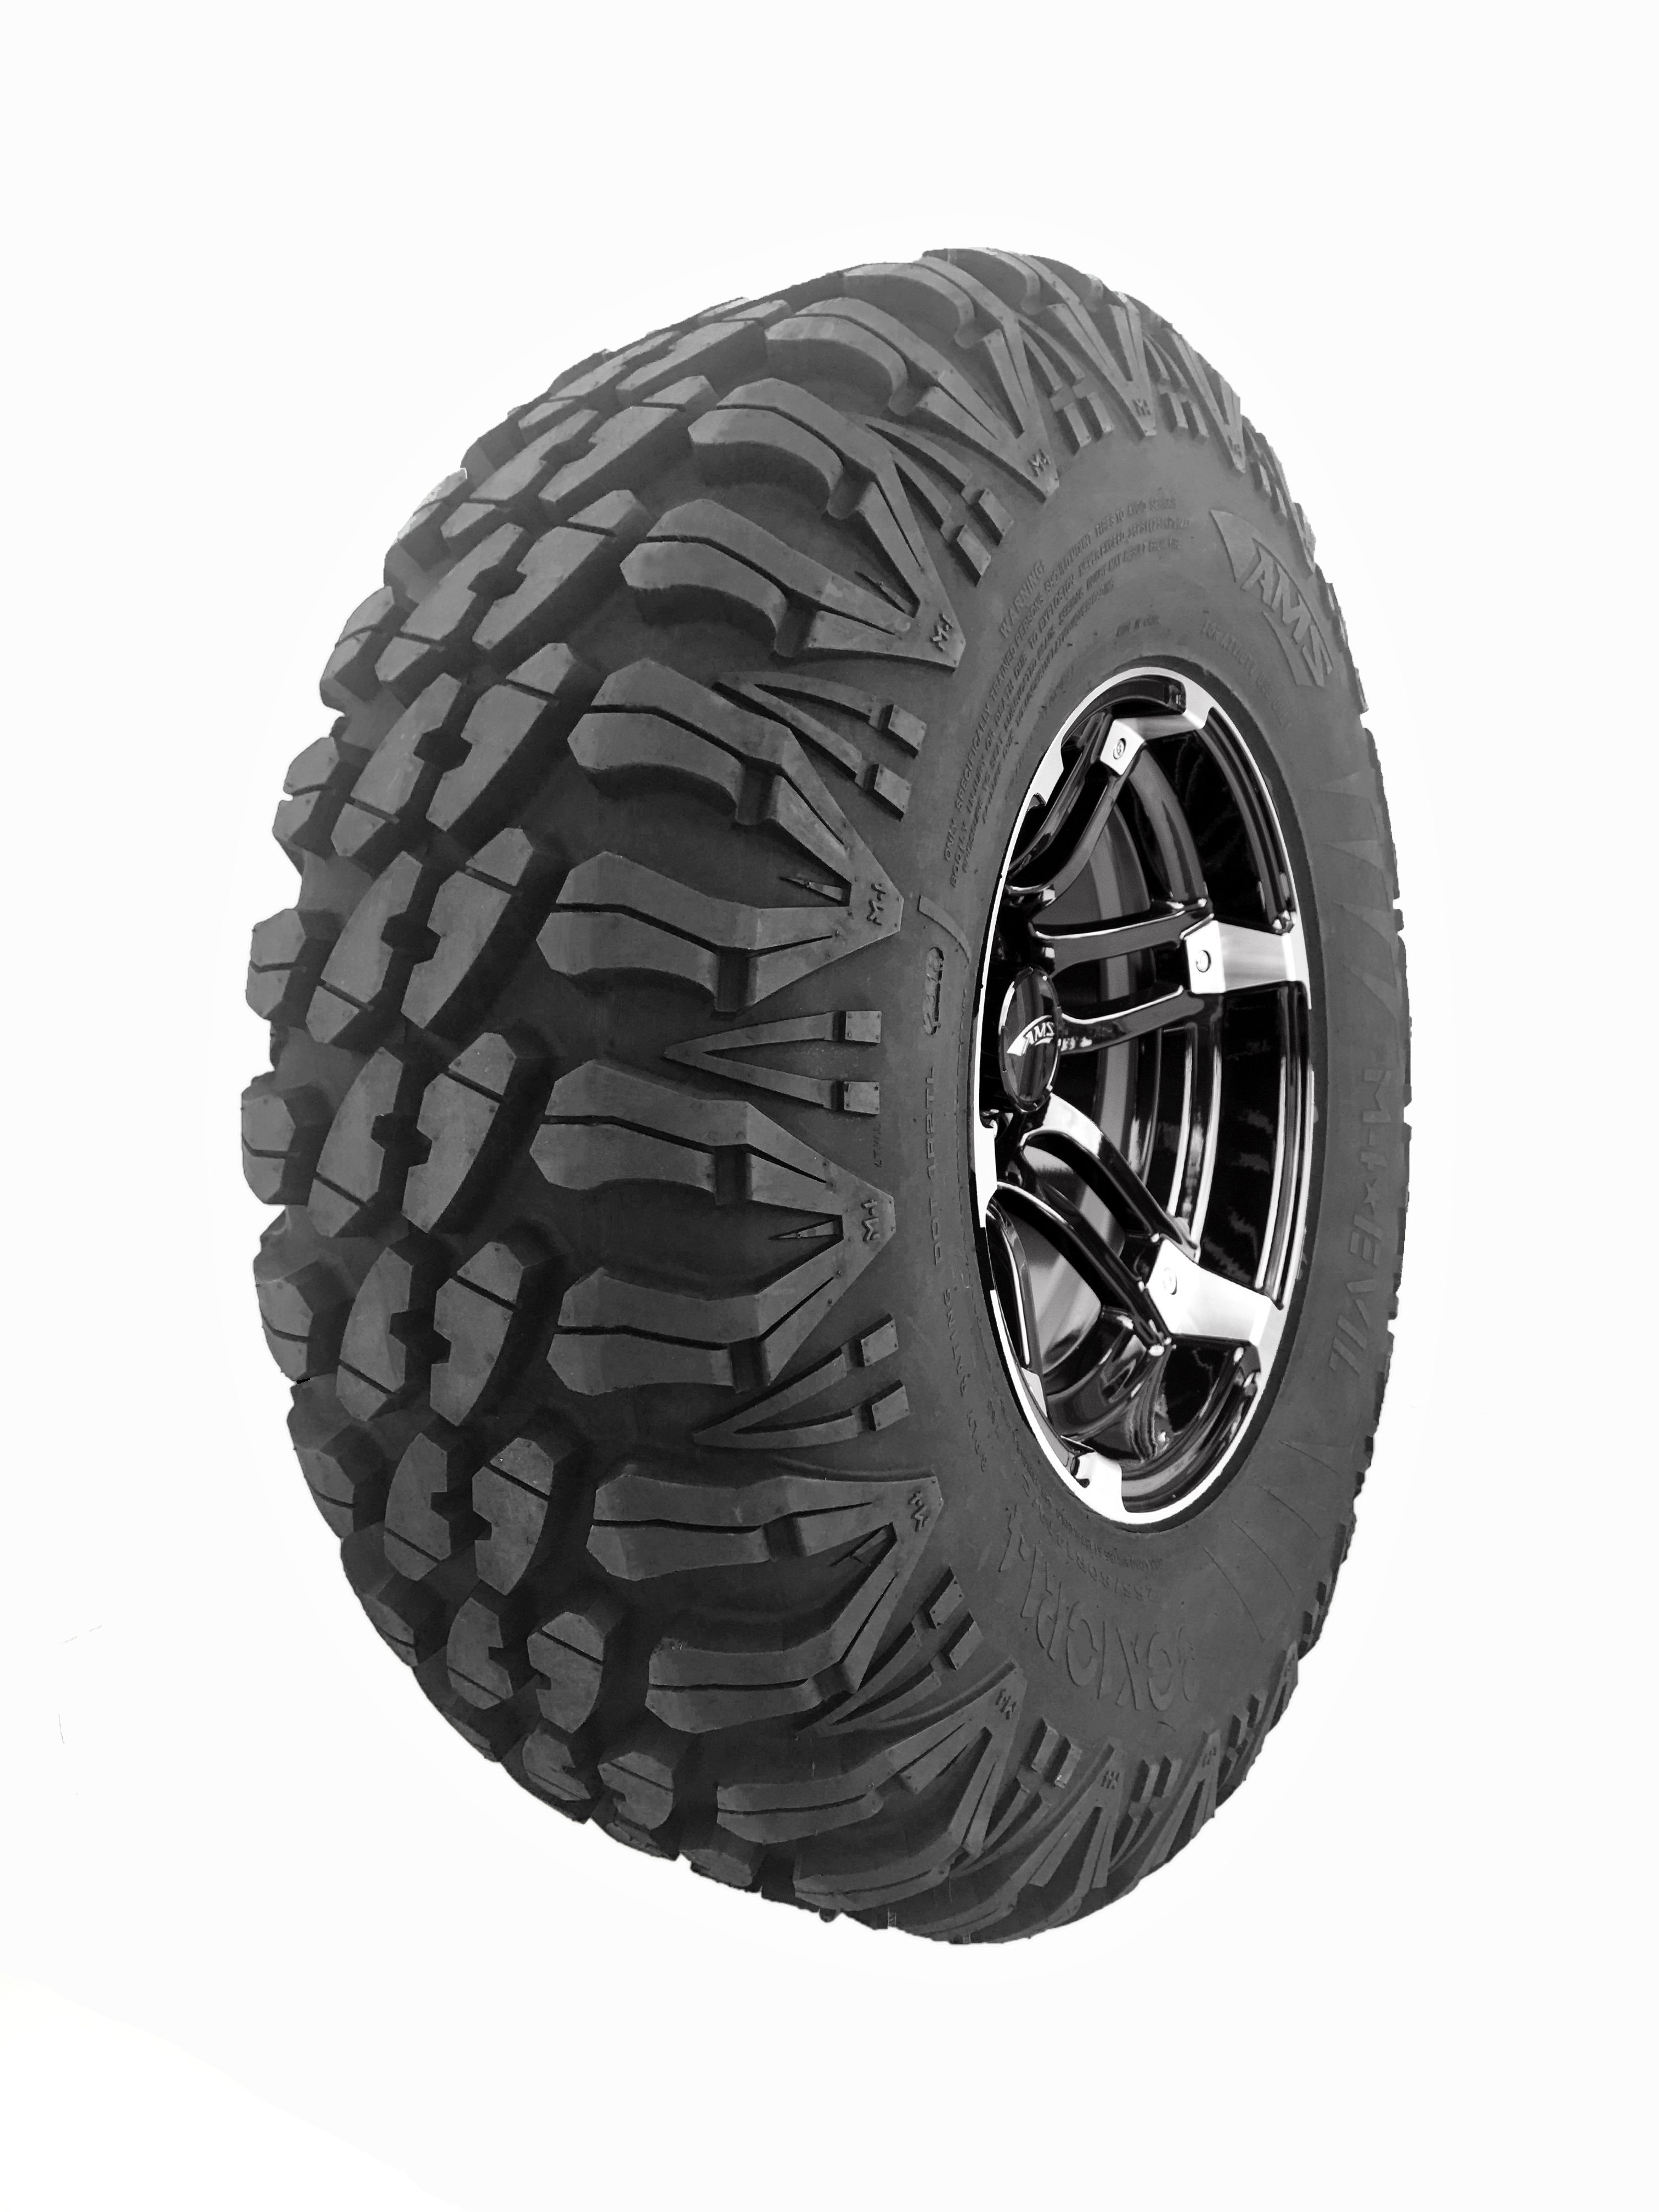
Hi, I am relatively new to Photoshop and trying to determine the best way to remove the yellow and purple lines that are painted on this tire. I have tried the cloning tool and the healing brush and just not having that great of success.
Thanks for suggestions.
.jpg)


 1 Correct answer
This did a half way decent job. You would have to look for it.

Explore related tutorials & articles
 11
Replies
11
11
Replies
11

Copy link to clipboard
Copied
If you were to add a blank layer and use the Spot Healing Brush set in the Options Bar to Sample All Layers, you would be presented with an editable layer of your corrections. Working upsize should also help.
Copy link to clipboard
Copied
This did a half way decent job. You would have to look for it.

Copy link to clipboard
Copied
Thank you Silkrooster!
Copy link to clipboard
Copied
https://forums.adobe.com/people/Excel+Tire wrote
Thank you Silkrooster!
You're welcome.
Copy link to clipboard
Copied
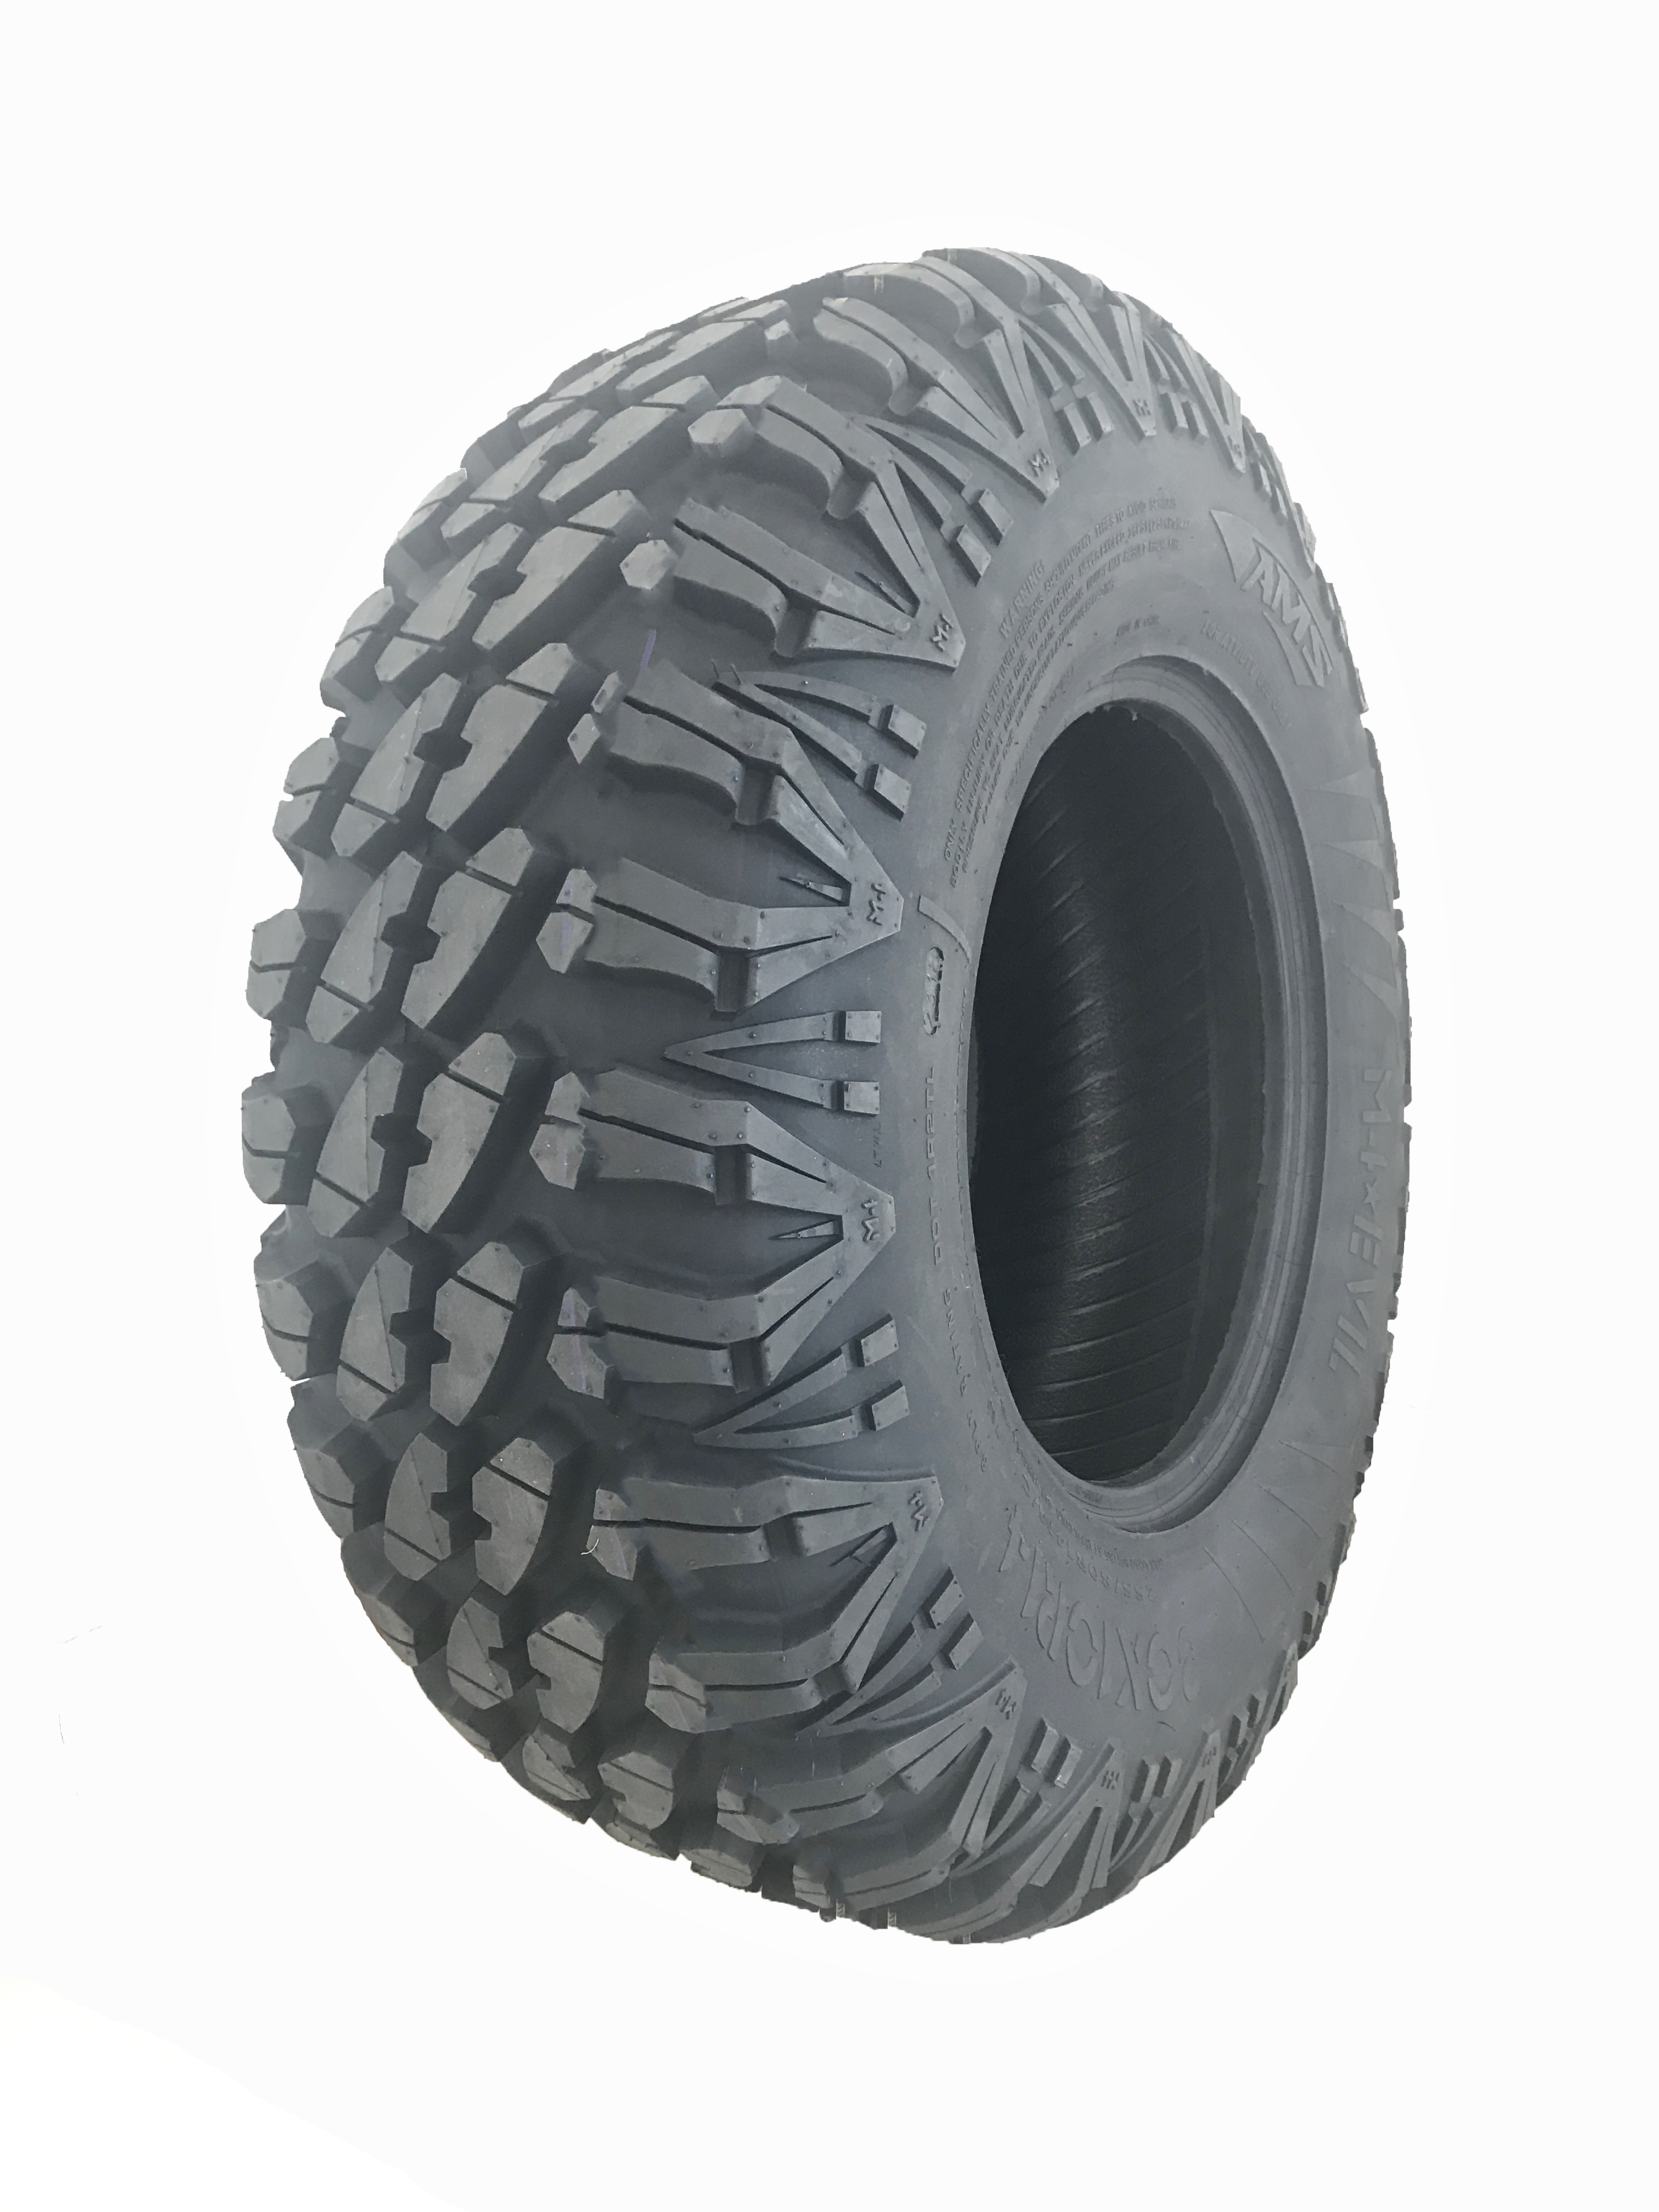
From the not so great photo that was sent to me and using your suggestion here is what I came up with including adding our wheel from another photo to this one. This took several attempts and still could us some work but it is evident that patience is the key. This photo was sent by the factory making this tire for us. We will have the actual tire for studio photos soon but I will still need to remove the painted lines from it so this was a learning curve for me. I am sure you will find flaws if you look close.
Copy link to clipboard
Copied
It’s OK. Not wanting to diminish your work, but the lines are quite an easy job to do. Never the less: each job needs to be done quickly and effectively. I took a short look at the tyre and did not find flaws...
Copy link to clipboard
Copied
Thank you.
Copy link to clipboard
Copied
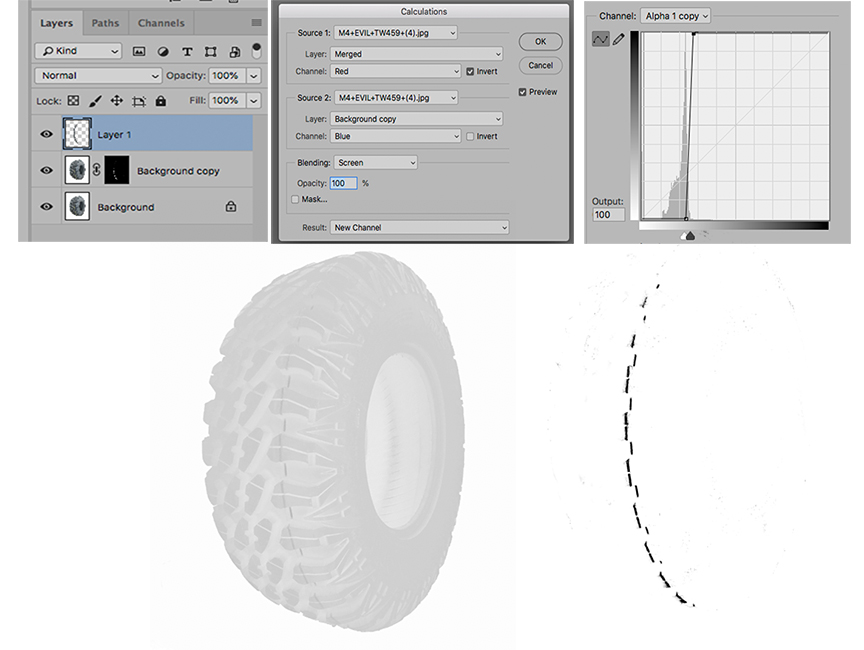
1. Create a duplicate layer.
2. Image > Calculations which, with the settings above, produce the ghost tire image.
3. Image > Adjustment Curves, with the setting shown above cleaned up with Brush set to White... Overlay Mode. Then increase the contrast with Curves again. Inverse this alpha channel. It will become the mask
4. Add a blank layer. Choose Spot Healing Brush, Options bar: Sample all layers. Drag brush down the yellow stripe
Copy link to clipboard
Copied
Thank you norman.sanders. Let me play with this option.
In your final png file the outside lugs are distorted from the original configuration but I may be able to work with this.
Your help is greatly appreciated.
Copy link to clipboard
Copied
Happy to help. It seems the dupe layer, top layer or mask mask seemed to have moved and that caused the misalignment.
Checked. It was the top layer. This is a 2 minute redo of the spot healing brush and top layer position. You. will be more precise with the spot healing brush.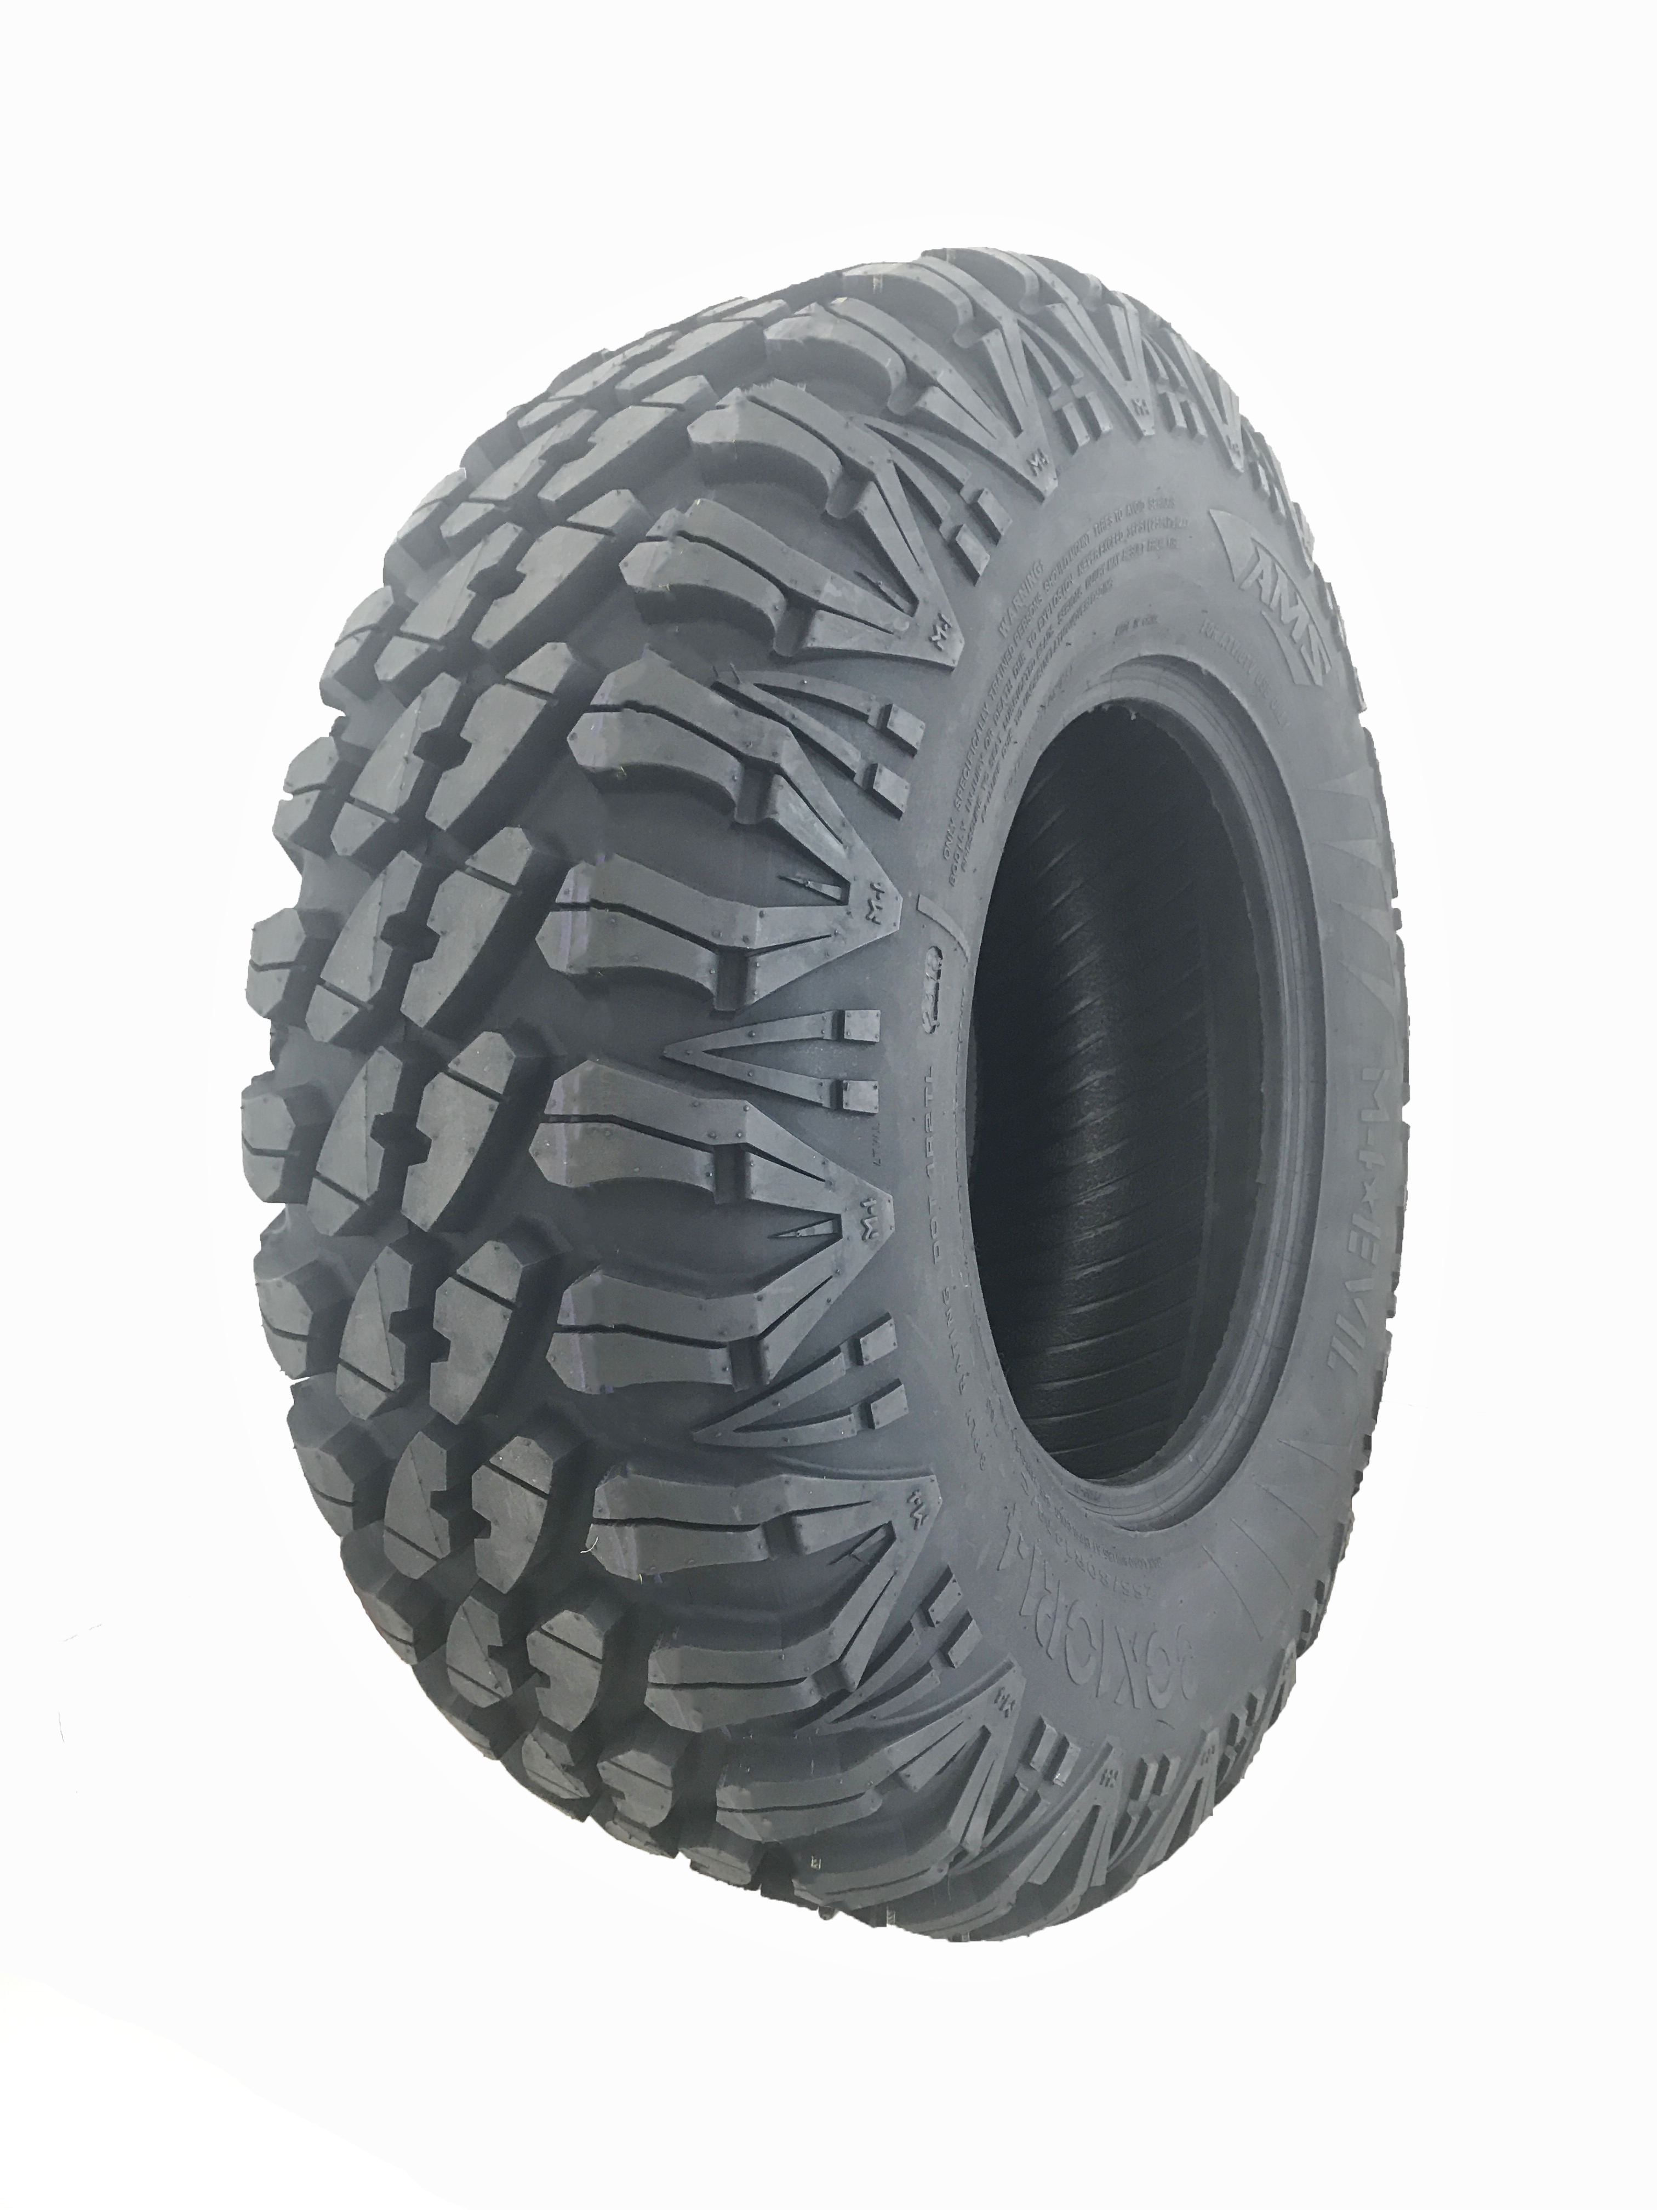
Copy link to clipboard
Copied
Thank you again. This appears to be a big help.
Gary

 AdChoices