- Home
- Photoshop ecosystem
- Discussions
- How can I remove the background?
- How can I remove the background?
How can I remove the background?
Copy link to clipboard
Copied
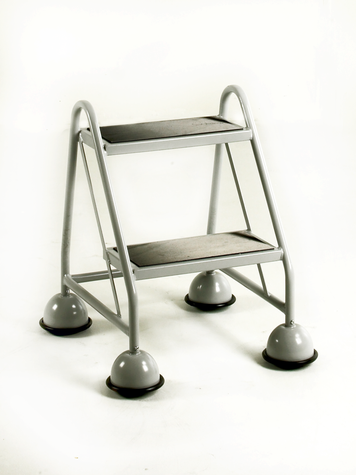
I'm trying to remove the background from the following image and set it to white as it is very dirty at present and there are lots of shadows which change when I attempt to apply a gradient layer to the image to change the colour of the object. My starting image is:
I've tried things like the background eraser and quick selection tools having studied articles and the help about them. The best I have managed is as follows but I don't think it is quite good enough as the way the object is lit makes it very difficult to select especially on the right hand side of the handrails and feet.
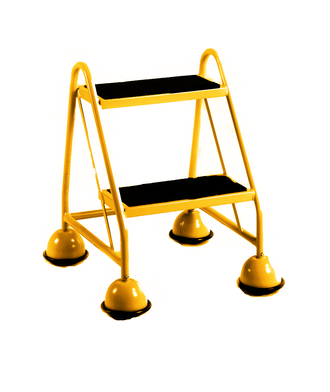
My best efforts:
If anybody has any hints or tips that I can improve this image I'd be greatly appreciative.
Regards
Nick
Explore related tutorials & articles
Copy link to clipboard
Copied
Seems like a good image for clipping with the Pen Tool.
Copy link to clipboard
Copied
Thank you for taking the time to respond. The Pen Tool is a new one on me. I don't suppose you would care to send me a nice little graphic about how it works and can solve my problem. I know I'm being lazy and should go and search google for it's use and wade through the relavent arcticles and fiddle about until I figured it out. But if you could save me that time I'd greatly appreciate it.
Regards
Nick
Copy link to clipboard
Copied
Copy link to clipboard
Copied
Master the Pen Tool in 30 Minutes | Photoshop In-Depth Tutorial - YouT
He explains things very well.
Copy link to clipboard
Copied
Jon, by far the best tutorials on using Photoshop's pen tool are a series of five videos by Mike Hoffman who sometimes posts to this forum. This is the first video, and you'll see links to the other four at the end of the video.
Copy link to clipboard
Copied
While I stongly agree with @c.pfaffenbichler that the Pen tool will provide the crisp silhouette you requested, I feel your objective might be better served with a only a color correction, allowing the shadows to lend dimension to the image. When the sample you provided is brought from RGB mode to Lab Color, a check of the background reading in the Info panel shows the entire image to have a yellow-green tinge. By neutralizing the color and droppiing the Lightness value one point to 98 to assure the value would translate well even to a printed page, perhaps a silhouette is unnecessary. A final step after making the correction in Curves would be to return to RGB mode.
Note: The a channel minus value indicates green. The b channel plus value indicates yellow. Zero is neutral. The reason for the -1 before correction in the right image is that I searched for something closer to 0 in the background before making the color correction.
Copy link to clipboard
Copied
Thank you so much everybody for the interesting replies and when I have time I shall certainly work my way through. I just thought everybody might be interested in the results of a chat I had with Adobe support who sent me a link that when you upload a picture it will automatically remove the background which I was quite excited about. For anybody who is interested the link is:
https://www.adobe.com/express/feature/image/remove-background#sa_src=web-messaging
Again regards and thanks to everybody who made the effort to help me out.
Regards
Nick


