November 6, 2017
Answered

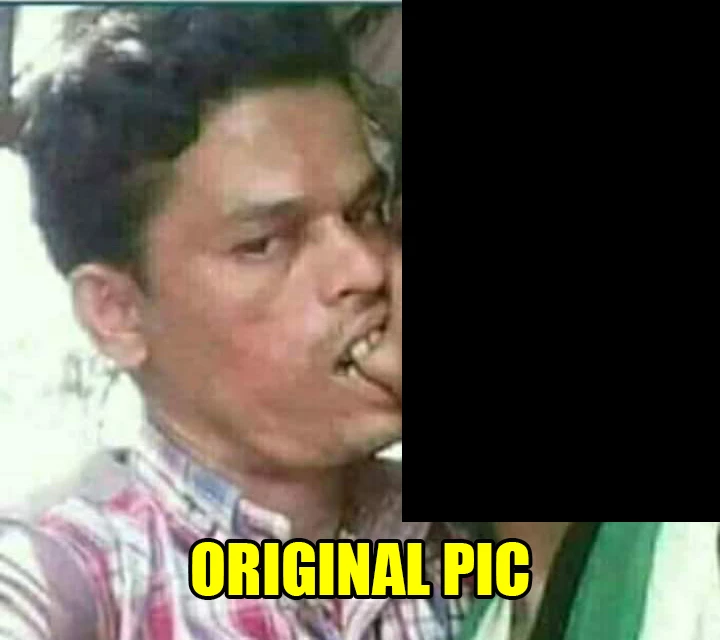
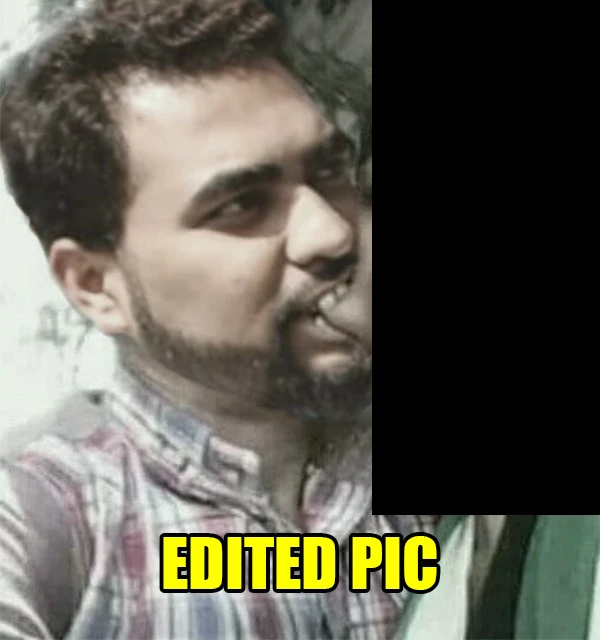
How can I replace mouth in a photo professionally?

  • November 6, 2017
  • 2 replies
  • 3261 views

How can I professionally replace someones mouth in a photo. I have attached the photos for reference. How can I get result like this. I have checked many video tutorials but could not find any video which would teach professional mouth replacement like this. This Photoshop was made by a member of a Facebook group and he does not want to tell me how did he achieve this result. Please guys kindly help me out and please dont get offended or frustrated by seeing this pic. I dont have any other pic than this to show you guys example. Thanks.

This topic has been closed for replies.
Correct answer Abambo

Work non destructively with layer masks. And you can create as much layers as you want. It may be that you need copying parts of one or the other picture to new layers to get them adapted. It may be that you need using Liquify for subtle deformations.

Mostly such operations are using multiple layers for more accurate manipulations.

2 replies

Participant
November 8, 2017

Are you sure the picture is true my friend the MOUTH !!!!! I cant see much difference however look at the eyes I wonder if it is two different snaps

Abambo
Community Expert
Community Expert
November 6, 2017

You have access to Photoshop?

It's not mouth replacement but face replacement, as the face of the second guy is pasted in the picture of the first one. You see it by looking at what is common in both pictures.

You take picture two and load on a separate layer on picture 1. You make the layer transparent (50% - it's important that you see picture one). You adapt the sizes of the layer with picture 2 so that most of the face features (placement of eyes / mouth) match the face of the underlying picture.

You add a mask to picture 2 and start painting black for what needs to disappear and white for what needs to stay (well initially it is white, but to correct errors...). To facilitate the task, you can make an initial selection with one of the magic selection tools. Feel free to return opacity to full at any time.

The composed image will contain the head of picture 2 and the rest of picture 1. You probably still need to make some colour adjustment as the quality of the pictures are different. You may also need to add artefacts to the layer of picture 2 if the quality of picture 1 is less.

ABAMBO | Hard- and Software Engineer | Photographer
November 7, 2017

Thanks for correcting me that its face replacement. I can replace the face however the most difficult part is the mouth. When it comes to the mouth part I messed up everything. My mouth replacement looks weird and fake whereas the one the guy edited looks very real. I used eraser tool only for doing this task. Thats why maybe I did not get the accurate result.

I did not try with the masking before so I will give it a shot. Also, do you think that the lower lips in the edited photo has been transformed (rotate) a bit than the lower lips in the original pic ?. (It looks a bit transformed to me). Or its all about masking and correct placement/positioning of the face(The one I will be using for replacing the original pic).


Thanks for your help.

Abambo
Community Expert
AbamboCommunity ExpertCorrect answer
Community Expert
November 7, 2017

Work non destructively with layer masks. And you can create as much layers as you want. It may be that you need copying parts of one or the other picture to new layers to get them adapted. It may be that you need using Liquify for subtle deformations.

Mostly such operations are using multiple layers for more accurate manipulations.

ABAMBO | Hard- and Software Engineer | Photographer