Copy link to clipboard
Copied
 1 Correct answer
>Not your fault. The reason you are getting a white patch is that the Color Filter command is accessing the mask in the Photo Filter Adjustment Laye rather than the image. After adding the Color Filter, Adjjustment layer click on the Mask and delete it. Then proceed as instructed.
Explore related tutorials & articles
Copy link to clipboard
Copied
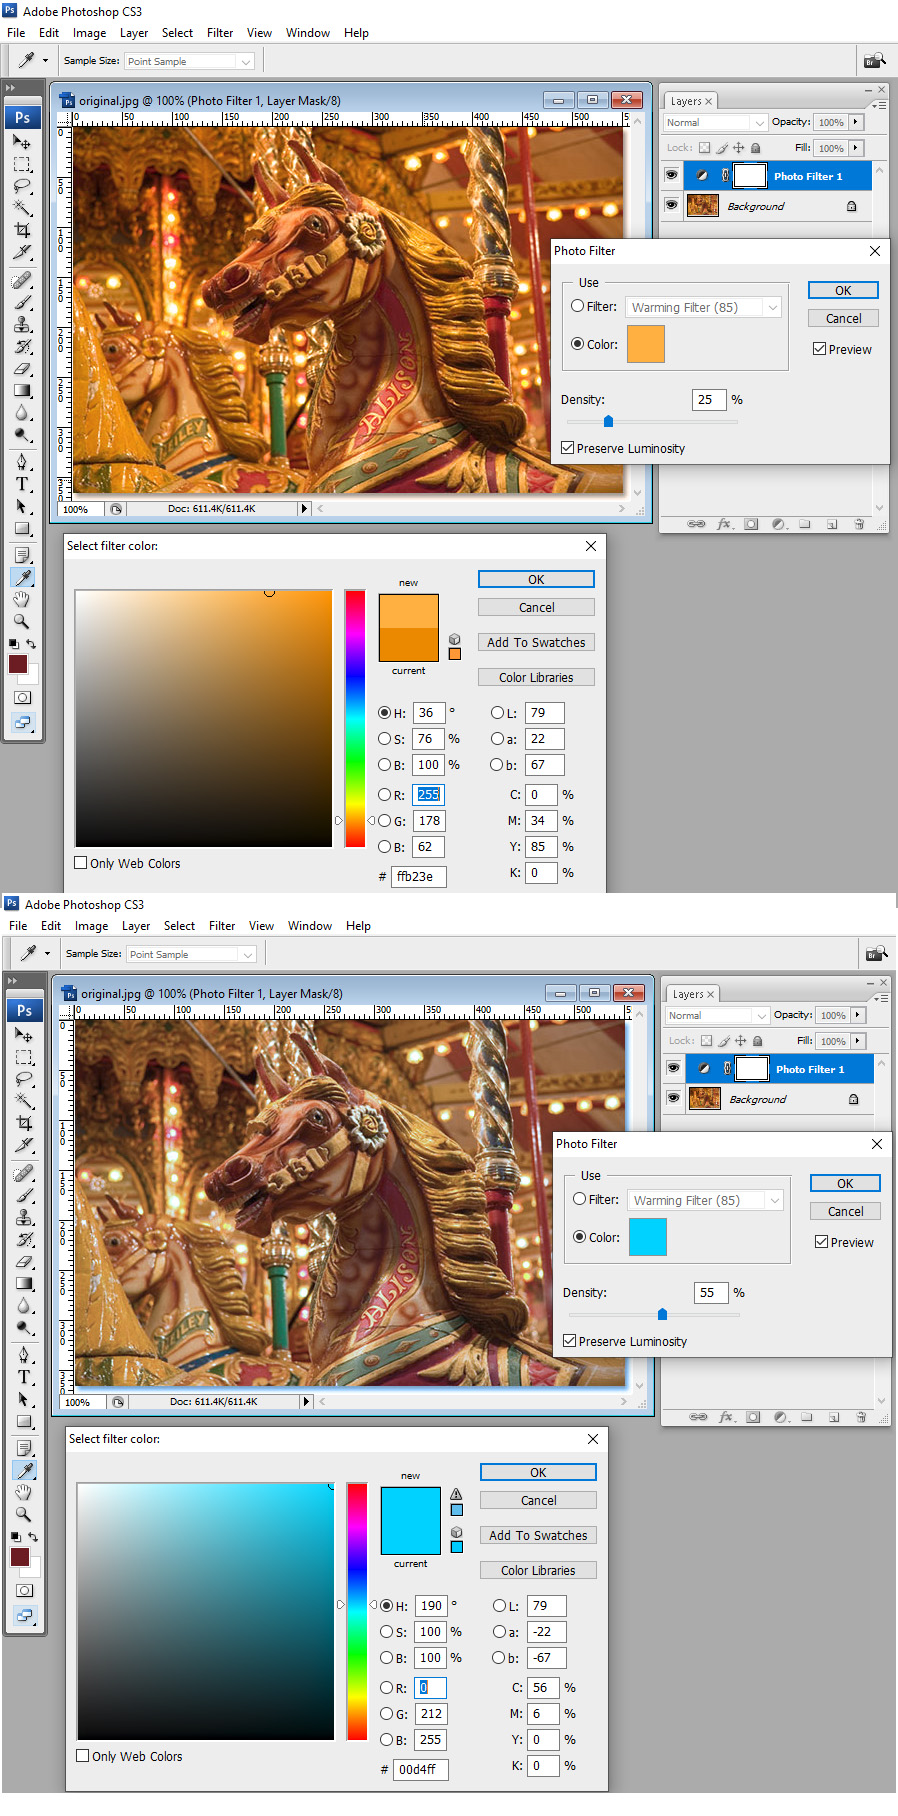
That tutorial old. Have CS3 installed and Photo Filter Adjustment works like in that tutorial. The Photo Filter popup opens ant the current tool becomes the eye dropper and the foreground color swatch changes to whatever color I The Other version versions of Photoshop I have installed CS6, CC 2014, CC 2018 and CC 2019 the Photo Filter works differently. There is no Popup dialog. The Adjustment layer is added and is the target layer. There is a Properties Palette you can changer the Photo Filters color in.
In all cases you need to click on the Color Square in the The Filter properties Panel to bring up the color picker Panel. Then pick a color in the images via mouse eyedropper then invert the color by - the two colors in the color picket panel.

Copy link to clipboard
Copied
>Not your fault. The reason you are getting a white patch is that the Color Filter command is accessing the mask in the Photo Filter Adjustment Laye rather than the image. After adding the Color Filter, Adjjustment layer click on the Mask and delete it. Then proceed as instructed.
Copy link to clipboard
Copied
Wonderful. That is the answer. I'll contact the tutorial host and let them know that there is an omission in the tutorial.
Thanks.
Copy link to clipboard
Copied
That tutorial appeared in 2007 - it's 12 years old, when CS3 was current. This probably works reasonably well, using the very old CS5, but you are 10 full versions behind, and Photoshop has a lot of changes. So
(1) you need to choose tutorials carefully - it's a pity this one doesn't mention versions
(2) if they haven't updated the tutorial in 12 years they may not be especially responsive to corrections.
Copy link to clipboard
Copied
Sorry JJMack, I didn't spot your reply earlier.
OK, you are correct I'm sure. So when you create a new adjustment layer in an early version of Photoshop, the mask isn't selected automatically? That would make the tutorial correct then.
On my version, the mask is selected by default and I have to deselect it to get the eye dropper tool to correctly select pixels in the image, not in the mask.
Thanks for the reply.
Copy link to clipboard
Copied
Photoshop cs2, that's the version the screenshots in the tutorial are from.
Cs2 no longer had the Link Column just to the left of the layer palette thumbnails and cs3 had a very distinct ui as seen in jj Macks screenshots.
Copy link to clipboard
Copied
Thanks for these additional replies. I must be more careful when viewing tutorials.
Copy link to clipboard
Copied
Generally tutorials for other versions of photoshop will work with cs5.
If you run into problems just come here and ask.


