

- Home
- Photoshop ecosystem
- Discussions
- Re: How do i make my images not look cut out?
- Re: How do i make my images not look cut out?
How do i make my images not look cut out?

Copy link to clipboard
Copied
My images have a hard lines and look like its copied and pasted. People have said it looks slapped together.
Does anyone have any tips, tricks, links, tutorials on how to make images not look cut out?


Explore related tutorials & articles
 9
Replies
9
9
Replies
9

Copy link to clipboard
Copied

Copy link to clipboard
Copied
Do you have an example, we could advise better if we could see it?
The key to a realistic composition is:
a. Matching the lighting and colour
b. Realistic perspective
c. A good mask and addressing any edge colors/artifacts and blends well. That might mean a softer edge on the mask.
Dave

Copy link to clipboard
Copied
As Dave says, perspective is a big factor. In our Something For The Weekend challenges — which ChelseaW and anyone else are welcome to join and contribute to — a good part of the time it takes me to complete an entry is finding suitable source images with the right lighting and perspective.
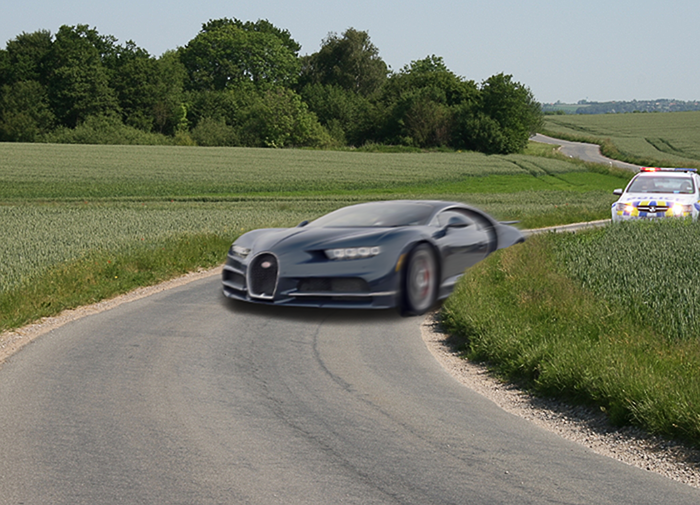
Shadows are probably a bigger factor thinking about it. Let's try an example, and I am knocking this together as I go just for this thread.
Dropping the car (which I have roughly cut from its original background with Select Subject) into this road scene, we can see they are massively mismatched, but let's see what we can do.
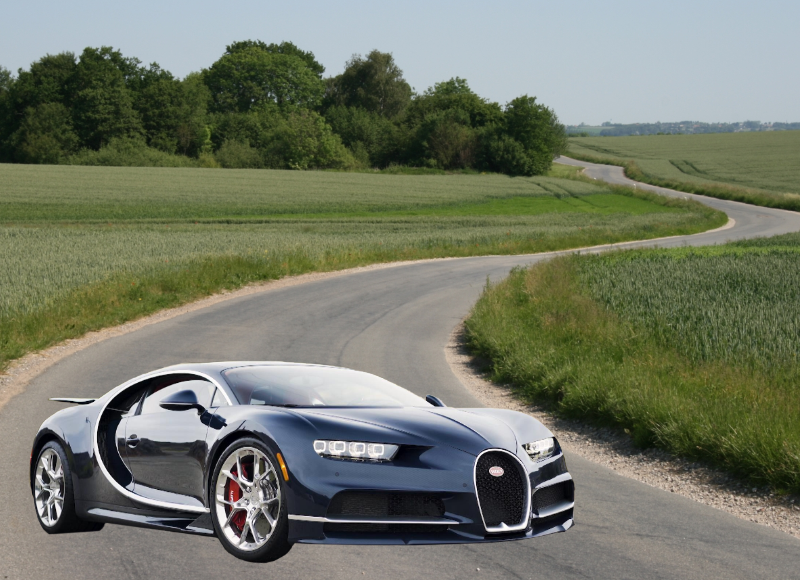
The first thing we can do is flip it horizontally to match the scene, but the only place it will fit is part way round the bend.

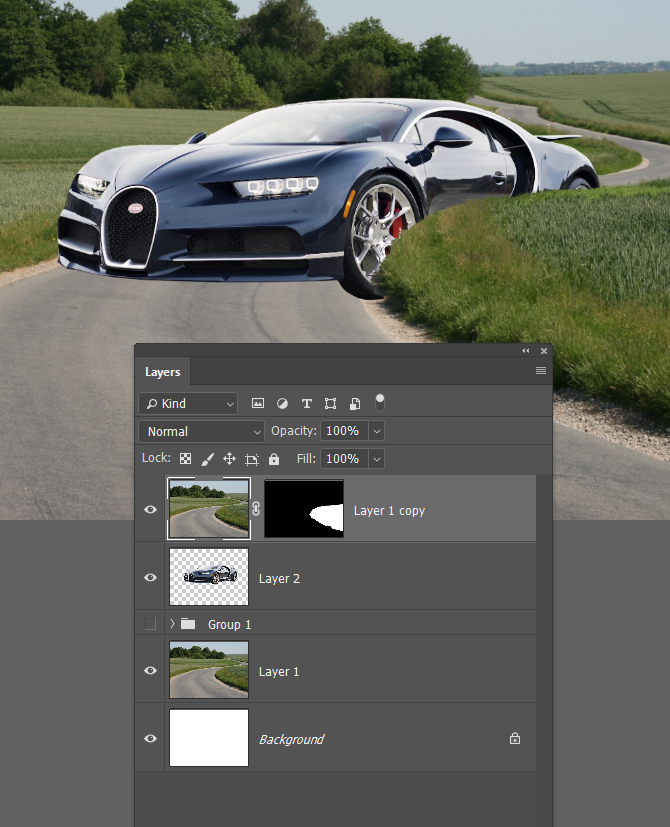
So we need to select the foreground that would conceal part of the car, and copy to a new layer, and place this layer above the car.
I pretty much _always_ work this way, as it means I can experiment with the car, and move it about, without having to remake any selections.
Another point here is that I always try to overlap part of the original above the composited element. This gives it depth and makes it belong.
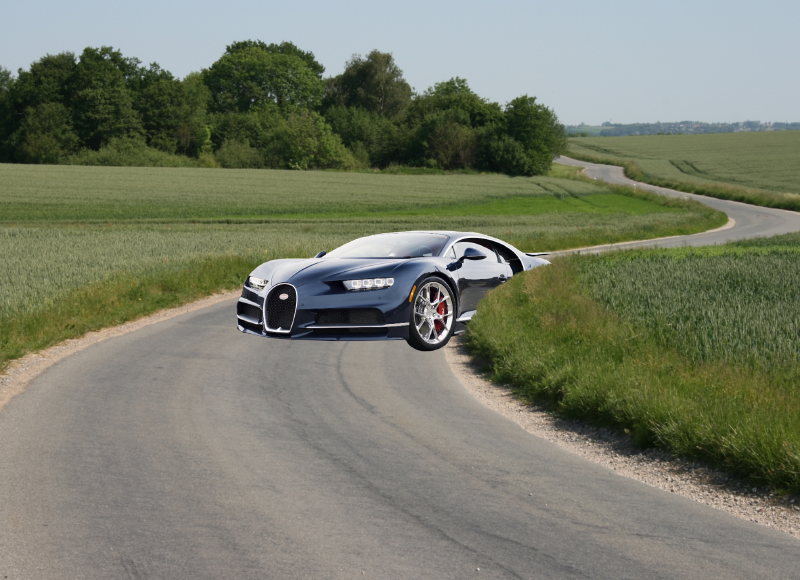
The car is now on the road, but much too big. So we make it a Smart Object (by right clicking the layer). That way we can keep changing the size without loosing quality
The car is now about the right size, but obviously does not belong there, so we need to add some shadows to tie it to the road.
The easiest, and usually best, way to do this is
- add a layer below the car layer
- Ctrl click on the car layer to load it as a selection
- Fill the selection with black in the new layer.
- Move this new shadow into position and blur with Gaussian blur
This gives us a problem in that the shadow should not project from under the wheel, so we add a layer mask and paint that out.

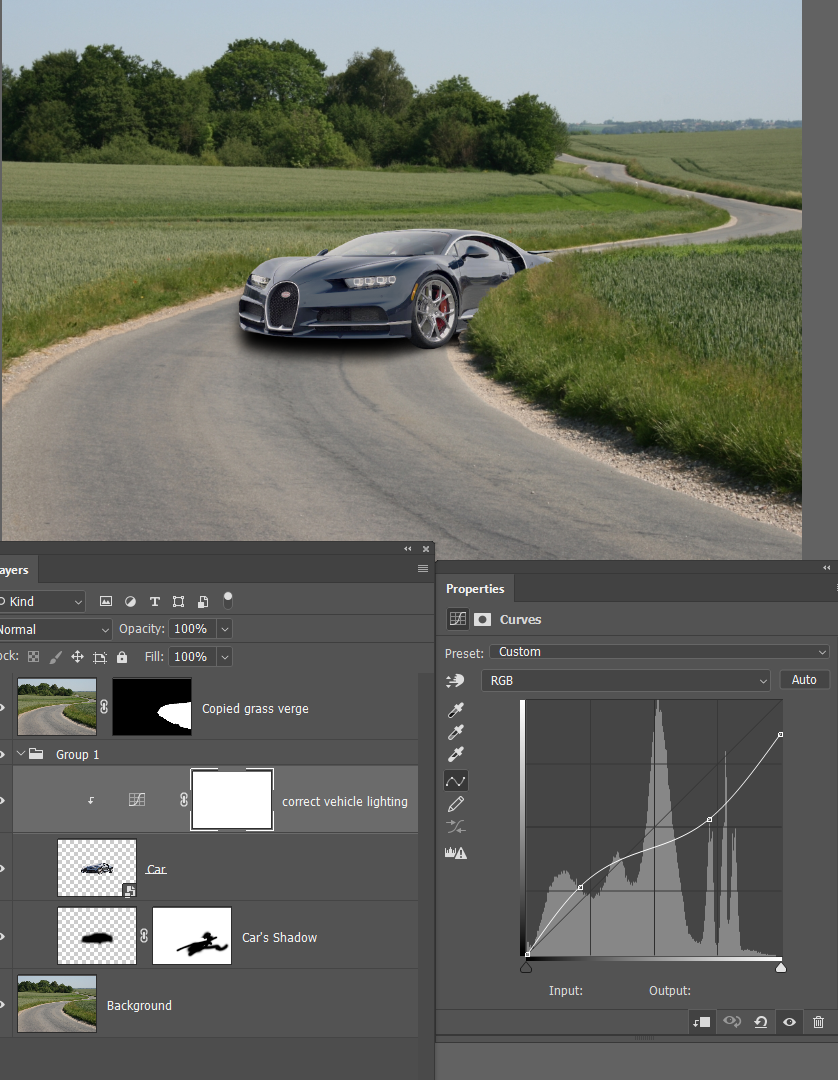
Now we have to fix the lighting on the car, which has far too much contrast, so we need to kill those highlights with a curves layer.
We are actually pretty close, and only took a few steps, but there is one glaring problem that I will _attempt_ to fix
The near side front wheel is pointing straight ahead
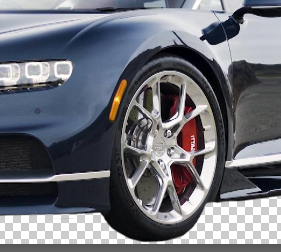
I need to try and making it follow the curve (to some extent at least)

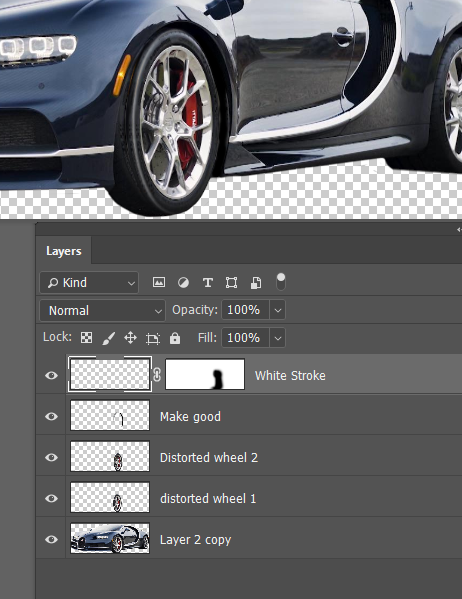
This is where using a Smart Object for the car comes in handy, because we still have the original, larger size, file to work with.
Double click the SO, and it will open in a new layer
The important part of this trick is squash the wheel to change its perspective
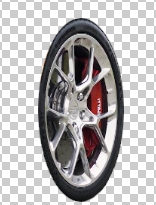
It is then just a mater of painting in (and out) to make the rest of the wheel fit this new perspective.
I actually used the squashed wheel twice, to help fill in the new tire wall position, but still needed to hand paint in some making good. Freehand brush work is an essential skill to learn
Finally I Ctrl clicked the new wheel shape to load as a selection, and stroked it with white for a highlight.
This was blured, and masked out at the bottom of the wheel
It would be better with more turn on the wheel, but this works as a quick demo.

I hope this has helped a bit.
I'll leave you with a trick to soften outlines:
- Ctrl click the object to load as a selection
- at the bottom of the paths panel, click on the select to path icon

Set up the Blur tool with the right sized brush and strength (I have set to 100%)
Right click the Path, and use the drop down and select the Blur tool
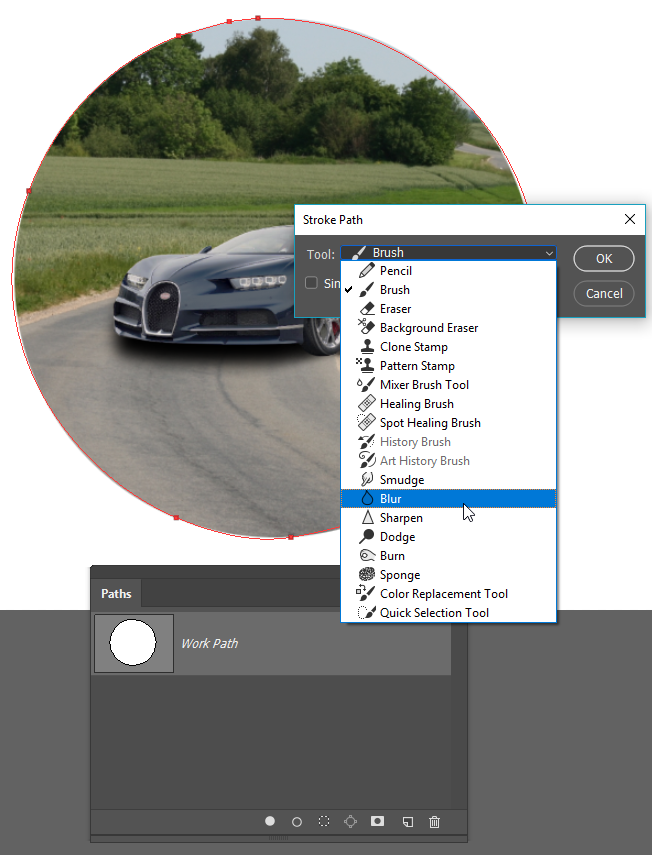
Having set the blur tool as the default stroke, you can repeat by clicking on the Stroke icon at the bottom of the paths panel.

Copy link to clipboard
Copied
Very nice tutorial Trevor
Copy link to clipboard
Copied
We can never stop messing adding little touches 


Copy link to clipboard
Copied
Okay, Trevor, you need to add a spin blur to the tires and a path blur to the car.

Copy link to clipboard
Copied
Great work Trevor on the steps.
One note for Chelsea.... if the object you are placing into a scene has the light hitting it from a completely different angle in the scene it still might look strange.
There is a photographer in Duesseldorf, Germany that I know (and I am hitting myself as I forgot his name).... anyways, he takes pictures of scenes and then drops in 3D modeled cars into the scene all the time. But I think once you master dropping things into scenes you will learn that there are even more tricks to make things look real!
Also check on YouTube as there should be additional tutorials.
Copy link to clipboard
Copied
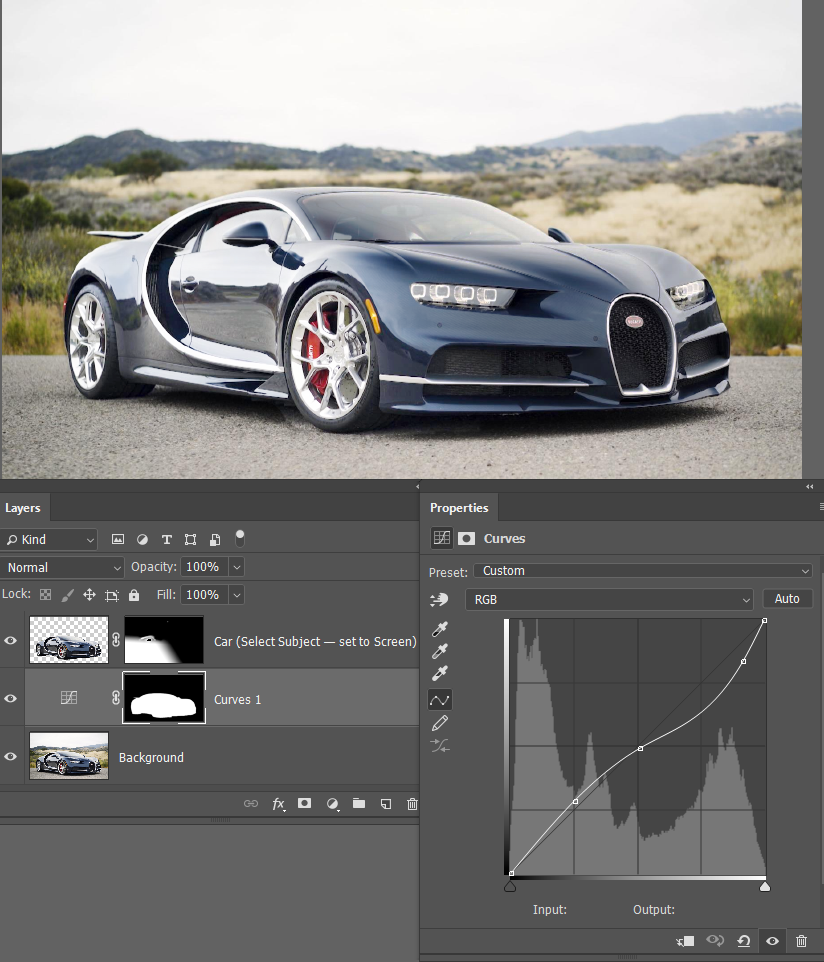
My go to first procedure for changing the lighting angle.
Original

Select the Quick Select tool and click on Select Subject in the Options Bar
Copy the resulting selection to a new layer, and set to Screen Mode
Note This is exactly what Select Subject selected. There is zero fine tuning. An amazing job, and kudos to the Development Team.

Add a layer mask, and use the Gradient tool set to Foreground to Transparent
This lets us 'build' our gradient using multiple drags across the image.

Two hits with the gradient tool, and we just have the left flank left, but we still need to kill the highlight on the front 'car left' corner.

What I did here is Ctrl click the copied car layer to select it as a selection, and with that selection place, I opened a curves layer above the background, but below the copied car layer. The layer mask automatically restricts the curve to the car.
A bit of fine tuning, like mask out the back of the mirror and fine tune the roof line, and we have reversed the lighting direction
Copy link to clipboard
Copied
Jesus Ramirez has posted a 90 second tutorial this week on how to color match a cutout with a background. It's a technique I haven't seen before and might be useful to know. It's also very easy. Full high definition video is at
Color Matching in Photoshop: Fast and Easy Method - 90-Second Tip #05 - YouTube
or it's below if you have good eyesight.
Terri

 AdChoices