• Global community
    • Language:
      • Deutsch
      • English
      • Español
      • Français
      • Português
  • 日本語コミュニティ
    Dedicated community for Japanese speakers
  • 한국 커뮤니티
    Dedicated community for Korean speakers
Exit
0

How do I remove watercolor paper texture from my work?

Explorer ,
Mar 14, 2022 Mar 14, 2022

Copy link to clipboard

Copied

I'm trying to remove the watercolor paper texture from a hand-drawn watercolor piece that's been scanned.


There are quite a few videos online for this, but most of them cover quite simple pictures, with a clear white background. A few things I've tried, with varying degrees of success:


1. Scanning and rotating the image, then overlaying: works for simple pictures, but doesn't seem good for more complex images. There's always part of the image that becomes 'out of focus' or blurry.

2. Surface blur: Works to a degree, but tends to make the paper look very processed and blurs out a lot of the ink lines as well as the paper texture. Maybe I'm not using it right?


Basically, I'm trying to keep the feel of watercolor painting but limit the extent to which the rough paper texture appears.
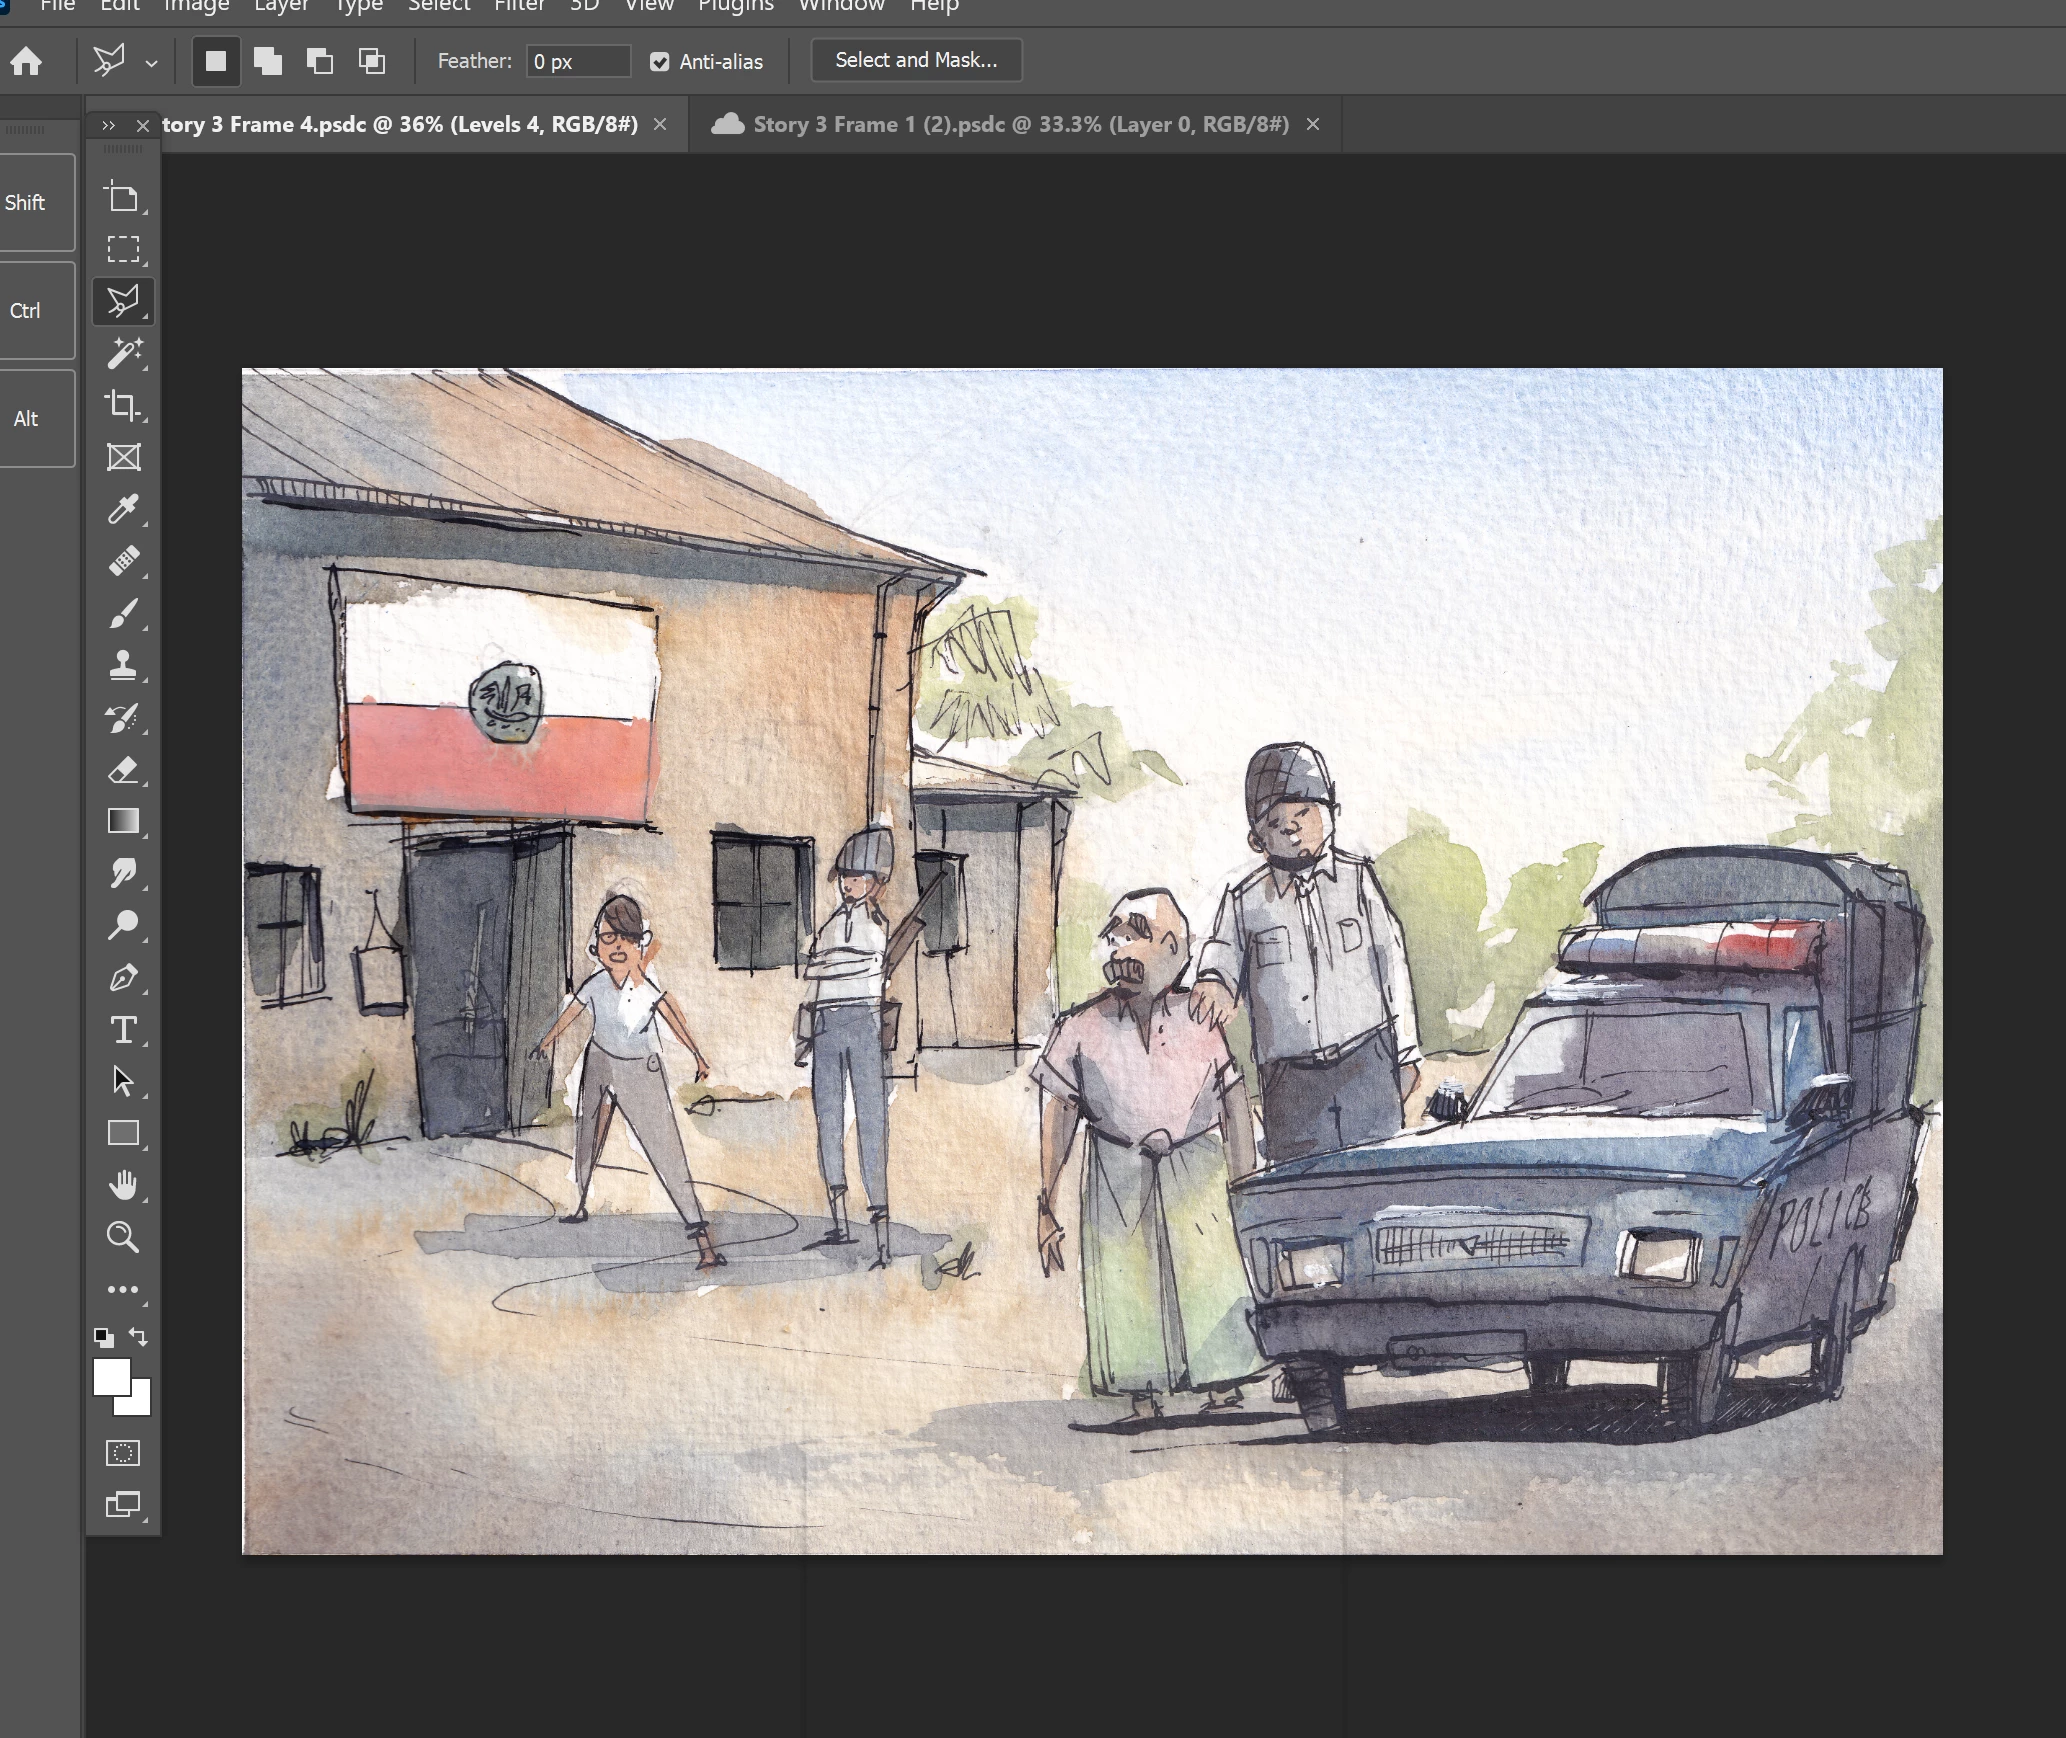
 

Watercolor.png

TOPICS
macOS , Windows

Views

5.7K

Translate

Translate

Report

Report
Community guidelines
Be kind and respectful, give credit to the original source of content, and search for duplicates before posting. Learn more
community guidelines

correct answers 1 Correct answer

Community Beginner , Mar 14, 2022 Mar 14, 2022

The light on the scanner is only lighting from one direction, so it causes a shadow from the watercolor "cold press" texture in the paper. So, light it from both directions with 2 scans then blend them together. Here are a few steps that work well


1- Scan Original on scanbed

2- Rotate 180 degrees and scan again without changing any settings (same exposure)

3- open scan 1 and 2

4- on scan 1 copy layer then delete the background layer leaving scan 1 on layer 1

5- rotate scan 2 180 degrees

6- copy scan

...

Votes

Translate

Translate
Adobe
Community Expert ,
Mar 14, 2022 Mar 14, 2022

Copy link to clipboard

Copied

Please elaborate on what exactly you did in the rotate-scan approach. 

How many scans, which angles, which Smart Object Stack Mode, …? 

Votes

Translate

Translate

Report

Report
Community guidelines
Be kind and respectful, give credit to the original source of content, and search for duplicates before posting. Learn more
community guidelines
Community Beginner ,
Mar 15, 2022 Mar 15, 2022

Copy link to clipboard

Copied

_Scan the art on the scan bed

_then rotate the art 180 degrees and scan again

_open scan 1 & 2

_In Photoshop rotate scan 2 180 degrees so that both scans are orented correctly

_ copy scan 2 layer into the scan 1 file so you have both scans (one on each layer in one file) no smart object needed

_select both layers (shift click)  ("stack") then go to Edit/Auto align layers

_ select layer 1 then change the blending mode to lighten 

_Flaten final file

Votes

Translate

Translate

Report

Report
Community guidelines
Be kind and respectful, give credit to the original source of content, and search for duplicates before posting. Learn more
community guidelines
Community Expert ,
Mar 15, 2022 Mar 15, 2022

Copy link to clipboard

Copied

180˚ seems a bit much for me, I would recommend at least 4 scans at 90˚ repeated. 

Votes

Translate

Translate

Report

Report
Community guidelines
Be kind and respectful, give credit to the original source of content, and search for duplicates before posting. Learn more
community guidelines
Community Beginner ,
Mar 15, 2022 Mar 15, 2022

Copy link to clipboard

Copied

4 scans at 90º is not necessary because the light from the scanner is coming from one direction so when you make the first scan with the light coming from "head to foot" then rotate the art 180º the light will be coming from "foot to head" when you blend the layers the shadow created from the directional light will be canceled out. 

Votes

Translate

Translate

Report

Report
Community guidelines
Be kind and respectful, give credit to the original source of content, and search for duplicates before posting. Learn more
community guidelines
Community Expert ,
Mar 15, 2022 Mar 15, 2022

Copy link to clipboard

Copied

LATEST

I disagree. 

Surface differences with a »direction« in the vicinity of a right angle to the light source might cause effects that 180˚ illumination difference might not alleviate greatly. 


A plain Blend Mode may provide a weaker result than an appropriate Smart Object Stack Mode. 

Votes

Translate

Translate

Report

Report
Community guidelines
Be kind and respectful, give credit to the original source of content, and search for duplicates before posting. Learn more
community guidelines
Community Beginner ,
Mar 14, 2022 Mar 14, 2022

Copy link to clipboard

Copied

The light on the scanner is only lighting from one direction, so it causes a shadow from the watercolor "cold press" texture in the paper. So, light it from both directions with 2 scans then blend them together. Here are a few steps that work well


1- Scan Original on scanbed

2- Rotate 180 degrees and scan again without changing any settings (same exposure)

3- open scan 1 and 2

4- on scan 1 copy layer then delete the background layer leaving scan 1 on layer 1

5- rotate scan 2 180 degrees

6- copy scan 2 layer into the scan 1 file so you have both scans (one on each layer in one file)

7- select both layers (shift click)  then go to Edit/Auto align layers

8- select layer 1 then change the blending mode to lighten

9- If you toggle the "eye" view on & off you will see most of the shadows dissapear. Done......

Votes

Translate

Translate

Report

Report
Community guidelines
Be kind and respectful, give credit to the original source of content, and search for duplicates before posting. Learn more
community guidelines
Explorer ,
Mar 15, 2022 Mar 15, 2022

Copy link to clipboard

Copied

Thanks. This seems to have helped a lot. I've done all of these steps except for the auto align layers feature (which I wasnt aware of). I might add a tiny bit of surface blur as well just to smooth it out a bit more but this is a step in the right direction.


Screenshot 2022-03-15 103822.png

Votes

Translate

Translate

Report

Report
Community guidelines
Be kind and respectful, give credit to the original source of content, and search for duplicates before posting. Learn more
community guidelines
Community Expert ,
Mar 14, 2022 Mar 14, 2022

Copy link to clipboard

Copied

I'm not saying this will be easy.  But I'd make several layer copies with Ctrl+J and use Frequency Separation to see where that takes you.  This video explains more.


Nancy O'Shea— Product User, Community Expert & Moderator

Votes

Translate

Translate

Report

Report
Community guidelines
Be kind and respectful, give credit to the original source of content, and search for duplicates before posting. Learn more
community guidelines