??? How is this plan made ???
Copy link to clipboard
Copied

Explore related tutorials & articles
Copy link to clipboard
Copied
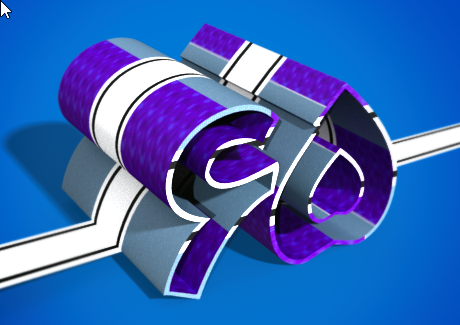
I think it was made starting by three basic shapes extruded along z axis.
Then some lights and textures were applied to the shapes and the scene.
Copy link to clipboard
Copied
Hi
I would use 3D to do that.
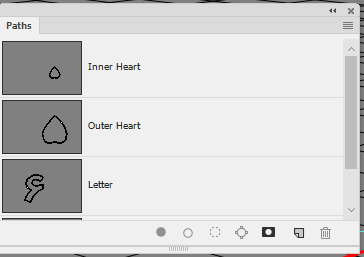
Make paths in the shape of the main shapes.

Make extrusions from those paths and then combine them onto a single 3D layer.
Add the materials - I did not have banknote images handy so just used fill patterns in this quick demo

Add a flat extrusion for the lower band. To match your image - turn "catch shadows off on thet band"
Light and render

Dave
Copy link to clipboard
Copied
Really a great work Dave! ![]()
Copy link to clipboard
Copied
You can teach on YouTube ؟
I could not learn ![]()
Copy link to clipboard
Copied
Hi
You can learn how to make simple 3D extrusions from paths (which is all I used above) in the tutorials linked by Francesco or those I have linked below :
https://design.tutsplus.com/series/using-photoshops-3d-capabilities--psd-18886
Shout out if you get stuck.
Dave
Copy link to clipboard
Copied
How can I put the white strip on the design?
Copy link to clipboard
Copied
amirh95769145 wrote
How can I put the white strip on the design?
For the stripe on the main shapes - put it across the extrusion material as I showed in my second screenshot.
For the stripe on the floor I made a separate 3D extrusion, made the front material the stripe - then rotated and positioned it against the others
Dave
Copy link to clipboard
Copied
Why uv overlay this way?
What to do like the first example
Copy link to clipboard
Copied
Hi
Hopefully these pointers will help you:
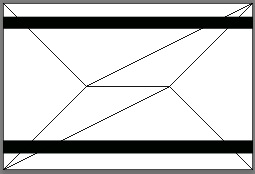
1. Adding the "ribbon" to the extrusion material
With the extrusion material selected in the 3D panel, go to the properties panel and click on the folder next to diffuse then Edit Texture

This will open a psb file with your texture. You can add layers to that file to create the ribbon


2. How to get the texture to map across the object.
Again, with the extrusion material selected in the 3D panel go to properties.
This time click on Edit UV properties

In the dialogue that opens you can adjust the scaling, tiling and offset to position the material where you want it

3. The ground ribbon
Make a new rectangular object with a small extrusion
Edit the front material to place the same stripe as used on the layer of the heart extrusion material, this time covering the entire material

Merge the object into the 3D layer with the others then rotate, move and scale it so that it matches the ribbon on the other shapes
I hope that helps
Dave
Copy link to clipboard
Copied
In this tutorial you'll learn how to create custom 3d object,add material and textures:
Learn how to create custom 3D object in Photoshop CC - YouTube
Copy link to clipboard
Copied
And here, some instructions: