Exit
  • Global community
    • Language:
      • Deutsch
      • English
      • Español
      • Français
      • Português
  • 日本語コミュニティ
  • 한국 커뮤니티
0

How make image from Adobe Bridge sharpening mask?

Enthusiast ,
Feb 14, 2018 Feb 14, 2018

I'm most likely asking wrong, which is why I'm not finding anything in the forums or even on the Internet, but...

Every once in a while, when I'm in Bridge (or Lightroom) and sharpen an image, as I drag the mask slider across, I'll reach a point where the image looks interesting as a reverse black and white.  It happened this morning as I was sharpening an image - wife walked by and said "cool"... 

Which is why I'm curious HOW to take an image and turn the interesting black and white mask display into an image...  I'm guessing its a Photoshop thing, but I have no idea how to do it...

Ideas?

765
Translate
Report
Community guidelines
Be kind and respectful, give credit to the original source of content, and search for duplicates before posting. Learn more
community guidelines
Adobe
Community Expert ,
Feb 14, 2018 Feb 14, 2018

Other than taking a screen capture, I don't know of any way to do that. You could enlarge the image then take multiple screen captures and piece them back together for a higher res image.

Translate
Report
Community guidelines
Be kind and respectful, give credit to the original source of content, and search for duplicates before posting. Learn more
community guidelines
Community Expert ,
Feb 14, 2018 Feb 14, 2018

Here's a sample of taking multiple screen shots and using align images to make a higher res image. If you open the image in Bridge by right-clicking and selecting: "Open in Camera Raw," you can then use PS to copy and paste, while the image is still open in ACR.

Translate
Report
Community guidelines
Be kind and respectful, give credit to the original source of content, and search for duplicates before posting. Learn more
community guidelines
Advisor ,
Feb 14, 2018 Feb 14, 2018

If you don't need an exact replica you can create a similar effect.

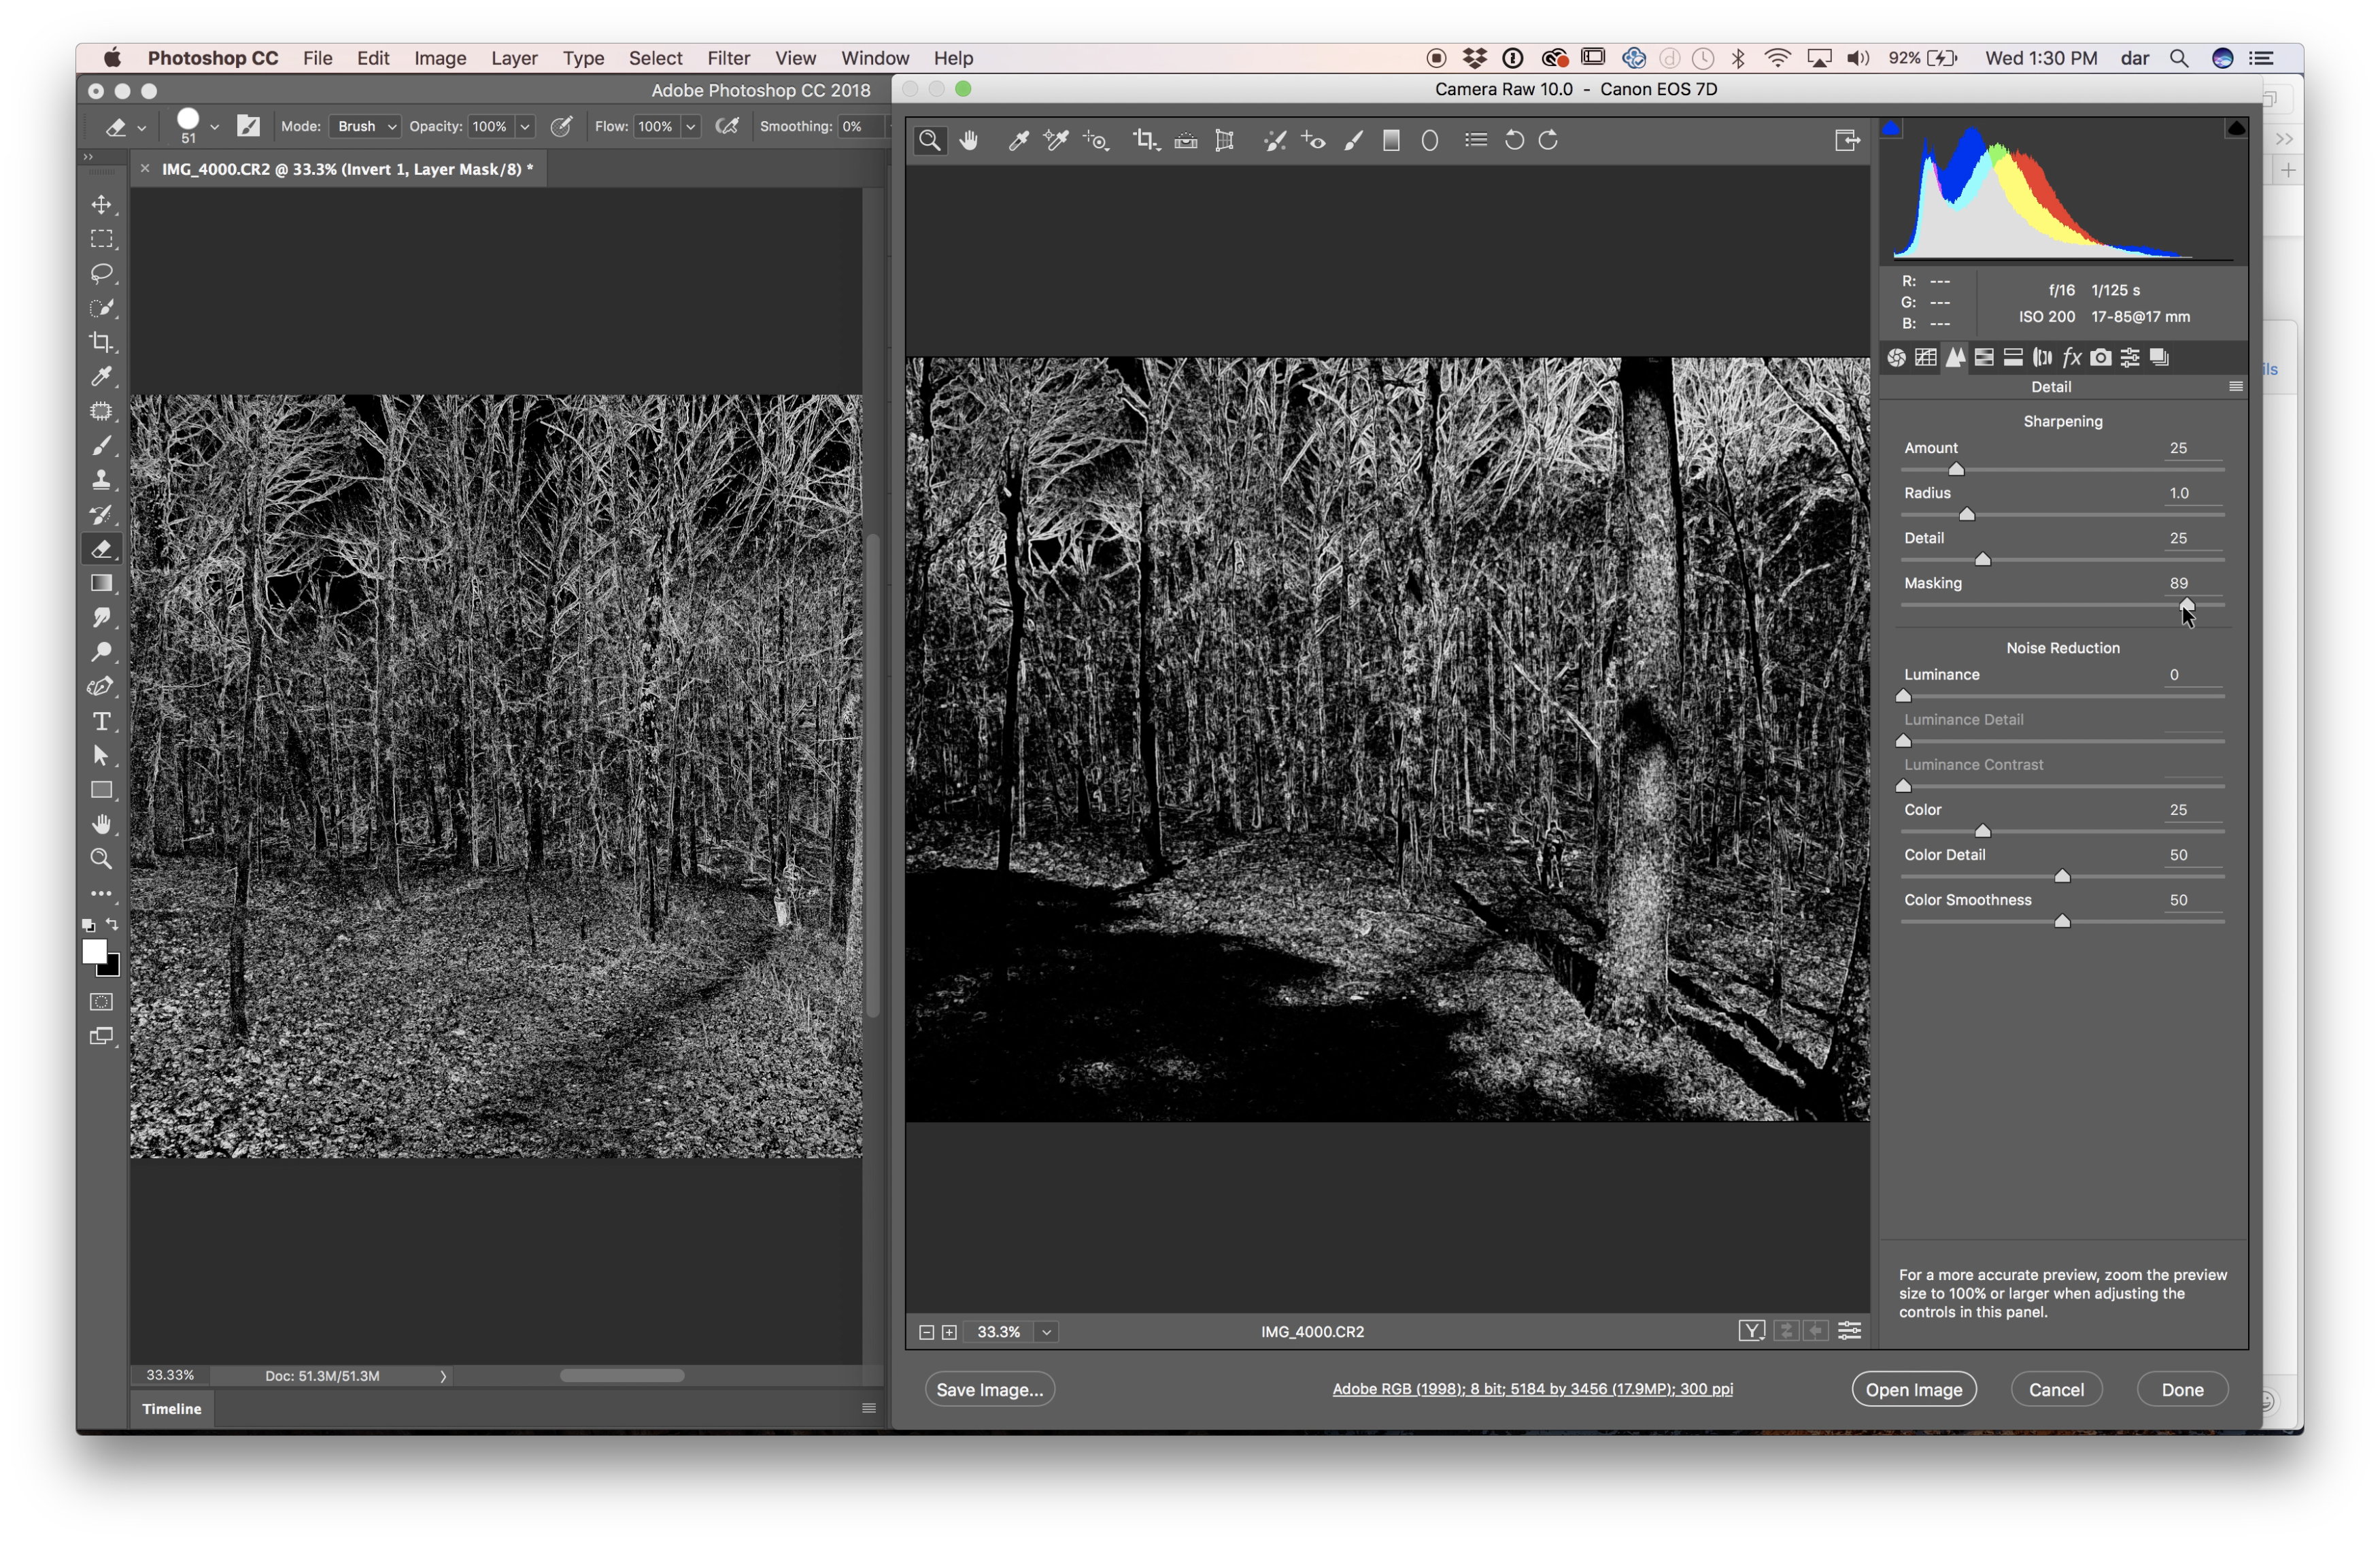
Note the mask you are seeing is invoked with the alt/opt key while sliding the mask slider.

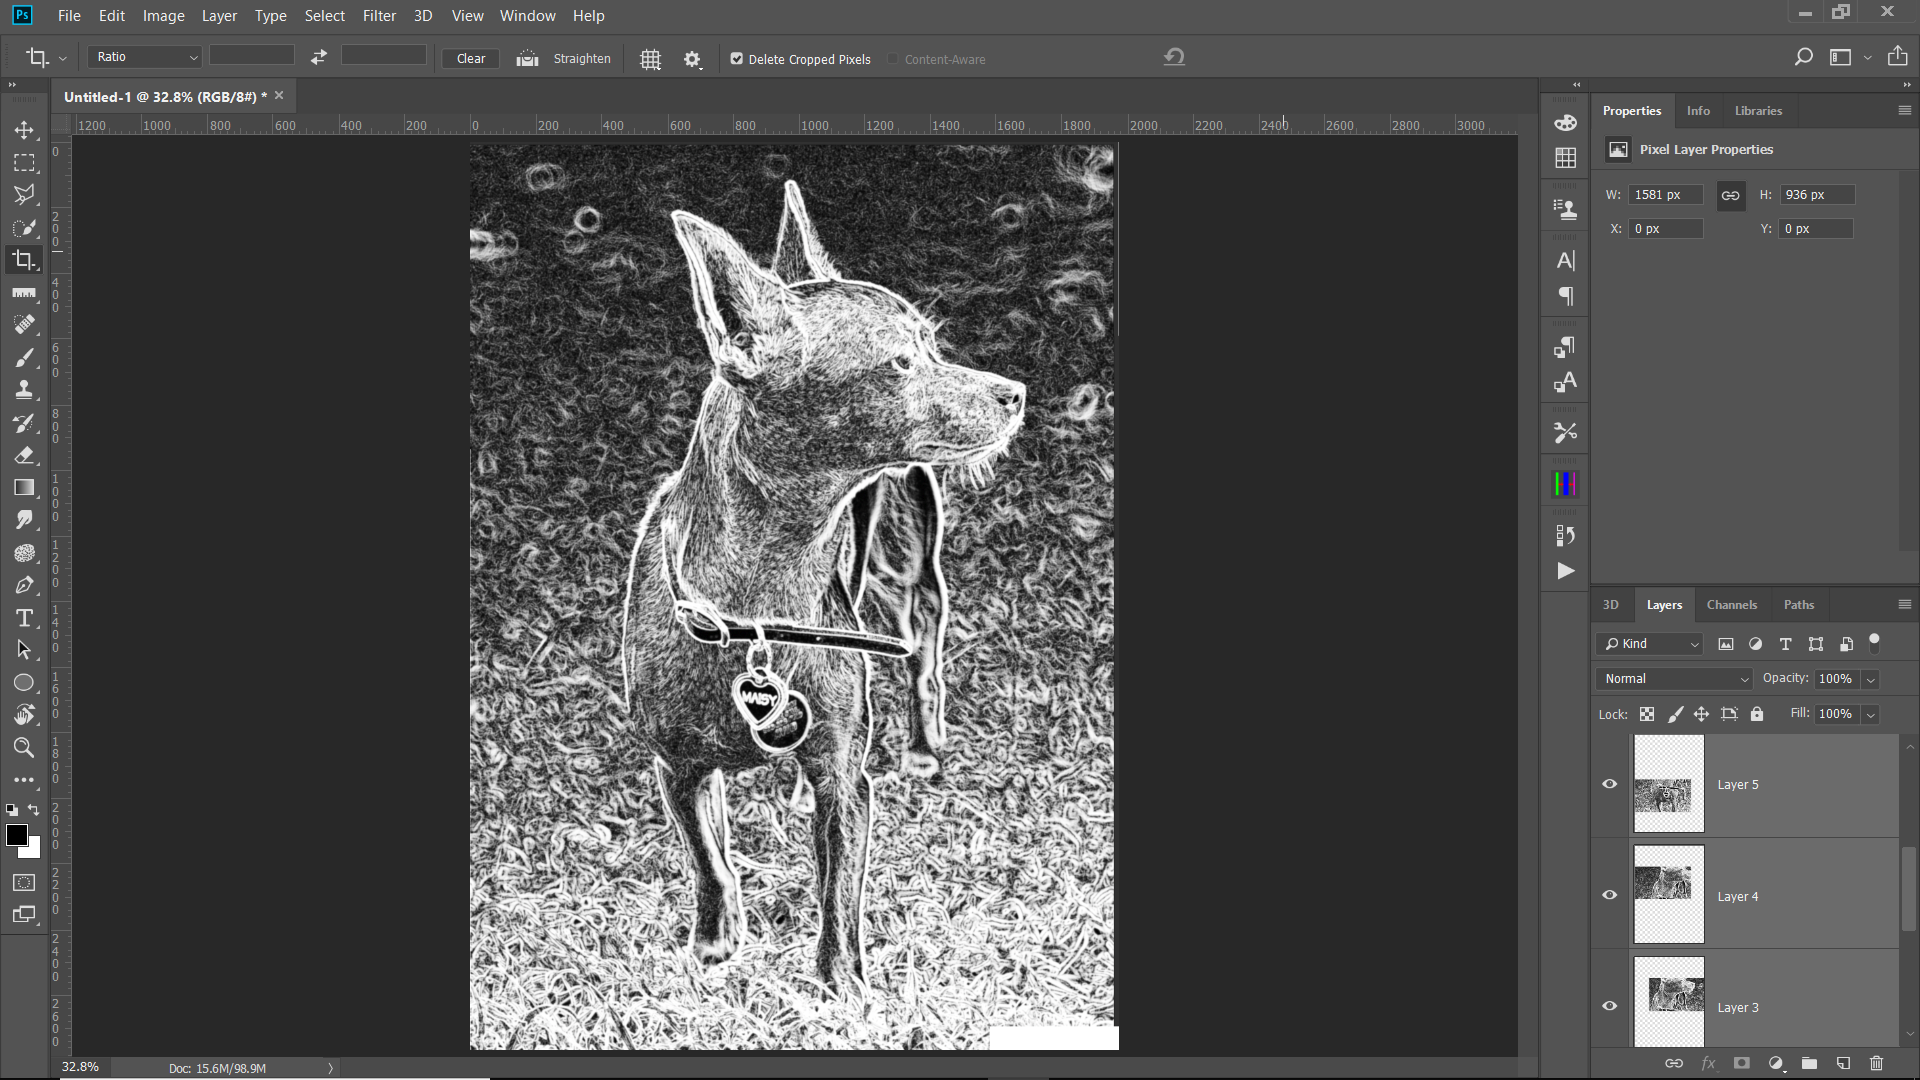
Here I have opened the image in Photoshop, converted it to a smart object (so I can adjust the filter easily)

The filter I used is Find Edges and the blend mode on the smart filter is Vivid Light.

The top layers are an Invert Adjustment Layer and a BW Adjustment Layer

The "effect" is shown left while the Mask in ACR is shown right.

Screen Shot 2018-02-14 at 1.30.53 PM.png

In Photoshop

Screen Shot 2018-02-14 at 1.36.26 PM.png

To change the blend mode of the Smart Filter, double click the slider looking icon in the lower right of the filter layer. In this example its called Find Edges.

Translate
Report
Community guidelines
Be kind and respectful, give credit to the original source of content, and search for duplicates before posting. Learn more
community guidelines
Community Expert ,
Feb 14, 2018 Feb 14, 2018

Another alternative

1. Put the image layer in a smart object

2. Ctrl+J to duplicate the Smart object
3. Set the upper smart object to Difference blending mode

4. Apply the unsharp mask filter to the layer

5. Add a curve layer

6 Add a black & White Adjustment layer

Dave

Translate
Report
Community guidelines
Be kind and respectful, give credit to the original source of content, and search for duplicates before posting. Learn more
community guidelines
Enthusiast ,
Feb 14, 2018 Feb 14, 2018
LATEST

I"ll have to play a bit more, but it looks like EITHER will give me what I wanted...  It'll be nice to have that available on those occasions when I need it!

Translate
Report
Community guidelines
Be kind and respectful, give credit to the original source of content, and search for duplicates before posting. Learn more
community guidelines