Inspiring
May 15, 2025
Respondido

How to avoid brush overlap/build up

  • May 15, 2025
  • 3 respostas
  • 745 Visualizações

This has probably been asked many times before, but even after trying to find the answer via Google, I can't seem to find what I'm looking for.

Playing with Opacity and Flow of the brush doesn't achieve this.


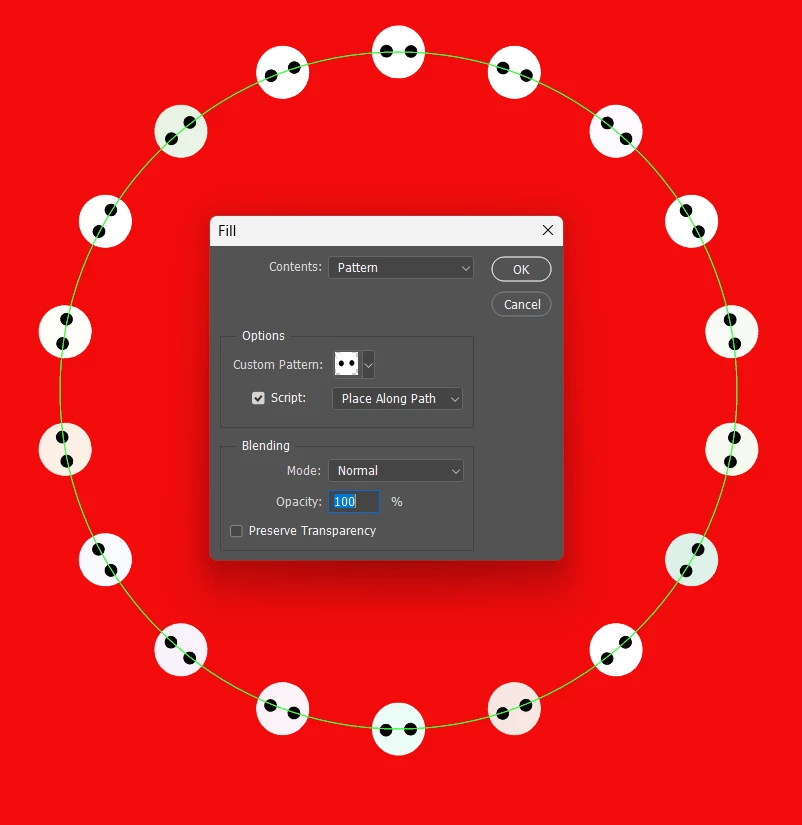
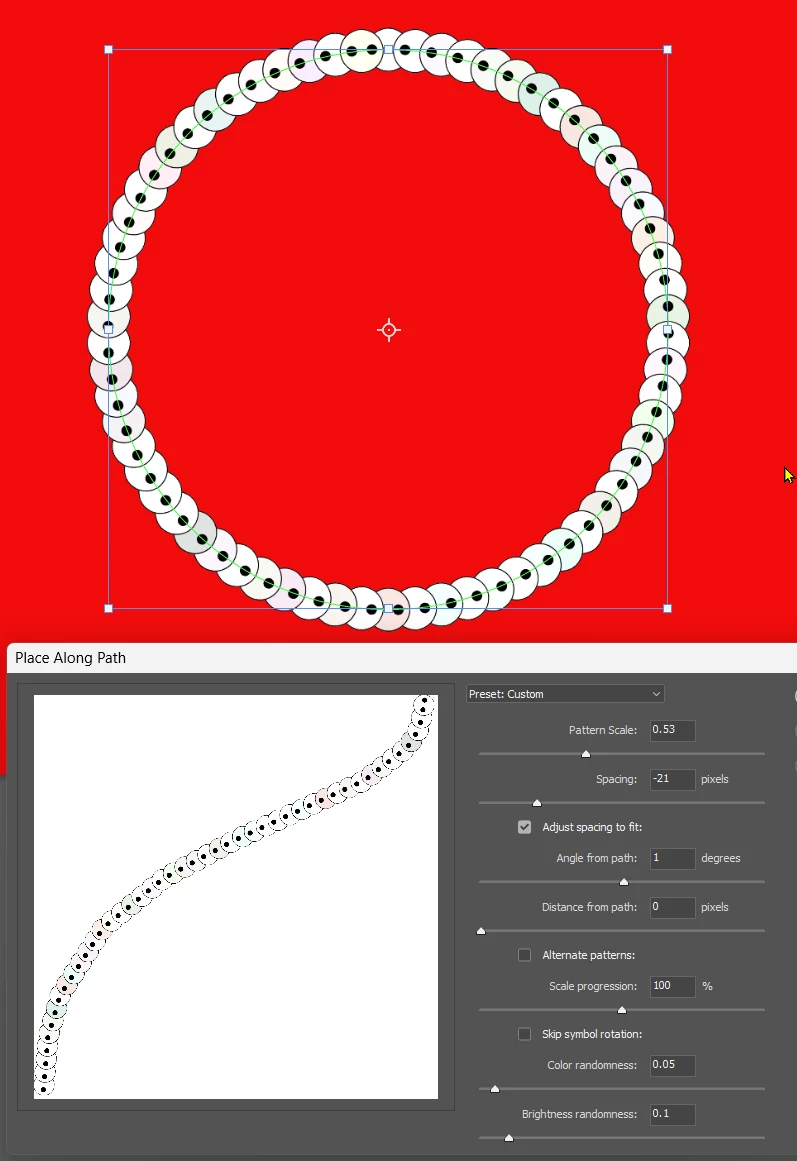
I created a layer with noise, made a selection and converted it to a brush.

Just as an example, let's assume I used Brush Dynamics, clicked and dragged the brush, and ended up with 2 "strokes" like this. As you can see, it's overlapping:


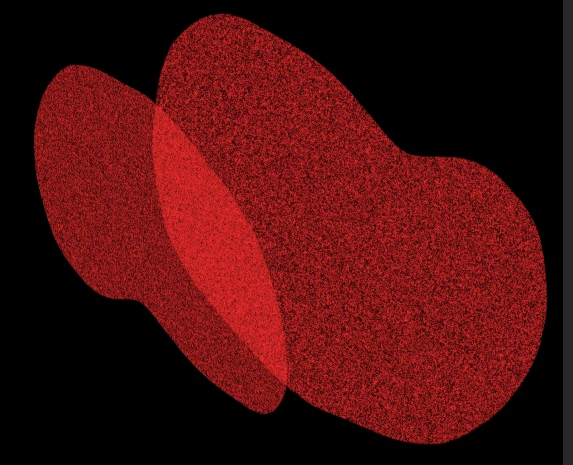
But my goal would be for Photoshop to know the area of the first stroke, even if there's no "paint" in it (in this case, it's the area I selected when I created the brush, which included white areas and black areas, creating the noise), then when 2 or more strokes overlap, Photoshop would know that certain areas were already covered, even if there's no red in them, and would create a uniform stroke like this:


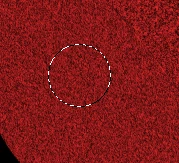
(I did this manually with 2 layers and removed from the top layer, the section from the layer below, just to illustrate what I'm trying to achieve).


Is this possible at all?


Basically I would like to create a texture brush, but I don't want it to keep adding "ink" to areas that are supposed to be empty.


Hope I'm making sense...


Let's say this selection was going to be my brush:


So now when I use the Brush Dynamics, Photoshop would know that there's an area of the brush, even if there are areas without "paint" in them, and overlapping another dynamic stroke, wouldn't paint those empty areas from previous strokes.


Melhor resposta por Trevor.Dennis

Whay are you trying to do this with a brush preset.   I'm thinking of creating your little Pacman graphic and defining it as a pattern. Thenusing Edit > Fill > Pattern > Place along a path.

The next panel is a bit clunky, but it's doable.

I've added a stroke to the pattern preset so we can see how it handles overlap


I'm with @Bojan Živković11378569  on this, as in I am not sure I completely understand what you are shooting for.


3 Respostas

Bojan Živković11378569
Community Expert
Community Expert
May 16, 2025

It may be a good idea to mention the Behind blending mode for the Brush, which will prevent overlap or painting over already painted areas. I should note that I probably do not fully understand what the problem is.

Inspiring
May 16, 2025

I know it's probably not easy to understand the issue, but here we go:

Let's say I have a simple brush and I set the spacing in Brush Settings, to more than 100%. When I click and drag I get this, right?


Now let's say I want to define a brush that looks like this (including the white circle, as part of the tip):

You can see that it ignores the white circle.


My goal would be to let Photoshop know that a brush is not just the black areas (or shades of it), but also the white areas. So for example, in the image below, the black small circle in number 1 (which was a second stroke created by the Brush Settings feature, that allows me to click and drag), would never overlap anything inside the big white circle (brush tip) in number 2 (which was the initial stroke), when using the Brush Settings, while clicking and dragging:


Right now, I get this, where it overlaps the black circles, and the white circle (I'm including the white circle just to explain what I would like the tip to be, which would include everything: white circle as a tip boundary, so to speak, and the black circles as "what to paint"):


In my case, I would like to get this, where Photoshop knows that the tip is that big white circle, and so the second stroke would not overlap anything inside that area:


because the tip is everything inside the big white circle, and the first stroke is the one on the left, and the second stroke (from clicking and dragging, spacing set to 50%) is the one on the right:


Hope this makes it easier to understand?

Trevor.Dennis
Community Expert
Community Expert
May 16, 2025

Whay are you trying to do this with a brush preset.   I'm thinking of creating your little Pacman graphic and defining it as a pattern. Thenusing Edit > Fill > Pattern > Place along a path.

The next panel is a bit clunky, but it's doable.

I've added a stroke to the pattern preset so we can see how it handles overlap


I'm with @Bojan Živković11378569  on this, as in I am not sure I completely understand what you are shooting for.


Trevor.Dennis
Community Expert
Community Expert
May 16, 2025

What was the tonal value or colour of the area you defined the brush preset from?

If it was anything less than full black (RGB 0.0.0) then a single stroke that overlaps would become darker where it overlaps.


Inspiring
May 16, 2025

I don't think the issue is the color, but something else. I will reply below, a more detailed explanation of what I'm trying to achieve

Legend
May 16, 2025

Try brushing on a blank layer, opacity at 100%, then adjust the layer's opacity.


Larry
Inspiring
May 16, 2025

Unfortunately, that's not the goal. The goal is to just use Brush Settings, not another layer. I will reply below, a more detailed explanation of what I'm trying to achieve