

- Home
- Photoshop ecosystem
- Discussions
- Re: How to change the color of the clouds
- Re: How to change the color of the clouds

Copy link to clipboard
Copied
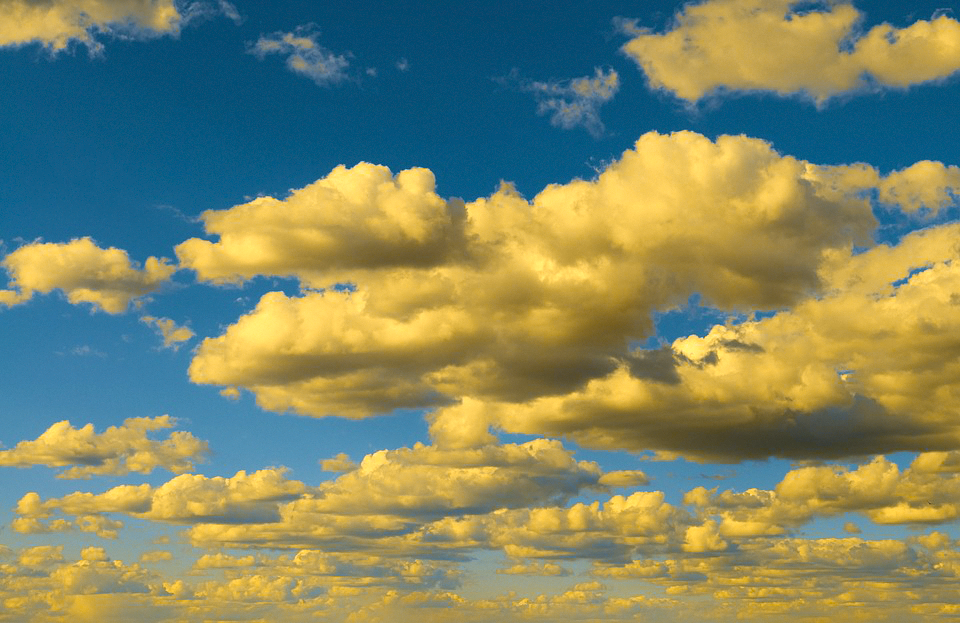
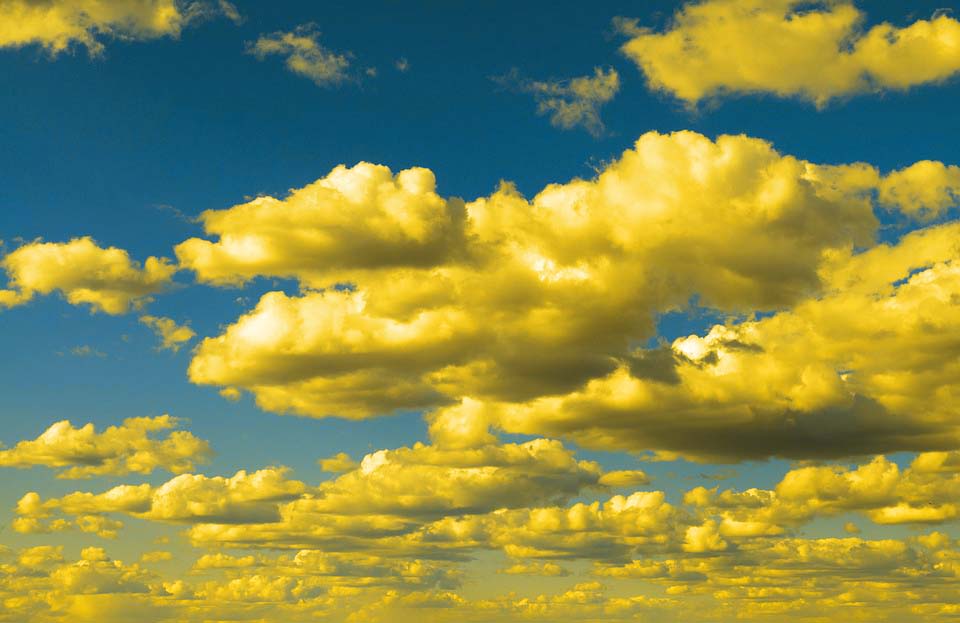
Hi, I'm using Adobe Photoshop CS6 and I a photo taken from Google Images it's a sky with some clouds and I want to change the color of the clouds please have a look at the photo below and share your suggestions.

I want the color of the clouds to be like yellowish color or like light orange something like that.
Regards!


 1 Correct answer

The approach here is to take advantage of two of Lab Color's features
a. Provides a suitable mask based on the b channel
b. Because of its unique color gamut, it provides appropriate tone where none exists in RGB.
First, make the mask
1. Open file
2. Add a duplicate layer
3. Image > Mode > Lab Color
4. Channels. Make a copy the b channel [then select that new channel]
5. Image > Adjustments > Curves …Auto. Done. No brushwork at all.
Now add the color
1. Return to RGB mode
2. Add a blank layer
3. Edit
...Explore related tutorials & articles
 17
Replies
17
17
Replies
17

Copy link to clipboard
Copied
Short answer:
Adjustment Layers and Layer Masks.
Copy link to clipboard
Copied
Copy link to clipboard
Copied
c.pfaffenbichler when I do that it also changes the color of the sky which I don't want I only want to color of the clouds to be changed not the sky. In your edited photo it looks great can you please share the values and step by step procedure?
Thanks.
Copy link to clipboard
Copied
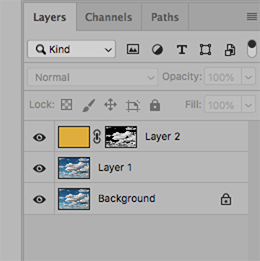
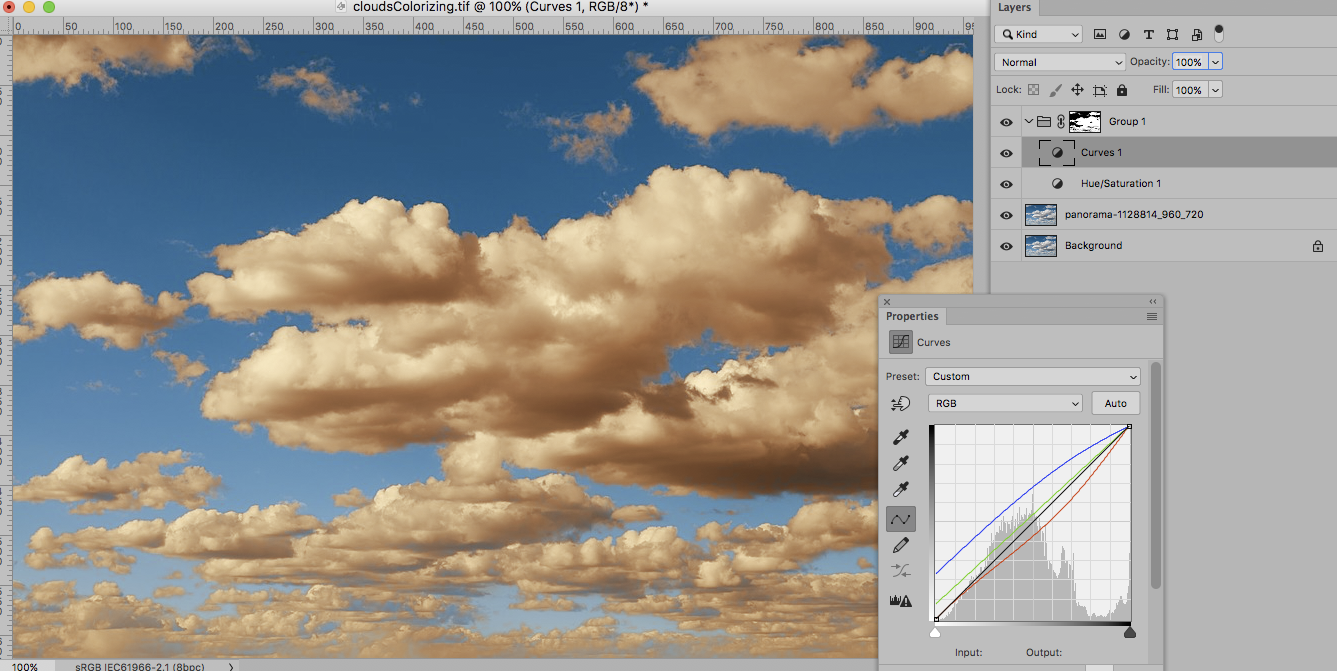
In the screenshot you can see that the Group containing the Hua/Saturation- and the Curves Layers has a Layer Mask.
The a-Channel of a copy of the image converted to Lab was the basis for that Mask.
Copy link to clipboard
Copied
c.pfaffenbichler that's what I didn't get I'm not very familiar with PS and I don't have any Idea how am I gonna do all those masking. The Hua/Saturation and the Curves part I got but in your layers section I can see one group that is grouped already and hidden which I don't know how is it. I did almost the same values as your screen shot for the curves and Hua/Saturation but the result is below.

Copy link to clipboard
Copied
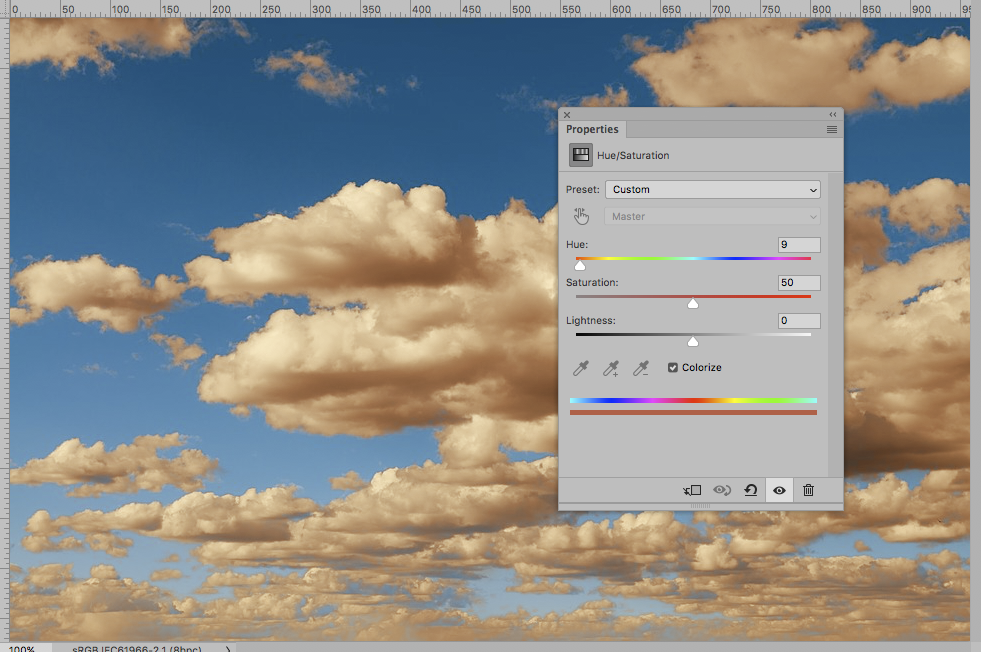
What are your Hue/Saturation settings?
Copy link to clipboard
Copied
Oh my Hue/Saturation settings were different I didn't check colorized and was totally different.
Copy link to clipboard
Copied
That's what I got now.

Copy link to clipboard
Copied
In your screenshot you have a group maybe there are things that I didn't do because I don't know.


Copy link to clipboard
Copied
Hi
I would use a Selective Colour Adjustment layer and target the white neutral colours


There is some overlap between colours, which keeps the adjustments smooth. If the blues move too much for your liking just select the blues in the same adjustment layer and tweak them back (I've not done that above)
Dave
Copy link to clipboard
Copied

The approach here is to take advantage of two of Lab Color's features
a. Provides a suitable mask based on the b channel
b. Because of its unique color gamut, it provides appropriate tone where none exists in RGB.

First, make the mask
1. Open file
2. Add a duplicate layer
3. Image > Mode > Lab Color
4. Channels. Make a copy the b channel [then select that new channel]
5. Image > Adjustments > Curves …Auto. Done. No brushwork at all.
Now add the color
1. Return to RGB mode
2. Add a blank layer
3. Edit > Fill the blank layer with a chosen Foreground color
4. Set the Blending Mode to Color in the Layers panel
5. Go to Channels, choose the b copy (the mask) and click on Load Channel as Selection
6. Choose RGB (in Channels) and return to the Layers panel
7. Click on the Mask symbol at the bottom of the Layers panel
(Note the burned out highlights)
8. Image > Mode > Lab Color
9. Burned out area now carries tone, near neutral shadow values of the original are maintained, and the proper modeling has returned.
10. Layer > Flatten image. (A must.) Then, return to RGB.
No brushwork, sliders or Curve manipulation.
EDIT: In retrospect, I think a lighter orange would haVe been a better choice.

Copy link to clipboard
Copied
it does give a nice effect which can be adjusted to other images
to be a little picky; step 4 "make a copy of channel b" needs to then select that new channel before doing step 5 "Curves …Auto"
thanks for the tutorial norman 

Copy link to clipboard
Copied
norman.sanders Thank you so much I really appreciate it. I did it and it helped me a lot. Thank you for taking your time to explain briefly. See my result!! (^_^)
Regards!
Copy link to clipboard
Copied
mystical.f143 Happy to help. Ya done good!
Ussnorways Nice catch! Thanks for the edit. Unfortunately I can't go back to my entry and insert the line. Drat!
Copy link to clipboard
Copied
Hi
I've edited it for you Norman 
Dave
Copy link to clipboard
Copied
Thank you, Dave.

Copy link to clipboard
Copied
There’s a lot of great solutions to this. The Great thing is there’s no one solution

Find more inspiration, events, and resources on the new Adobe Community
Explore Now
 AdChoices