• Global community
    • Language:
      • Deutsch
      • English
      • Español
      • Français
      • Português
  • 日本語コミュニティ
    Dedicated community for Japanese speakers
  • 한국 커뮤니티
    Dedicated community for Korean speakers
Exit
0

How to clean up/refine the automatic background removal

Engaged ,
Mar 14, 2022 Mar 14, 2022

Copy link to clipboard

Copied

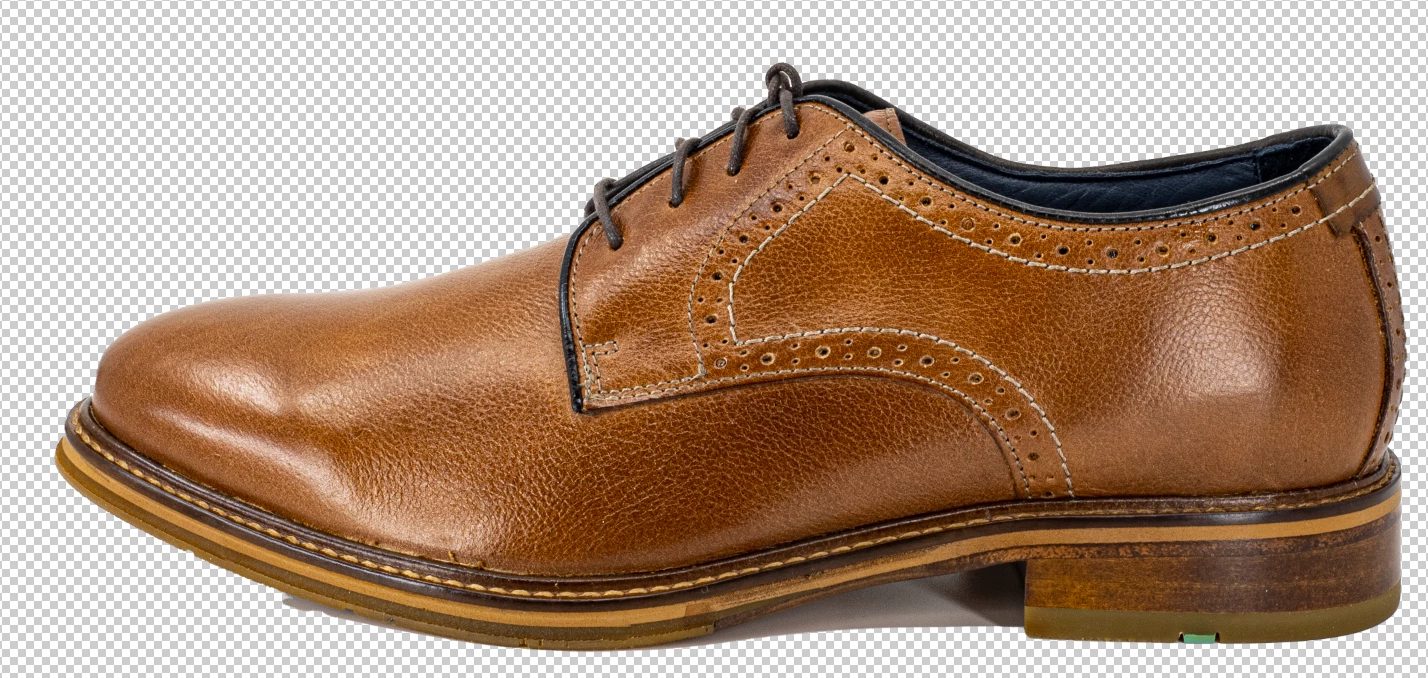
I have some product photos on white backgrounds; I need to change them to transparent backgrounds. The Photoshop Remove Background quick action gets things off to a very good start. But, as you can see in this photo, there are still some parts of shadows that need to be cleaned up. What is the quickest way to do this?


Screen Shot 2022-03-14 at 4.19.11 AM.png

TOPICS
macOS

Views

404

Translate

Translate

Report

Report
Community guidelines
Be kind and respectful, give credit to the original source of content, and search for duplicates before posting. Learn more
community guidelines
Adobe
Community Expert ,
Mar 14, 2022 Mar 14, 2022

Copy link to clipboard

Copied

Don't do this directly by deleting pixels.


Do it with masking. Then you can go back and forth just by painting in the mask. If you overdo, just paint back.


The basic selection process can be the same, but the end result should be a mask, not "delete". If this was a mask, you could just paint those areas out in the mask.

Votes

Translate

Translate

Report

Report
Community guidelines
Be kind and respectful, give credit to the original source of content, and search for duplicates before posting. Learn more
community guidelines
Engaged ,
Mar 14, 2022 Mar 14, 2022

Copy link to clipboard

Copied

I'm afraid I don't understand. Do it with masking how? And why? If you can take the time to explain, I would greatly appreciate it!

Votes

Translate

Translate

Report

Report
Community guidelines
Be kind and respectful, give credit to the original source of content, and search for duplicates before posting. Learn more
community guidelines
Community Expert ,
Mar 14, 2022 Mar 14, 2022

Copy link to clipboard

Copied

Here's how a mask works. It's pretty intuitive.


First click the icon to create the mask. Then click the mask thumbnail to work on the mask; or the image thumbnail to work on the image content.


All you need to do is paint with black to hide content, or paint with white to reveal content. Or anything in between. Or use selection tools and fill with black/white.

mask1.png

Votes

Translate

Translate

Report

Report
Community guidelines
Be kind and respectful, give credit to the original source of content, and search for duplicates before posting. Learn more
community guidelines
Engaged ,
Mar 14, 2022 Mar 14, 2022

Copy link to clipboard

Copied

Thanks. And then what - how do I get from my masked subject to my transparent background?

Votes

Translate

Translate

Report

Report
Community guidelines
Be kind and respectful, give credit to the original source of content, and search for duplicates before posting. Learn more
community guidelines
Community Expert ,
Mar 14, 2022 Mar 14, 2022

Copy link to clipboard

Copied

LATEST

Save As to a format that supports transparency (TIFF or PNG).


If you want to send a final version where the transparency is baked in, removing the mask itself, Layer > Layer Mask > Apply. For a multi-layer image "merge visible" will work too.


If it's for screen/web, then Export or Save For Web to PNG. Then it will automatically merge.

Votes

Translate

Translate

Report

Report
Community guidelines
Be kind and respectful, give credit to the original source of content, and search for duplicates before posting. Learn more
community guidelines