Copy link to clipboard
Copied
As you can see below, I have made a grid using the method of view > show > grid, and then made adjustments to the grid in an attempt to create it how I envision it should be. I am not sure how to make the size of each individual square equal so that the squares on the edge of the document are not smaller than the rest. I also want to place all the text boxes I created on top of the grid so they are not covered by it.
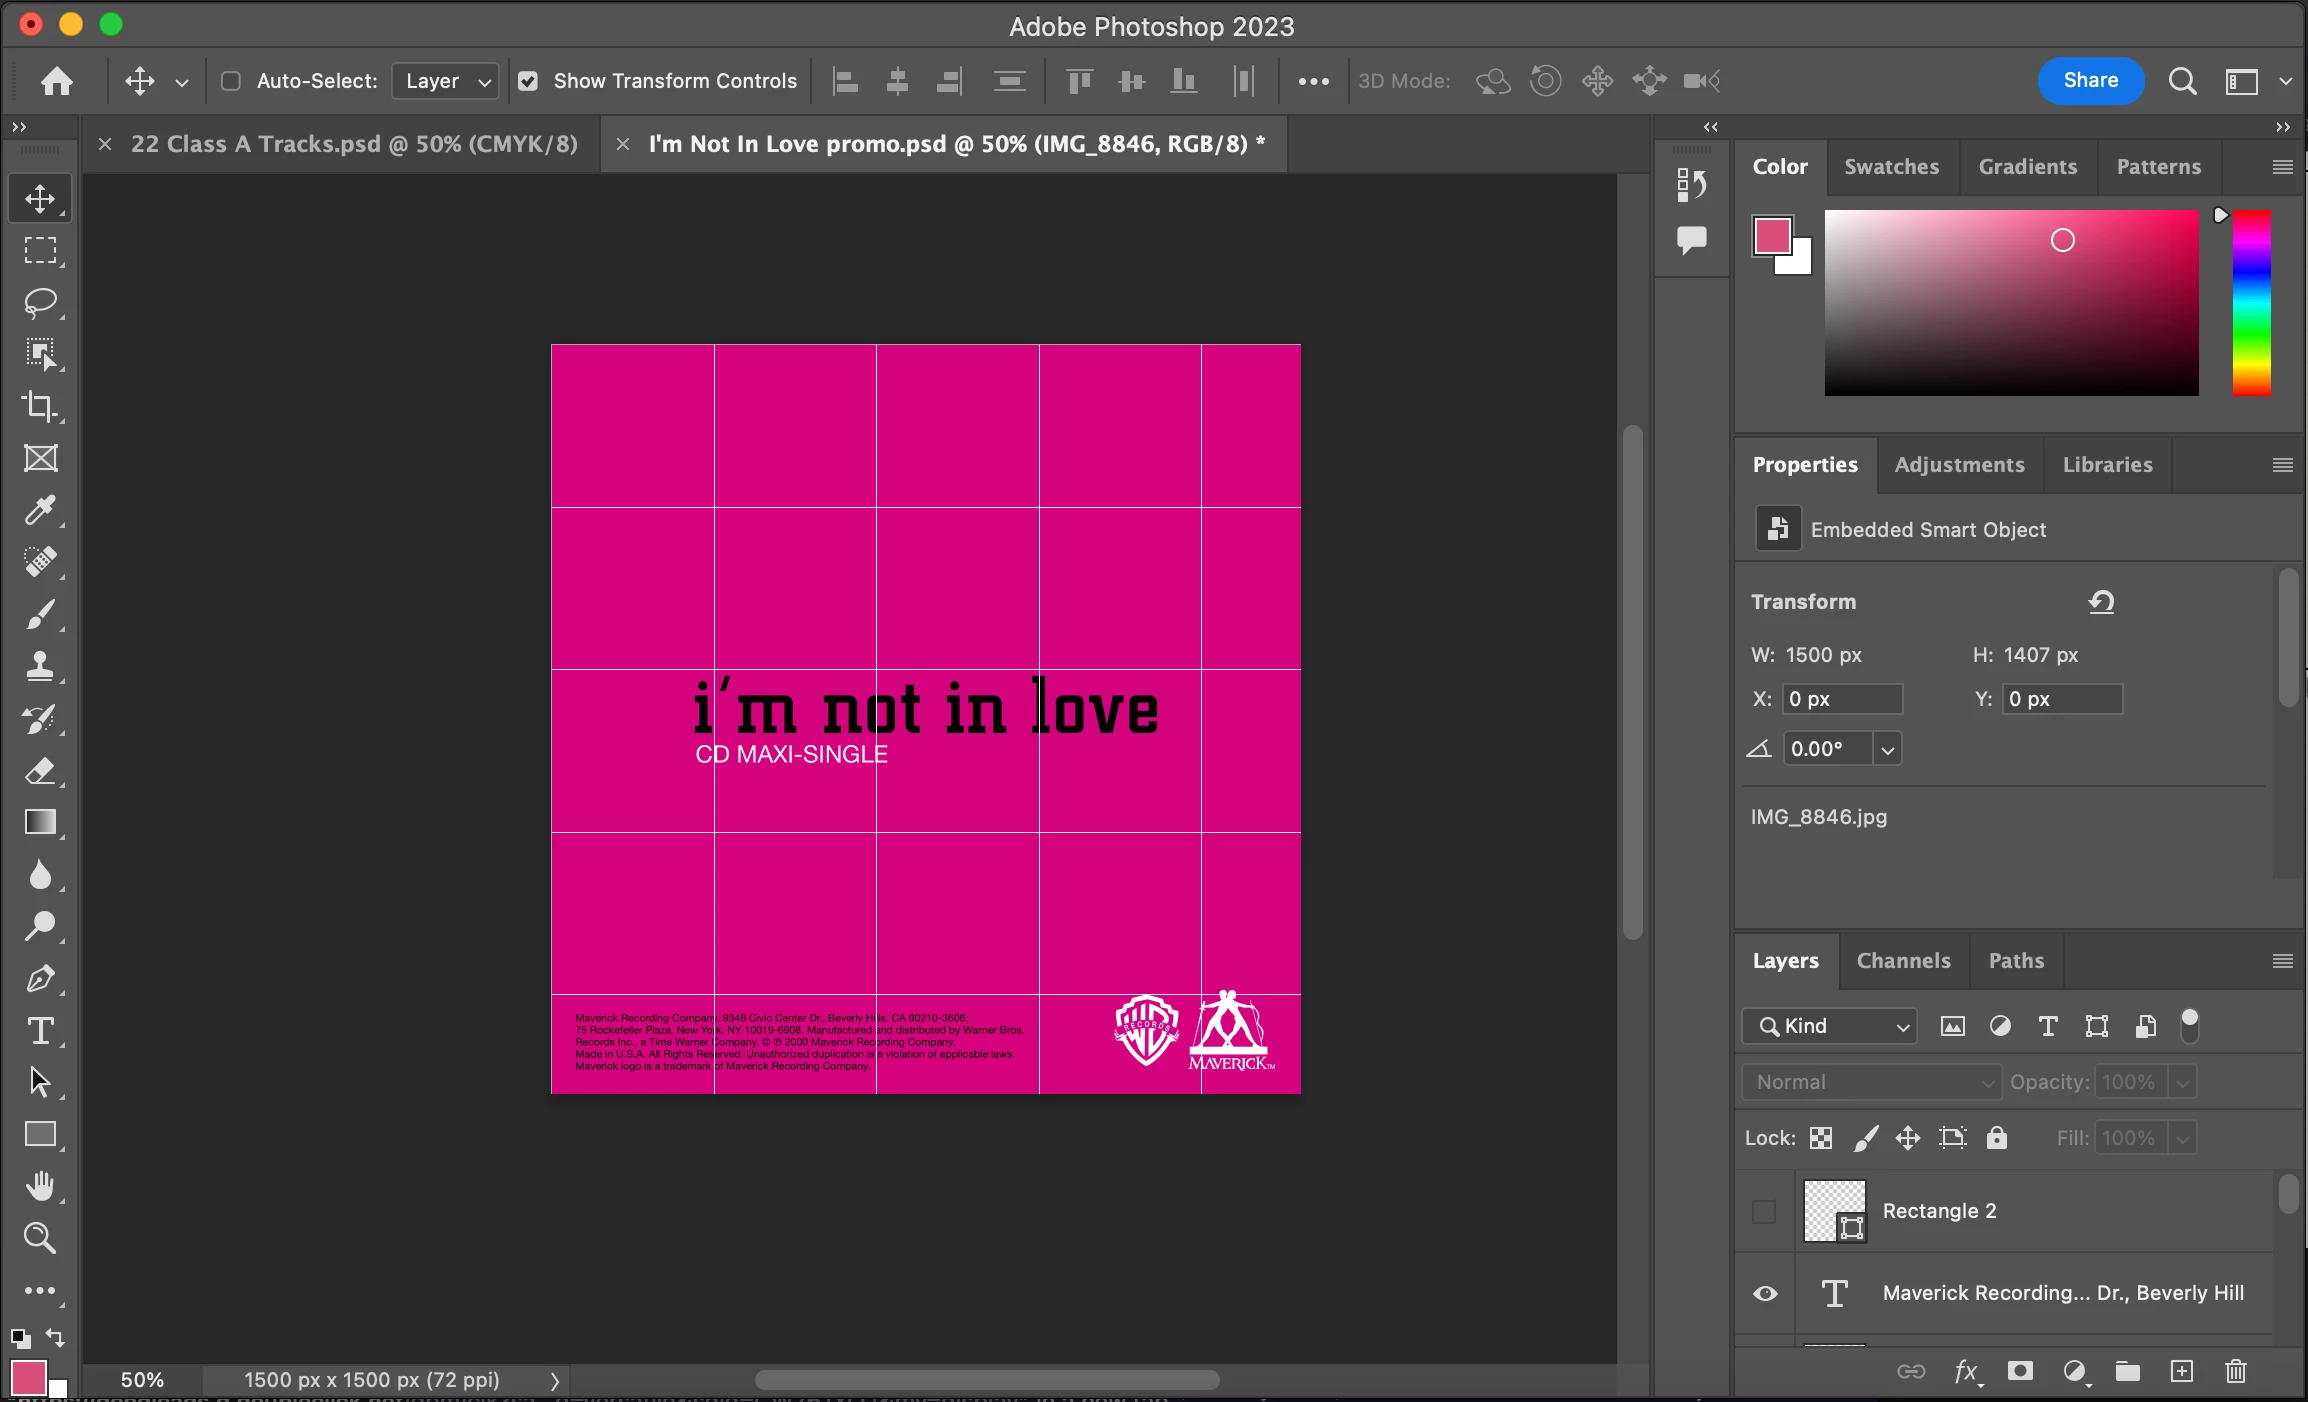
How exactly can this be done?
Thank you so much for any help!
Copy link to clipboard
Copied
Have you tried View > Guides > New Guide Layout > use Columns and Rows without Gutter (delete value or type 0). This will create guides which you can lock using View > Guides > Lock Guides. To show/hide guides use Ctrl + H keyboartd shortcut. I do not think you can control order of guides, they will stay on top, otherwise guides will lose purpose.
Here is free script to convert guides to vector shapes, change: var lineWidth = 6 to lets say 2 what will be shape width if you want tiny shapes or to 1 if you want them tiny as guides https://community.adobe.com/t5/photoshop-ecosystem-discussions/hey-guys-how-to-convert-ps-guides-int... After converting to vector shapes you can control position of shapes in the Layers stack.
Copy link to clipboard
Copied
In addition to Bojan's method, you can also set the grid to %.
I use both methods depending.
Copy link to clipboard
Copied
I probably do things the long way around but here's how I did it:
1. Using either the Pen Tool or Line Tool draw a vector line. Set it to the width you want.
2. With the Move Tool, select that line and with the Align Tools align it to the left of the canvas. The Align Tool has two options: align to Selection or Align To Canvas - make sure it's Align To Canvas.
3. Make a copy of that line layer. Select it and align it to the right-hand side of the canvas.
4. Make 4 more copies of the line and drag them anywhere between the two aide lines already aligned.
5. Select all the lines and use Align>Distribute Spacing Horizontally.
6. Group all the lines together and make a copy.
7. Rotate 90 degrees and align to the canvas either top or bottom to finish the grid.
It took longer to write than to do!
Copy link to clipboard
Copied
A slight variation
Make a New Guide Layout. Save with a meaningful name if you like to make it a preset. (It will easier to use in an Action if it is a saved preset.)
Make your grid using the Line tool. The line will snap to the grid.
I made one line; copied it three times and space them out using Move > Align. Merged the layers, copied again and rotated 90°. Merge one more time and you have a vector grid.
What I suggest you do at this stage is open the CC Libraries panel. Make a new library with a meaningful name, and drage your grid to it.
That grid can be dragged onto any new document with square dimensions, and dragged to fit. CC Libraries are super useful.
Copy link to clipboard
Copied
Thanks to everyone for their responses. I apologize for the delay in my reply. My biggest struggle with this is in getting the grid to be equal in width and height as it extends across the document space. I keep ending up with leftover space on one side of the document. I've tried a number of methods and haven't yet gotten it right. I've tried to make equal the number of pixels (all the way around a square) in the new guide layout, but the guides don't extend equally.
If the entire document is an even width and height (1500 x 1500 px), then I should be able to get even squares in that space to make a grid. 🤷🏻
Copy link to clipboard
Copied
Can you show your settings in Preferences > Guides, Grids, & Slices? Here I have 20%. You can set the subdivisions higher or lower — setting it to "1" will leave only the larger grid.
Each section is 300px x 300px.
Jane
Copy link to clipboard
Copied
Your asked for a grid and several folks have told you how to do it with guides. If you prefer guides, show us a screenshot of what you have in View > Guides > New Guide Layout.
This is 5 columns and 5 rows with no gutter.
Jane
Copy link to clipboard
Copied
I've used the exact same settings as you and I'm still ending up with larger rectangles in the middle of the pink square and smaller ones on the edges. Your example is exactly what I want to achieve.
Copy link to clipboard
Copied
The white margin is part of the image. The grid in your examples is entirely correct to your specifications.
To accommodate the white margin, you need a lot more than the 5 pixel margin you have set. Here it's 40 pixels in a 1500 pixel square document.
Copy link to clipboard
Copied
@kirbydoo wrote:
I've used the exact same settings as you
I don't have a margin. If you need one, follow the advice from DFosse.
Do you want the grid to be even across the 1500px by 1500px or across the pink square? The pink square appeared to fill your canvas in your first screenshot, but it no longer does. We don't know the size of the pink square.
Jane
Copy link to clipboard
Copied
I'm sorry. Yes, the pink square is where the grid needs to be. The size of the pink square is 1408 x 1408 px. I tried to pick an even number for that.
Copy link to clipboard
Copied
Try DFosse's method with 46 for the margins and see if that works.
1500-1408=92
92/2-46
Jane
Copy link to clipboard
Copied
I've tried both 46 and 44 and I end up with a little bit of space left over at the other side of the pink square. I keep making squares and just using the stroke as black with the interior color set to nothing.
I also tried creating a new document with the resolution of 1408 x 1408 with the intention of just making the grid and copying it over to the original pink square document and I end up with the same results.
Copy link to clipboard
Copied
Copy link to clipboard
Copied
I've tried both 46 and 44 and I end up with a little bit of space left over at the other side of the pink square.
By @kirbydoo
I can't help but think how easy this is in Illustrator and InDesign because you can select multiple guides and use Distribution to equally space them!
This is working for me.
Are you positive that your pink square is exactly in the middle? If your pink square is on a separate layer, use Cmd+T. If the proxy is in the middle, the X and Y should be 750 px (half of 1500).
Jane
Copy link to clipboard
Copied
Here's one more idea if nothing else works:
Jane
Copy link to clipboard
Copied
I've tried both 46 and 44 and I end up with a little bit of space left over at the other side of
I can't help but think how easy this is in Illustrator and InDesign because you can select multiple guides and use Distribution to equally space them!
Jane
By @jane-e
There is the same in Photoshop: I explained that in my method back on December 12th, which was done the same way 🙂
And, sorry, I was doing my answer just as the nurse turned up to give me my B12 injection, so I missed the bit about needing a border, so I was still wrong. I'm glad it's all sorted now though 👍🏼
Copy link to clipboard
Copied
Hello, in your previous images, there was no margin around the pink area, it might have saved everyone some grey hair if you had shared this very image, don't you think?
Copy link to clipboard
Copied
Jane already brought that to my attention, but yes. I didn't quite understand from the beginning that the margin was going to completely change the way the grid was made, but it makes perfect sense.
Copy link to clipboard
Copied
Jane already brought that to my attention, but yes.
By @kirbydoo
No worries, we're on the same page now!
Jane
Copy link to clipboard
Copied
Glad to hear that eveyone is on the same sheet of music, but did any of the multiple solutions work for you?
Copy link to clipboard
Copied
Copy link to clipboard
Copied
Good to know, @kirbydoo please mark the answers that helped you as correct, so that others users can find the best solution easily!
Copy link to clipboard
Copied
I feel bad picking just one answer because they're all pretty accurate! 💁🏻 The Janes came through though!