How to edit Lightroom Classic images in Photoshop: 🔎 Quick Tip

Editing images in Adobe Lightroom Classic and Adobe Photoshop is a common workflow for photographers who want to take advantage of the strengths of both programs. Lightroom is excellent for cataloging, organizing, and performing basic edits on your photos, while Photoshop offers more advanced editing capabilities and creative options.
Watch this video to see how to edit Lightroom Classic images in Photoshop.
❶ Select the Image
- Choose the image you want to edit in Photoshop by clicking on it in the Library or Develop module.
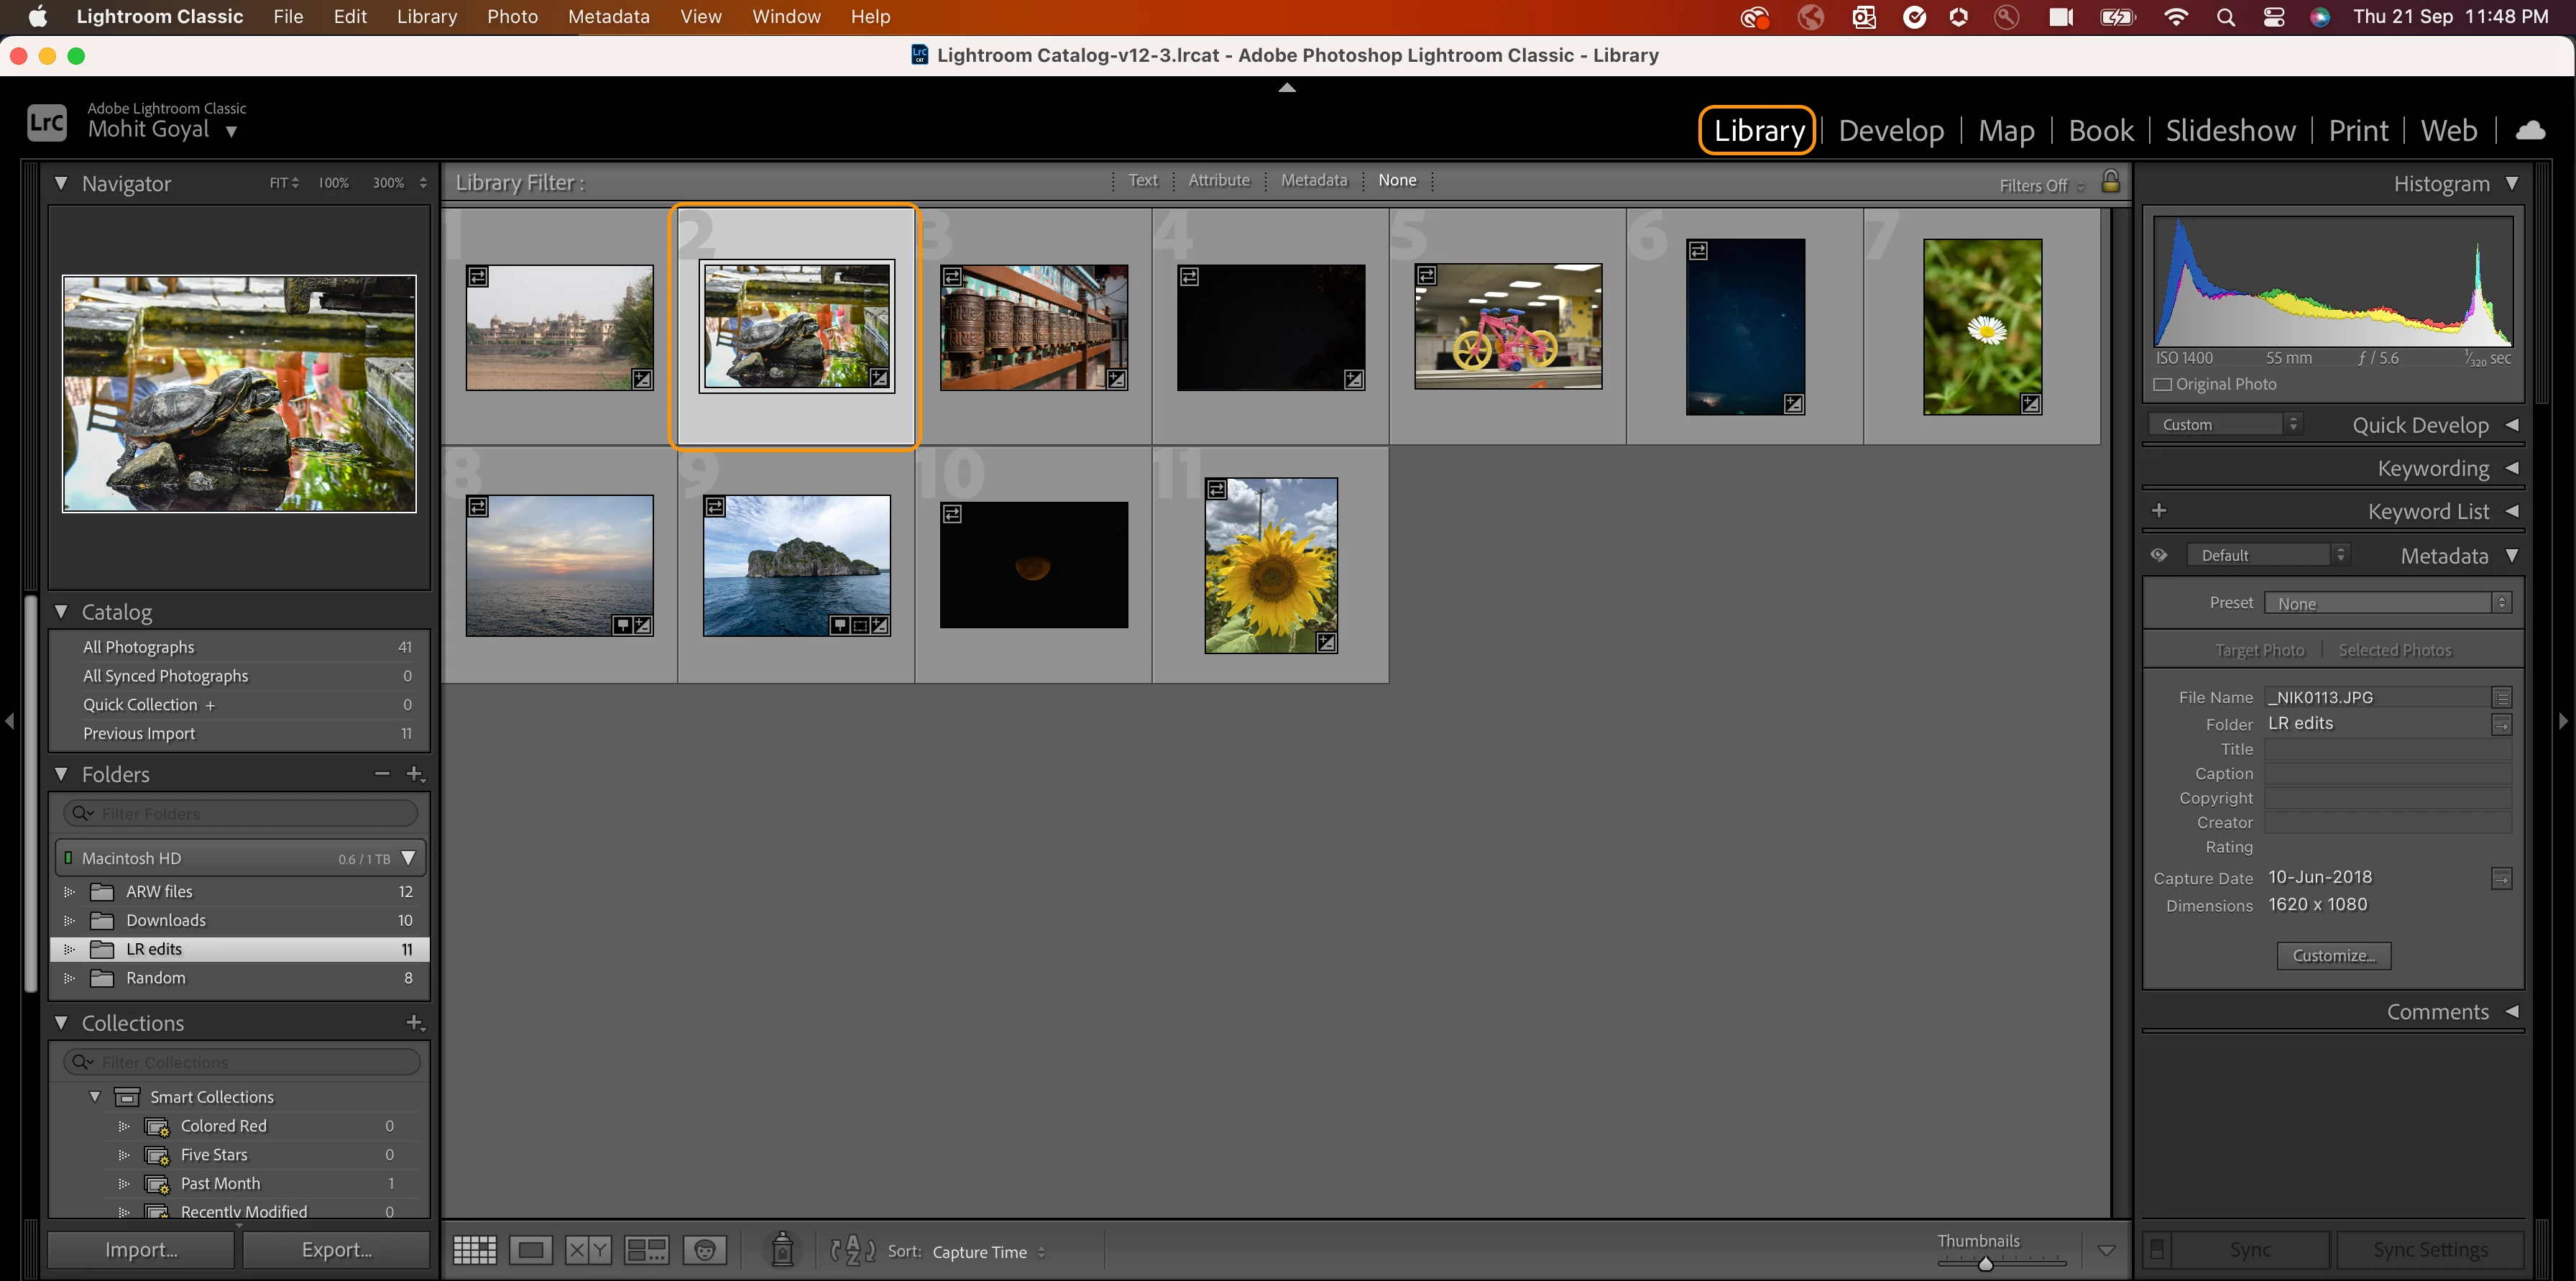
Library Module
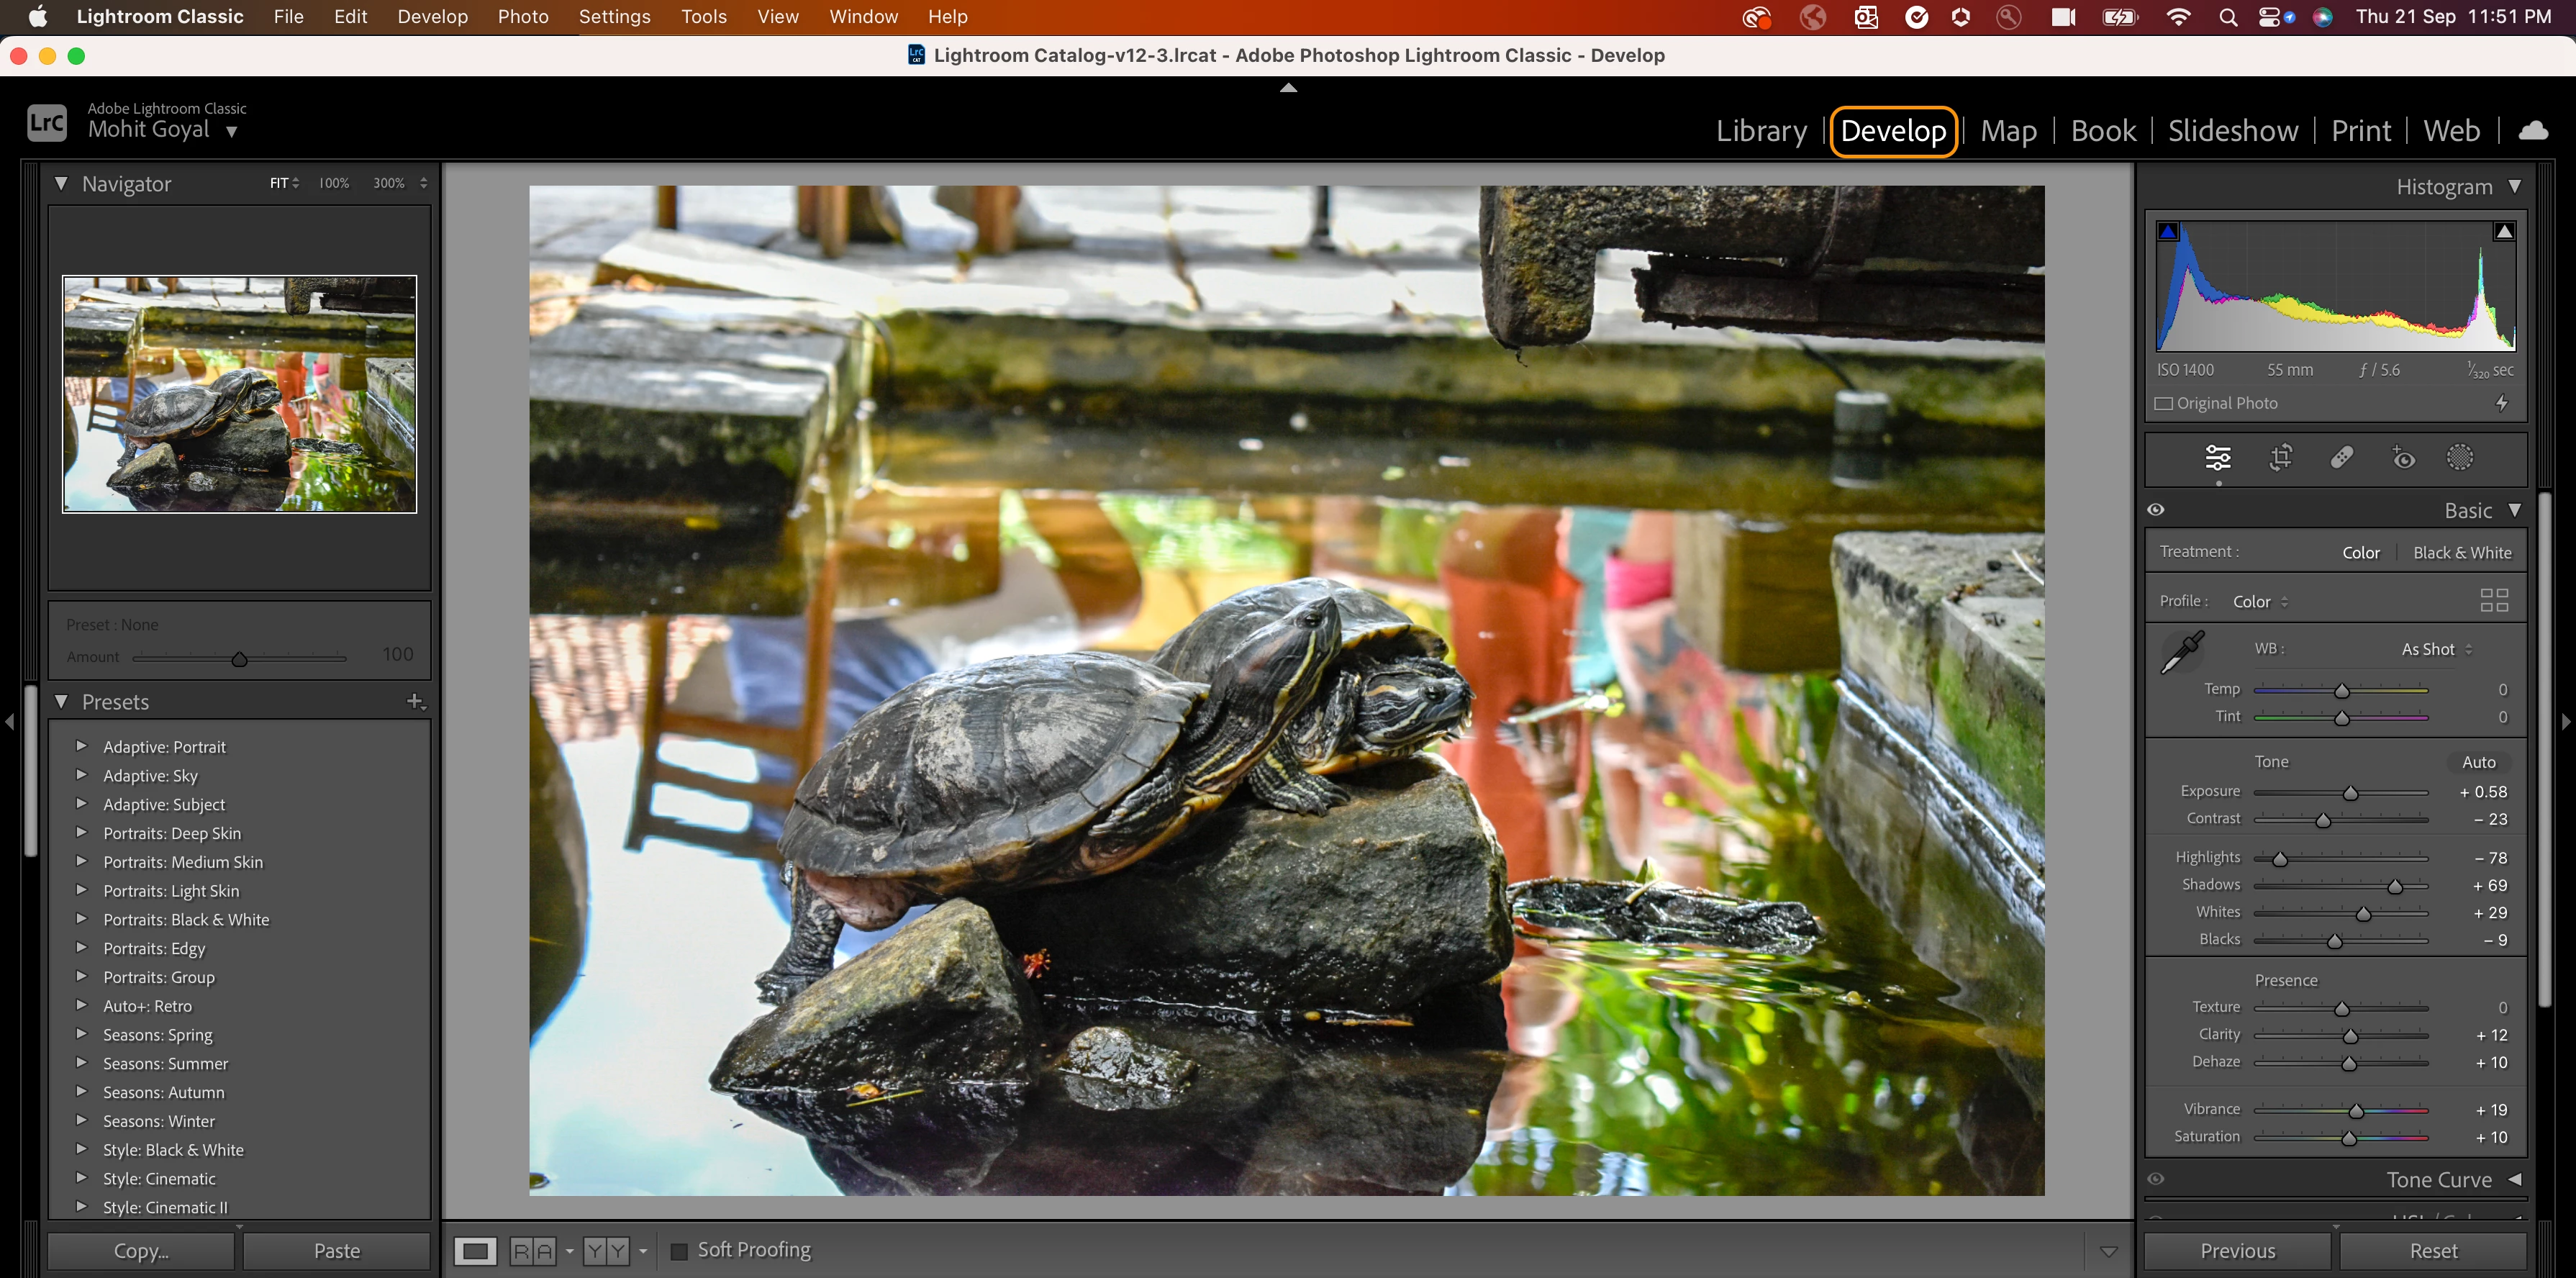
Develop Module
❷ Edit in Photoshop
- Go to the "Photo" menu in the top-left corner, Or you can right-click/cmd-click on the image.
- Select "Edit In" and then choose "Adobe Photoshop."
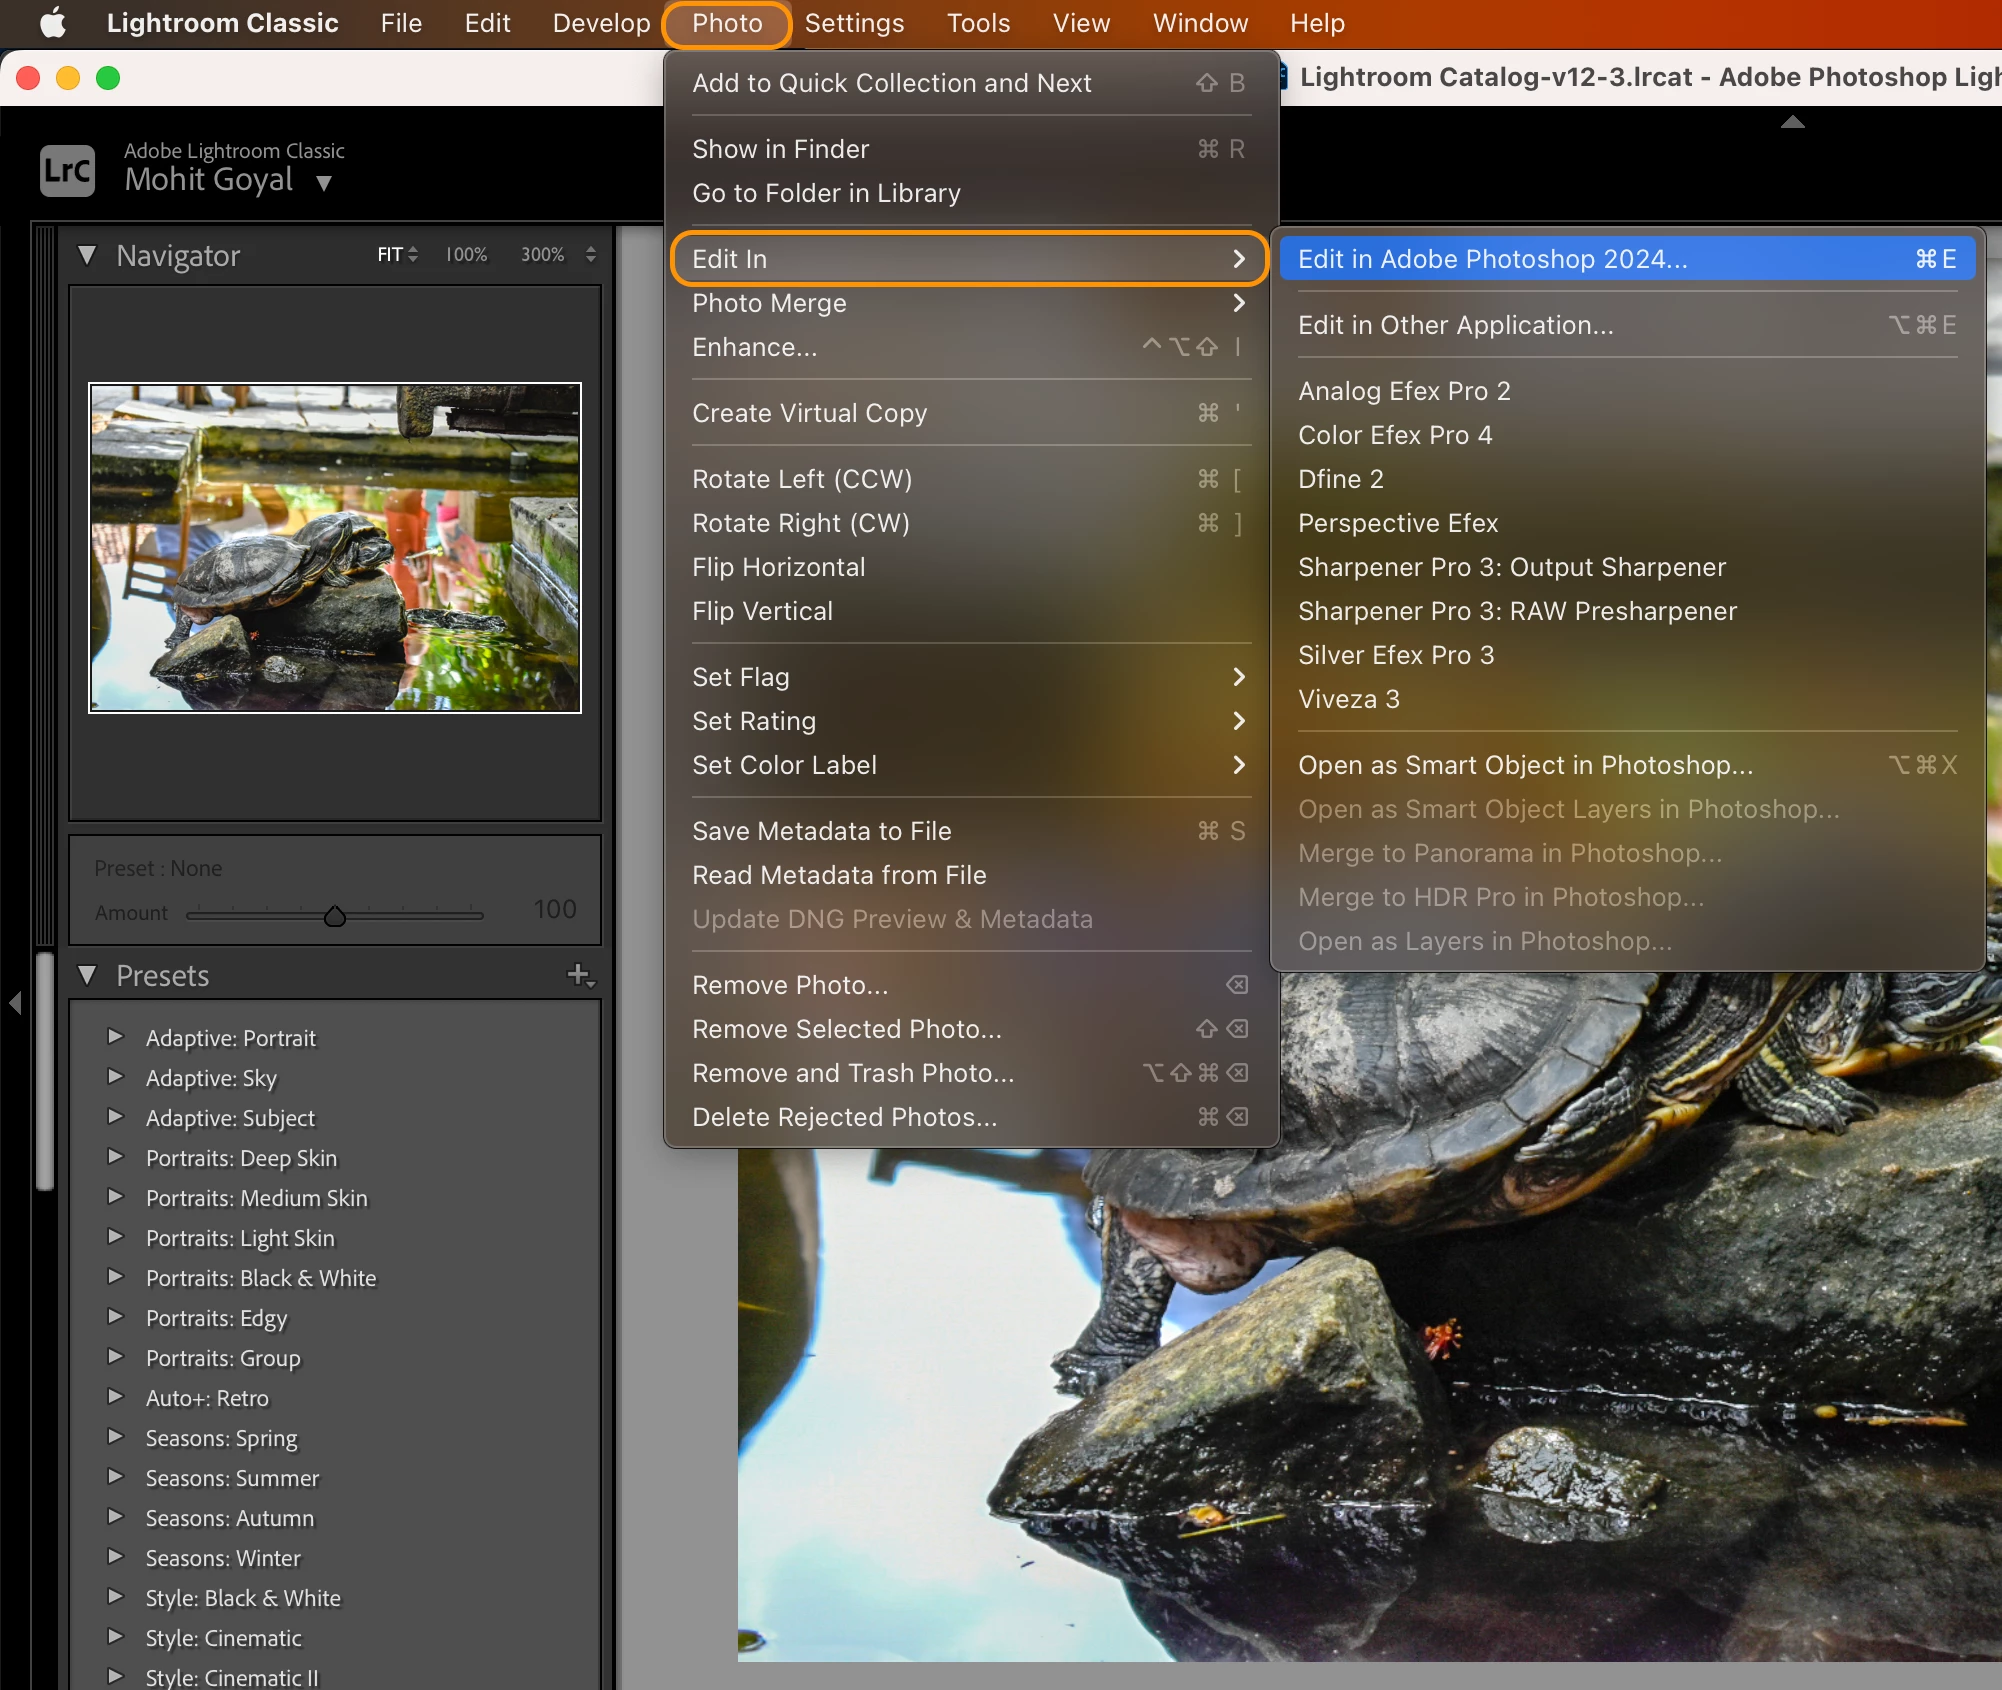
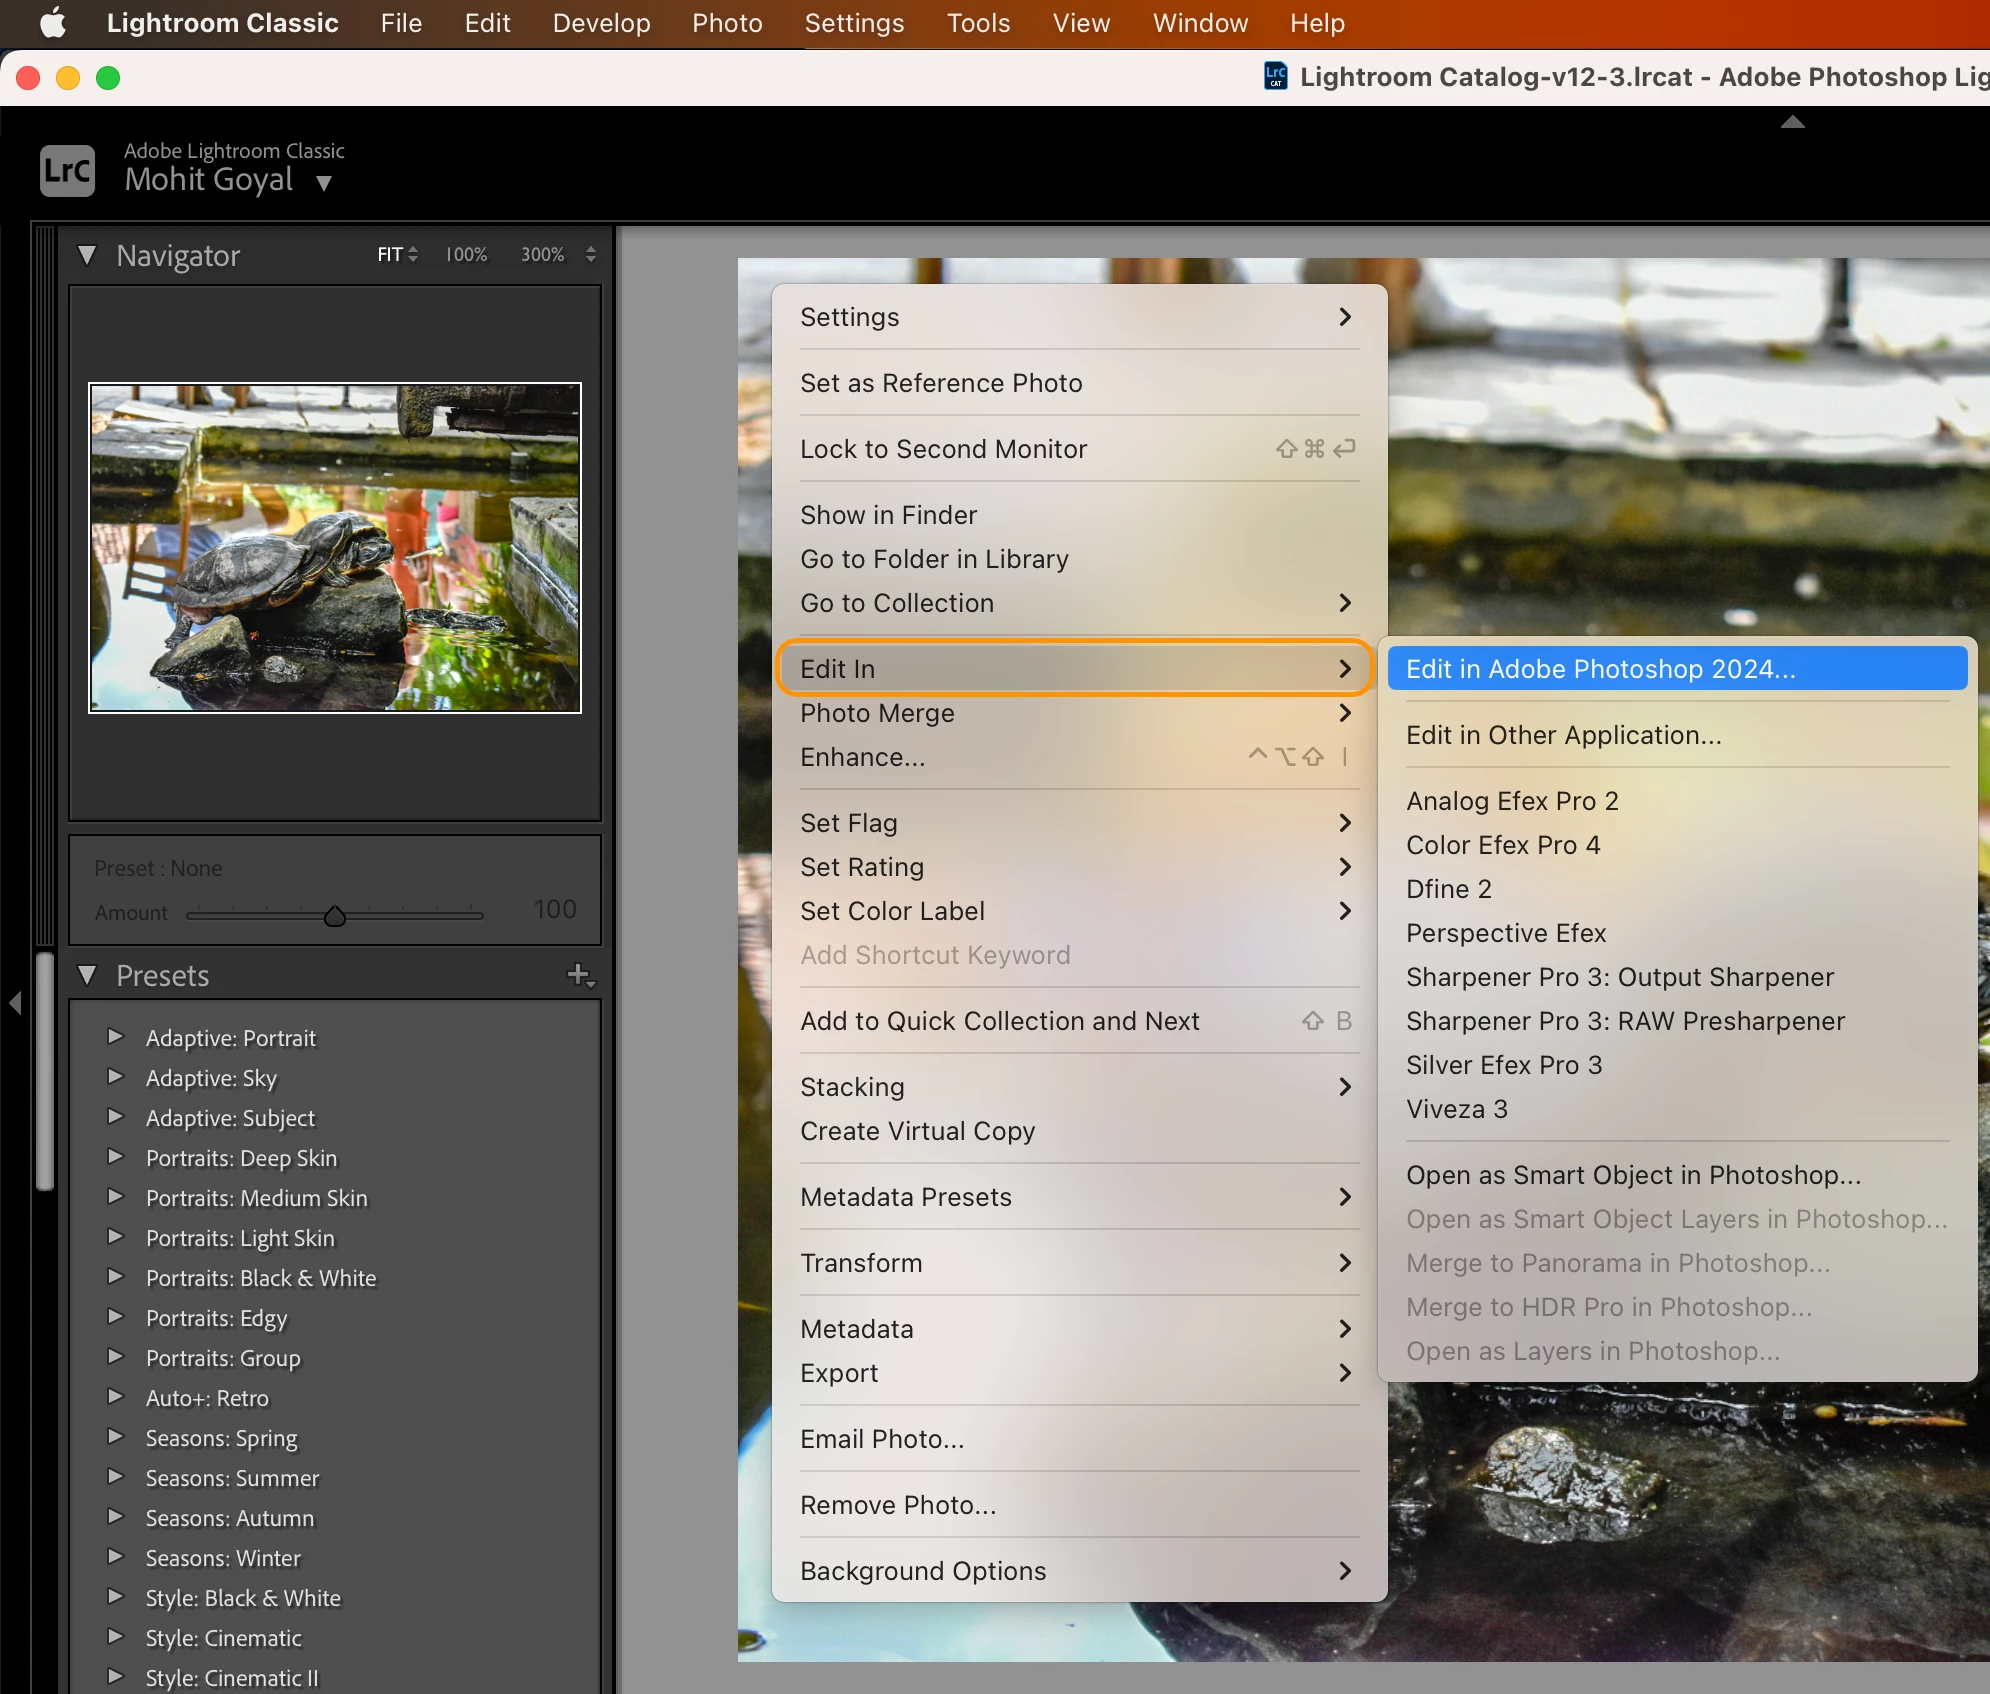
❸ Choose Edit Options
- If you open a camera raw file, Photoshop will directly open the image. However, if you're opening a TIFF, JPEG, or PSD file, you have the option to edit a copy with Lightroom adjustments, create a copy of the original, or edit the original image itself.
- Choose the option that best suits your needs and click "Edit." For more info, see this
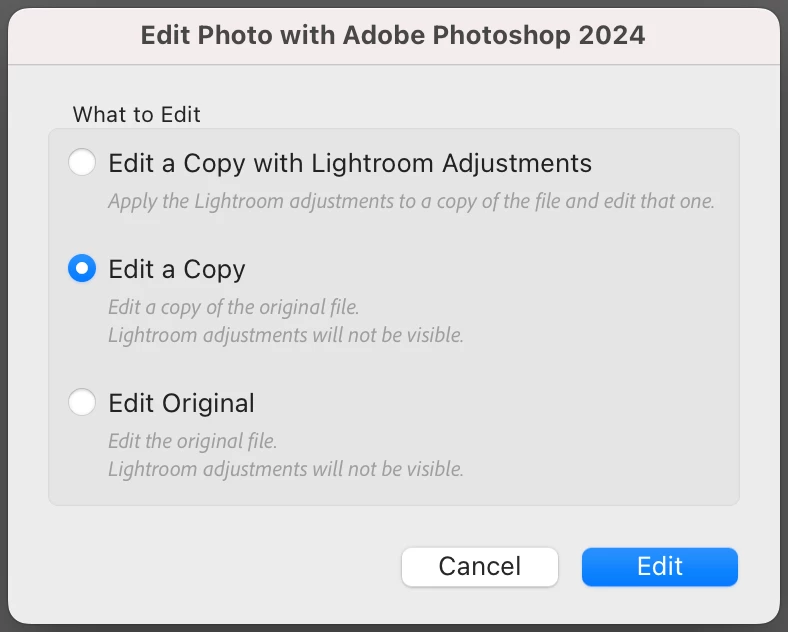
- Editing a Camera Raw or DNG file in Photoshop from Lightroom Classic results in the file returning in either a TIFF or PSD format. The default setting is TIFF, but you can customize these preferences by navigating to Lightroom Classic > Preferences > External Editor > Edit in Adobe Photoshop. See External editing preferences for more info.
❹ Edit in Photoshop
- The selected image will open in Adobe Photoshop, where you can perform more advanced editing tasks.
- After making your edits in Photoshop, go to the file menu and click "Save" to save your changes. To return to Lightroom, simply close the image in Photoshop. Your edited image will automatically be saved as a new file in Lightroom Classic's catalog.
This topic can also be found in the Lightroom Classic community. Here's the link
Related links:
Edit Lightroom Classic photos in Photoshop or Photoshop Elements
Edit Lightroom Desktop photos in Photoshop
Edit Lightroom photos on Photoshop on the iPad
Troubleshoot common Edit in errors


