Known Participant
September 26, 2021
Answered
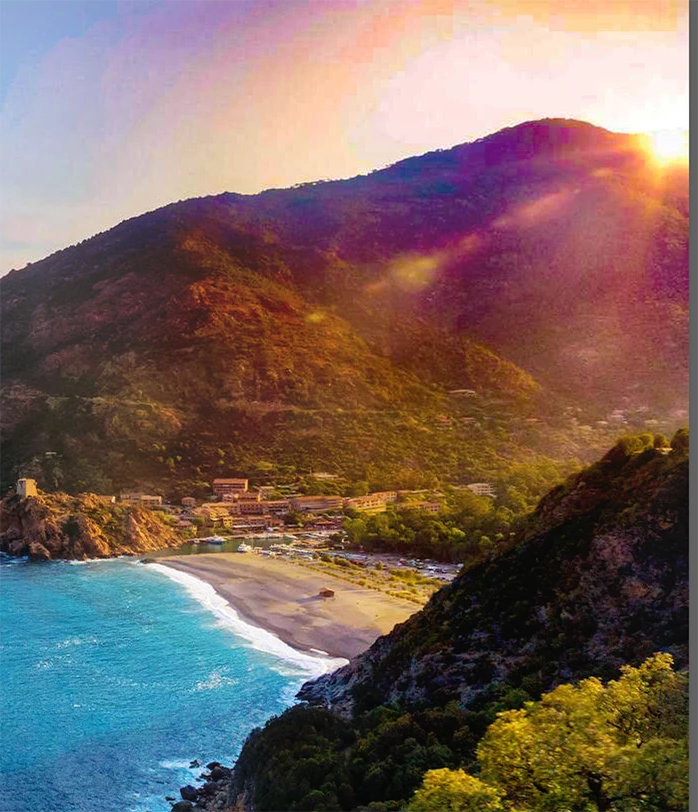
How to enhance this photo
- September 26, 2021
- 9 replies
- 1051 views

Hi!
I have a couple of steps for you--but you need to remember that the light in the upper right corner is a sun flare, and it will be enhanced along with the rest of the photo. If you are not happy with the sky, then you can replace it when you're all done.
First, with your image open, dupliate the layer. Press Command-Shift-A to take the image into Camera RAW and slide the Dehaze filter all the way over to the right. You can also add a little black to increase the darks if you want, and play with someof the other sliders until you feel comfortable that you have matched the saturation of the other parts of the moruntain. Hit ok and leave Camera Raw
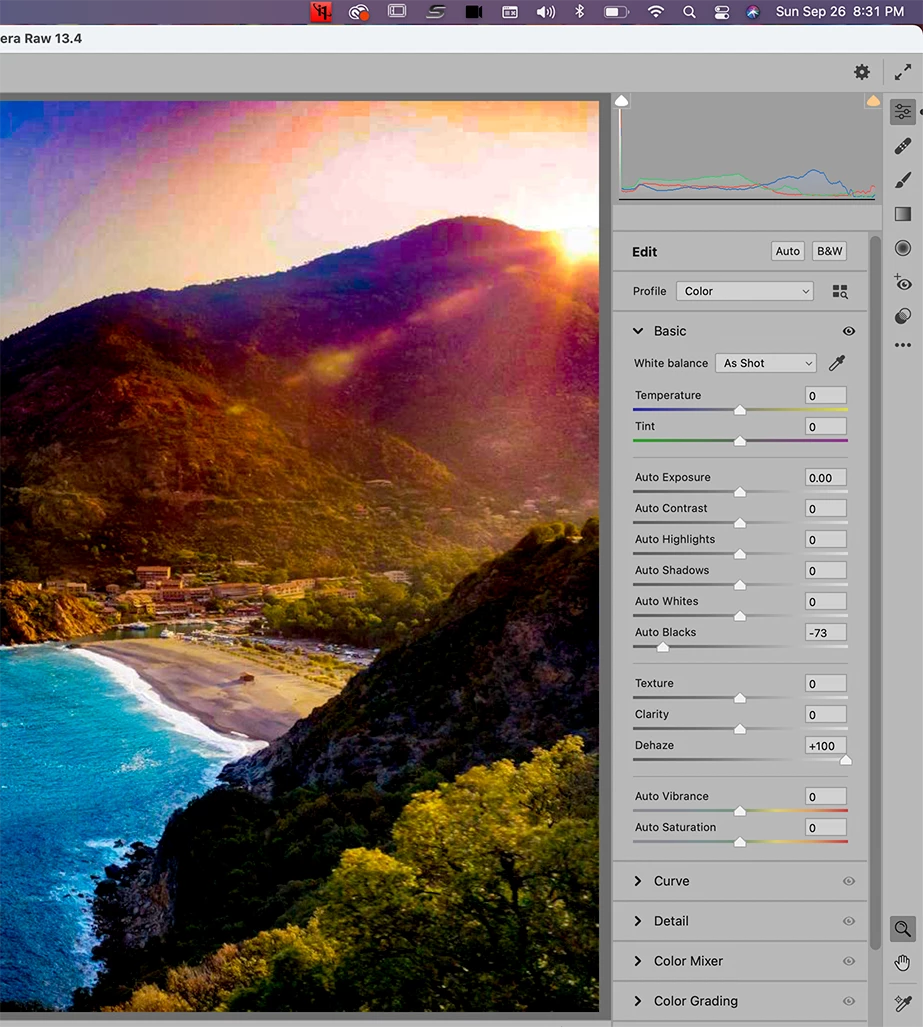
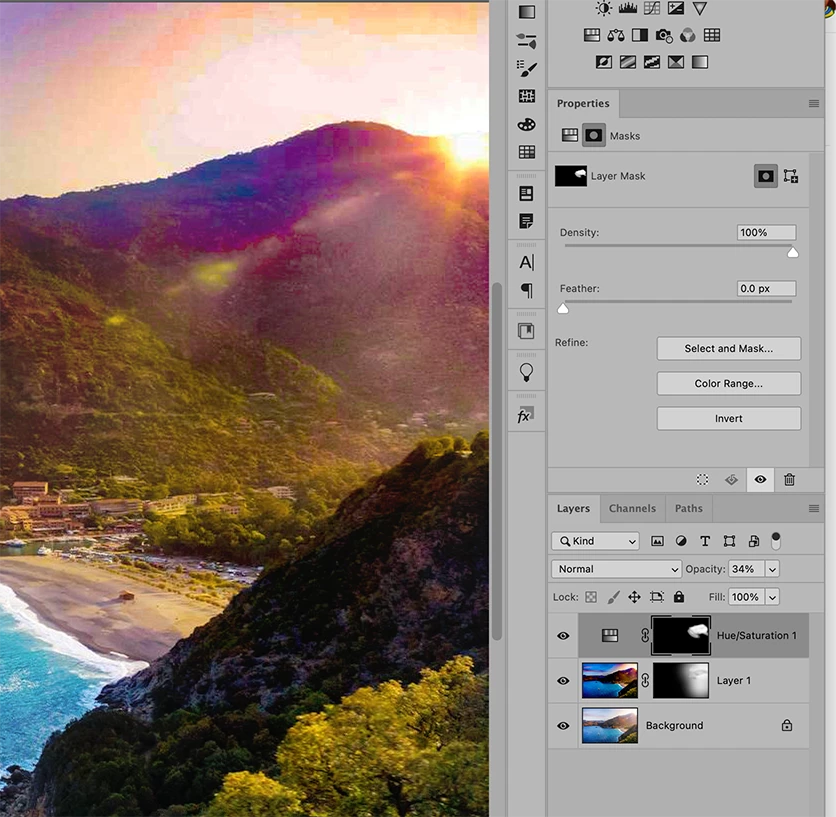
Next, Add a Layer Mask by holding down the Options key and pressing the Layer Mask Icon at the bottom of the Layer's Panel. This will create a mask that will hide the image. Use a very large, soft edge brush with the Foreground color set to white, and a lower opacity, and start painting in the area to darken it until you are satisfied.
I have found that Dehaze warms up an image when I use it, so to change thr redish brown color, you can use an Adjustment Layer with Hue and Saturation to decrease the red. Add a Hue and Saturation Adjustment Layer and change the Master Drop down menu to Red and adjust the area so that the value of greenery matches the rest of the mourntain.
Fill the existing Layer mask with black so that the image is hidden. Use your soft-edged brush at a low opacity to get ridd of the dark reddish brown color left from the Dehaze filter.
As I said before, trying to correct for a sun flare causes a whole new set of problems, but using Dehaze can be a really good option. Play with it and let us know if you have any questions.
Michelle
Already have an account? Login
Enter your E-mail address. We'll send you an e-mail with instructions to reset your password.