- Home
- Photoshop ecosystem
- Discussions
- How to get a set of dots in a 3d effect in Photosh...
- How to get a set of dots in a 3d effect in Photosh...
Copy link to clipboard
Copied
Although it seems trivial, it fails to achieve the 3D effect placement of dots on the globe theme, see http://pasteboard.co/2Xy9WGE8T.jpg.
Standard way somehow I cannot reach (spherize, distorsion, etc.) Does it works with some plugin or way to accomplish this?
thanks for any advice
Peter
 1 Correct answer
If anyone was having trouble with the link in the above post, there was an additional full stop tagged to the end. This is the image it was trying to link to:

Here's how to do it: You'll be using Free Transform multiple times on the same objects, so use Shape layers to avoid nasty pixelation artefacts. You might need to set the workspace to none to ensure Step & Repeat work OK.
Use the Ellipse Shape tool to make the first circle near the middle of your canvas. Hold down the Shift key to force t
...Explore related tutorials & articles
Copy link to clipboard
Copied
This looks like it was done in 2D. You could try this
Adjust the shape dynamics of a hard brush to Size Jitter Control - "Fade" and adjust for a wide spacing.
Then draw a path with the pen tool and stroke it with the brush ( I used two paths one from the middle up and another from the middle down so that the size reduced in each direction.


Mine on the left are not exactly the same as the originals on the right - but play around with the fade and spacing as required

Trevor.Dennis our resident brush expert will be along soon to show us a better way 🙂
Dave
Copy link to clipboard
Copied
If anyone was having trouble with the link in the above post, there was an additional full stop tagged to the end. This is the image it was trying to link to:

Here's how to do it: You'll be using Free Transform multiple times on the same objects, so use Shape layers to avoid nasty pixelation artefacts. You might need to set the workspace to none to ensure Step & Repeat work OK.
Use the Ellipse Shape tool to make the first circle near the middle of your canvas. Hold down the Shift key to force the round circle. Set fill to your color and stroke to none.

Copy the ellipse shape layer.
Use Free Transform and Shift > Right Arrow to move it, and set width (W:) and height (H:) both to 90%

Now Shift Ctrl Alt t (Shift Cmd Opt t) as many times as you need to copy the ever smaller circles. (not that with Shape layers, Step & Repeat adds to the same layer)

Merge the two shape layers, and copy the resulting merged layer.
Use Free Transform and choose Flip Horizontally, but Alt (Opt) click to the left of the merged shapes to place the center handle to the left of the shapes so that they flip about this point.

Fine tune the space between the shape layers and merge them Ctrl e (Cmd e), and move them to the middle of the canvas. Note mine were a bit too large and I have downsized them a touch to fit.

Now Free Transform, and chose Warp from the Options bar (red highlight) and Arc from the Warp Drop down on the left of the Options bar (red highlight)

Note you could have started with a vertical array and used the toggle vertical/horizontal icon to the right of the Warp drop down.
Free Transform into position, and perhaps add a drop shadow to lift them off the surface of the globe.
Job done.

Copy link to clipboard
Copied
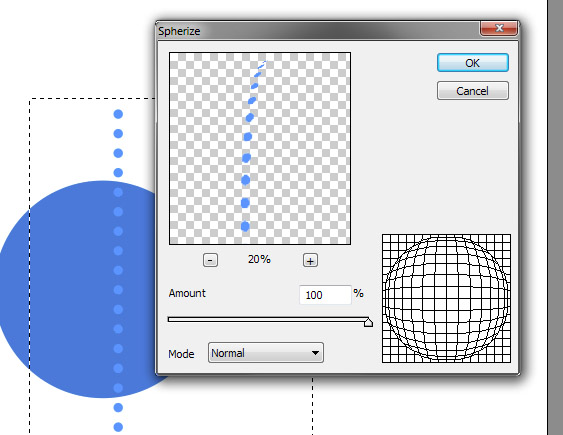
thank you especially for your reaction, and for the tutorial, really appreciate it. A small problem is that I need to achieve real 3d look in 2D space. It means the position of the dots on the globe, as well as to the real object as a sphere. And I don't want to do it manually, like this one in Illustrator. Most of it is visible above and below, at the poles. I was looking for a plug-in for Photoshop, something better as spherize, see below.
I know that the best course of action for this case is it to make a ball in some 3d editor and place this motive on it as a texture. Then it would be physically accurate. Photoshop for 3d stuff I don't use at all, for my needs I have still CS5.
Peter

Copy link to clipboard
Copied
It would be easy to set up dots like this in Illustrator using a blend. My guess is that the dots were done in Illustrator and then placed into Photoshop.
Copy link to clipboard
Copied
to Barbara: yes it's true, but it's not what I need, see my reaction above .No blend, no envelopes, etc.
