


Copy link to clipboard
Copied
Hi,
In this image i wish to highlight the spot you can see in the circle. How can i do?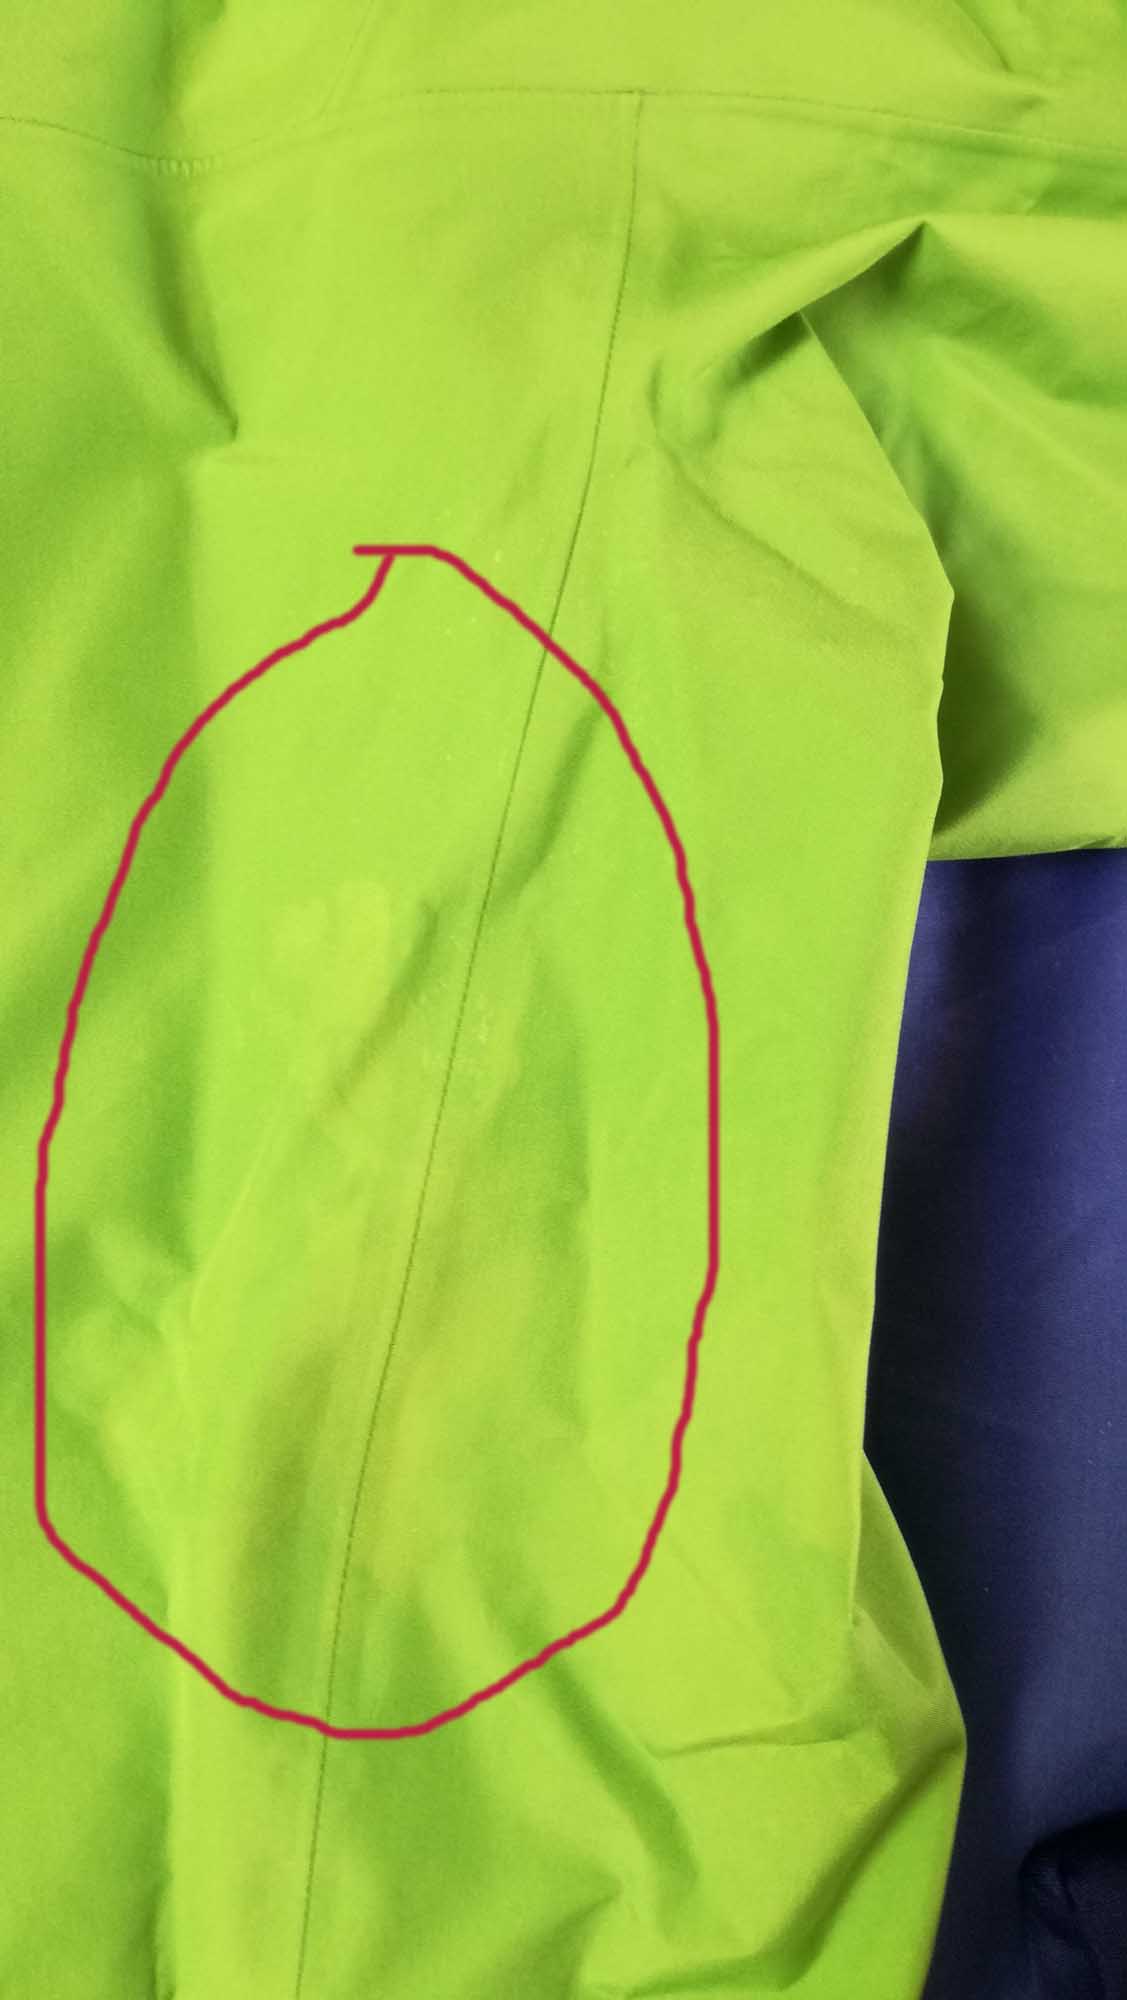


 1 Correct answer

Trevor's recommendation is well worth following, as usual.
If you do not have the opportunity to reshoot, the following may be helpful
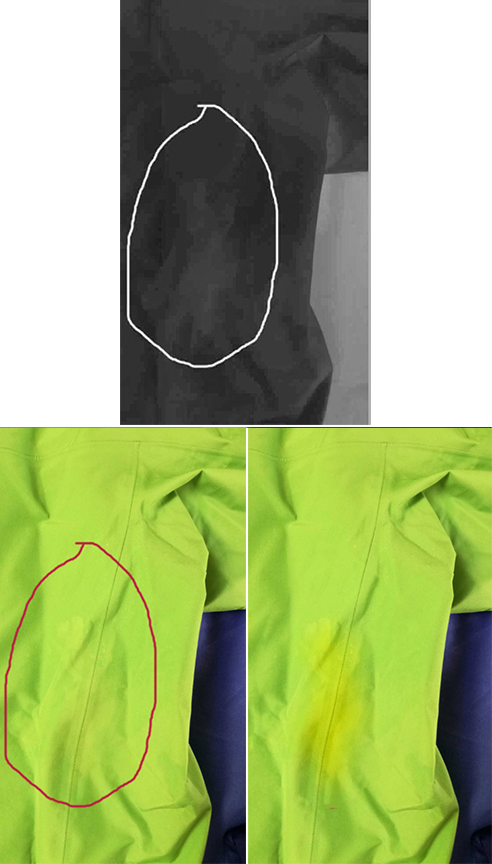
1. Make a duplicate layer and then change the Mode from RGB to Lab Color.
2. Choose the a Channel and drag it down to create an alpha channel that will be the basis for a mask.
3. Choose Curves and click on Auto. The result will look like the b&w image above
4. Increase the contrast further and use a soft edged brush to build the mask.
5. Return to RGB and apply th
...Explore related tutorials & articles
 5
Replies
5
5
Replies
5

Copy link to clipboard
Copied
I'd have said that you have already done exactly that. You paint over it with a different colour on a new layer, and set the blend mode to Overlay, but that might disguise that which you are trying to highlight. If I am wide of the mark, can you give us some more information on the effect you'd like to achieve? Thanks

Copy link to clipboard
Copied
It looks as though you want to call attention to the fabric stain. If that is your objective use the Elliptical Marquee tool to draw an Oval. You can then tweak and/or rotate the marching ants outline by using Select > Transform Selection.) Then, Edit > Stroke with a 16px white or colored line line (in the file you posted). It will not be much different from your drawing, but neater.
Copy link to clipboard
Copied
i wish to improve the contrast in order to call more attention to the fabric stain
Copy link to clipboard
Copied
gtsolid wrote
i wish to improve the contrast in order to call more attention to the fabric stain
There's nothing to work with in that picture. If you can take the photograph again, experiment with lighting direction, and maybe try a polarizing filter. It's going to be a case of trial and error, and you need to be careful not to overexpose again. You only need to improve the contrast a bit more in the photograph to give you something to work with in Photoshop, but I would hope to do it with the camera.
Copy link to clipboard
Copied
Trevor's recommendation is well worth following, as usual.
If you do not have the opportunity to reshoot, the following may be helpful

1. Make a duplicate layer and then change the Mode from RGB to Lab Color.
2. Choose the a Channel and drag it down to create an alpha channel that will be the basis for a mask.
3. Choose Curves and click on Auto. The result will look like the b&w image above
4. Increase the contrast further and use a soft edged brush to build the mask.
5. Return to RGB and apply the mask to the top layer
6. Use Curves to Increase the R and reduce the Blue (Blue reduction increases yellow). It is OK to overdo the change slightly.
(NOTE: At this point you have the option to favor orange-ish if desired.)
7. Use the Layers Opacity slider to tweak the amount of color change you want to create.

 AdChoices