Hi Dave I really appreciate your interest in my problem. Unfortunately I do not have a usable solution to my question yet. I have been trying out Photoshop cc under a one week trial. I have used most of the time just trying to get this one function to work. It feels like I have been dropped into a 103 level course without having taken the 101 and 102 courses :-).
I would have thought changing a photo from Landscape to portrait would be a very fundamental requirement in photo manipulation. Any other suggestions ?.
I have actually spent several hour online with Adobe support and even they did not seem to know how to do what I am requesting.
Hi Alex
You still didn't post an image so that we could give you specifics so I'll demonstrate with one of mine. I will have shown two methods below. Which is best - depends on the image:
Method 1. If you start with a landscape and want no distortion then you will need to crop.
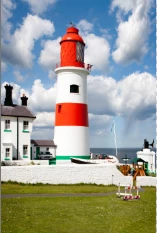
So starting with this (which is in a 3:2 ratio) :

Select the crop tool and enter the ratio you require in the options bar - I will choose 2:3


Note by leaving "Delete Cropped Pixels" unchecked , I can go back an re-crop later if required
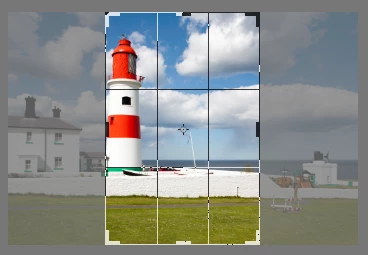
Now drag the crop area till You get the crop you want :
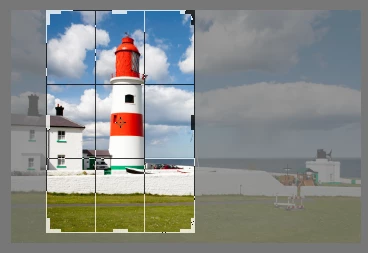
Then hit enter or click on the tick in the options bar
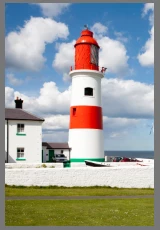
Job done.
Method 2. : If you can accept some distortion then you could try this.
Make a selection round the area that should not be distorted and in the channels panel save selection as channel.
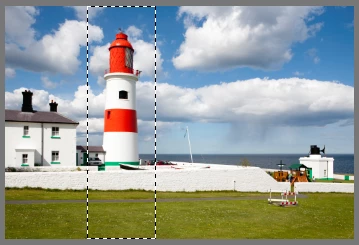
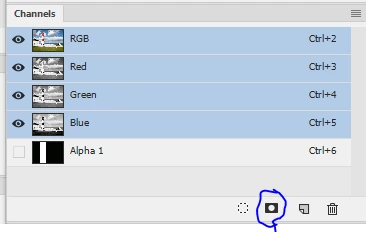
Now select all the go to Edit - Content Aware Scale and in the options bar set protect to Alpha 1 (or the name of the channel that was created in the previous step)

Now drag the handles to scale the image and the area you protected will not distort but the rest will
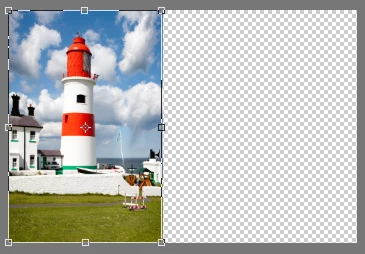
Once happy press enter or click on the tick symbol
Finally you can crop away the empty space
I hope that helps you
Dave
