

- Home
- Photoshop ecosystem
- Discussions
- How to make an inserted image look more natural in...
- How to make an inserted image look more natural in...
How to make an inserted image look more natural in another background photo?

Copy link to clipboard
Copied
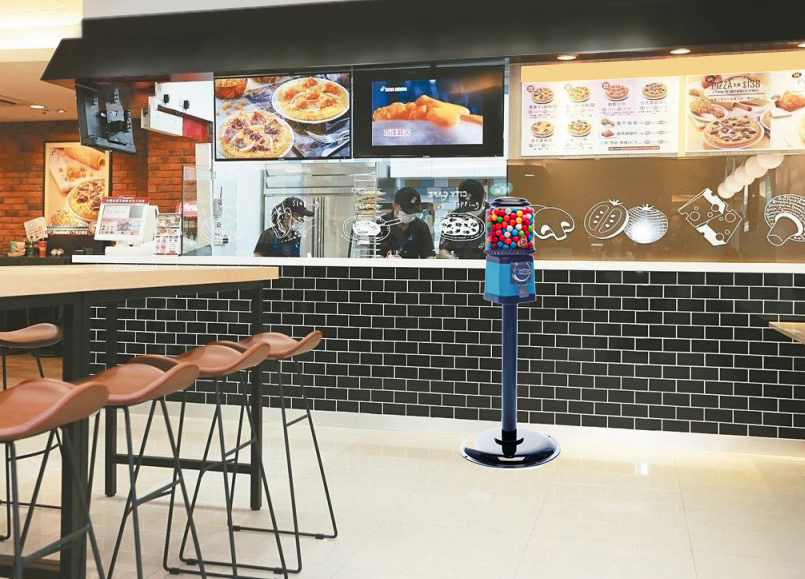
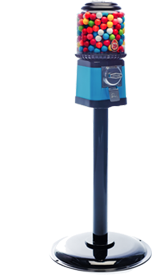
I have a background of a restaurant and want to insert an image of a gumball machine in it (see attached screenshot). Does anyone have any tips on how to make the gumball machine look more "grounded" and part of the restaurant setting? As it is, it just looks like it's setting there awkwardly.
Any tips are appreciated!
Thanks,
RS


Explore related tutorials & articles
 9
Replies
9
9
Replies
9

Copy link to clipboard
Copied
Hi
A few things
1. Perspective - if the machine was that tall you would not see the top. You can't see the counter top so why would you see the top of a machine that is higher?
2. Lighting - needs to be matched to the scene lighting in both direction and colour.
3. Shadows and reflections - the floor is reflecting the back wall so it should also reflect the machine.
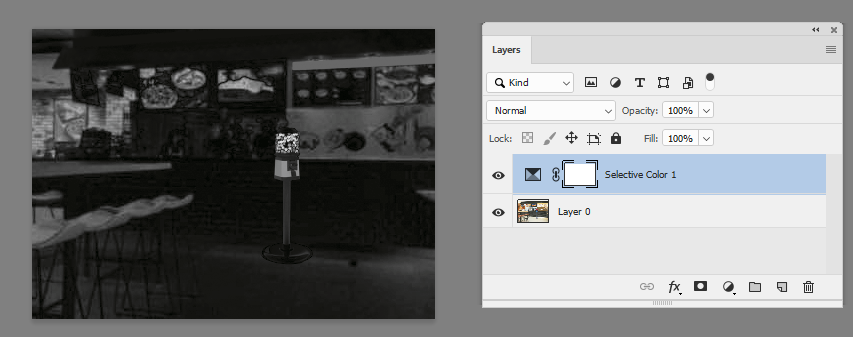
4. Saturation. Make a saturation map by adding a selective color adjustment layer and then go through the adjutment properties and ,for each colour, change the black slider to -100. For the three neutrals change the black slider to +100. Now you can see a black and white representation of the saturation and it confirms your machine is over-saturated compared to coloured objects in the rest of the scene.
I hope that helps
Dave
Copy link to clipboard
Copied
I like Dave's idea of creating a saturation map. Another method (more advanced) to explore this could be to convert a copy of the file to Lab and review the "a" and "b" channels which hold the colour information. This method is of course not as flexible as adding an adjustment layer as initially proposed by Dave.

Copy link to clipboard
Copied
It would make life easier if you pasted in the full res image. Just copy to clipboard, and paste with Ctrl V
Copy link to clipboard
Copied
Copy link to clipboard
Copied
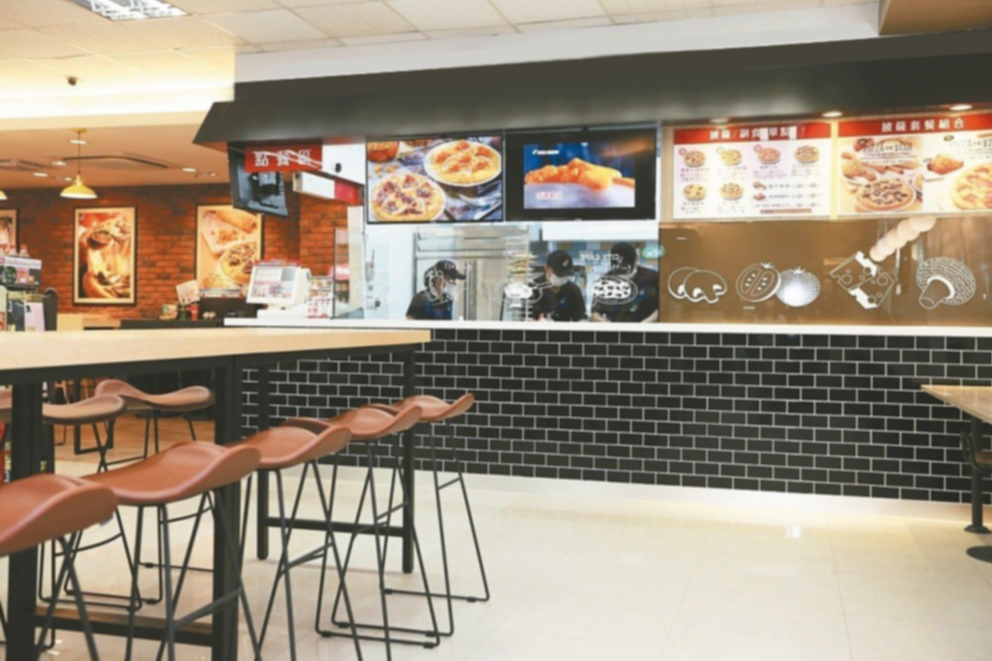
Thanks. I had already upresed your original, and cut the machine from the image, so IQ is not flash, but you'll get the idea.
First off a shadow that matches the rest of the image, like the table legs. There are multiple light sources in the scene, which makes for interesting shadows, but I have just added one to the left. I think people rarely use drop shadow layer style, but you could get away with it here because of the symmetrical profile. So what we do is:
Add a new layer below the object layer
Ctrl click the object layer to load as a selection
Fill the new layer with black
Free Transform into position.
Gaussian Blur
Reduce opacity
Add layer mask and run a gradient to fade the shadow with distance.
I also added a thin black stroke to the base of the machine. Anything sitting on a floor is nearly always going to have a tiny shadow around it's outline that is in contact with the floor. When adding shadows to people, for instance, it is usually best to do it with multiple layers with hard shadows close in, and fading softer shadows extending away from the person or object.
Other than that, try to match contrast and light direction.

Copy link to clipboard
Copied
Thanks so much...very helpful advice!

Copy link to clipboard
Copied
Please explain.

Copy link to clipboard
Copied
could not refrain myself…

Beside the joke, the first thing to do is contract the selection to avoid a white edge around the machine…

Copy link to clipboard
Copied
Too large, wrong color balance, over-saturated, wrong perspective, lighting doesn't match, no reflection. You have a lot to fix on the gumball machine.

 AdChoices