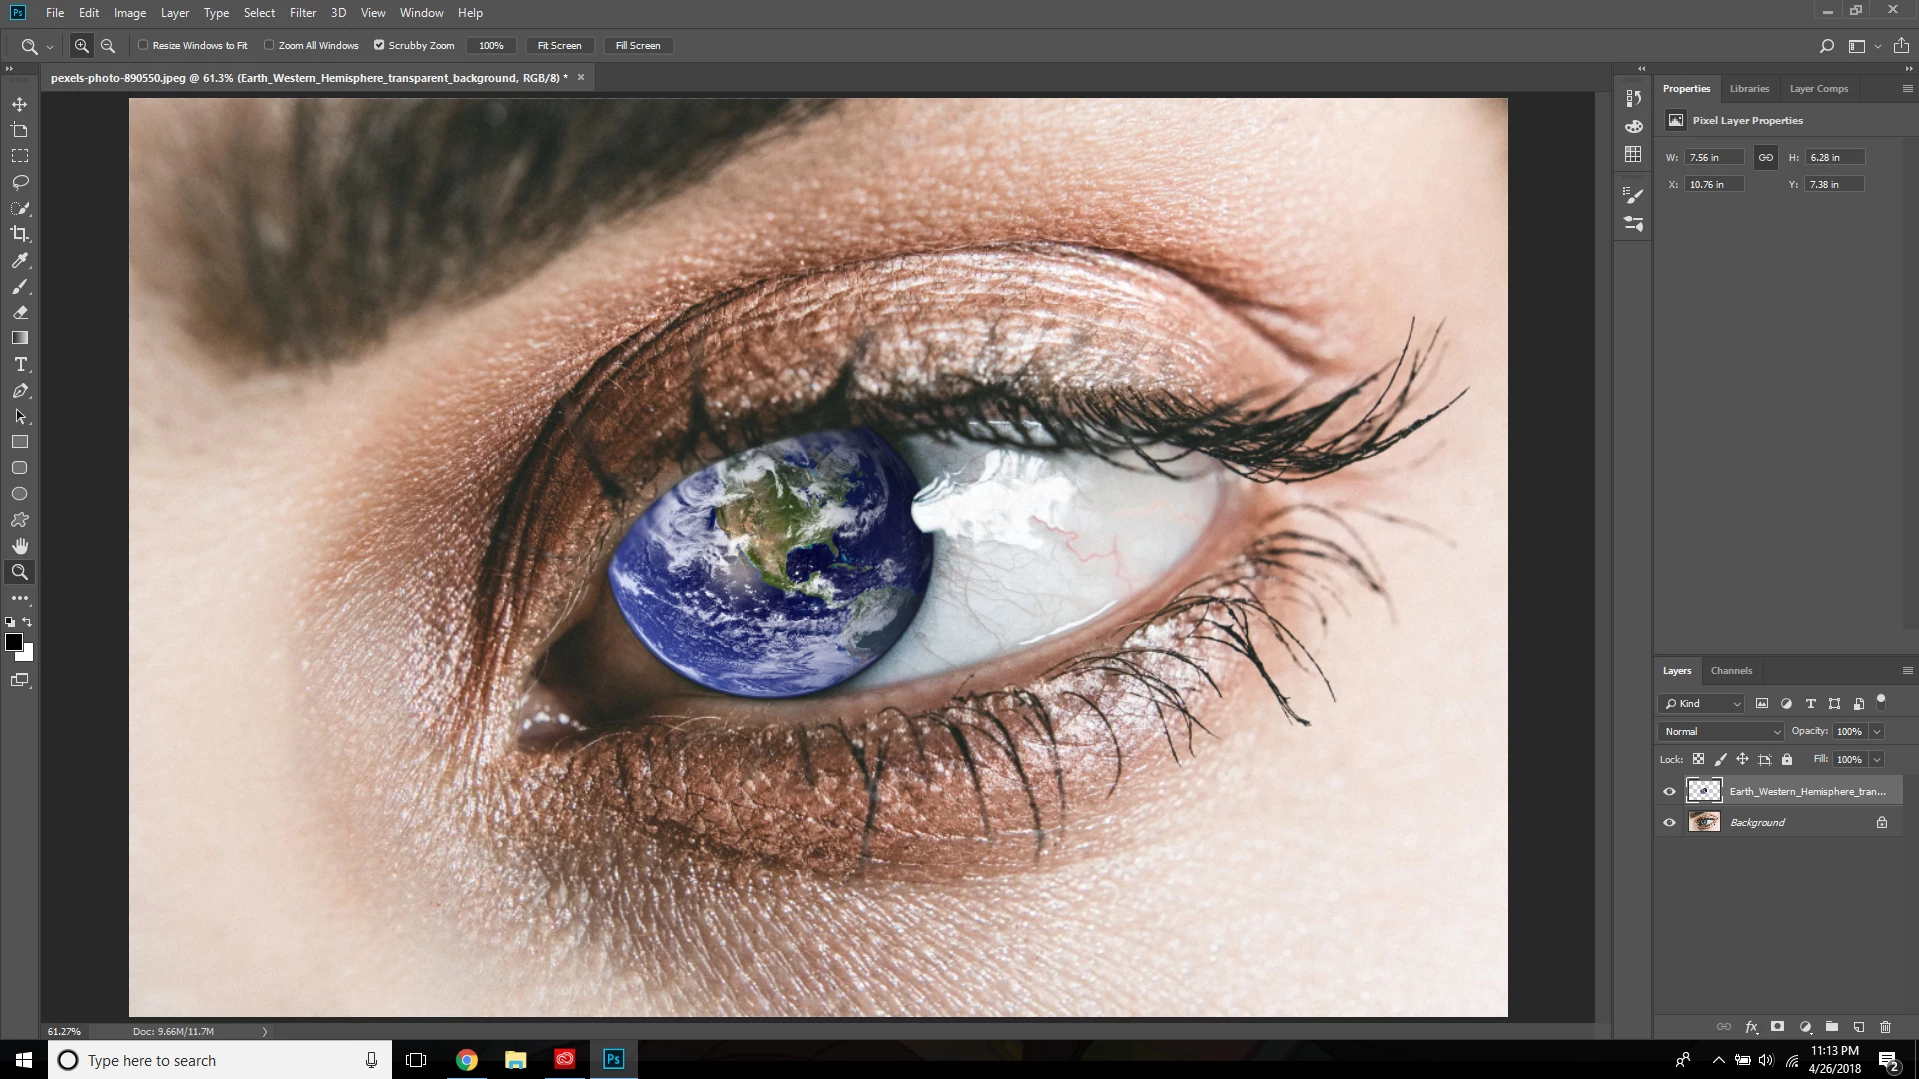
How to make this look realistic?
Copy link to clipboard
Copied
Explore related tutorials & articles
Copy link to clipboard
Copied
Please post images on this Forum directly.
Copy link to clipboard
Copied
And realistic means what? I rarely see people having entire planets as irises. If you mean better integration, then start by learning how to actually create clean cutouts. Those fuzzy, dark edges are an embarrassement even for a beginner, considering the simplicity of the shape. The rest woulkd include re-creating the shadow from the forehead/ eye socket cavity and adding a highlight to emulate the original glossiness, both of which could be done with simple brush painting and blending modes or deriving matching shapes from layer duplicates, colorizing and cutting them up.
Mylenium
Copy link to clipboard
Copied
When you are learning, it pays to have a real life example to guide you. That obviously doesn't mean a globe for an eyeball, but I imagine it could be done with contact lenses.
You have a few issues with your illustration, but it basically comes to down to shadows and highlights.
- There needs to be a shadow under the upper eyelid.
- The existing highlight does not extend far enough. Highlights reflect from the nearest part of a spherical surface, because that is going to be perpendicular to your point of view. I used one of the Chalk brush presets (you have to load them with CC2018 via the Legacy brush set.
- It looks like you put a black ring around the iris. The tutorials mostly suggest doing this, but yours was too dark, and too sharp. Add a touch of blur and lower opacity.
- Your globe looked a little bit too flat. Bevel & Emboss helped fix that, but you need to be subtle. In this case the shadow component of B&E was not working, so I reduced its opacity to zero, and substituted Inner Shadow layer style.
- The eye lashes extend over the eye everywhere else, so you need to add some lashes over the globe. We do that with a fully hard brush with size jitter set to Fade so they taper to a fine point. Blur to match the other lashes, and reduce layer opacity for the same reason.
- Last of all, eyes do not look like eyes without a pupil. You could simply use a black circle and lower it opacity, but I used curves so that the continent showed through. Radical curves (and levels) usually impact on colour, and the trick to prevent that is to set the blend mode to Luminosity.
Copy link to clipboard
Copied
The key skill to Photoshop retouching is your attention to detail. When retouching and compositing images it is important to pay close attention to highlight and shadow. Compositing 2 images as you have done above will not look "realistic" unless the light direction is the same on both images and the new section matches the contrast and luminosity of the original image.
Good retouchers take note of those subtle changes in light and make sure they are included in the final result.
ICC programmer and developer, Photographer, artist and color management expert, Print standards and process expert.
Copy link to clipboard
Copied
try the blending mode for the earth layer, you can test with one is better, but multiply will be good. then refine the edges for circle (earth). you can do it by eraser, or mask with black brush.
Copy link to clipboard
Copied
What I did differently is simply select the earth, create a new layer. Then using the eyedropper tool select the shadow color in the white of the eye at the left. Then change the blend mode of the new layer to multiply, and paint in those missing shadows on the earth with a soft brush at about 10% in multiply mode.
ICC programmer and developer, Photographer, artist and color management expert, Print standards and process expert.