- Home
- Photoshop ecosystem
- Discussions
- How to remove red pencil lines from a illustration...
- How to remove red pencil lines from a illustration...
Copy link to clipboard
Copied
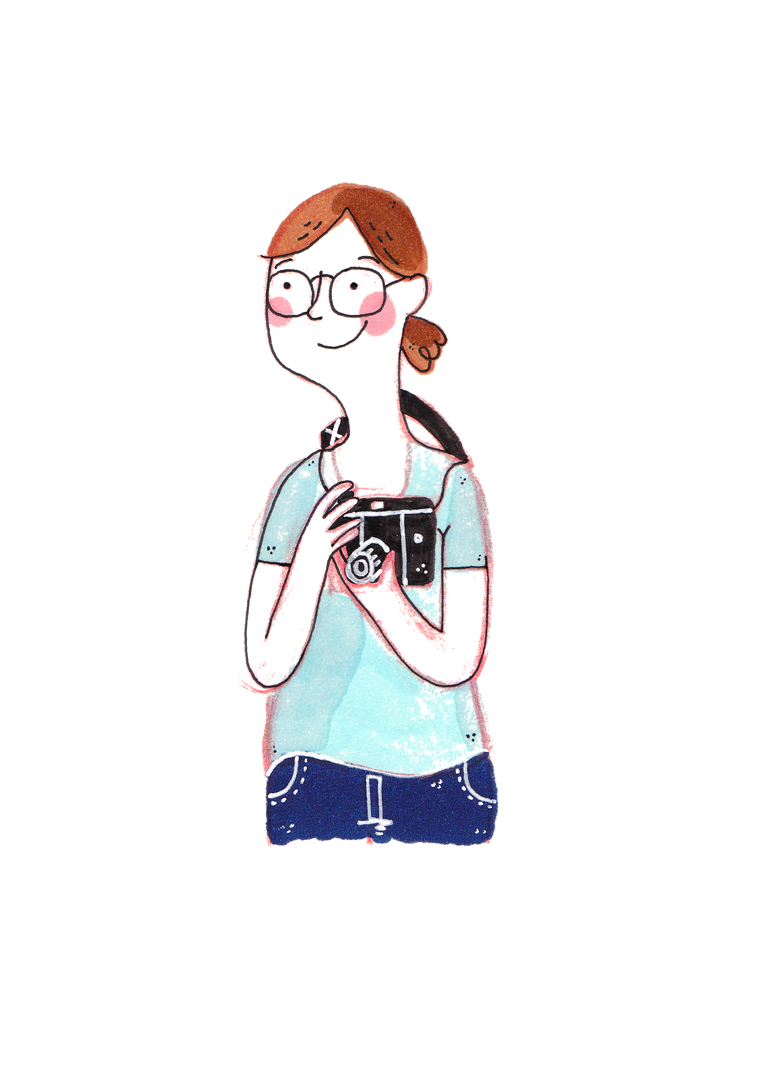
I need some help...I'm wondering how to remove red pencil lines when the drawing is already traditional colored with the hand. I can only find tutorials about removing red or blue pencil lines when the drawing is not colored. Is this possible or maybe I want something what isn't possible, I don't know. But for me it seems to be quite a job to erase every pencil line one for one and my drawing isn't going to look very nice then. Thank you in advance!
 1 Correct answer
This will get you part way there:
Add a Hue/Saturation adjustment layer, and use the Master drop-down and select the reds.
Drag the saturation all the way to the left, and Lightness all the way to the right. This will make all the reds in the image full white.
You'll need to do the same again for the Magnetas in this image.
Now invert the layer mask (Ctrl i) and paint over the red pencil lines with a white brush.
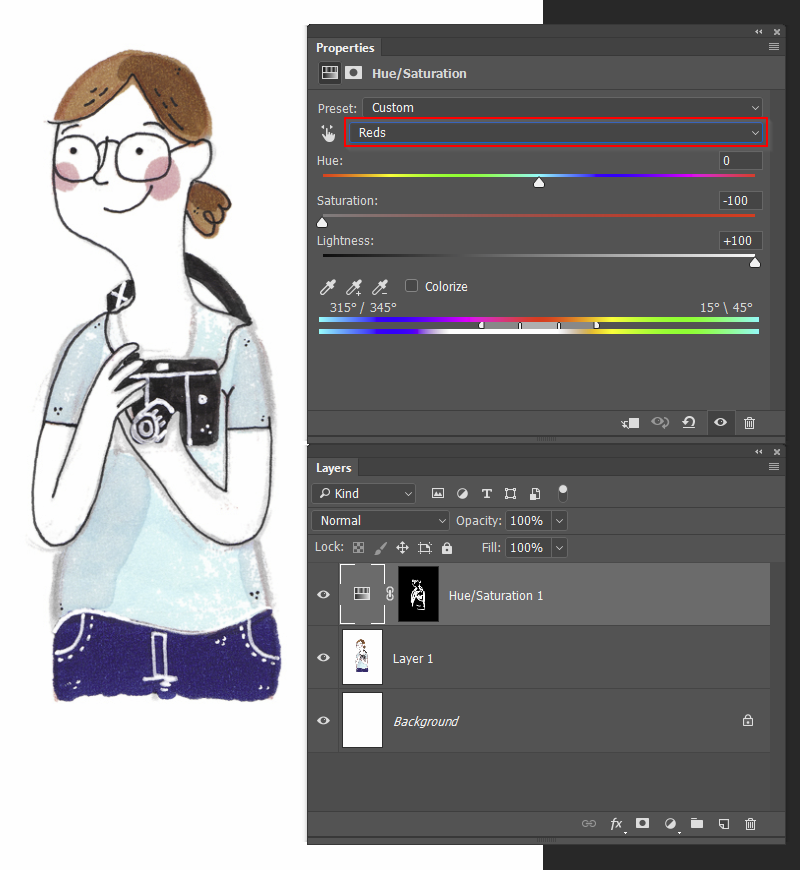
Now add a copy merged layer to the top of the stack (select the top layer and Shift Ctr
...Explore related tutorials & articles
Copy link to clipboard
Copied
Much depends upon the difference in density of the red lines when compared to the red of the art. With an adequate difference the Blend If command may help solve the problem. Another consideration is the width of the lines. If they are thin enough, their removal may leave an area that can be filled via the Spot Healing brush or other technique. All this is guesswork without seeing the art. Post a section of it here and we will try to help.

Copy link to clipboard
Copied
Check the Red Channel to see if it i strong enough to make a selection, if it is you can use the Channel mixer to reduce the Red from the Red channel to zero and perhaps replacing it with the green channel. If the drawing is already coloured then you may have to change it back to Greyscale to remove the lines and then add the colour back in. Can you upload the image so I can take a look please?
Hope this helps,
Copy link to clipboard
Copied
Please post a sample image so we can see what you are talking about. I have some ideas but would need to see the problem.
Copy link to clipboard
Copied
Copy link to clipboard
Copied
This will get you part way there:
Add a Hue/Saturation adjustment layer, and use the Master drop-down and select the reds.
Drag the saturation all the way to the left, and Lightness all the way to the right. This will make all the reds in the image full white.
You'll need to do the same again for the Magnetas in this image.
Now invert the layer mask (Ctrl i) and paint over the red pencil lines with a white brush.

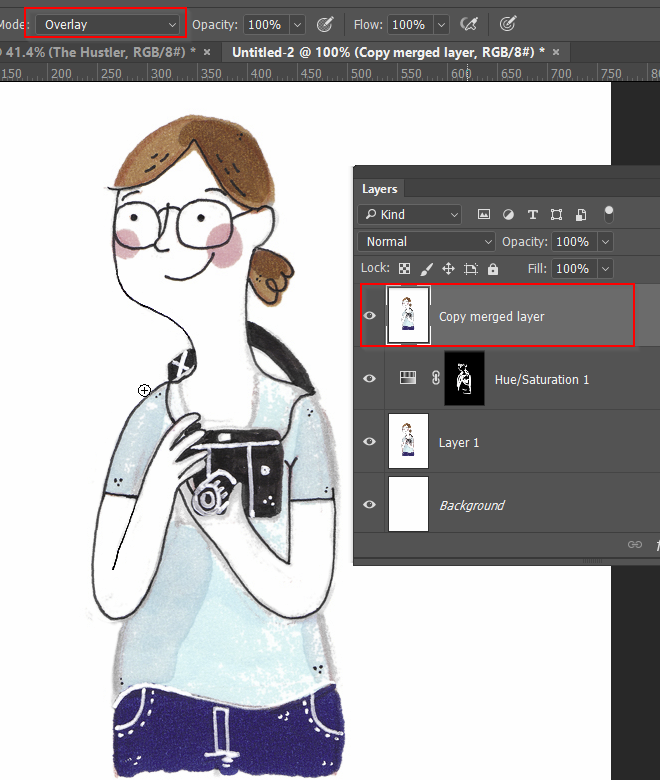
Now add a copy merged layer to the top of the stack (select the top layer and Shift Ctrl Alt e)
Select the Paint brush, and set it to Overlay in the Options bar.
Set the brush opacity to around 50%, and carefully paint over the faded grey residue from the last process with white.
If the dark lines become thin, paint over with black. (I've demonstrated with her right shoulder.)
Note: in Overlay mode, anything lighter than 50% grey will respond to being painted over with white, and anything darker than 50% grey with black. It's a little bit of Photoshop magic.
Copy link to clipboard
Copied
This is a great suggestion and will, as Trevor says, get you part of the way there. To avoid this happening in the future use a non-photo-blue pencil to draw with, instead of red. It's much easier to get rid of non-photo blue in PS. How to remove blue pencils with Photoshop - YouTube
I hope this helps,
Copy link to clipboard
Copied
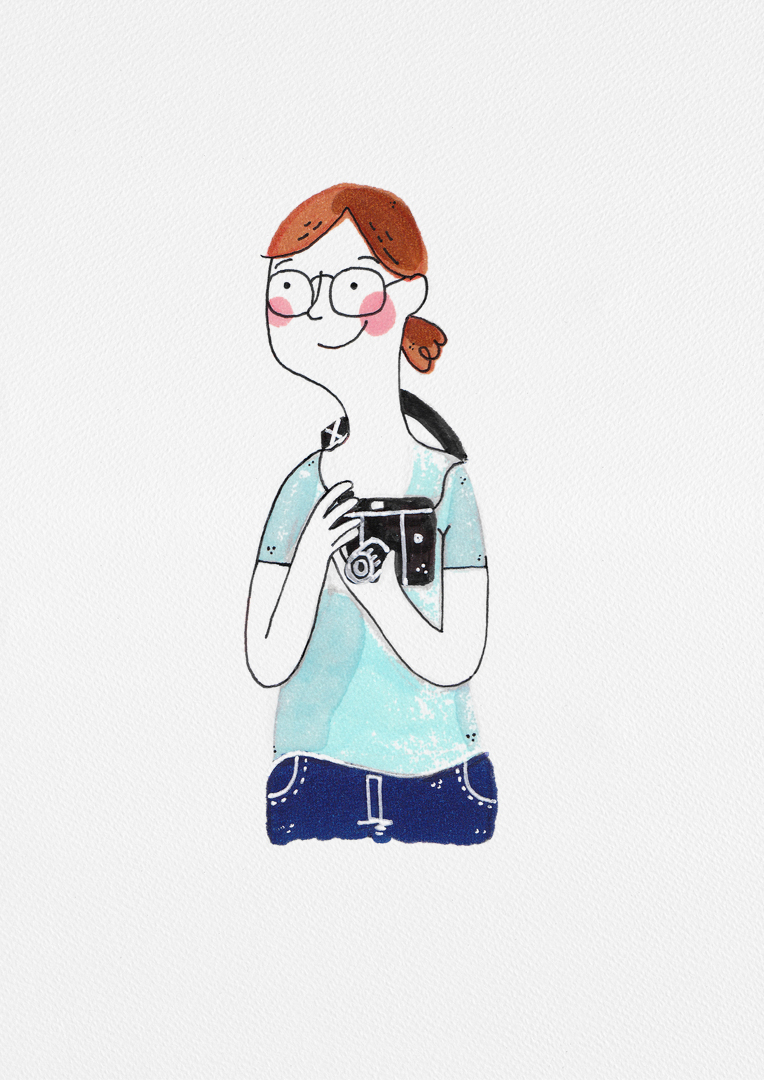
Thanks Angie! Trevor's advice worked perfectly and like you said I think non-photo blue pencil is better for other illustrations! I read something about it yesterday. Good learning 😉
Copy link to clipboard
Copied
Thank you so much for your help! It worked amazing. Big thanks!!
Copy link to clipboard
Copied
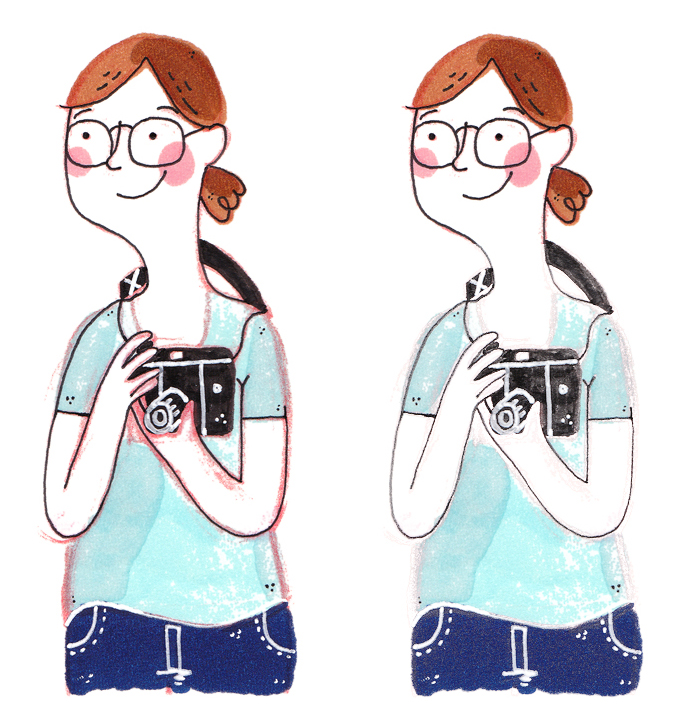
1. Open the file and make a rectangular selection of the girl's head down to the top of the backpack.
2. Cmd+J to place it on a separate layer. Then, turn off the eye for that layer
3. Return to the Background layer and duplicate the layer
4. Put a transparent layer below the duplicate layer and Fill with white.
5. Return to the duplicate of the Background layer and choose Select > Color Range
6. Click on the red and use the plus eyedropper in Color Range to add a few red areas
7. Delete key, then Cmd+D to deselect the marching ants
8. Turn on the eye on the top layer.
Copy link to clipboard
Copied
Copy link to clipboard
Copied


