 Adobe Community
- Home
- Photoshop ecosystem
- Discussions
- How to replace a Smart object content with folder ...
- How to replace a Smart object content with folder ...
How to replace a Smart object content with folder of JPGs

Copy link to clipboard
Copied
Greetings!
Sorry if that title is not clear. I have a cover design template (see example). The image is a transformed Smart Object. I want to streamline my workflow.
Say I have a folder of jpgs, and need to replace the smart object of the template with the new cover jpg, then save for web as a JPG comp. Repeat.
I already have a nice "scale layer to current canvas size" script from Michael L Hale. Which would be necessary in case the jpg is larger or smaller than the Smart object's content it will replace.
Any thoughts if this could be done?
Michael's resize script is here: http://forums.adobe.com/thread/1233856
Thanks
Maxi


Explore related tutorials & articles
 17
Replies
17
17
Replies
17

Copy link to clipboard
Copied
You can use Action Manager to replace the contents of a smart object
function replaceLayer(fileRef){
//replaces the contents of the smart object on the activeLayer
try {
var desc = new ActionDescriptor();
desc.putPath( charIDToTypeID( "null" ), new File( fileRef ) );
executeAction( stringIDToTypeID( "placedLayerReplaceContents" ), desc, DialogModes.NO );
} catch (e) {}
}
};
You can edit the contents of a smart object with this line
executeAction( stringIDToTypeID( "placedLayerEditContents" ), new ActionDescriptor(), DialogModes.NO );
What I would do is have a loop that for each jpg file it replaces the template smart object then opens it for editing. Once open check size and resize if needed, Save/close the SO, SaveAs the template.
Copy link to clipboard
Copied
Hello again!
Thank you.
I will play with that script.
Max:-)

Copy link to clipboard
Copied
Remember in that other tread I wrote you would need to take aspect ratio into account if you don't want distortion. You do not want distortion placing in images. You also do not want to place in all image in canvas size. If your images vary in size you do not want to replace the contents of a smart object layer for the smart object associated transform to work correctly you need the replace the embedded object with an object with exactly the same size of the original embedded object.
Also in that other thread I gave you code from one of my Photoshop Photo Collage Toolkit. You seem to be creating a collage. You man want to look at my Photo Collage Toolkit.
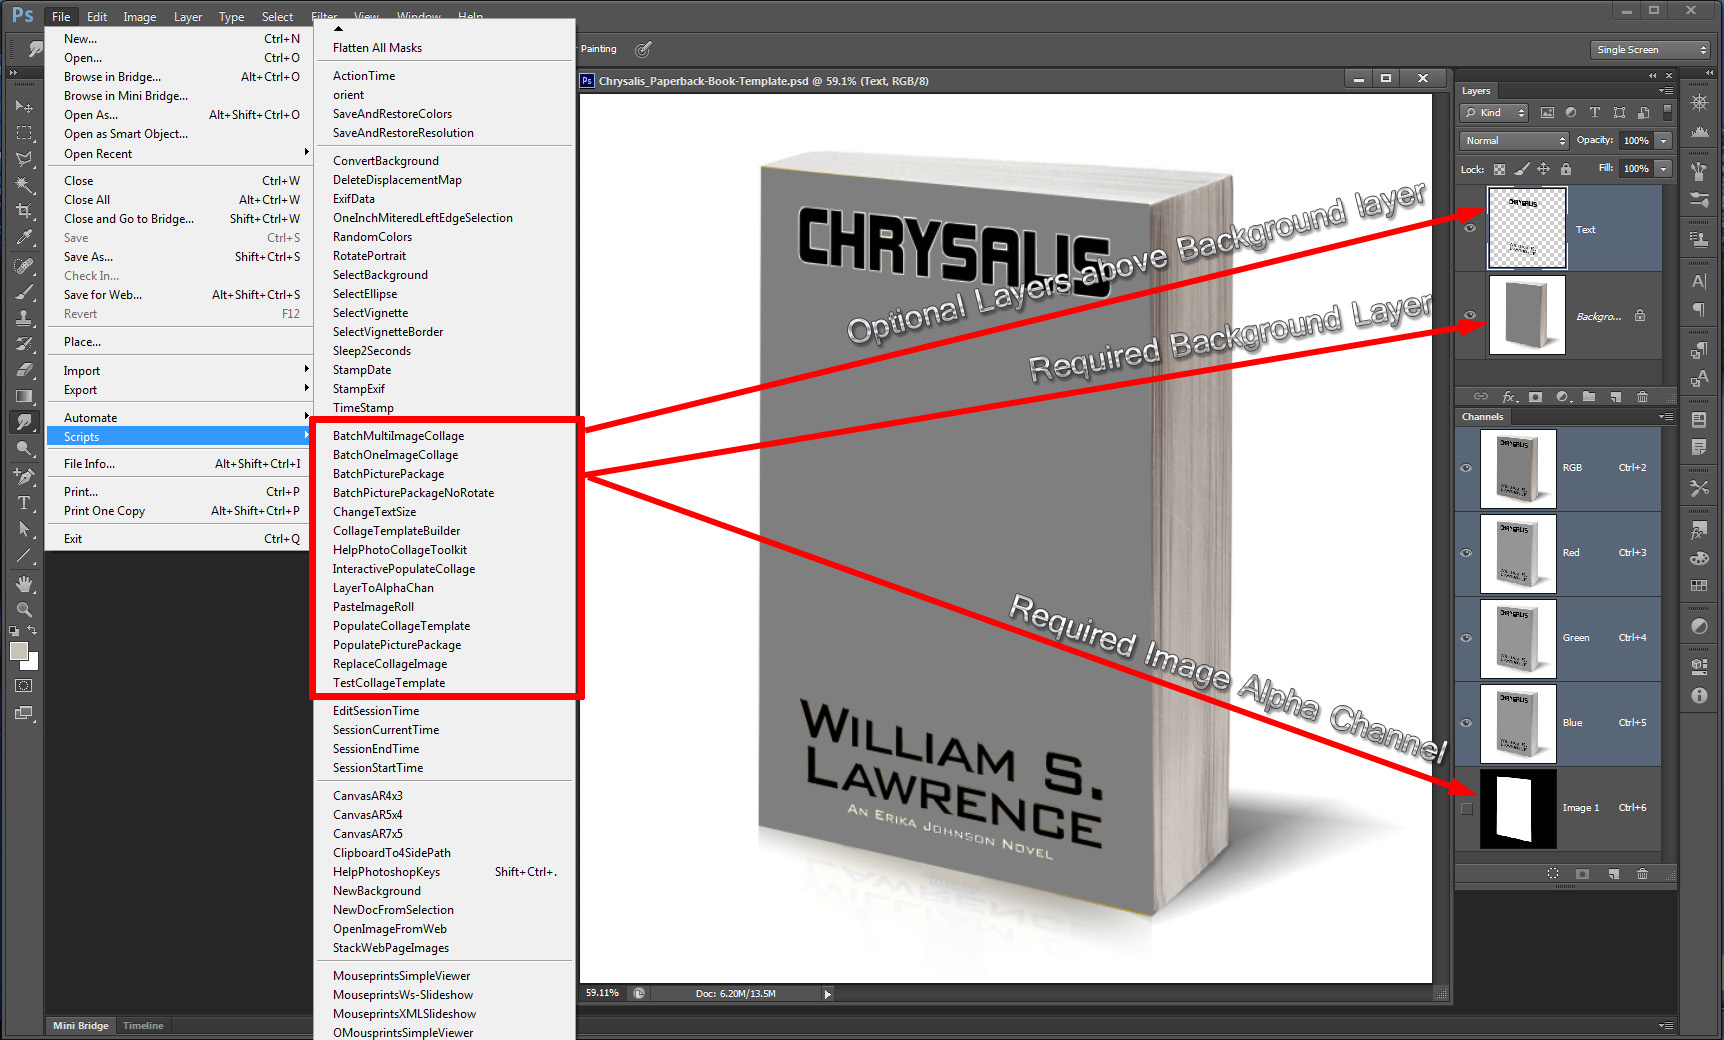
Templates are very easy to create for my Toolkit's scripts to work, You just need to follow four simple easy rules.
The Four Rules:
- Size the photo collage templates for the print size you want - width, height and print DPI resolution.
- Photo collage templates must have a Photoshop background layer. The contents of this layer can be anything.
- Photo collage templates must have alpha channels named "Image 1", "Image 2", ... "Image n".
- Photo collage templates layers above the background layers must provide transparent areas to let the images that will be placed below them show through.
So your template would be easy and look like this, Red rectangle outlines my scripts.
You would then use one of the scripts like interactive popopulate select the template then hit create collage
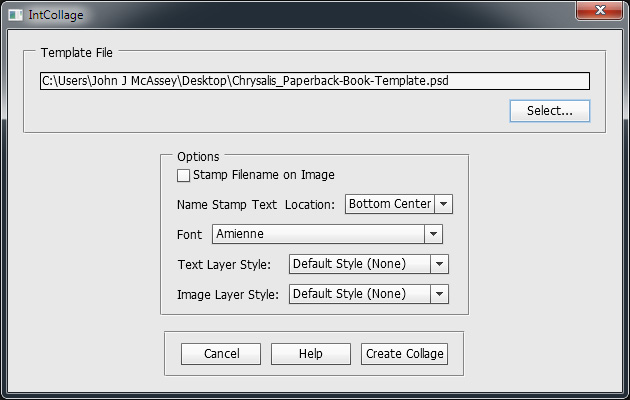
The script would the open the template copy it the go to full screen show you a cyan mask as to where the next image will be placed, And put you into an interactive select image dialog.
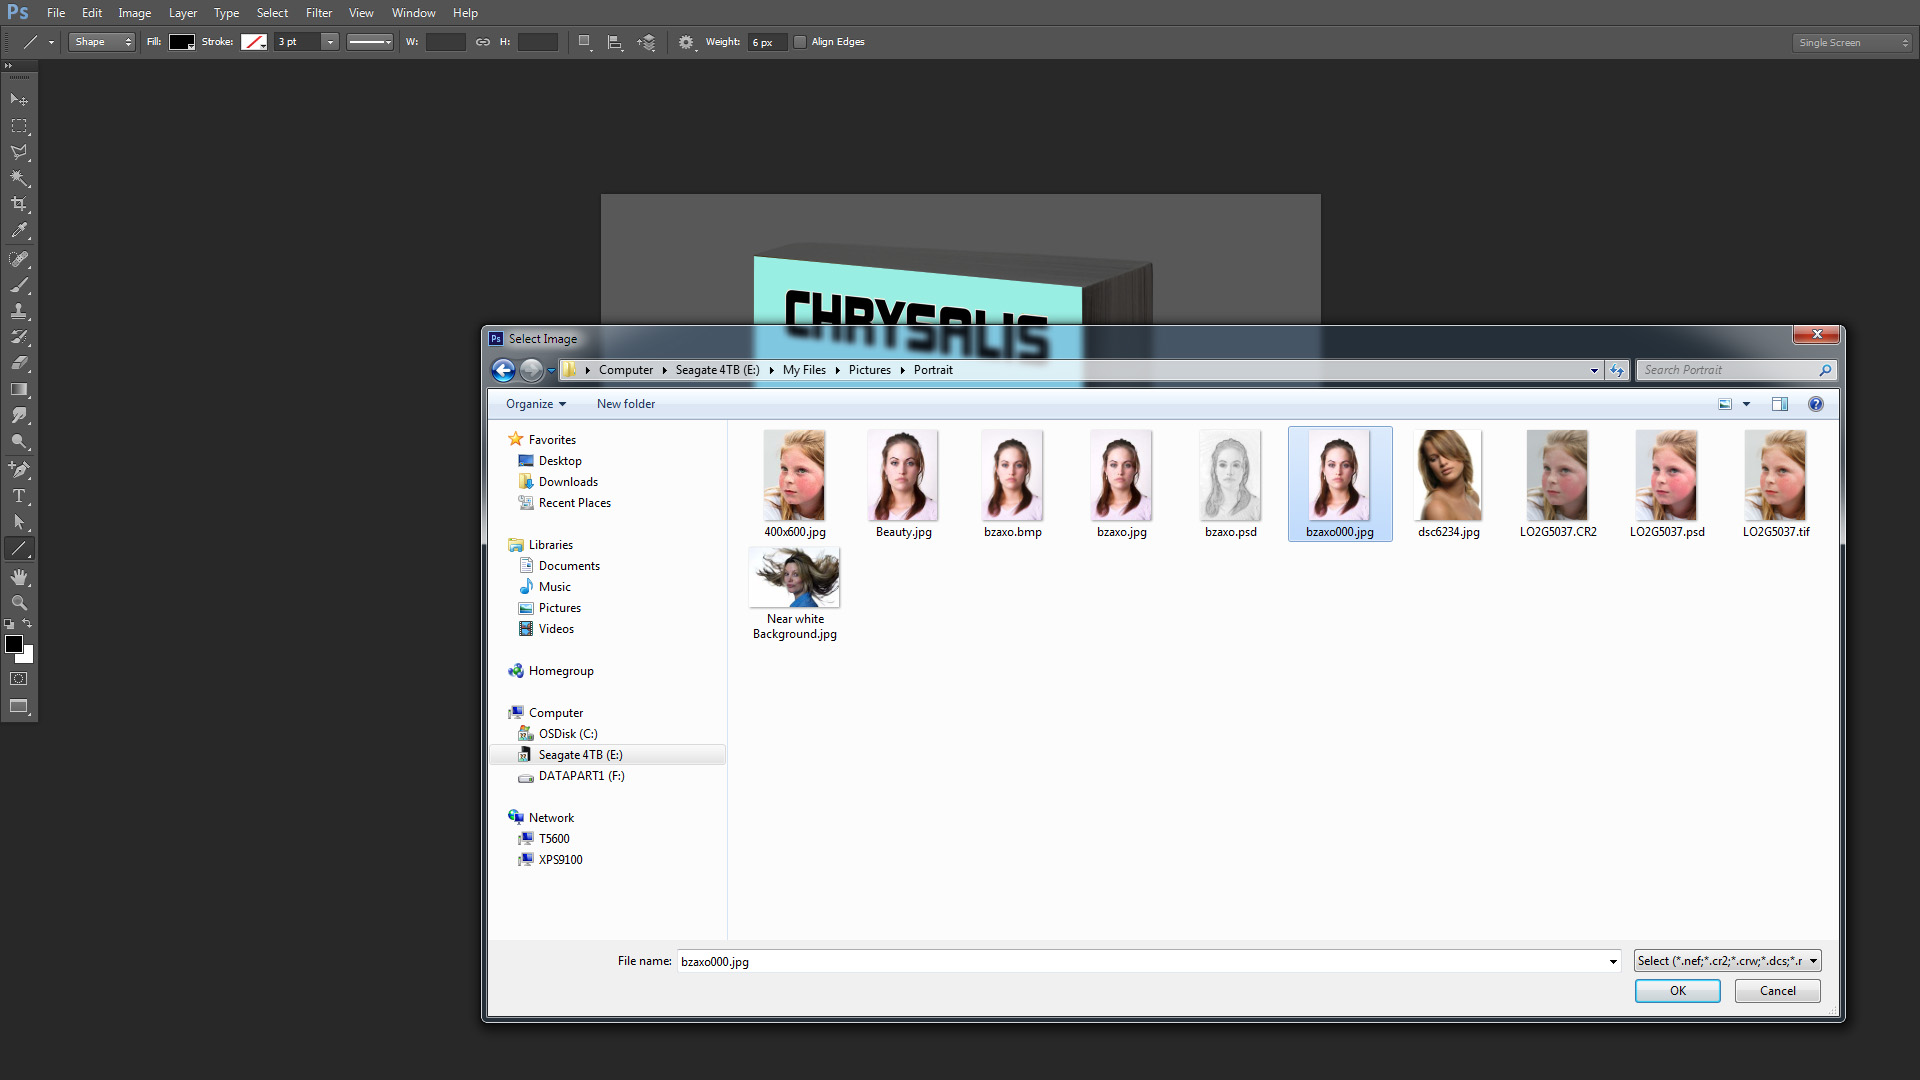
Once you select the script will place in the image resize and position it the put you in an interactive transform so you can tweak the position and size. The Populated collage will remain open in Photoshop.
Copy link to clipboard
Copied
Wow again!
I will use your Photoshop Photo Collage Toolkit. Generally my specs are for a 6x9 cover. I usually save off 1200 pixel x... JPGs to sent to my client. Ocassionally the aspect ratios are not exact.
So when I open the smart object. I paste in or copy the new cover on top of the previous cover. In that case I must match the aspect ratio, or the edges will show in the primary template. (So that resize script is perfect!)
But since the SO has already been transformed. skewed, even warped to fit the cover. So the aspect ratio issues ere not critical. As long as it fits x and y.
I have been trying to offer more value. So, I have been creating these "Collages" so to speak, manually. So, if I can get this workflow working properly, I can run through a dozen design options and present a really nice package.
Thanks again for sharing your expert knowlege.
I'll start playing with your toolkit.
Best
Maxi!

Copy link to clipboard
Copied
o when I open the smart object. I paste in or copy the new cover on top of the previous cover. In that case I must match the aspect ratio, or the edges will show in the primary template. (So that resize script is perfect!)

Copy link to clipboard
Copied
Maxir wrote:
o when I open the smart object. I paste in or copy the new cover on top of the previous cover. In that case I must match the aspect ratio, or the edges will show in the primary template. (So that resize script is perfect!)
Well actually when you open a smart object by double clicking its smart icon in the layers palette. How it will be open depends on what the content of the embedded object is. All embedded objects are not the same. Basically anything supported by Photoshop can be made a smart object layer, A Layer, a group of layers, an image file, etc. Smart object are independent from the original. Embedded objects are copies of the original object. When you open a smart object Photoshop first copies the content of the embedded object to your temp space as a file and then opens that file so you can update it. If the smart object is a Image file how it open depends on the image file's file extension and your Photoshop settings. Some image files will open in ACR while others will open in Photoshop. The last time I looked ACR does not support Copy and Paste or Photoshop type scripting. In the case where ACR opens There are only two buttons in the bottom of ACR main Dialog. An OK button to update the changes you made and Cancel button to close ACR and not make an update.
Copy link to clipboard
Copied
Be warned my Collage Toolkit does not support the automation of transforming images Skewed, perspective or even rotated some. You can do that type of of transforming with the Interactive Populate collage script for it put you into an interactive transform step after placing in images positioned and resized. Fullly automated population scripts do not. However Populated collages are still Layered files or documents and Images layers are smart object layers that can be transformed and tweaked after the scripts populate your templates.
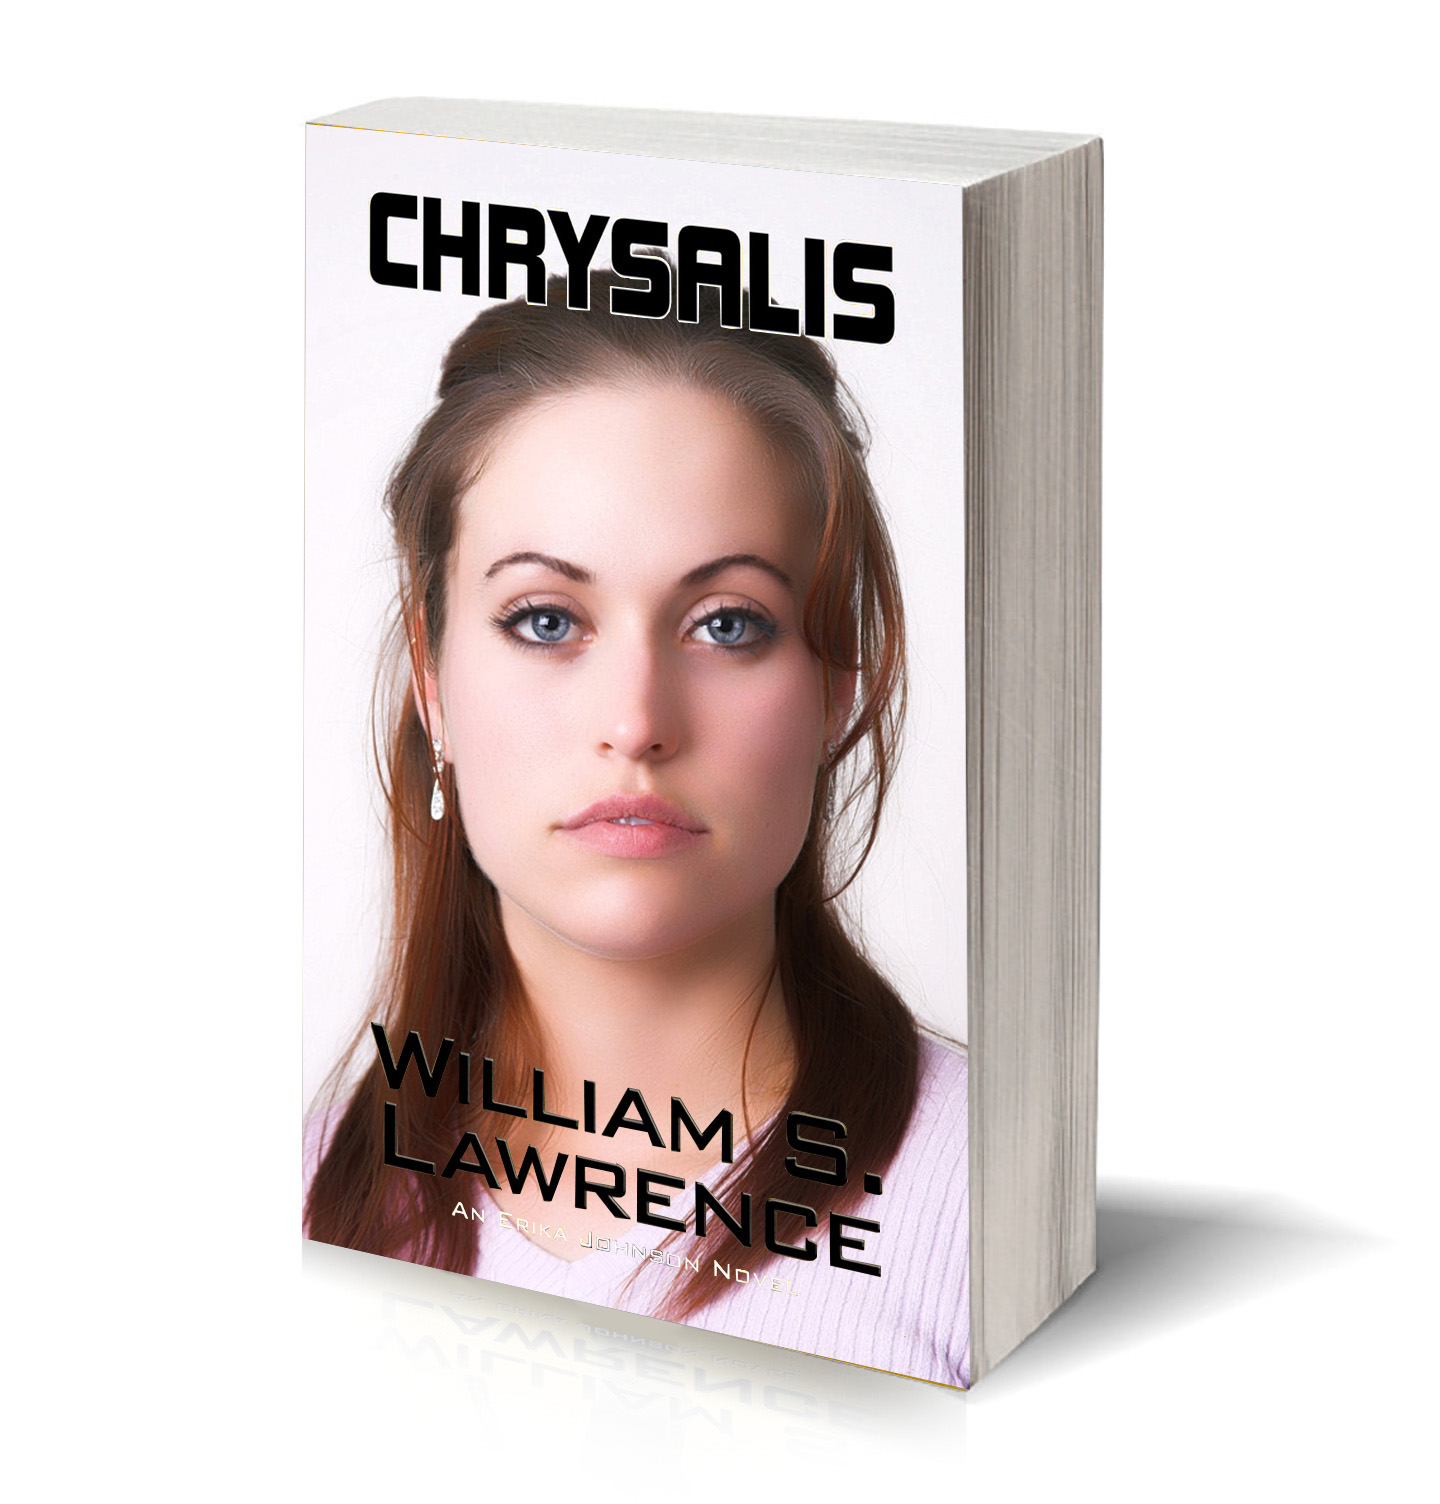
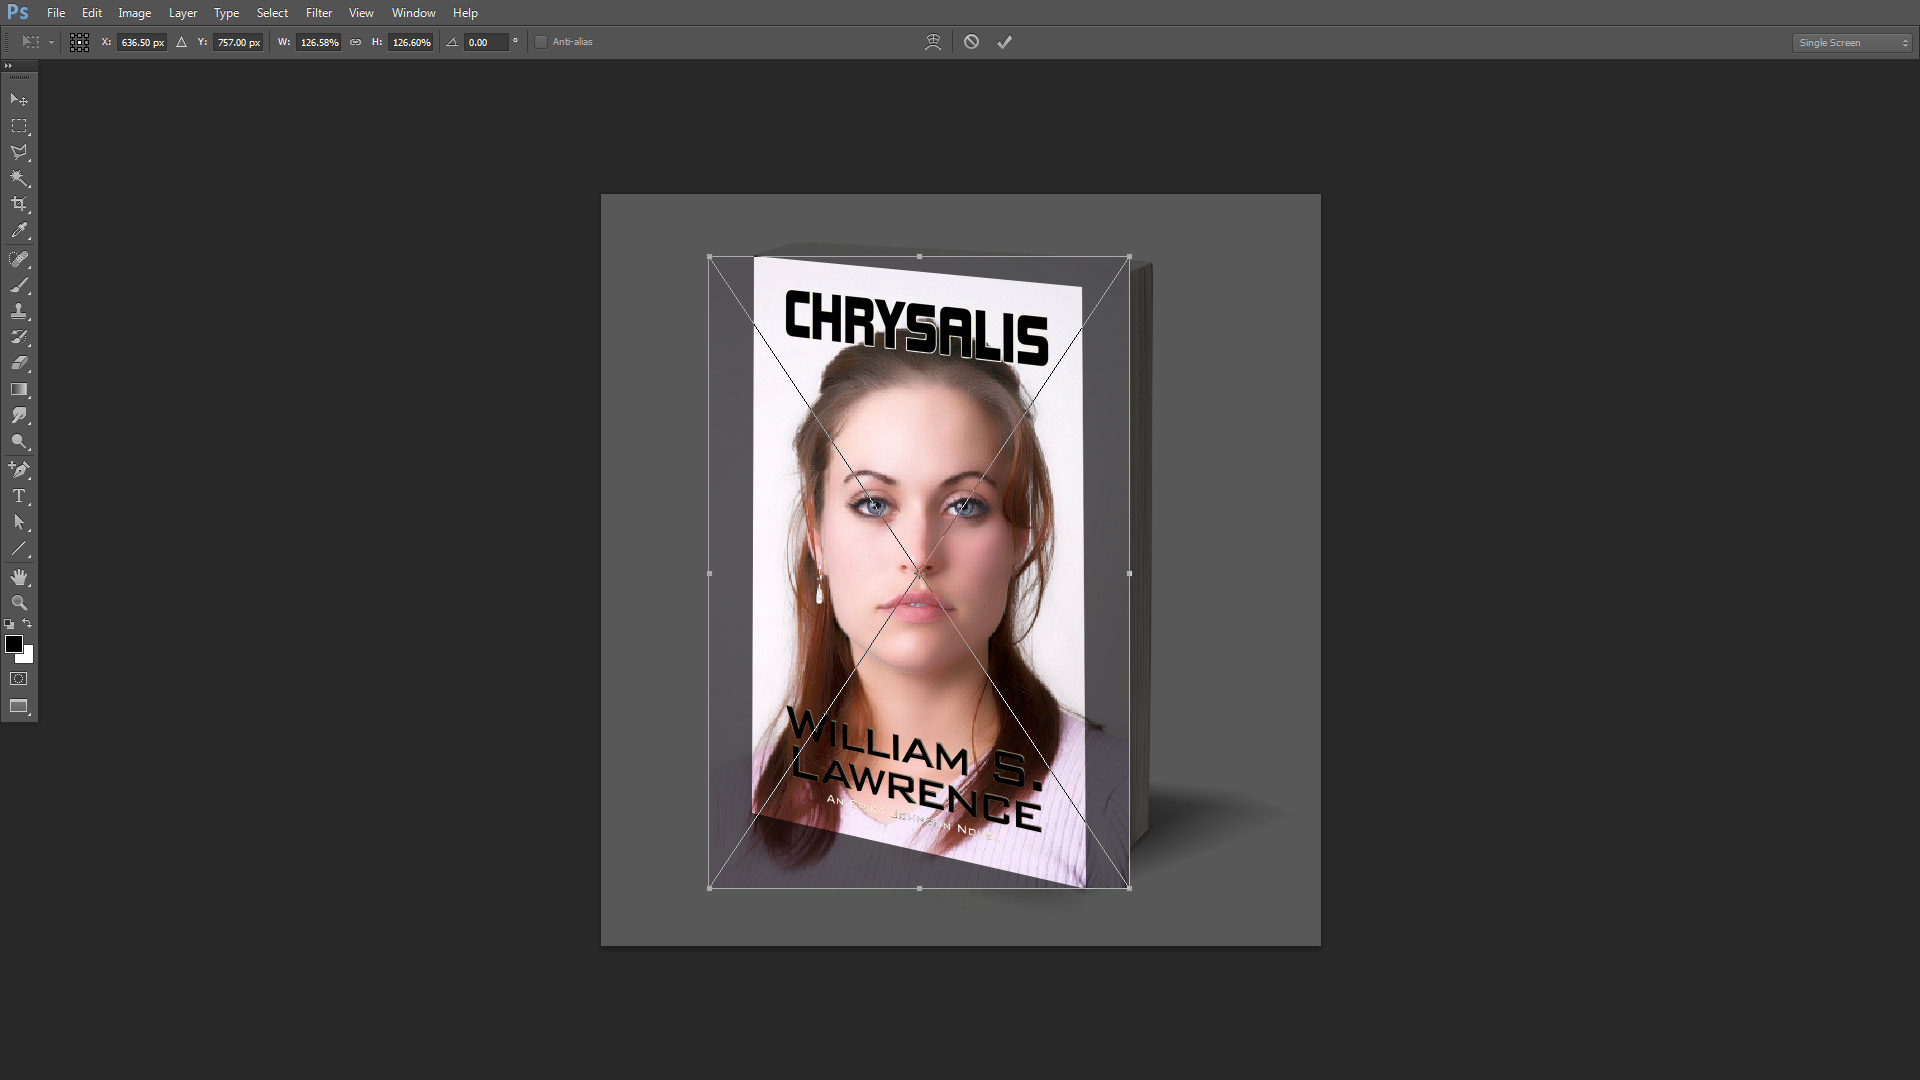
In the example I showed no skewing or rotation was done. The image was just placed into the document to cover Alpha channel Image 1 mapping squarely then the alpha channel was used to mask off the excess. That is why it looks skewed. However in reality in the case it not it just looks like it is skewed because of the masking.
This is what the interactive transform step look like. I just accepted the squarely placed image as is for it looked ok to me.
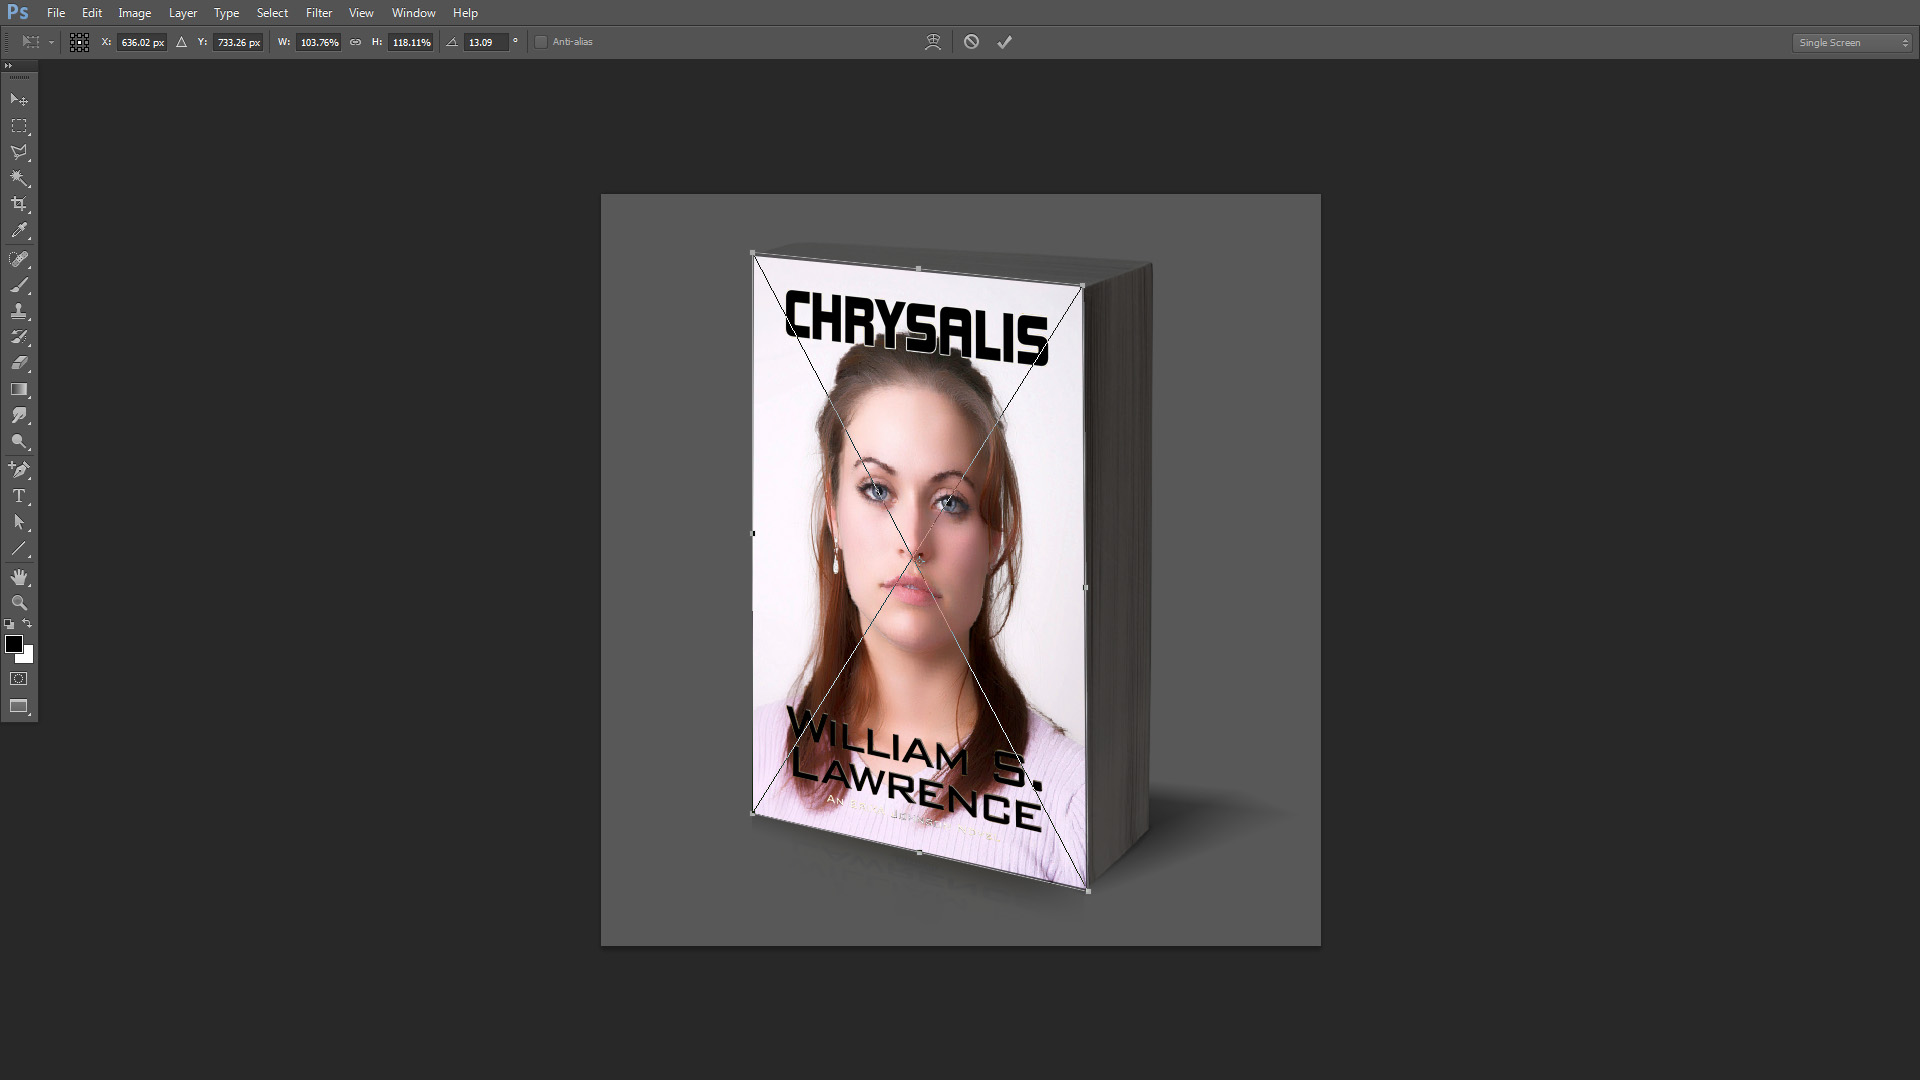
I could have transformed the image If I wanted too. To something like this:
Copy link to clipboard
Copied
Be warned my Collage Toolkit does not support the automation of transforming images ...
That is why I suggested replacing the smart object's contents. The existing transform is maintained. The image used to replace the contents does need to be the same size and dpi for an exact replacement. But you can edit the smart object to resize if the source jpg are not already the correct size. If the smart object layer has a channel or vector mask and you can live with some cropping the aspect ratio could be handled by the mask.
If the smart object opens in ACR just turn off the option to open jpeg image in ACR.
If the source images are correctly sized you can create a set of comp images as fast as Photoshop can read and write the files as all the script needs to do is replace contents and saveAS. You can think of it as data driven graphics in overdrive.
Copy link to clipboard
Copied
Yes replacing the contents of a smart object get the original smart object transform applied to it. So the replacement must be the same size as the original object. If images vary in size you can not just use replace smart object content. You need to reopen the embedded object and paste in a new image over the original and re-size the pasted in image to be the same size as the original object. You may also need the flatten before you save the smart object being worked on. You can also run into problems reopening a embedded smart object.ACR may open not Photoshop. If the original object was a RAW, Jpeg or Tiff file.
It would be complex to batch something like that for each smart object layer would need to be targeted in the layers palette and be opened into Photoshop. I don't know how to even automat re-opening a smart object layer. To replace the image and run the script to size the replacement the same as the original object. If the cover of that book were a transformed image file. If you just replaced the contents of the smart object you would need the replacement be the same size as the original object. If the original image file was a placed png file double click on the smart object icon in the layers palette would open Photoshop and you could run the script the re-size the new replacement image the same size as the original object. However if the original placed image file was a RAW file then ACR would open when you double clicked on the smart object layer's smart icon in the layers palette and the script can not be run.
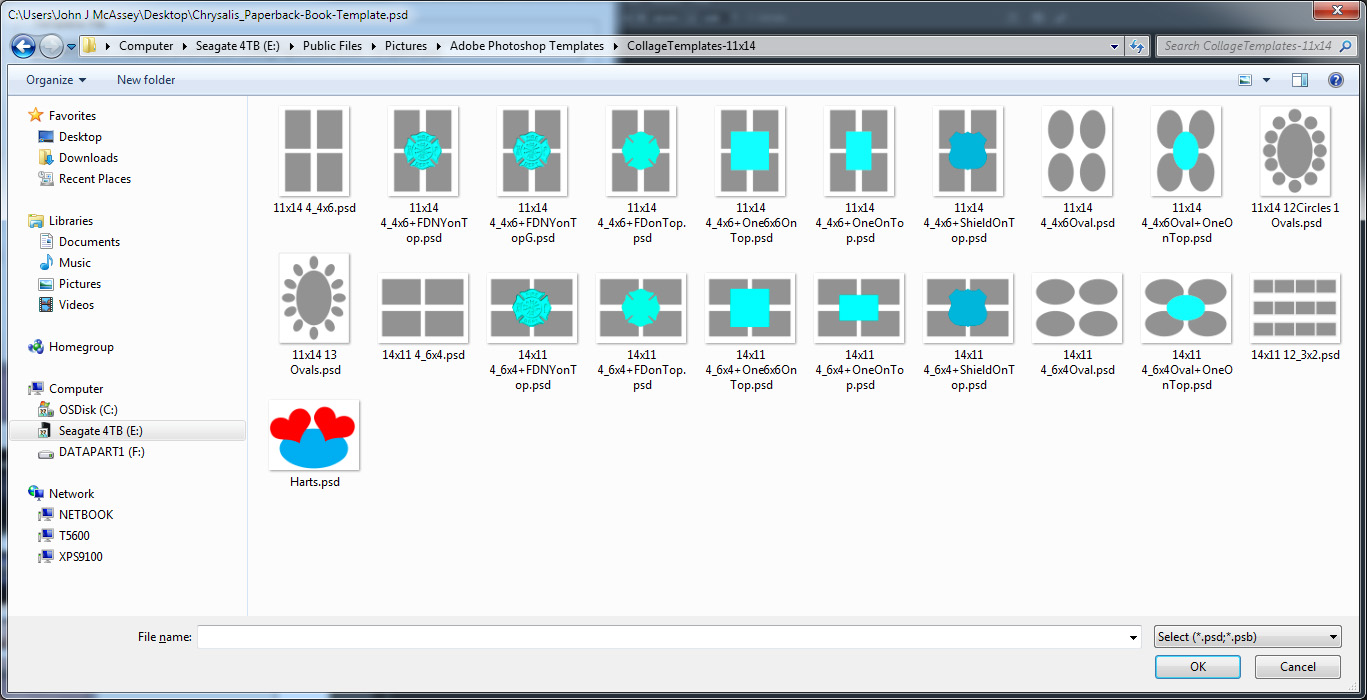
Also using an Alpha channel support any shape image you want. for example: Also note how Aspect ratio missmatch are handled.


Sample Templates:
Copy link to clipboard
Copied
If images vary in size you can not just use replace smart object content. You can also run into problems reopening a embedded smart object.ACR may open not Photoshop. If the original object was a RAW, Jpeg or Tiff file.
You can still use smart object replace if the image sizes differ. Jpeg and Tiff editing in ACR is an option that can be turned off. Before Adobe moved that preference from a Photoshop to a Camera Raw option it could be changed with a script. But if you don't want to disable jpeg and Tiff support in ACR there are ways around that so a script could still work. For example before you replace the contents the script could open the image, resize canvas and save. Then when it is used in the replace it is already the correct size. For non-smart objects you can bypass the ACR dialog when opening ACR supported files.
I don't know how to even automat re-opening a smart object layer.
I posted the code to open a smart object for editing. A script can even edit nested smart objects. But yes, there would be some layer selection. I would think layer selection would be needed no matter how this is automated.
Also using an Alpha channel support any shape image you want.
That is why I said that aspect ratio may not matter. It does require a willingness to have the mask crop the image and works with channel or vector masks.
Copy link to clipboard
Copied
Michael L Hale wrote:
That is why I said that aspect ratio may not matter. It does require a willingness to have the mask crop the image and works with channel or vector masks.
If you do not want distortion Aspect Ratio matters with or without a cropping mask/.
Copy link to clipboard
Copied
If the layer mask hides( crops ) the difference between the original and new aspect ratio where does the distortion come in? The mask, in effect, does the aspect matching as long as you don't mind that part of the new image may be cropped/hidden.
Copy link to clipboard
Copied
In the script re-size to canvas size the resize must be done without distortion. To do the you must maintain the images original aspect ratio. If you do not maintain the images aspect ratio you have distorted the image.
Copy link to clipboard
Copied
The Smart object I am refering to opens as a .psb extension, so not a problem for me.
I was almost thinking of just loading the series of jpg covers as layers from Bridge. Copy the stack to the .psb so then just turn off a layer at a time, save, go to the master comp, save off the JPG comp, and repeat until all the images in that layer stack have been "processed".
I just need to do this quickly say if I have 12 versions to process, and maybe 2-3 of these Master templates. Example the front view. Maybe a spine and front view, and 2 books laying down with one upright on top. That would result in 36 variants. So every minute saved would add up.
Thank to both of you for your advice.
Maxi
Copy link to clipboard
Copied
Really the distortion is not an issue. To mimic the 3D nature of the composite, I transform, Distort the corners to match. Then in the paperback I transform the SO with Warp to get the curved cover. Its then already distorted quite a bit. Most importantly, is that all the original pixels are there. Masking off width or height would be noticed.
For my purposes, all covers are 6x9" but then may vary 1/4-1/2" depending on the printer's specs.
Copy link to clipboard
Copied
In your case distortion does not matter that much for the aspect ratio difference is not great. Your images are most likely portraits being distorted into a portrait cover. If your image were landscaper you would notice much distortion. If you create your 2-3 master templates for my scripts. You could run 2-3 batch process to create all the populated files you need. Then for the cover you would need to edit each one and just transform the image smart object layer and align the four corners to the cover.
In your case if you cameras have a 3:2 aspect ratio and you shoot portrait orianted images have a 2:3 aspect ratio and your cover 6"x9" also has a 2:3 aspect ratio. So your camera's un-cropped portrait image fit perfectly onto you cover without distortion. So making your cover image a smart object and transforming that layer to your cover's perspective will work perfectly. If your cameras have a 4:3 and you just resize them to a 3:2 aspect ratio there will be some distortion but it will not be that noticeable particularly when its transformed to your cover's perspective.
Your case is simple a one image collage. A one image collage does not require a complex solution. My scripts were designed for more complex collages and can handle collage that have from 1 to 53 images. In a simple layered structure. I fact all that would be required is a Photoshop background layer and up the Photoshop maximum 53 Alpha channels named Image 1 through Image 53 to map image placement and stack order where Image I is place just above the background layer follow by Image 2 to Image N. Alpha Channels can any shape. All image are placed squarely in to cover the alpha channel mapping. I would not know where to begin to try to determined what perspective , slant, rotation etc images should have. So I created an interactive script where users can select each image being populated and the tweak its placement give it rotation and perspective, I also created an automatic populating script the would populate all image for a template the remain open in Photoshop so the users can tweak the image that need tweaking. I also create batch scripts that can create many populated collages for a template. These Populated collage files can be opened in Photoshop and the images can be tweaked.
Image can also have text stamped on them and Images and text layers can have optional layer styles applied. There are scripts that can replace a image in populated collage positioning and sizing the replacement image. An other script to change the text layers added font size and reposition them for the images populated. There a script that can tile as many images as you want into a new document. Scripts to do picture packages etc.
Copy link to clipboard
Copied
Good idea. And advice!

 AdChoices