How to rotate and warp text in Photoshop: 🔎 Quick Tip

Learn how to rotate and warp text
❶ Add the text to the document
Create or open a document and select the Type Tool from the toolbar on the left. Then tell them how to select the font and color. After entering your text, click the checkmark in the Options bar to accept it.

❷ Rotate the text
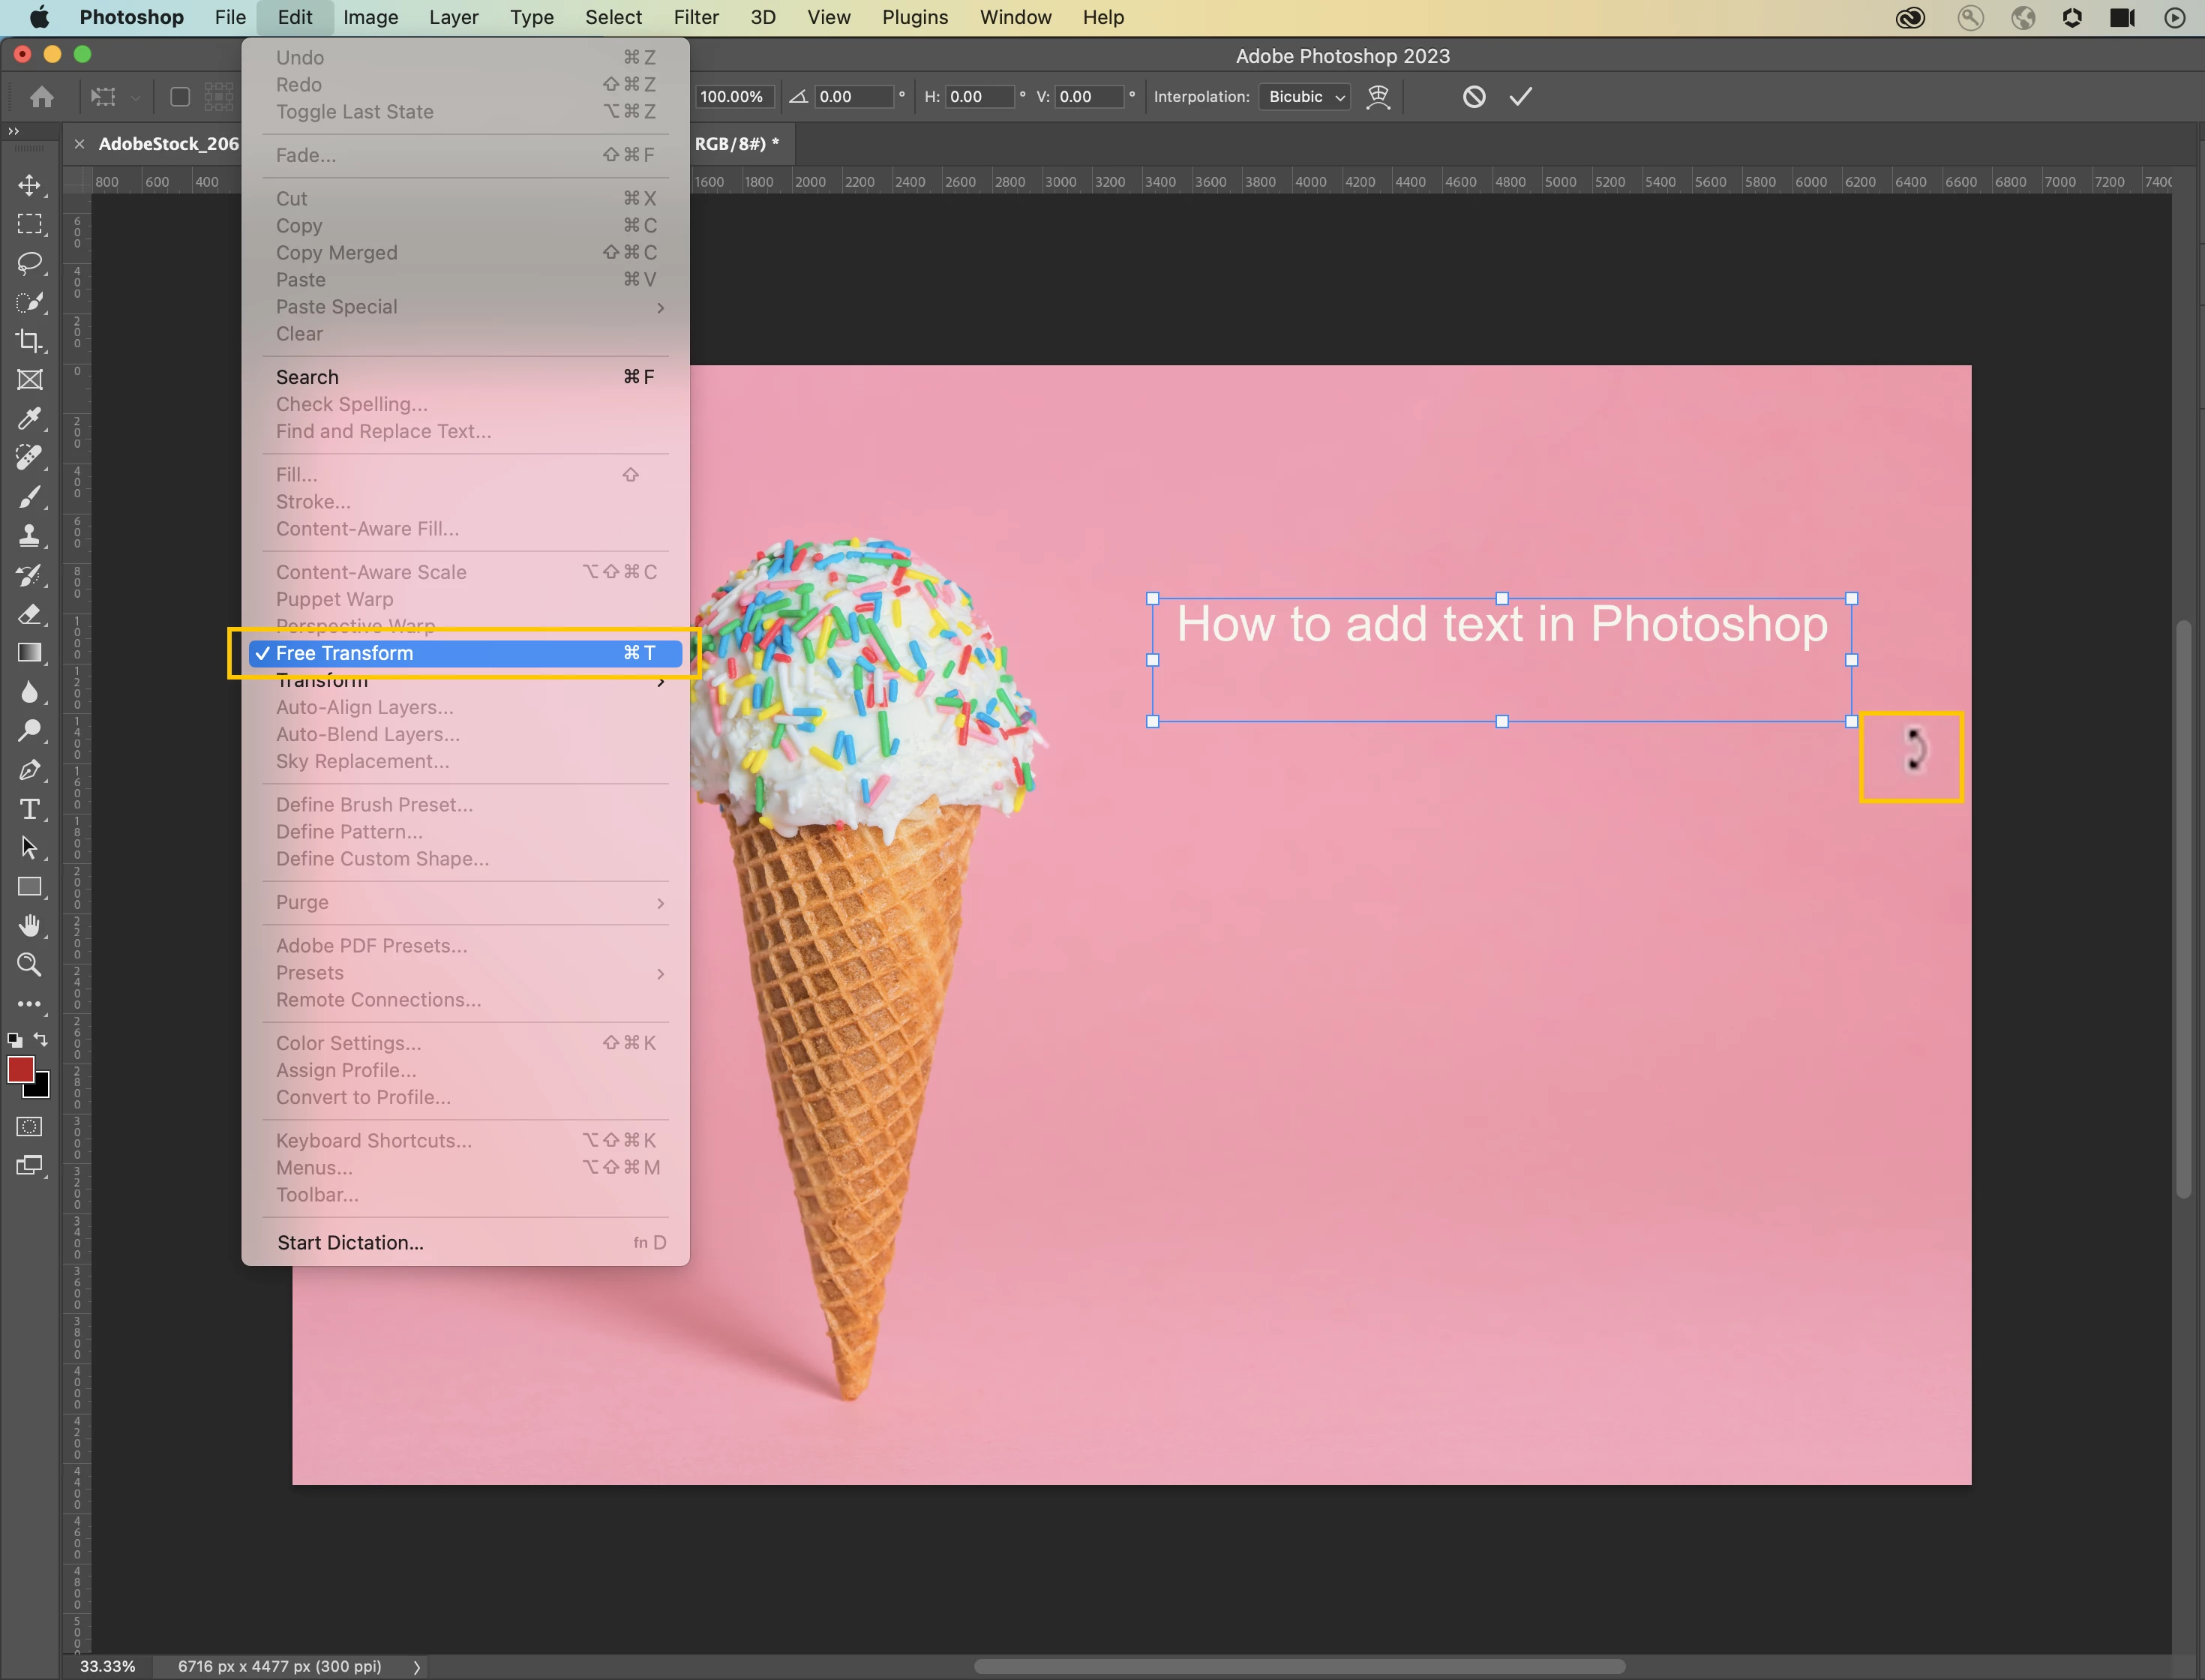
Choose Edit> Free Transform (CTRL+T/ Cmd+T) from the main menu. When the Free Transform tool activates, a blue box will appear around the text. Hover near the boxes on the corners, and your cursor will turn into a double-sided arrow with a 90° bend. Click and drag to rotate the text.

❸ Warp the text
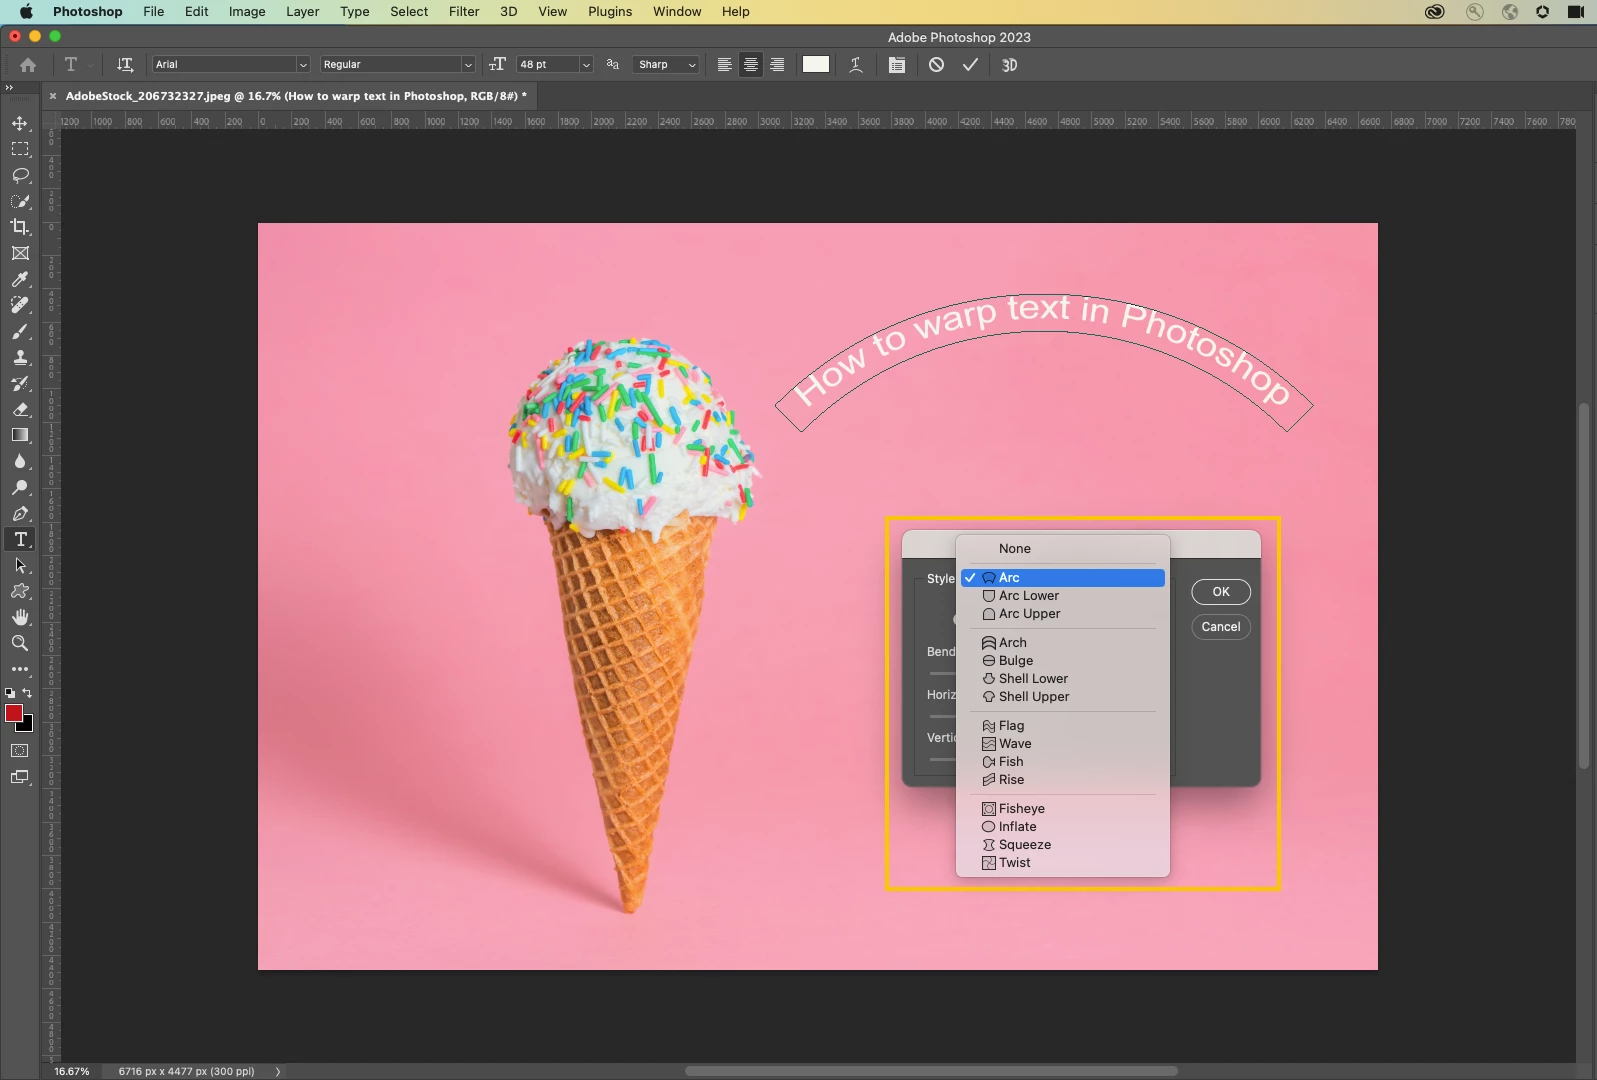
With the Type Tool selected in the tools panel and the Type layer selected in the Layers panel, click on the Warp Text option  in the Options Bar. This will open Photoshop's Warp Text dialog box, where you can choose (from the 15 preset options) the style of warp warping you want to apply. Photoshop refers to the various warping options as styles, but by default, the Style option at the very top of the dialog box is set to None. We've chosen 'Arc' here. As soon as you select a style, Photoshop applies it to the text in the document, giving an instant preview of how the text will look with the chosen effect.


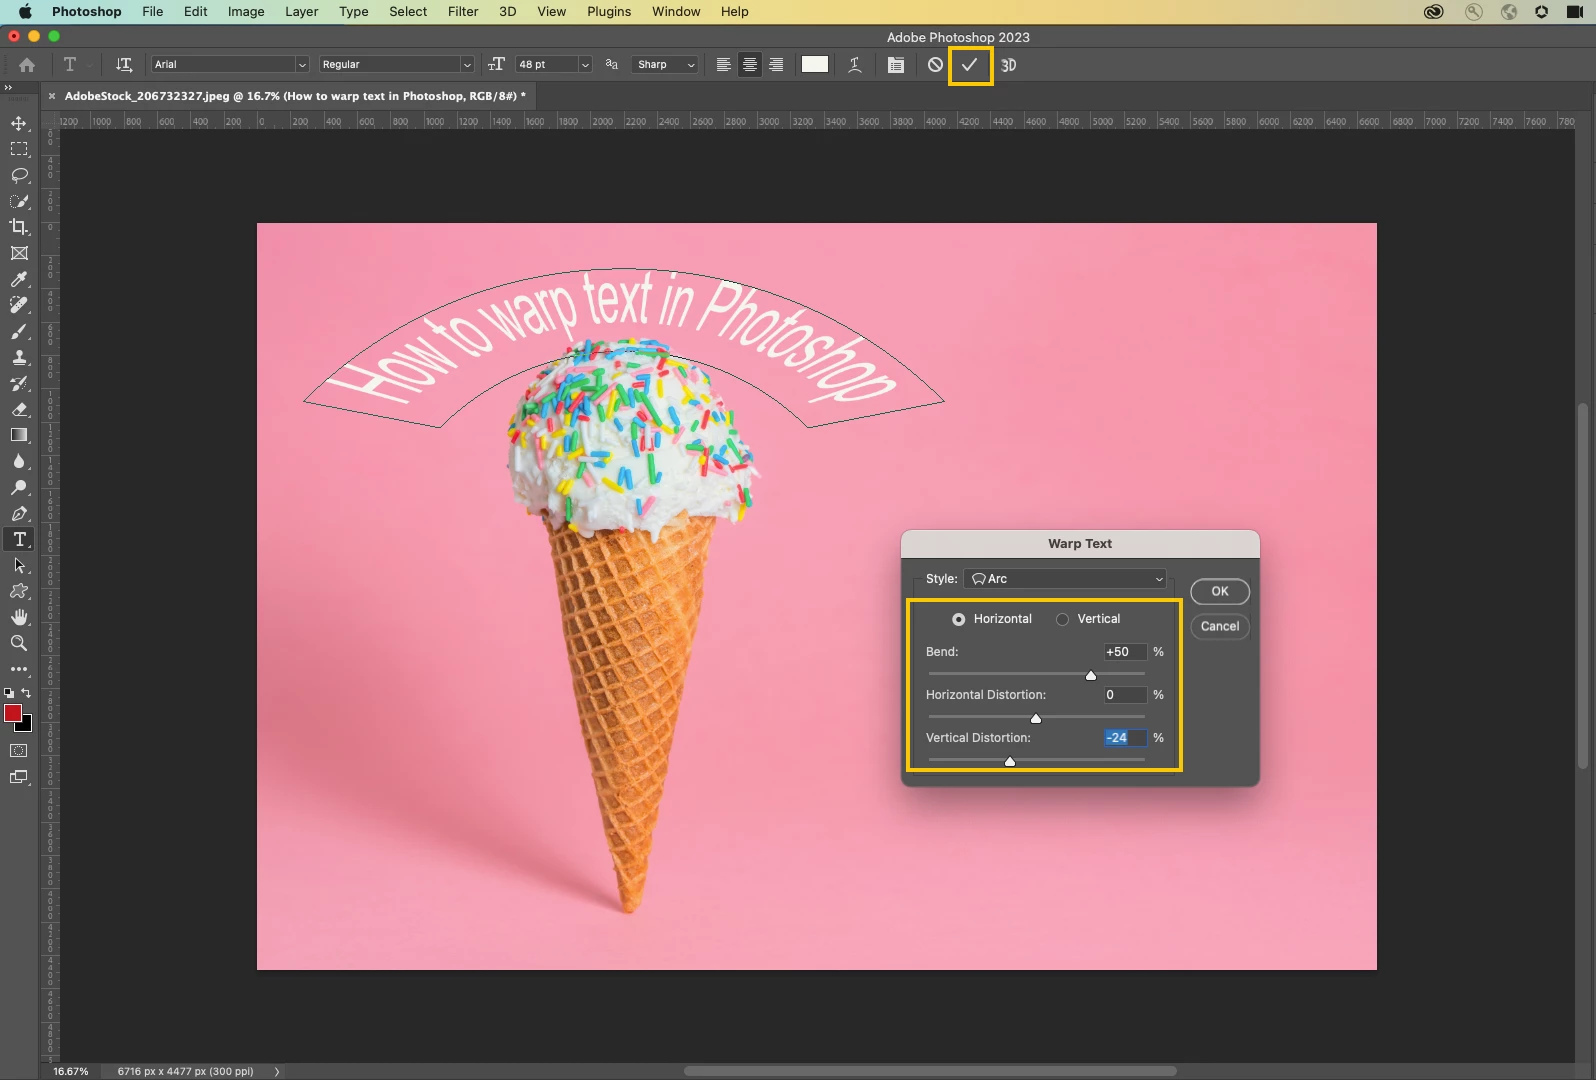
❹ Customize the Warp

Related links:

