- Home
- Photoshop ecosystem
- Discussions
- I need help. I'm sure it's simple but I'm stumped
- I need help. I'm sure it's simple but I'm stumped
I need help. I'm sure it's simple but I'm stumped
Copy link to clipboard
Copied
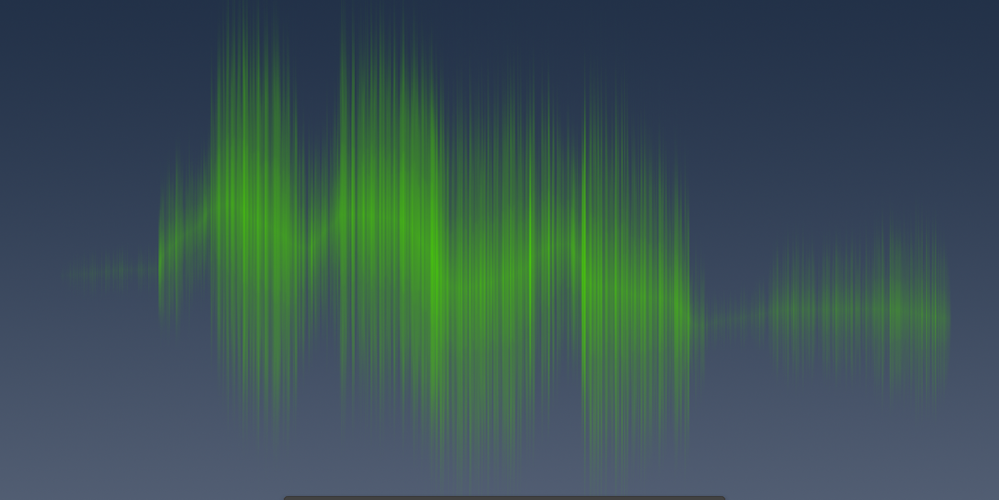
I want to be able to do something like this fake northen ligths design and I just can't figure it out and google just keeps showing me how to add realistic ones. Please help!
Explore related tutorials & articles
Copy link to clipboard
Copied
Use Filter > Stylize > Wind, using the Wind option (not Blast or Stagger). It builds up, and might take several runs to get it the way you want. Note that it "blows" White into Black horizontally, so you'll likely want to colorize and rotate it.
Copy link to clipboard
Copied
I want to be able to do something like this fake northen ligths design and I just can't figure it out and google just keeps showing me how to add realistic ones. Please help!
By @Elliot30462263y1aj
Hi Elliot. See if this helps.
1) Make a new image document 500 pixels wide and 1000 pixels high.
2) Add a new layer.
3) Select the Brush tool, and a Soft Round Pressure Size preset. Make it 2 pixels in size
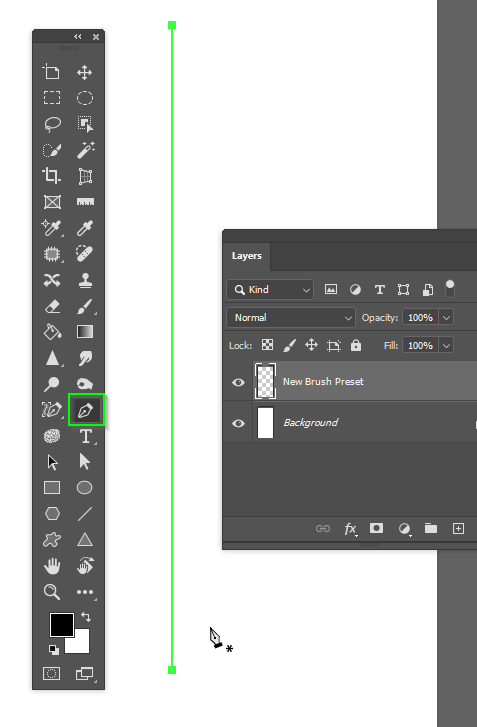
4) Now select the Pen tool, and make a vertical path as below. Note If you add the top point, and hold down shift while adding the bottom point, it will force the path to be perfectly vertical. Hit Escape after adding the lower point to finish the path.
5) Select the new layer you added, and with black as the forground color, right click the Path and chose Stroke Path.
Note: make sure that the Brush tool is selected, and that Simulate Pressure is checked. Click OK.
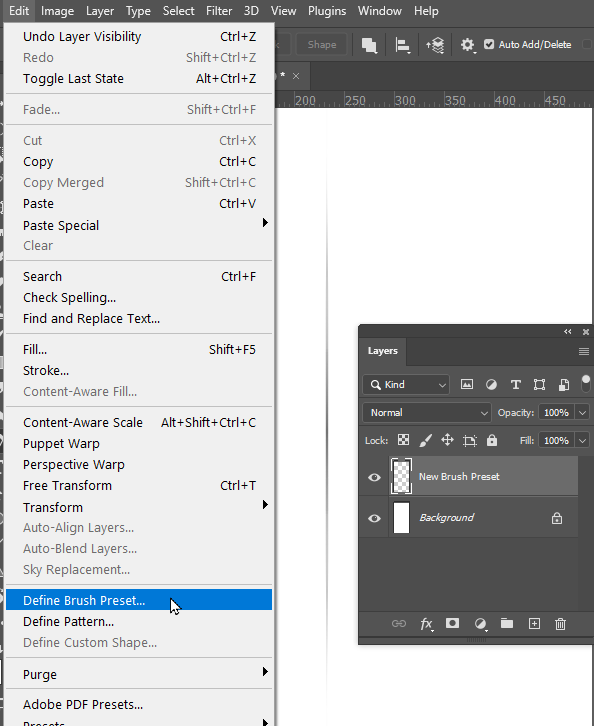
6) Now go Edit > Define Brush Preset, Don't worry too much about the name, as this step is temporary.
7) Hit F5 to open Brush Settings, and set Spacing to 1%
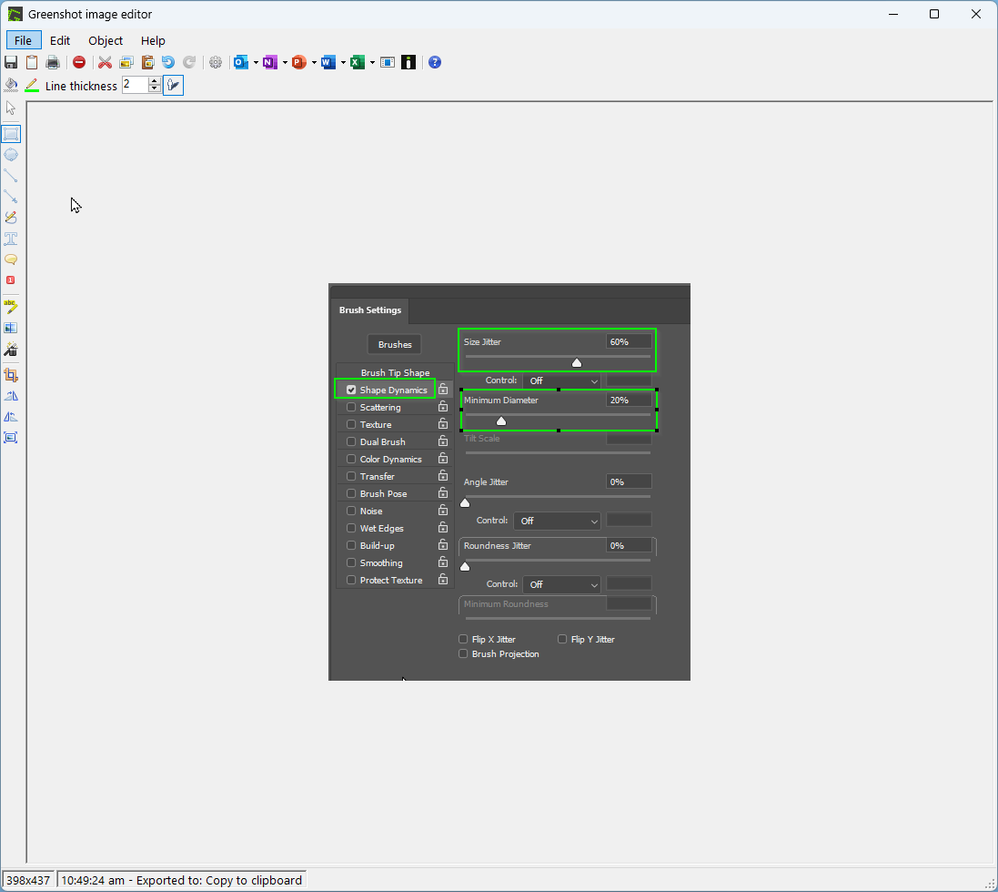
8) Under Shape Dynamics set Size Jitter to 60% and Minimum Diameter to 20%. Note these are starting points that you can change for best effect.
9) Under Transfer set Opacity Jitter to 30%
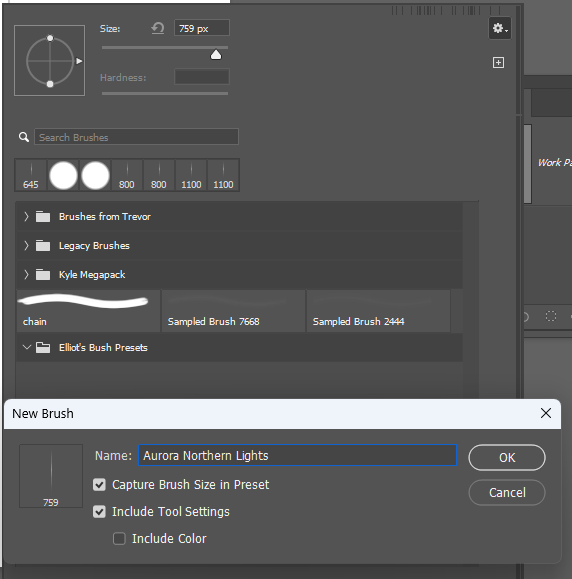
10) Now you need to save the preset for real. With the Brush tool selected, right click inside the image window to open the Brush panel, and click on the little cog icon top right corner. You should probably create a new Brush group, which I have called Elliot's Brush Presets
11) Click on the cog icon again, and chose New Brush Preset. When the dilog window opens give the brush a meaningful name, and makes sure Include Tool Settings is checked. You can decide whether to also include the size.
That's the preset, so I am going to post this, and show some tips on using it in another post.
Copy link to clipboard
Copied
The settings we used look like this. because there is no way to vary brush size in one direction only, so we have this vertical symmetry. Plus the ends of the stroke start and end abruptly.
If you are using a graphics tablet, you set size jitter to pen pressure, like this. You could do the same with Opacity jitter.
Lets get to the shape in your example.
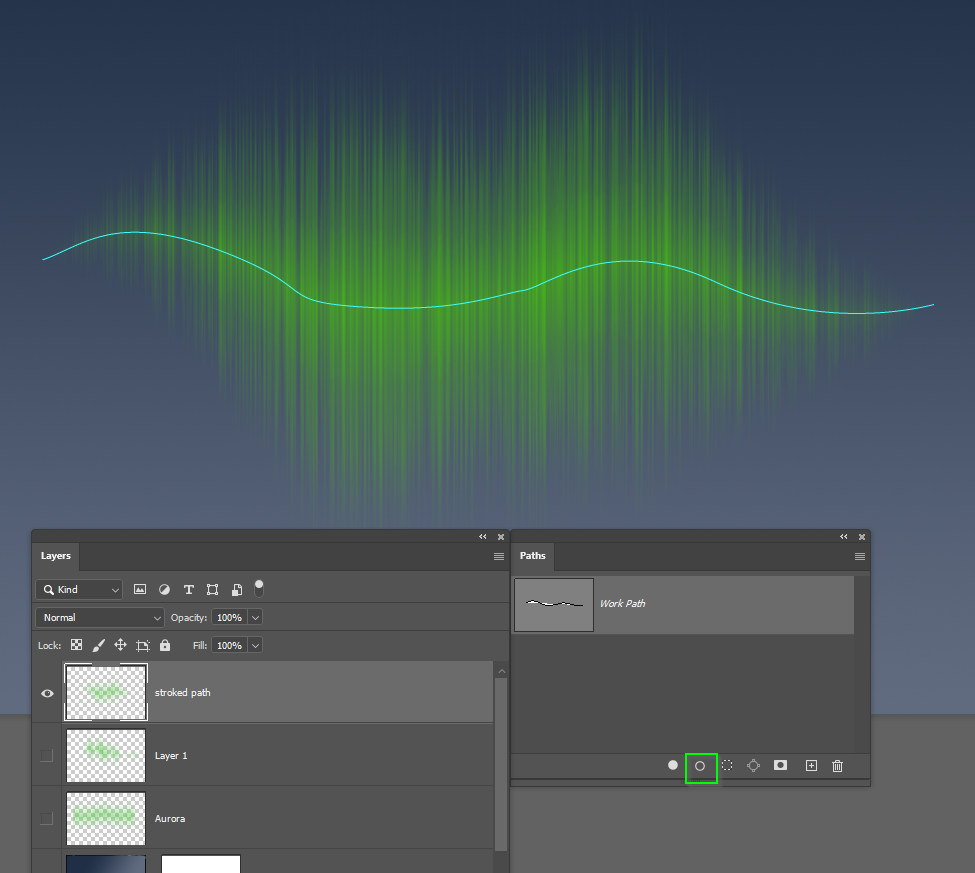
I have used the pen tool to create the wavy path, and stroked the path again. Note: you can use the icon I have highlighted at the bottom of the Paths pallet to stroke with the last settings. I still have size jitter set to Pen pressure.
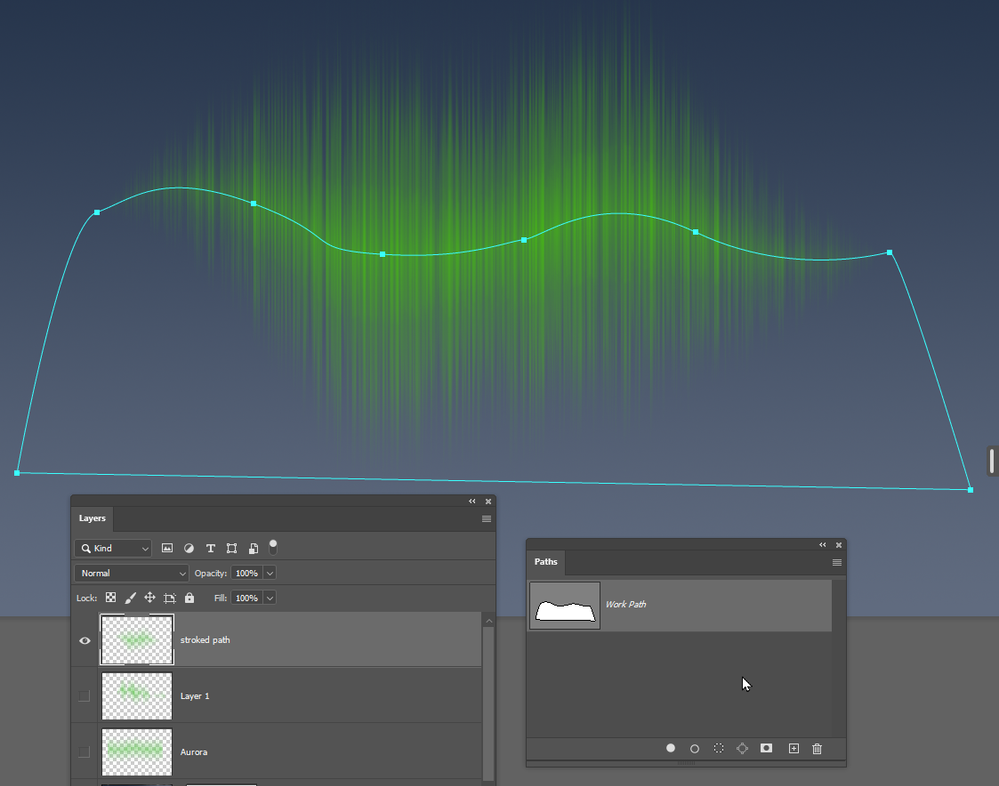
We want just the top half of the stroke, so select the Pen tool again, hover over one of the end points and click to continue the path. join the two ends together enclosing the bottom half of the brush stroke like this
Add a layer mask to the stroked path layer.
Ctrl click the path to load it as a selection
Fill the selection with black (the layer mask must be selected for this to work).
add some gaussian blur to make it look more real. Play with the settings for best effect.
One last thing. Open the Brush panel and select your new Brush group
Make sure the Aurora preset is in thew group. You can drag it in if not
Right click the group and Export it. This saves it as a .abr file so you don't lose your new presets
If you add more presets to the group, you need to export it again, and overwright the file name.
I hope this helps as it took me a good half hour to do it, but making the preset and saving it took about two minutes tops.
Good luck, and do try experimenting with the brush engine. It's a lot of fun.
Copy link to clipboard
Copied
One more trick.
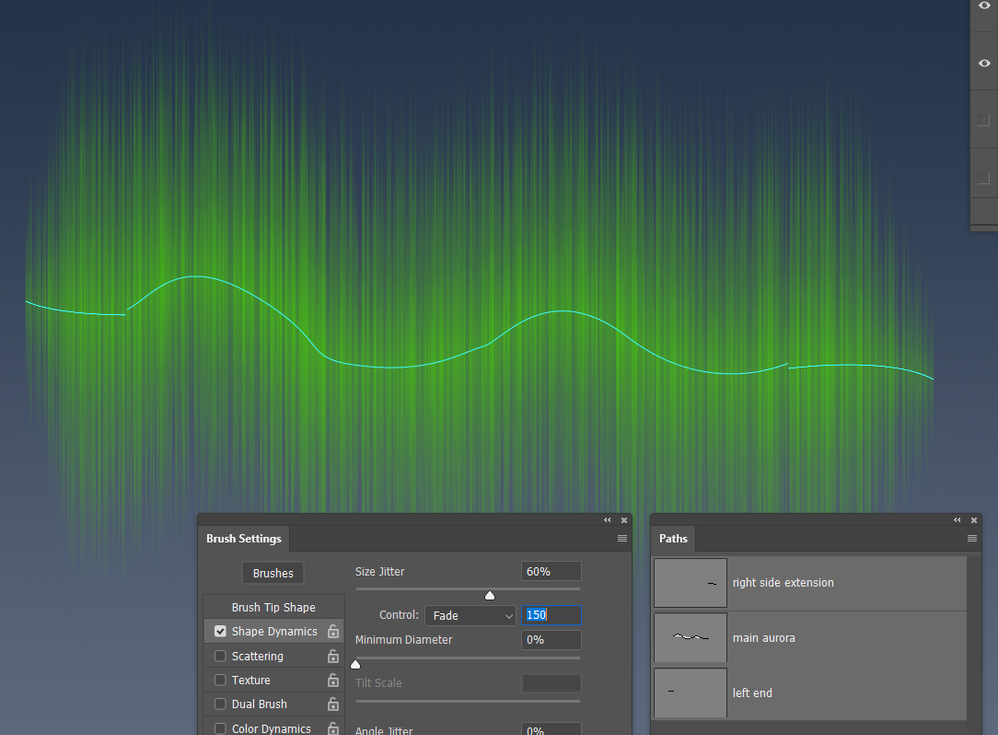
The original preset with size jitter set to Off left abrupt ends to the aurora stroke.
Make a new work path and going from left to right, extend the aurora a wee bit.
Set the size jitter to Fade, and on a new layer, stroke the new path. You'll need to experiment with Fade value. I used 200.
I did the same thing for the other end. You can see that the new strokes did not need to perfectly match the original path. As long as the additions are on new layers, you can nudge them into best position.


