- Home
- Photoshop ecosystem
- Discussions
- Re: image adjustments don't apply
- Re: image adjustments don't apply
image adjustments don't apply [2013]
Copy link to clipboard
Copied
Hi,
I'm using CS4 photoshop on my iMac 2008. When I try to apply image adjustments like 'posterize' or 'Brightness/Contrast' or 'Levels' to my image, I can adjust the settings in each dialog box, and I see the changes on my image because the 'Preview' box is checked. But when I click 'OK', the image reverts to its original and no changes are applied to the image.
I started out by importing a .jpg into photoshop. I've tried working on this .jpg, and I've also converted to Photoshop file format .psd, and still the same problem occurs. The original image had colour, but I converted it to grayscale. I also tried not converting to grayscale, and still the same problem. I am trying to make the image high contrast, with only black and white (no grey).
The same problem also occurs when I apply my adjustments on adjustment layers. Here I am able to modify each adjustment layer. The image changes and looks the way I want. But when I go to save the image, no matter what format I save as (.jpg, .psd, or .tif) the resulting image has none of the adjustments. It's still the original.
Thanks for your help,
-David
Explore related tutorials & articles
Copy link to clipboard
Copied
Hello,
Does it help if you are viewing at 100% (View>Actual Pixels) as you make your adjustments? Preview at less than 100% can be misleading.
Copy link to clipboard
Copied
Thanks for your suggestion.
When I viewed at 100% and applied my adjustments, I saw that there was no change to the pixels of my image. But when I zoom out and look at the whole image, I see changes when I make my adjustments, and they do not save when I click 'OK'.
I am trying to make a two tone image, black and white, where there are no black pixels in the white sections. Even though posterize must have worked successfully, because there are only black and white pixels, there are still black pixels in the white sections, making all sorts of grey tones. This is unacceptable because I am preparing an image for screenprinting, and there needs to be solid black and solid white, no grey.
Using brightness and contrast, posterize, and levels, I am not able to achieve what I am trying to do. Is there some other way to do it? Based on what is happening to me, it seems like posterize, brightness/contrast, and levels do not work. When I adjust their faders in their dialog boxes, I see the changes in the preview image, and it looks like what I want. But when I click 'OK', it reverts to the original. It basically is not working. The same thing happens when I create adjustment layers. It looks fine and is working. But when I save to jpg, tif, or psd, the adjustment layer changes are not saved onto the final image.
-David
Copy link to clipboard
Copied
Detailed, high contrast images, are most susceptible to incorrect previews at less than 100%.
Can you post an example at 100% view? And describe what you are trying to do?
Copy link to clipboard
Copied

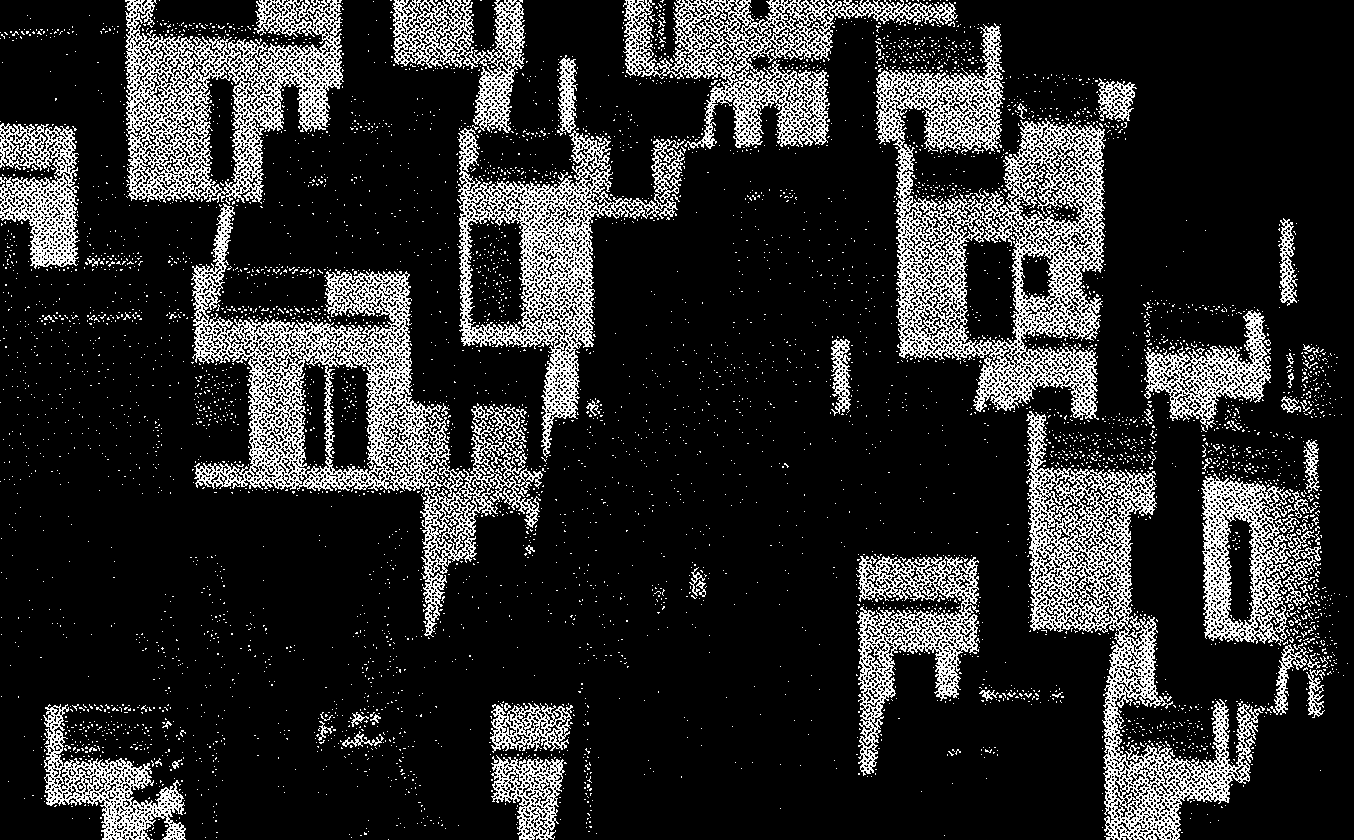
Here is a small section of the image viewed at 100% (View-> Actual Pixels). I want the building faces (the grey parts) to be completely white, devoid of black pixels. At the same time, I want the shadows to be completely black, devoid of white pixels. It is too laborious to go over this with the bucket fill tool, or any paintbrush tool. Do you have any suggestions for how I can achieve this?
Thanks so much,
-David
Copy link to clipboard
Copied
Hm, yeah. If you look at what you call "the grey parts" you'll see it is actually a halftone screen of black pixels and white pixels. Photoshop does not see it as grey. You can't darken the black and you can't lighten the white.
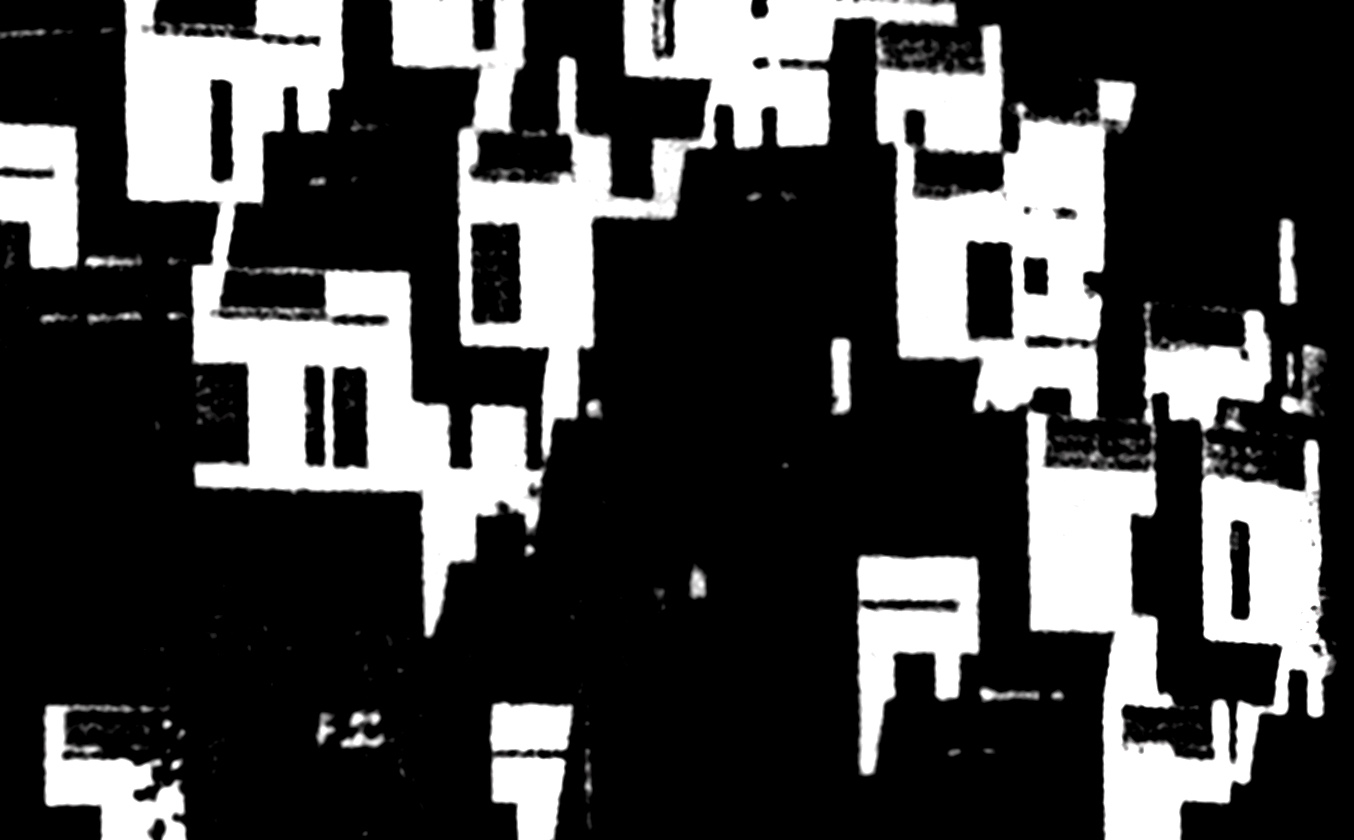
Here I ran a blur filter and using Levels combined with Dodge Tool got building faces close to white.
Probably someone here who does this more often might have better suggestions.

Copy link to clipboard
Copied
You can see the Rosette pattern of halftone dots in the lighter areas.
This was a scan of a printed image and this is a common issue.
Can you get an original photo (not a scan)? This is probably best solution.
If you scanned this yourself, try adjusting the settings when scanning, look for De-Screening options or something that mentions printed images.
This can reduce the problem. But scan at a high resolution, also 48 bit if this is an option with your scanner.
Scan in COLOR. Then you want to make your adjustments to the image in the color image before changing to Grayscale and possibly doing additional adjustments.
It looks like this image is already in Bitmap mode which is Black & White pixels ONLY, no grayscale pixels at all.
Once you are in Bitmap mode (Black & White only) that is very little you can do. That is why you say you cannot see any changes in your adjustments.
You could erase to White and erase to Black but this is labor intensive and only a viable option if you cannot do the above options.
If this is just a one time thing and you have Illustrator you could redraw this and save it in many different file format (but always save the original vectors you created as an AI file BEFORE saying in any Raster (Pixel) type format since these will destroy the vector elements and be no longer editable as vectors)
Copy link to clipboard
Copied
If you search the internet for images of "Habitat 67", you should be able to find some better candidates.
Copy link to clipboard
Copied
I've had this issue happen too, were adjustments such as contrast and posterize effects appear to be working while you're making the adjustments, but then immediately revert back. In other words, they don't take effect. In the cases I've seen, it was always because the file was too large. When I reduced the file size, the effects would then work.
Copy link to clipboard
Copied
My God, it was that easy! Thank you. No one else gave this answer, after an hour of searching.
Copy link to clipboard
Copied
Thank you, WendyAnn! I've had the same exact problem and reducing the image resolution/size worked perfectly! After 2 hours of searching and re-editing/re-saving the file, I found this thread. Thank you!
Copy link to clipboard
Copied
So AMAZING! THANKS WendyAnn!!!!!
Copy link to clipboard
Copied
What would you then bring the file size down to?
Copy link to clipboard
Copied
Why do you want to change the file size? That doesn't solve anything. The preview is wrong. The file is right.
View at 100% so that you know what you're working with. That's all.
The reason those people above claim it "worked", is because you're then doing the same thing to the file itself: by downsampling, you're softening all those crisp pixel edges. That means you get a lot of fuzzy and blurry middle tones that weren't there in the original. So all of a sudden there are gray values that a Levels adjustment can work with.
The question is: do you want to destroy your file just to get those adjustments, or do you keep your data and instead find a more appropriate way to work with it?
Copy link to clipboard
Copied
It's not the 100% view or anything else you have been discussing. It happens to me too and all the settings are correct. I can also tell black and white spots from grey. that is not the issue either. The issue is that the lighting adjust ment looks right in preview, but then when you hit "okay", the change disappears. It does it to some files and not others, and the settings are all the same.
Copy link to clipboard
Copied
Please post before and after screenshots taken at 100% view.
Copy link to clipboard
Copied
How do you reduce the file size of an existing image? It doesn't seem excessive in size.
i have the same problem and it is obviously some files and not others...driving me crazy...
Copy link to clipboard
Copied
"I want the building faces (the grey parts) to be completely white, devoid of black pixels. At the same time, I want the shadows to be completely black, devoid of white pixels."
You can't use Levels for that with a binary bitmap image. No matter how you push the sliders, the black pixels are still black and the white pixels are still white. If you stop and think about it, I'm sure you understand why.
The problem is that with a downsampled screen image, it appears to work, because there are suddenly a lot of blurred gray values caused by the interpolation. These gray values aren't really there in the full data.
With adjustment previews, the calculations are made on the downsampled and softened screen version. This is for performance reasons. When you commit the adjustment, it is calculated on the full image data.
That's why you always have to view at 100% for a reliable adjustment preview. In a normal photograph it doesn't matter, but with noisy or binary images you have to.
Copy link to clipboard
Copied
I'm having the same issue. I'm a teacher and I have 21 kids doing the same exact assignment with the same file size settings, and on ONE computer every time we make an image adjustment the preview shows what is supposed to happen but when we click OK the adjustments disappear completely. It's not the zooming on the preview, I've reset Photoshop settings, updated the version, started a new file and it STILL doesn't work. Something else that's curious... when we apply the adjustment as an adjustment layer we see the correct effect - but when we merge the two layers the affect disappears again. What is going on?!
Copy link to clipboard
Copied
Read my reply above again. It's still the same explanation.
The important thing to understand is that it's the flattened/merged version that is the correct one. The preview is wrong, for the reasons I explained.
What triggers this, when it happens, is the relationship between image pixels and screen pixels. So different screen resolutions/zoom ratios may be differently impacted. It happens with noisy or binary images where you have a lot of sharp pixel-level transitions. These get blurred on downsampling, producing pixel values that aren't really there in the full data.
Bottom line, again: always view at 100% for a reliable preview.
