Answered
improving a bad quality light effect
Hi,
In my workshop there is a bad photographic contour. The high glass wall causes me some trouble.
this is the example:
There is a sort of white for into this milling head.
what should I do?

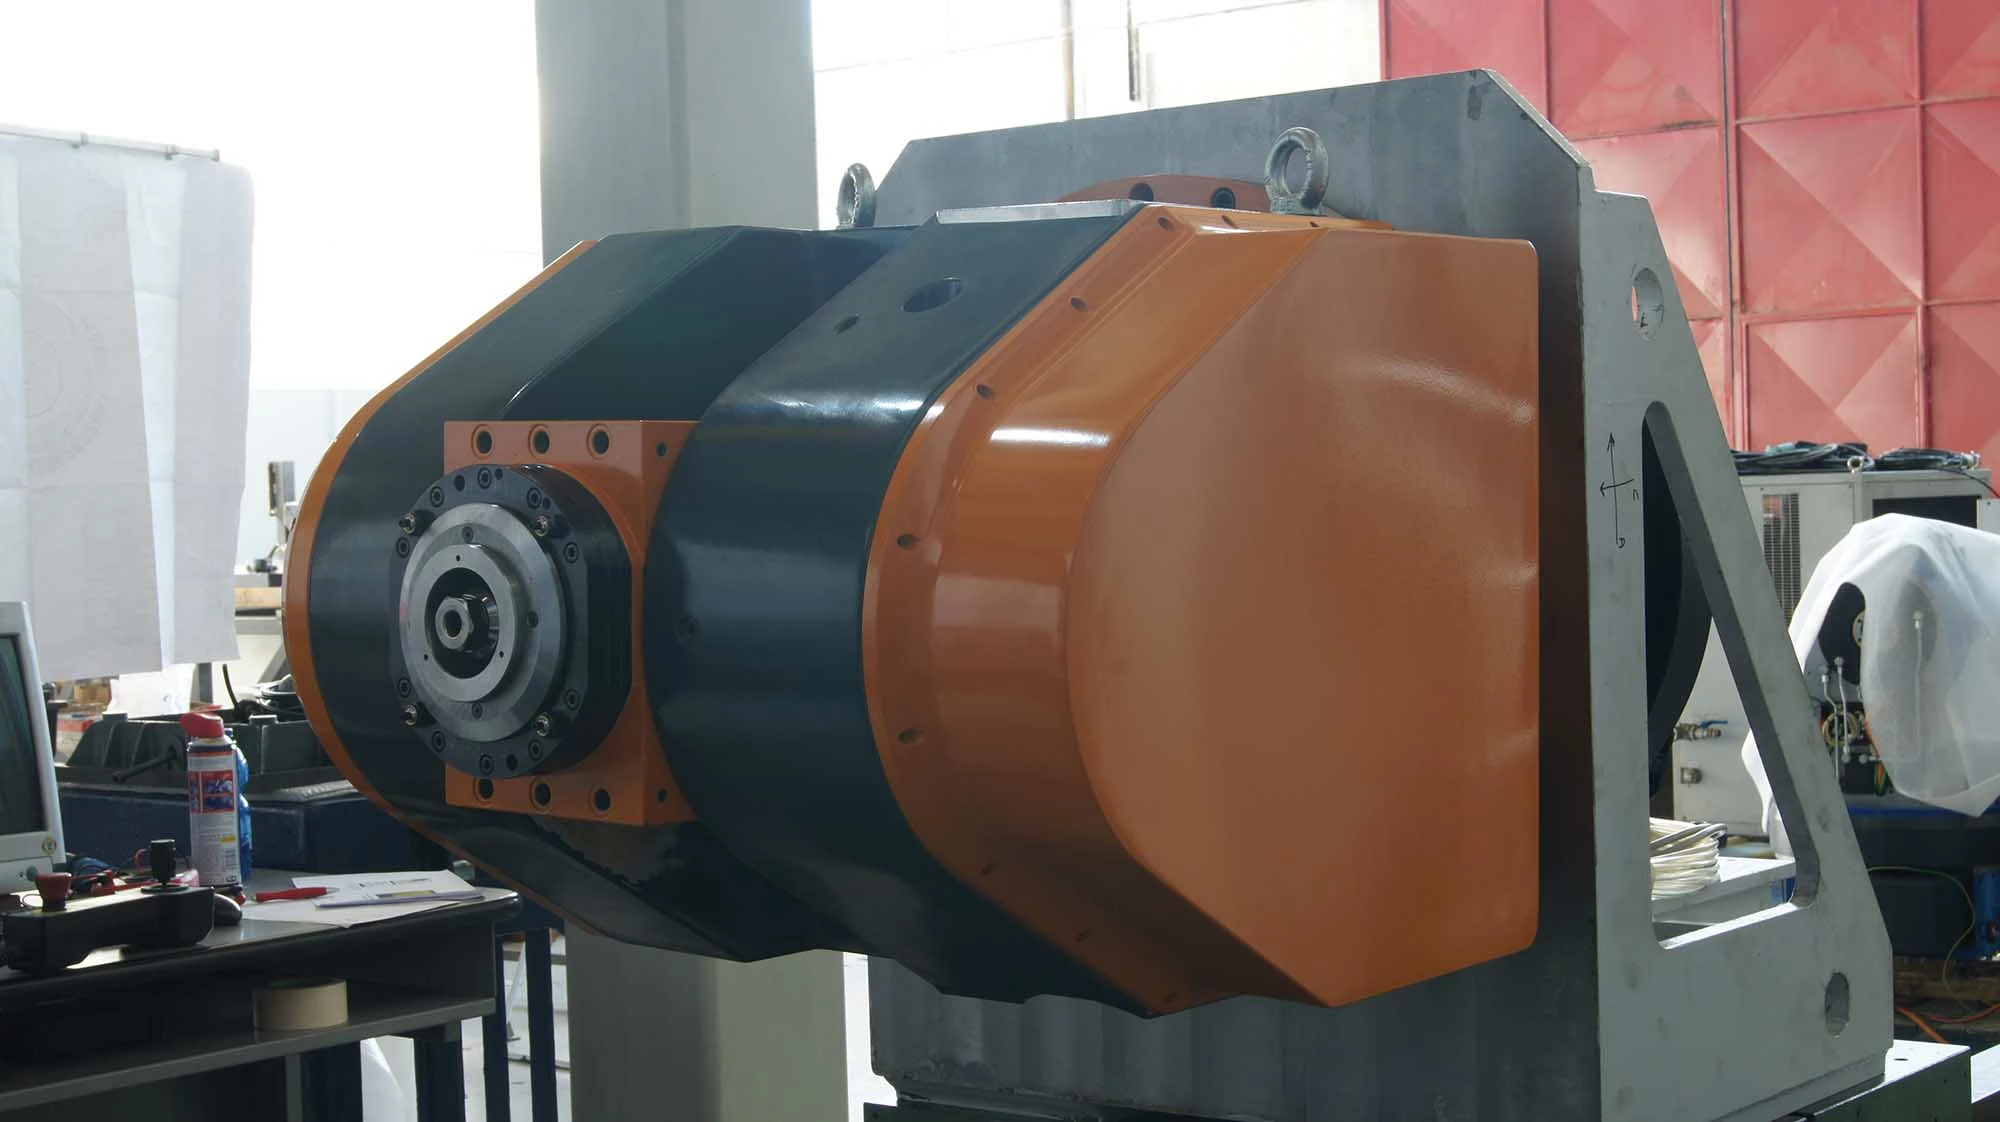
Hi,
In my workshop there is a bad photographic contour. The high glass wall causes me some trouble.
this is the example:
There is a sort of white for into this milling head.
what should I do?
The camera raw filter is good for this.
Hold down the alt key whilst moving the black slider to the left so that you just get the start of black clipping in very dark areas. Increase the contrast and clarity and finally in the fx tab move the de-haze slider to the right slightly
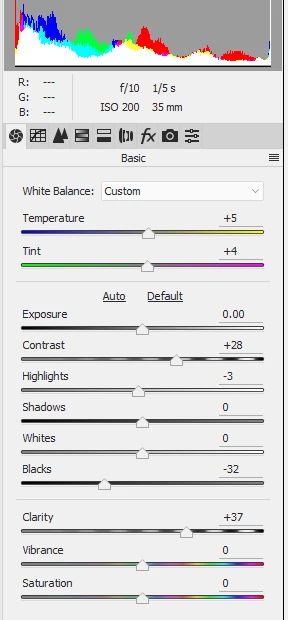
The impact of the flare was worse at the top of the machine than the bottom so a bit more dehaze on a local brush helped
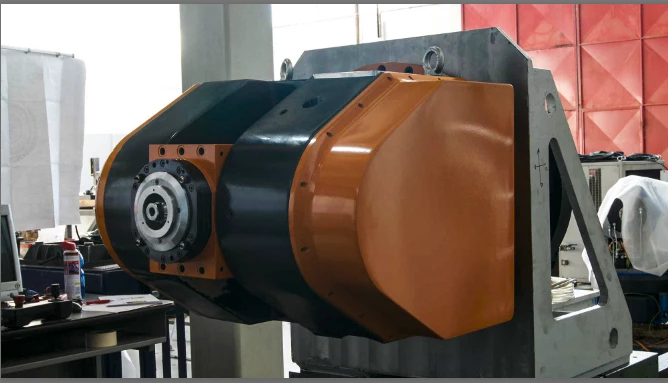
Dave
Already have an account? Login
Enter your E-mail address. We'll send you an e-mail with instructions to reset your password.