• Global community
    • Language:
      • Deutsch
      • English
      • Español
      • Français
      • Português
  • 日本語コミュニティ
    Dedicated community for Japanese speakers
  • 한국 커뮤니티
    Dedicated community for Korean speakers
Exit
1

Layer mask leaving faint ghost

Explorer ,
Sep 28, 2019 Sep 28, 2019

Copy link to clipboard

Copied

I'm using PS CC.  My layer mask is leaving a faint ghost of the background of the image I am extracting.  I have to go back and erase the ghost...so double the work.  My brush color is black.  My brush opacity is 100%.  My layer density is 100%.  What am I overlooking?

Views

11.6K

Translate

Translate

Report

Report
Community guidelines
Be kind and respectful, give credit to the original source of content, and search for duplicates before posting. Learn more
community guidelines

correct answers 1 Correct answer

Explorer , Sep 30, 2019 Sep 30, 2019
I think I found my problem. In the Properties panel, under Select and Mask, the transparency setting was set to 20%. It seems to be clean now.

Votes

Translate

Translate
Adobe
Community Expert ,
Sep 28, 2019 Sep 28, 2019

Copy link to clipboard

Copied

Can you describe the process you are using to 'extract' the image and make the mask? 

It would be helpful to see an example of the ghost you are seeing.  Grab a screen shot with the zoom ratio at 100% and paste to this thread.  Especially describe any selection methods you are using.


Is it a fringe, for instance?

Votes

Translate

Translate

Report

Report
Community guidelines
Be kind and respectful, give credit to the original source of content, and search for duplicates before posting. Learn more
community guidelines
Explorer ,
Sep 29, 2019 Sep 29, 2019

Copy link to clipboard

Copied

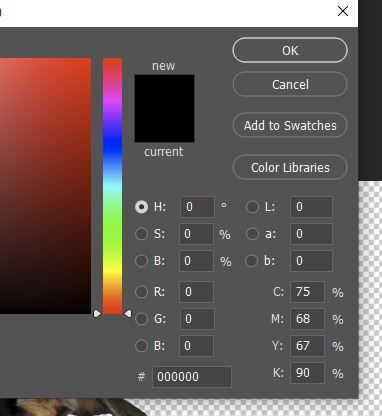
My process is to bring up my image and apply a layer mask. I use the hard round brush (with black setting) to mask around the image. When it's complete and I'm satisfied with the result, I apply the layer mask. Per Dave's comment below, I checked my "black" setting and it WAS at 060606 so I thought that was the problem...I didn't have true black...but once I changed the settings to 00000 as suggested, it still didn't remove the ghost. Hope you can see what I've overlooked. I upgraded from CS6 about a month ago and always used my mask for extracting...and never had a ghost until CC...but I'm sure it's something I've done and don't know how to correct.

Votes

Translate

Translate

Report

Report
Community guidelines
Be kind and respectful, give credit to the original source of content, and search for duplicates before posting. Learn more
community guidelines
Explorer ,
Sep 29, 2019 Sep 29, 2019

Copy link to clipboard

Copied

I have screen shots but I don't see how to load them here....

Votes

Translate

Translate

Report

Report
Community guidelines
Be kind and respectful, give credit to the original source of content, and search for duplicates before posting. Learn more
community guidelines
Community Expert ,
Sep 29, 2019 Sep 29, 2019

Copy link to clipboard

Copied

Hi. To attach screenshots, use the reply button next to your first post. You will then see a button to attach images. Dave

Votes

Translate

Translate

Report

Report
Community guidelines
Be kind and respectful, give credit to the original source of content, and search for duplicates before posting. Learn more
community guidelines
Community Expert ,
Sep 29, 2019 Sep 29, 2019

Copy link to clipboard

Copied

Hi

Although you say your brush color is black, make sure it is actually RGB 0,0,0.  It is easy to have say 10,10, 10 and miss the difference, but it will show through when used as a mask.

Dave

Votes

Translate

Translate

Report

Report
Community guidelines
Be kind and respectful, give credit to the original source of content, and search for duplicates before posting. Learn more
community guidelines
Community Beginner ,
Jul 18, 2022 Jul 18, 2022

Copy link to clipboard

Copied

This solved my problem 100%! I assumed it was pure black I was using!

Votes

Translate

Translate

Report

Report
Community guidelines
Be kind and respectful, give credit to the original source of content, and search for duplicates before posting. Learn more
community guidelines
New Here ,
Mar 07, 2023 Mar 07, 2023

Copy link to clipboard

Copied

This worked, really this skipped my mind to use default, but It's weird since whenever we mask the default colors goes to black and white which is 000000 and ffffff.

But thanks a lot!

Votes

Translate

Translate

Report

Report
Community guidelines
Be kind and respectful, give credit to the original source of content, and search for duplicates before posting. Learn more
community guidelines
New Here ,
Dec 05, 2023 Dec 05, 2023

Copy link to clipboard

Copied

LATEST

This did it for me!  I had a couple of letter values in there w/ the 000's!  Thank you!

Votes

Translate

Translate

Report

Report
Community guidelines
Be kind and respectful, give credit to the original source of content, and search for duplicates before posting. Learn more
community guidelines
Community Expert ,
Sep 29, 2019 Sep 29, 2019

Copy link to clipboard

Copied

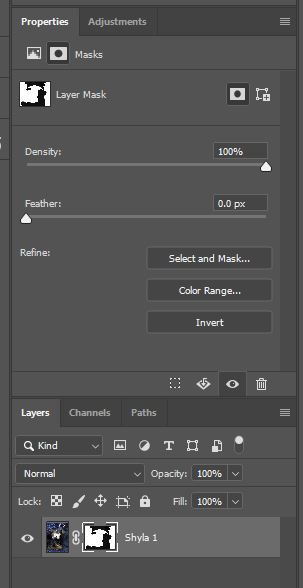
Also, make sure that the density setting in the properties panel for the layer mask is at 100%.

Votes

Translate

Translate

Report

Report
Community guidelines
Be kind and respectful, give credit to the original source of content, and search for duplicates before posting. Learn more
community guidelines
Explorer ,
Sep 29, 2019 Sep 29, 2019

Copy link to clipboard

Copied

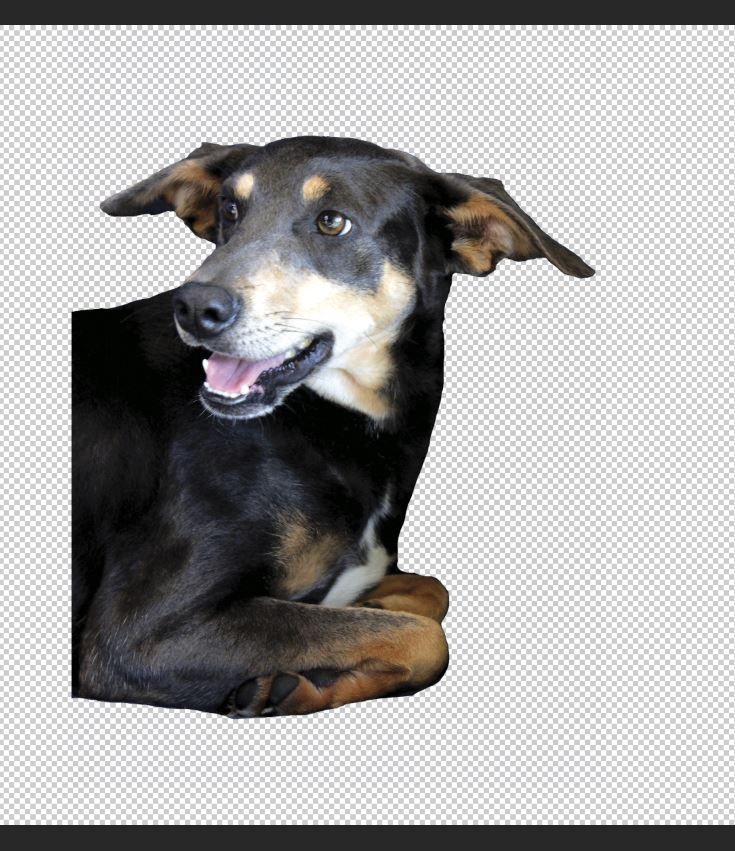
color settingscolor settingslayer mask settingslayer mask settingsopasity settingsopasity settingsvery faint shadow (rectangle) running top to bottom of dog's body.very faint shadow (rectangle) running top to bottom of dog's body.

Votes

Translate

Translate

Report

Report
Community guidelines
Be kind and respectful, give credit to the original source of content, and search for duplicates before posting. Learn more
community guidelines
Explorer ,
Sep 30, 2019 Sep 30, 2019

Copy link to clipboard

Copied

I think I found my problem. In the Properties panel, under Select and Mask, the transparency setting was set to 20%. It seems to be clean now.

Votes

Translate

Translate

Report

Report
Community guidelines
Be kind and respectful, give credit to the original source of content, and search for duplicates before posting. Learn more
community guidelines
Community Expert ,
Sep 30, 2019 Sep 30, 2019

Copy link to clipboard

Copied

The transparency setting in Select and Mask is used only for the preview whilst in the select and mask workspace. It does not affect the actual mask at all.

Votes

Translate

Translate

Report

Report
Community guidelines
Be kind and respectful, give credit to the original source of content, and search for duplicates before posting. Learn more
community guidelines
Explorer ,
Sep 30, 2019 Sep 30, 2019

Copy link to clipboard

Copied

There is so much more I need to learn. 🙂 I haven't even looked into those settings before. I have no idea why I was getting that ghost image, but it's gone now. I'm just grateful for that.

Votes

Translate

Translate

Report

Report
Community guidelines
Be kind and respectful, give credit to the original source of content, and search for duplicates before posting. Learn more
community guidelines
Community Expert ,
Sep 30, 2019 Sep 30, 2019

Copy link to clipboard

Copied

There are plenty of folk here to help you. You may want to take a look at this link: https://helpx.adobe.com/photoshop/using/select-mask.html


Dave

Votes

Translate

Translate

Report

Report
Community guidelines
Be kind and respectful, give credit to the original source of content, and search for duplicates before posting. Learn more
community guidelines
Explorer ,
Sep 30, 2019 Sep 30, 2019

Copy link to clipboard

Copied

Thanks so much...I'll do that. 🙂

Votes

Translate

Translate

Report

Report
Community guidelines
Be kind and respectful, give credit to the original source of content, and search for duplicates before posting. Learn more
community guidelines
New Here ,
Jun 23, 2022 Jun 23, 2022

Copy link to clipboard

Copied

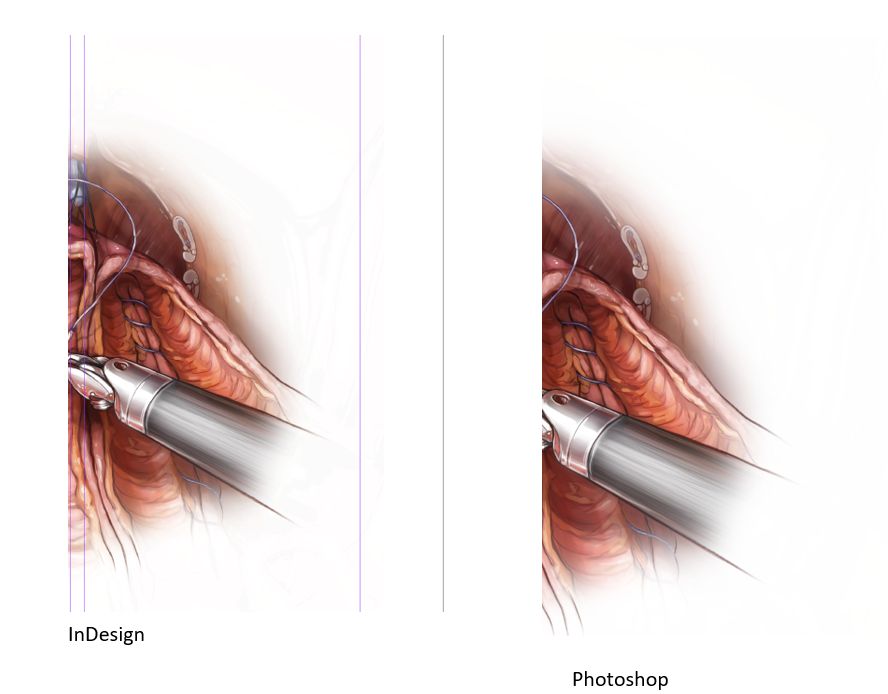
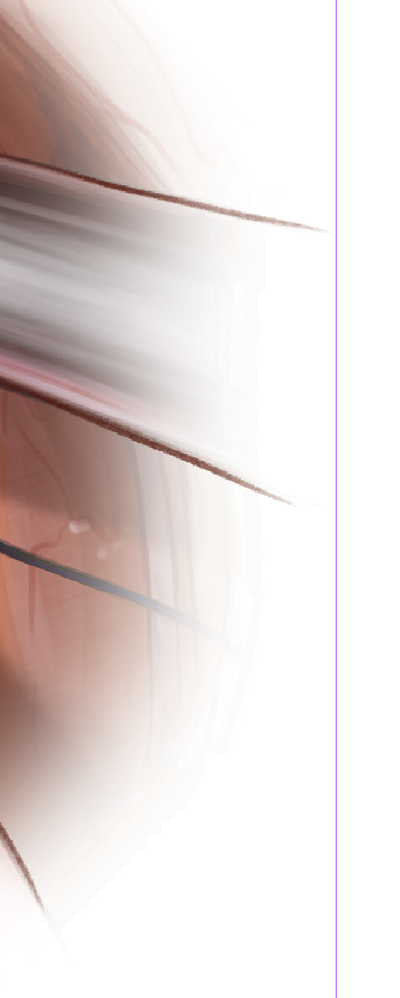
I'm having this issue now, but nothing I've tried is fixing it. I can improve it, but I'm trying to do a feathered fade of an illustration, and there's always a harsh jagged line that's apparent. It doesn't show up in photoshop, but it does in indesign and when printed. This is any color space too, it's less noticeable in RGB than in CMYK though. I have no clue what to do, I've been making faded masks in this same way for years and I've never had this issue before....

image (1).pngimage.png

Votes

Translate

Translate

Report

Report
Community guidelines
Be kind and respectful, give credit to the original source of content, and search for duplicates before posting. Learn more
community guidelines
Community Beginner ,
Aug 01, 2023 Aug 01, 2023

Copy link to clipboard

Copied

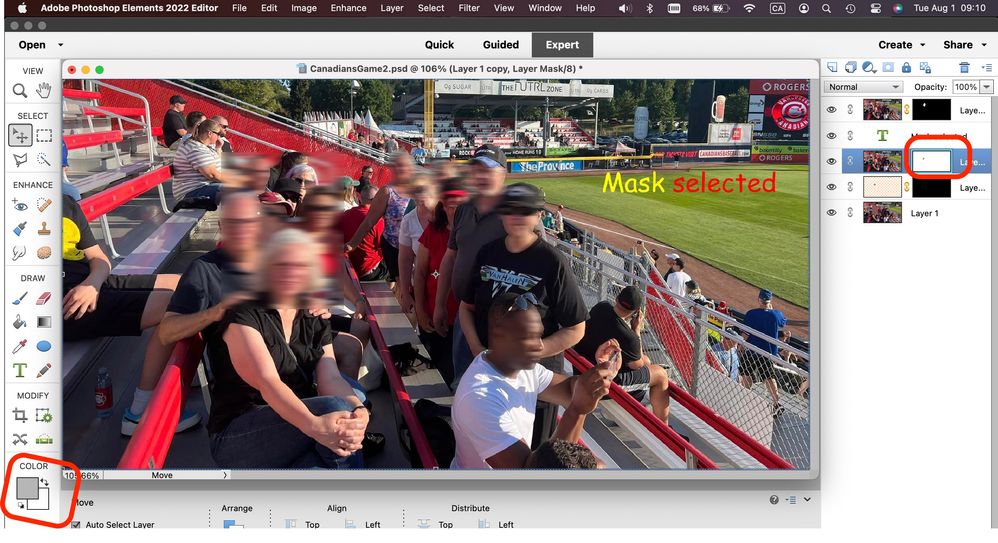
Photoshop Elements 2022... same issue, but a note that it's sneaky. On multiple occasions I made sure to set the color to all zeros black. But, if you don't have both the mask, and the paintbrush tool selected, the change doesn't take. I'm fairly certain that other tools are not so picky. The current foreground/background color settings (bottom left in my display) are different between when the image is selected and when the Mask is selected. Also, when a Mask is selected, the change affects all of the masks. Also, chosing a color when a mask is selected is always converted to greyscale.mask.jpg

Votes

Translate

Translate

Report

Report
Community guidelines
Be kind and respectful, give credit to the original source of content, and search for duplicates before posting. Learn more
community guidelines