Known Participant
December 18, 2016
Question

Layer Matting defringe artifacts

  • December 18, 2016
  • 4 replies
  • 7095 views

I have a selection made by hand using the brush tool in Quick Mask Mode. I used a small bush size, about 5 pixels in diameter.

When I copy the selection and paste it as a new layer over a different background, there is a white fringe, about a pixel or so wide.

This is to be expected because of the way the selection was made.

However, when I try to remove the fringe using Layer->Matting->Defringe with a 1 pixel width, I get some strange looking artifacts.

They appear as vertical streaks a few pixels in height.

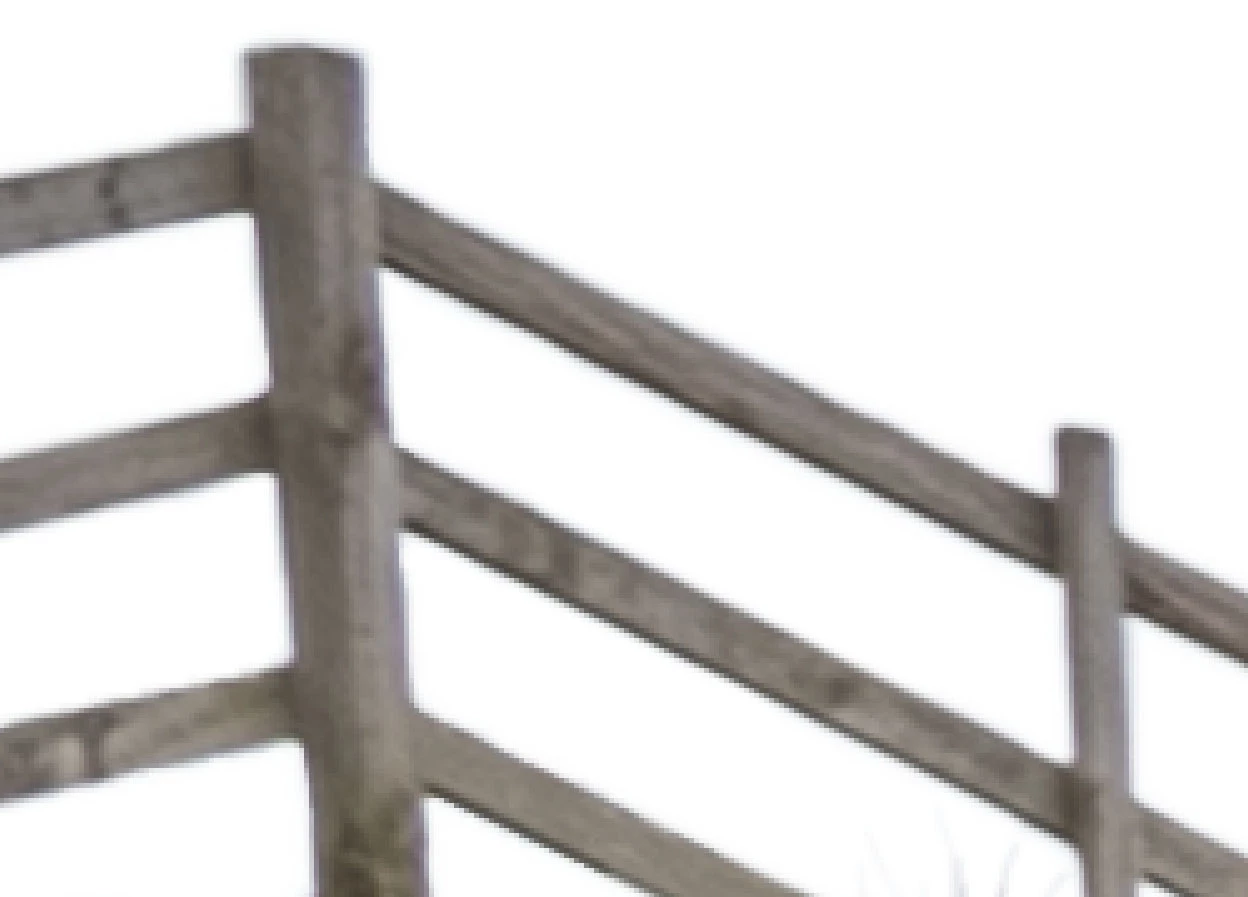
Here is a small section of the image before defringe (over a plain white background)

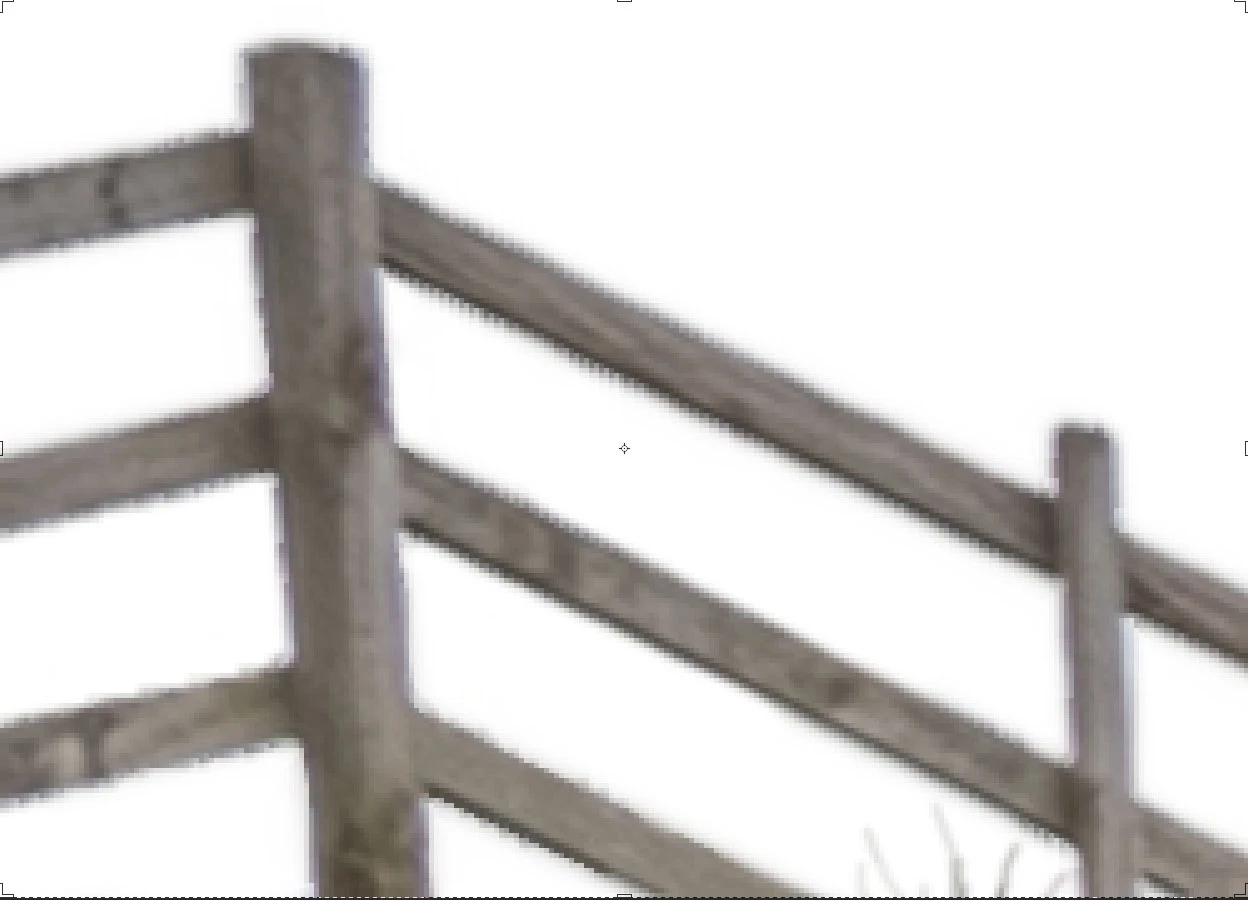
Here is the image after a 1 pixel defringe

Can anyone explain what might be going on here?

This topic has been closed for replies.

4 replies

Richp56
Participating Frequently
September 7, 2021

There's no doubt about it IMO, your image resolution is too low. If this image is a 'zoomed-in' part of a larger image, then it still means your overall image resolution is too low. The easiest thing to do is to go to your "Image" dropdown list and select Resize. You'll see a "DPI" setting there and it's likely to be something like 72 or 96.

Frankly, I never work with resolutions lower than 250 but then, I have a custom-built desktop with some very powerful hardware. In addition, most of my images rarely finish at a higher dimension than 23" x 84". I certainly can understand that not all computers carry that kind of muscle and of course, the higher the resolution of your image, the more processing power it requires.

Therefore, what you may want to do is to dial the resolution up to 250 or 300 DPI but decrease the image's size to 1/2 or even 1/3rd of the intended final size. For example; If your image's final dimensions want to be 20" x 30", reduce it to 10" x 15" and of course, maintain a 250 or 300 DPI.

At the reduced size, but with a higher resolution, your Defringe application (and any other changes) will be applied correctly. If you get a "lag" or the display freezes every few minutes, reduce the size to one third of the final target size. When you're completely through with the editing, resize the image to 20" x 30". If the higher resolution change that you made earlier must be lower in your final image, first resize it to 20 x 30 (for the example I've used) but don't change the resolution yet, just alter the dimensions.

Then after PS has completed the dimension change, go back to the Resize options and reduce only the resolution as a separate step. By doing it that way, you can avoid the possibility of some distortion.

Occasionally, I've experienced instances of small distortions in the detail when I tried to make the reduction in resolution while increasing the dimensions all in one step. It hasn't happened often and I won't deny the possibility of other reasons for that result, but when I made the changes as two separate steps, it always seemed to work out.
FWIW,
Rich

D Fosse
Community Expert
Community Expert
September 7, 2021
quote

dial the resolution up to 250 or 300 DPI but decrease the image's size to 1/2 or even 1/3rd of the intended final size


By @Richp56


That actually decreases the resolution even further.


In Photoshop, resolution is just total number of pixels. Nothing else, just pixels high by pixels wide.


The ppi number, pixels per inch, is irrelevant here. That's strictly a print parameter. Pixels per inch determines the physical print size, how big those pixels will be on paper.


It all becomes much clearer if you read ppi literally: pixels per inch. It means exactly what it says: so many pixels spread out over so many inches of paper.

D Fosse
Community Expert
Community Expert
September 7, 2021

Actually, I think I understand what you're trying to say or mean, (I think). Frankly I don't even use PS's resizing options. I use a fractal logarithm that’s much more precise.


However, in my reply I said “DPI”, not “PPI” (which is definitely a different reference), and I think that’s where you may have misread and then misunderstood.


I’ve been doing enlargement and photo restoration for about 14+ years as a sideline service. I stopped about 2 years ago.


I have several printers in my home. One medium format and one large format printer which I use the most. I don’t have a certification as a print master, but I took a one-year printer apprentice course in 2008, (final grade was high).


We covered the DPI/PPI factors in detail. I can assure you that you will improve the resolution of the image by increasing the DPI without increasing the dimensions. If you increase the dimensions w/o increasing the DPI, it will still have the same appearance in a print, but only as you move farther from the image.


A bill board that’s 20 feet long and 15 feet high and with a 90 DPI printed resolution, will look terrible up close, but from 150 feet away, it’ll look great.


However, decreasing the dimensions w/o decreasing the DPI will still effectively increase the performance and processing of your computer even though the image resolution remained the same.


That’s simply because the size of the image has less surface area for the computer to work with.


i.e.: If image was 10” by 8” and 72DPI and you used PS Resize option to reduce the dimensions to 5” x 4” (but maintained the DPI at 72), the image will appear sharper, (depending on several other variables), but the load on the computer’s GPU and CPU will definitely decrease.


This was what I was trying to get across to the topic poster. In addition, they could reduce the DPI to get better performance, but that’s what was causing the Defringe to act the way it did.


That’s why raising the DPI and decreasing the dimensions will make it easier for the computer to work with, but only to a limit.


I hope that may clear up what I was saying.

Rich


Dots per inch is a printer property, how many ink dots per inch of paper. It has no relation to the image, or to Photoshop. An image pixel can be printed with any number of ink dots, depending on the printer.


In Photoshop, pixels per inch is the relevant concept. Ppi is the correct term.


And again, in Photoshop, the image is just pixels. The ppi number is not a native property of the file. It is used to translate from pixels to physical sizes where needed (such as print, font sizes, smart object/vector object sizes and so on).

davescm
Community Expert
Community Expert
December 19, 2016

Barbara and macpawel have given you good suggestions on how to use the defringe command.

However I will offer you an alternative. (I almost never use defringe).

Instead place a new empty layer above your cutout. Set this to clip to the cutout layer (Alt click on the boundary in the layers panel)  Depending on the fringe type set the blending mode as follows:

To remove a colour fringe. Set the layer blending mode to colour and then use a soft brush loaded with the same colour as your wanted image edge and opacity around 20% and brush on. You will need to load the brush with new colours as you work around the mask.

To remove a bright edge (against a dark cut out). Do the same as above but this time set the layer blending mode to Luminosity.

This method is far more controllable and gives better results than a single click method.

I hope that helps

Dave

brian_mkAuthor
Known Participant
December 19, 2016

My original question was really about trying to understand how layer defringe operates rather than finding a better way to select an area of image. (I have since achieved what I wanted using Select & Mask without using defringe)

I am still baffled about how defringe works, so I carried out some experiments. The results have just confused me even more.

I started by creating a 100 pixel x 100 pixel gradation, expanded the canvas and created a selection using the magic wand tool. I expanded the selection by 2 pixels and feathered it by 2 pixels. This simulates what I was doing originally with a real image.

Thus:-

I then copied the selection and pasted it as a new layer over a blue background to make it easy to see the fringe:-

There is an obvious white fringe around the top and bottom of the new layer.

Maybe I am being stupid, but it seems reasonable to expect that layer->defringe with a width of 2pixels would remove most of the white fringe.

Here is what actually happens:-

Duh! Explain?

barbara_a7746676
Community Expert
Community Expert
December 19, 2016

The way defringe operates is that it looks inside the pixels along the edges. Then it pushes out those edge pixels to cover up the white fringe. That is why defringe is good for a small amount of fringe along the edge. If the fringe is large, the results can look rather strange.

macpawel
Participating Frequently
December 19, 2016

Defring command just "paint" over unwanted parts of your image. This way you can add some noise to your image instead improve wuality add some extra artiffacts. Maybe before cut this object into new layer try tu use Select&Mask command and then Shift Edge, Smootch, radius sliders?

Pawel

barbara_a7746676
Community Expert
Community Expert
December 19, 2016

My guess is that the problem is happening because the image is very low resolution.

Try this instead:

Select the pixels on the layer. You can Ctrl (Win) or Command (Mac) click on the layer thumbnail to quickly load a selection of the pixels.

Add a layer mask.

With the mask active, choose Filter > Other > Minimum, and put in a 1 pixel radius (or higher radius -- you may need a higher number than it appears). OK.

If your image is low res, it will look pixelated. To compensate, with the mask active, Filter > Blur > Gaussian Blur with a low number.