- Home
- Photoshop ecosystem
- Discussions
- lens blur not working for background
- lens blur not working for background
Copy link to clipboard
Copied
I want to blur the background in an image. I watched Jesus Ramirez of the PS Training Channel on youtube to figure out how to do this. I followed these steps:
I selected the foreground image which should be in focus.
I created a solid color adjustment layer in black.
I created a mask using a gradient.
I dragged the gradient fill below the color fill layer.
I put these 2 layers in a group.
I clicked on channels and duped one and dragged it down to the new channel icon and gave it a name.
I clicked on RGB, then clicked on layers.
I disabled the group.
I duped the layer I am working on so as not to touch the original.
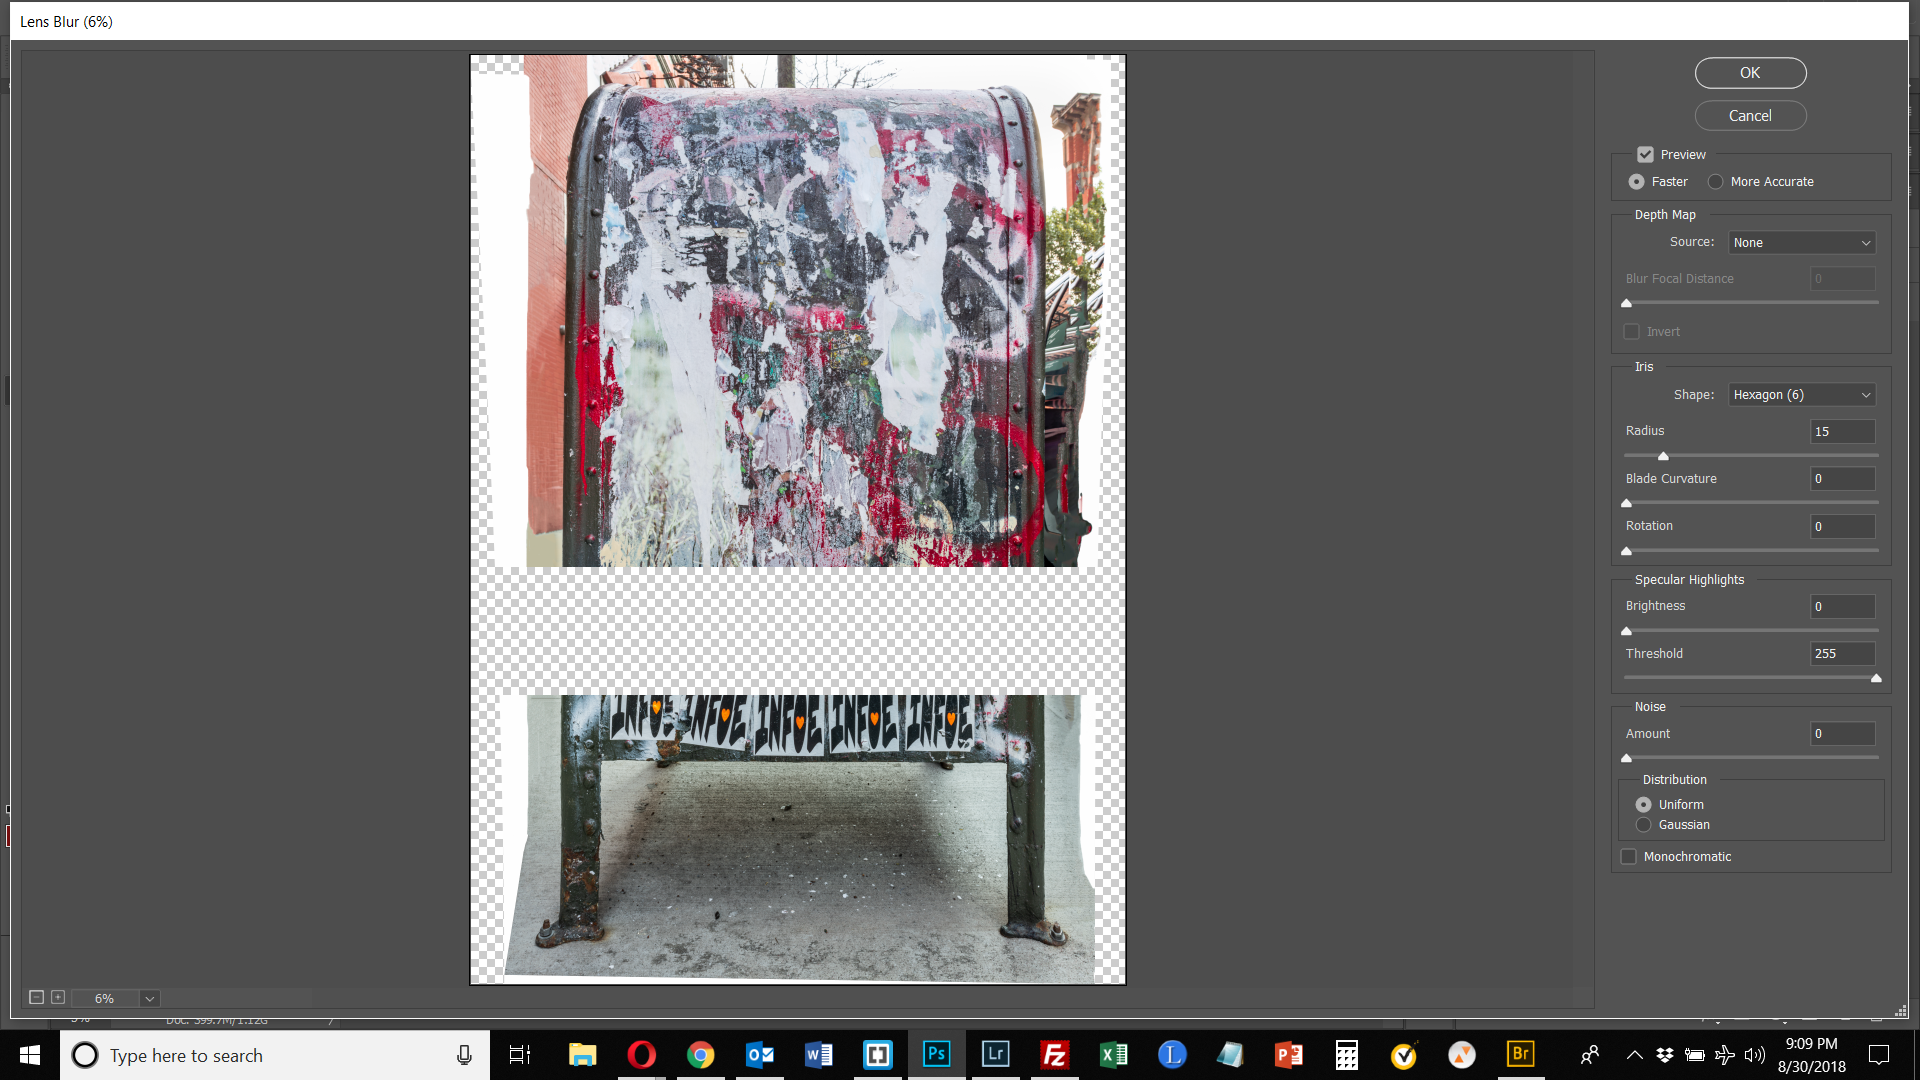
I wen to Filter > Blur > Lens Blur. THIS IS WHERE I RAN INTO PROBLEMS.
As can be seen, there is an area of the image that is checkerboard. This image was created using the Panorama tool and assembled from 2 images. The area shown is roughly where the two images intersected. I output the panorama to a DNG file once merged. I began the exercise with a single layer, merged from these 2 layers. Why is this happening?
Secondly, the background is not blurred at all. Is that because of the problem with the checkerboard?
Beneath the 1st image is the image shown before applying Lens Blur. Any help would be appreciated. Thank you.

 1 Correct answer
I think one of the biggest reasons that your're not seeing the blur, other than your mask was off, is that your file is so large. Lens Blur doesn't really blur that well on large files - one of my main gripes about the filter. You really need to run it several times on large files. It's a great filter though, as it's the only blur filter that can blur something up to a selection or mask line, and not pull in pixels from neighboring areas. Only other way to do this is to content away fill in the
...Explore related tutorials & articles
Copy link to clipboard
Copied
Look at my above sample and the way the layers are in the layer panel. The layer background is the original. Background copy is the layer that I moved the bg pixels behind the dog, you can see the edges of the dog are all messed up. Background copy 2 is my blurred layer, and is a copy of background copy. I made a selection of the dog in the top layer and reversed the selection, then used gaussian blur. This just blurs the bg area, but the blur pulls in neighboring pixels from where the dog would be. You have a layer mask with the shape of the mailbox. You just want to us the selection to blur that layer. Once the layer is blurred, you van add a layer mask, then use the gradient tool to have the age background get more blurry towards the top of the image. My last screen shot shows the three layers that are needed to put the image together.: the background layer for the sharp bg, the background copy 2 for the blurred bg, and finally the dog.
Copy link to clipboard
Copied
It seems like you made these screen shots after you had completed the process, so I can't see the order of how things were done as they were being done (the steps in which layers were created). This would have helped me understand the process better. Sorry, but I have so little experience with layers and masks. SO for example, you start with a layer that has a dog and grass in it. Your 2nd screen shot looks like you have selected the dog and moved it to a blank layer. I really get lost at the next step. You have a copy of the original layer visible - which copy has the dog and grass in it. Was that the next step in the process? You say you cloned pixels [the grass] to go behind the subject" - but those pixels were part of the original layer. Why do you need to clone into a layer that already has the information in it you need? Are you saying you used the clone stamp tool to recopy the grass from the original background layer into its copy? This is totally confusing to me.
Copy link to clipboard
Copied
In my reply with the screen shots I listed the steps, so look at the layer panel and see which layer is visible, and that is the order that I made the layers. Sorry for not being more clear. In the layer where I cloned the grass into the area where the dog was is needed, otherwise the blur will pull in colored pixels from the dog, and you will get a halong effect, which you got on your last screen shot: see how the dark legs blurred into the white pavement? That what you need to avoid by using this method. The lens blur filter doesn't do that, which is why I love it. I made that dupe layer where I cloned the grass, just so I wouldn't destroy the original image on the background layer.
Copy link to clipboard
Copied
Use whatever tool works best for you. There is no standard.
Copy link to clipboard
Copied
Making a video to show. Will post as soon as I get it uploaded to youtube.
Copy link to clipboard
Copied
Here's the video on what I did to create the blur.
Creating a depth of field blur, using gaussian blur - YouTube
Copy link to clipboard
Copied
thank you, Chuck, much clearer now. The only part I have a question about is the clone stamping. I'm more familiar with clone clamping on an area and then applying the stamp to the same layer to copy those pixels. So, alt click for the reference point and then draw in another part of the image. Here, it's more like you are making a selection and copying the selection to another layer. At least that's what it looks like. But maybe you are in one layer, activating the clone stamp, and then applying it in a different layer. I only see the copy of the background layer selected. If I am right, which layer are you in when you define the reference point and which layer are you on as you draw around the dog? Thank you very much.
Copy link to clipboard
Copied
I'm doing all the cloning on the background copy layer. Was used for that.
Copy link to clipboard
Copied
Okay. So are you clicking somewhere in the background copy layer as a reference point - the first step in cloning that I am used to (alt click) - and then painting along the edge of the dog? What is your reference point - somewhere/anywhere in the grass? I missed that step in the video.
Copy link to clipboard
Copied
No, I'm alt clicking in the background copy layer. It's all done on that layer. Just taking a lot of samples around the dog, in the grass section to add green grass pixels inside of the dog selection.
Copy link to clipboard
Copied
Got it, thanks. Does this look right? Here is right after creating the gaussian blur.
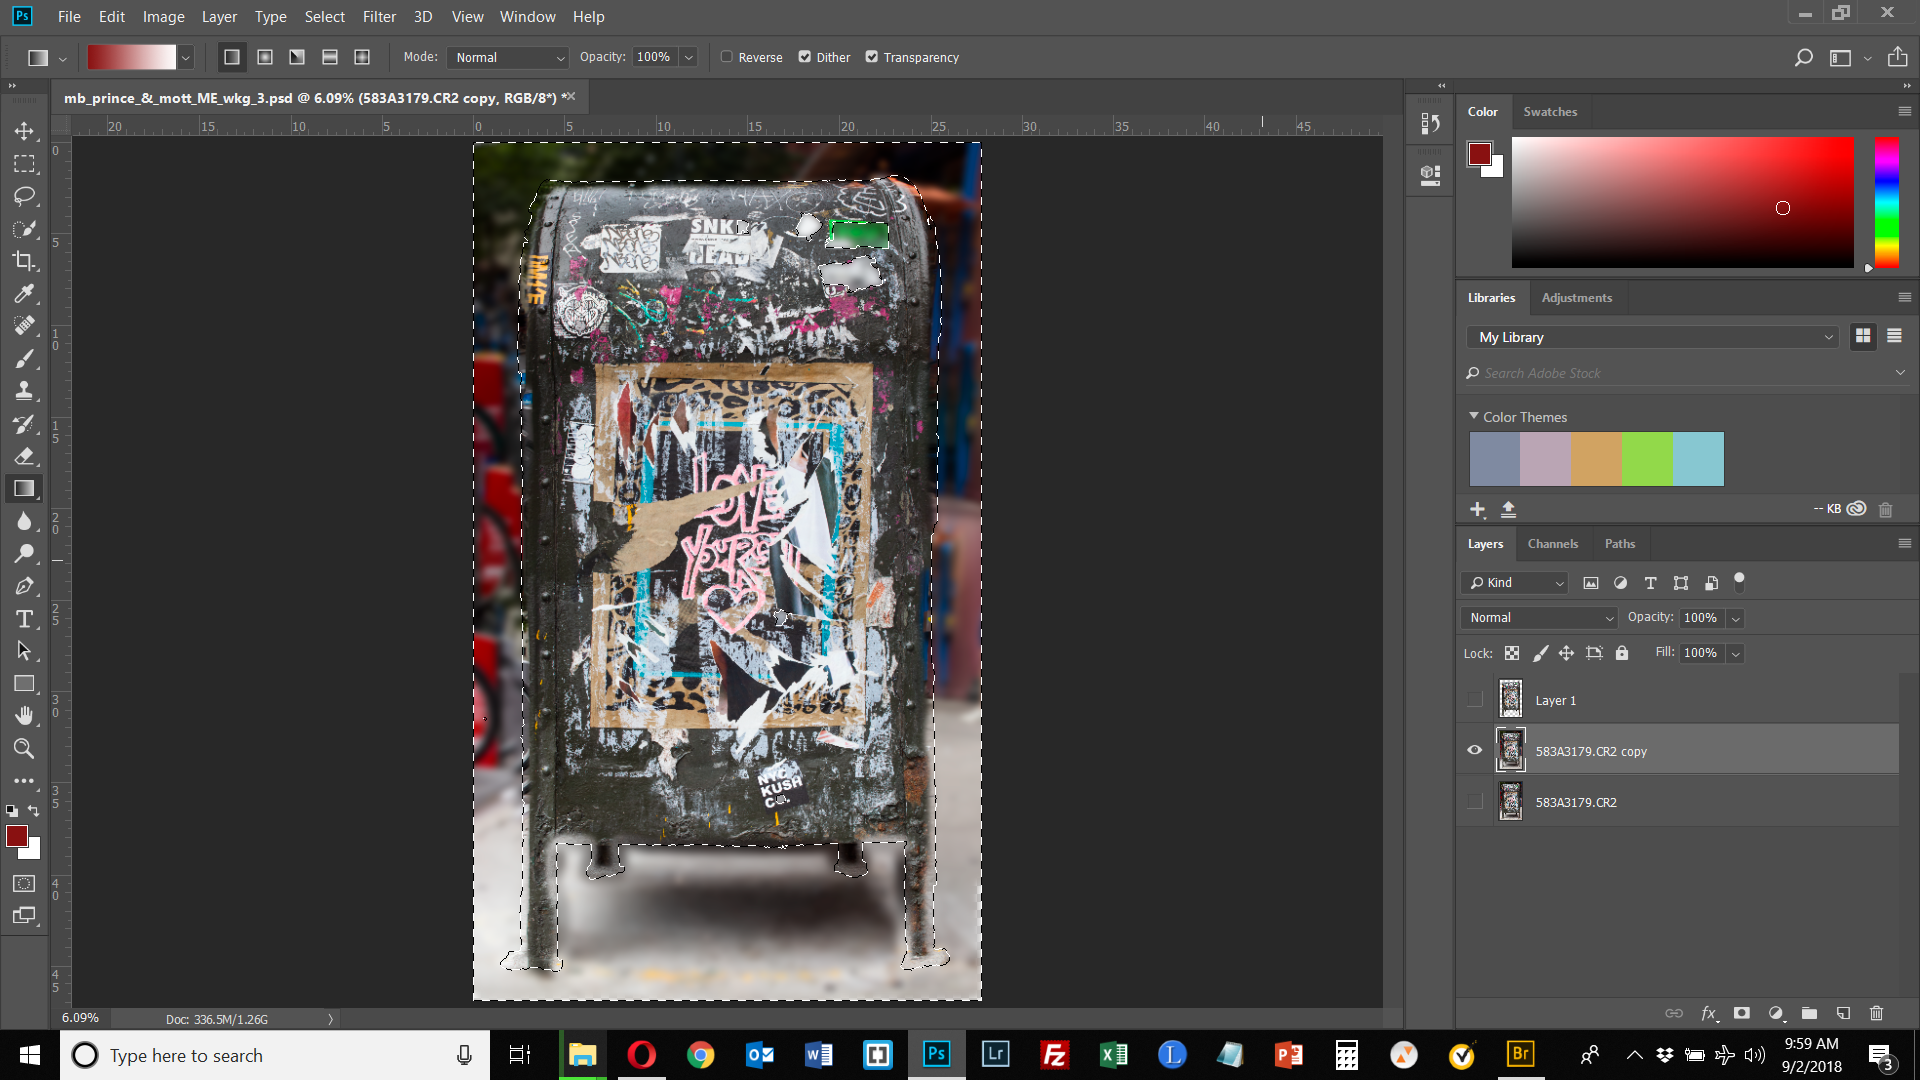
This is after deselecting and turning on the mailbox.
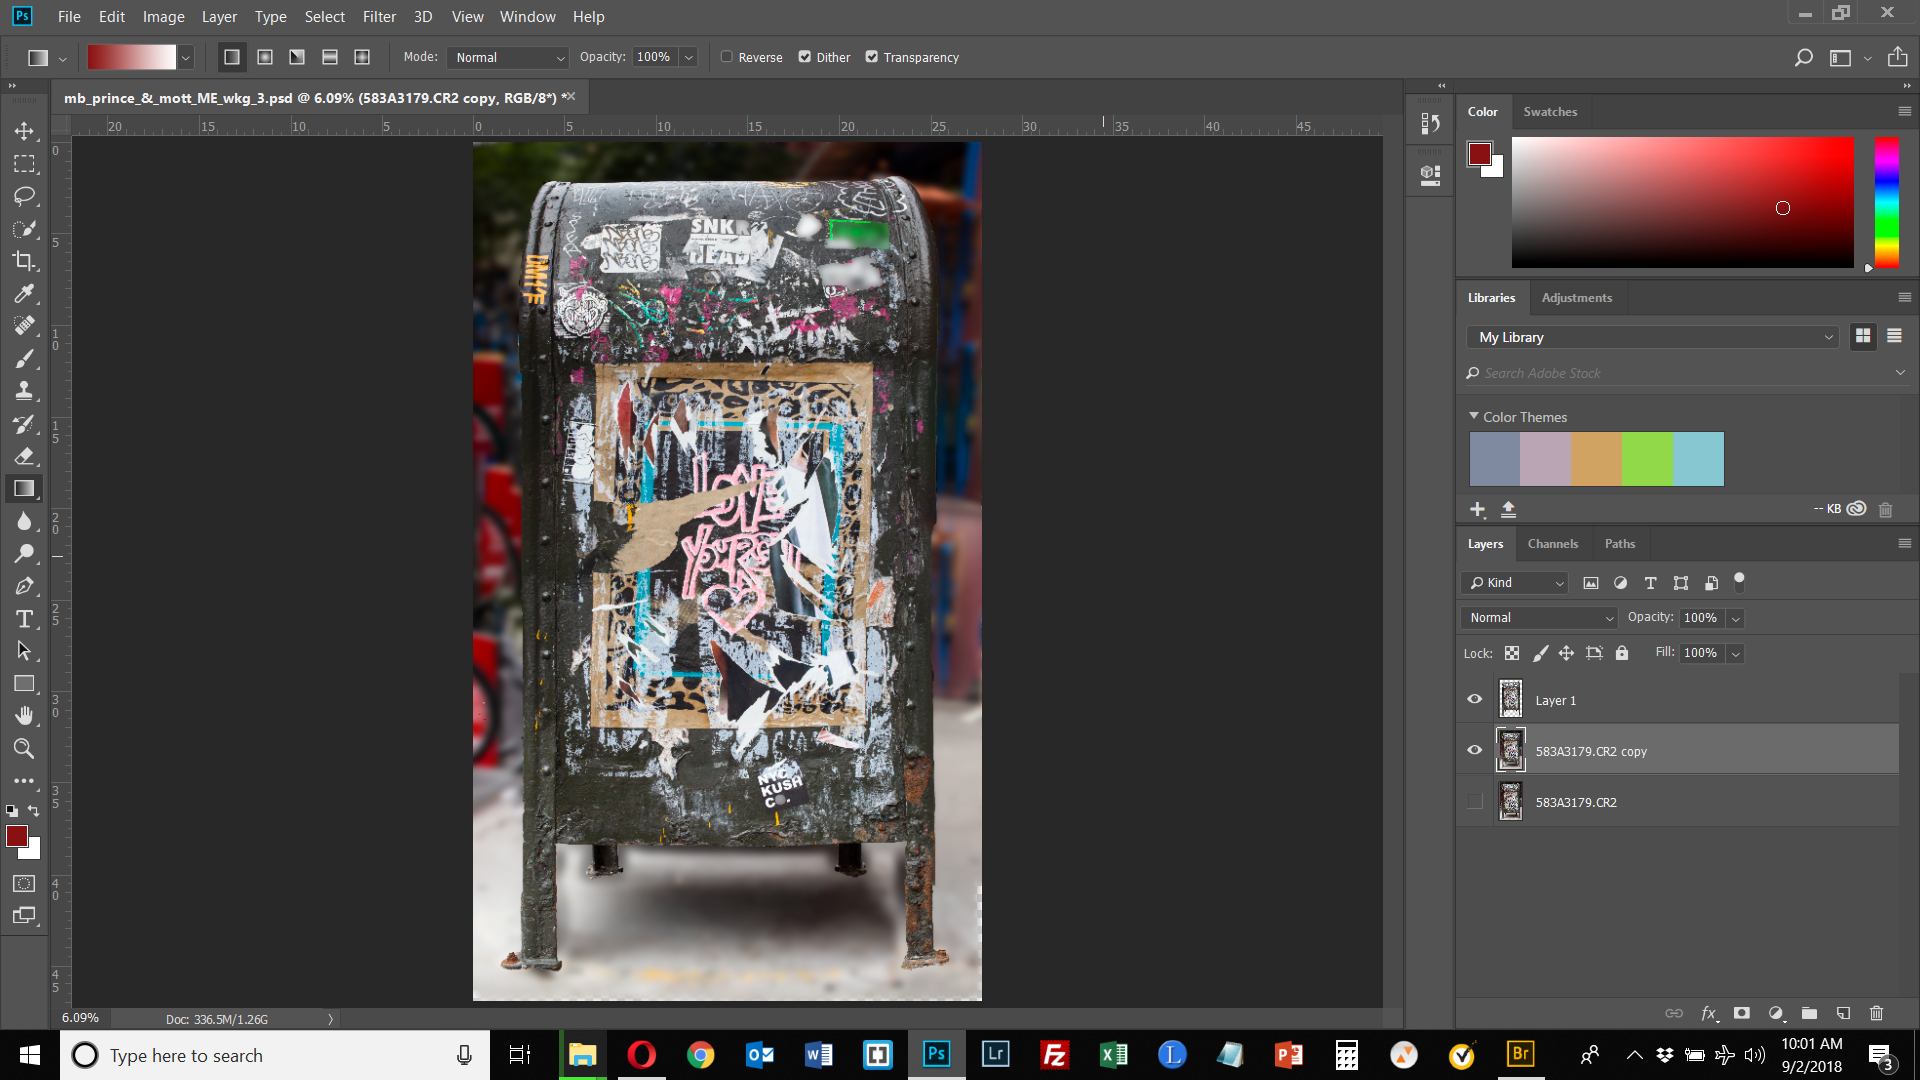
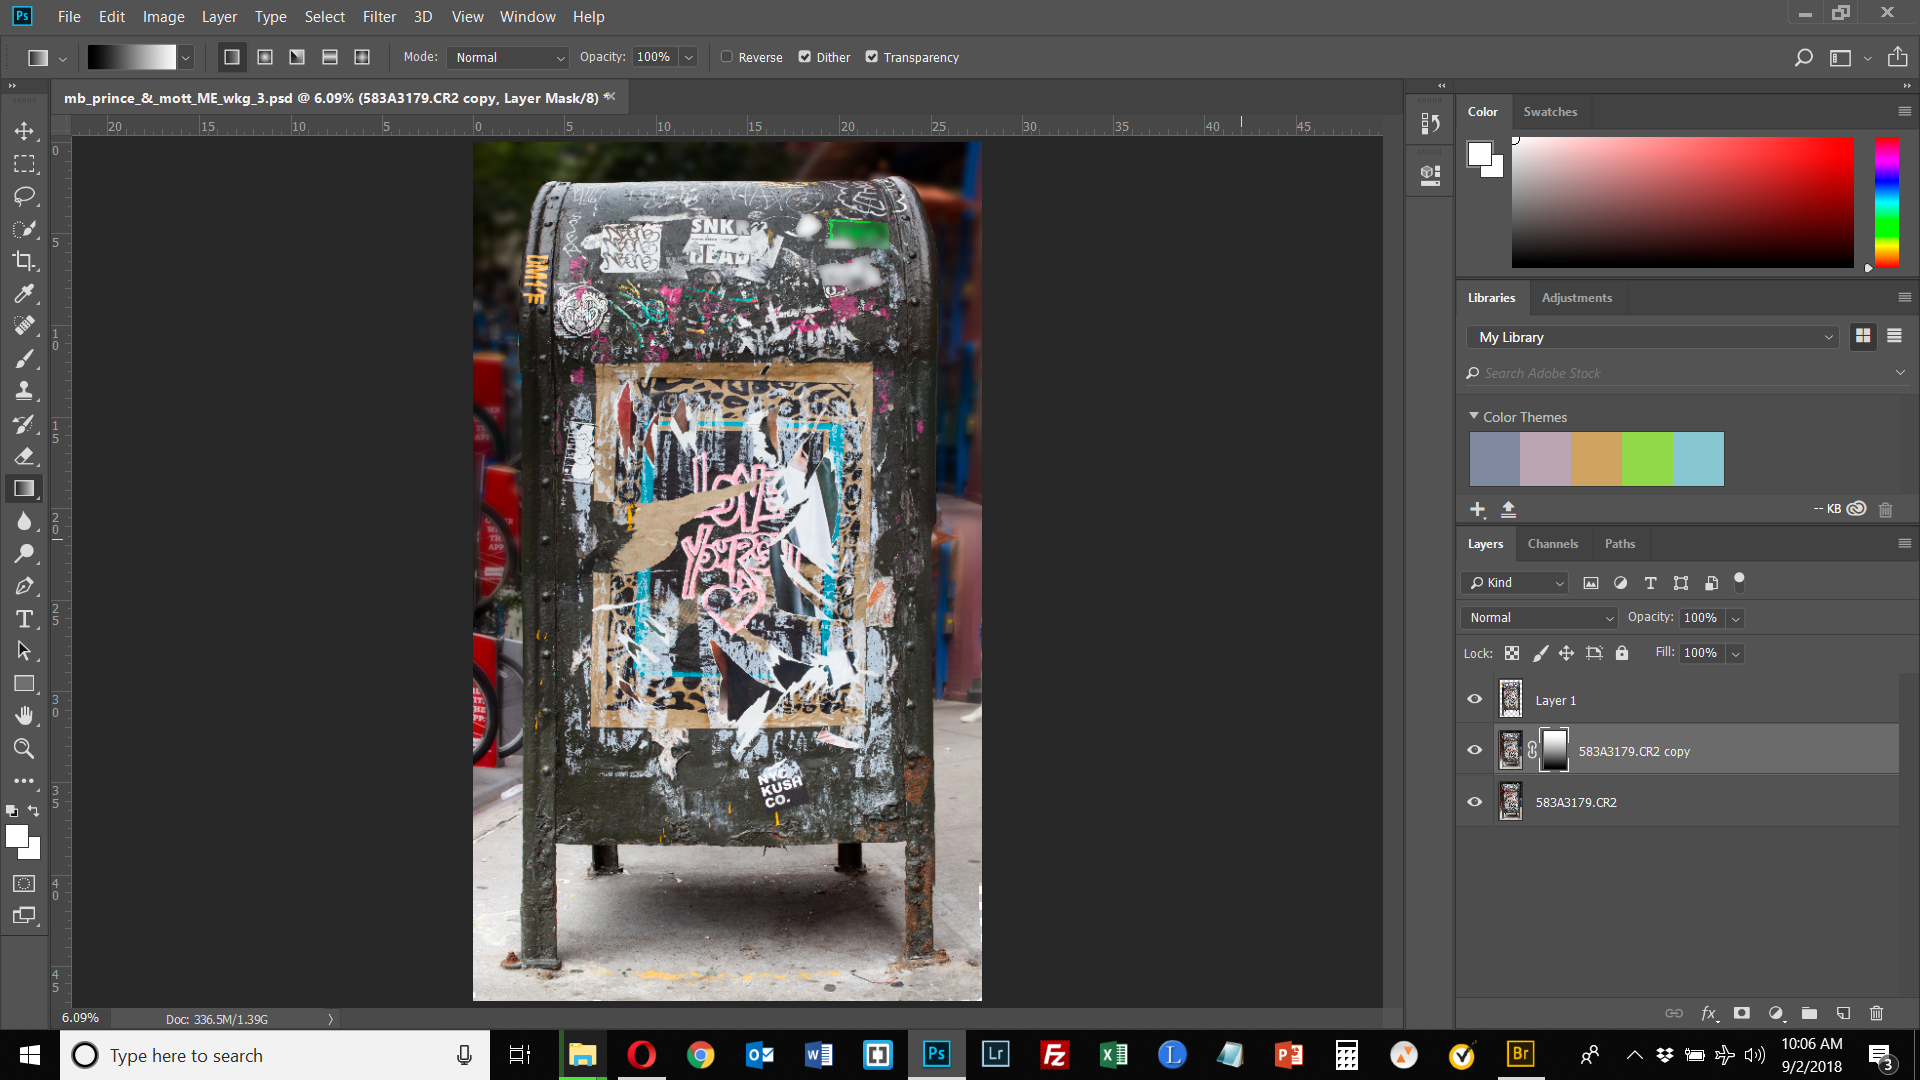
Here is after adding the gradient. So it does look like it's working, doesn't it? But there are issues. The image was created using panorama and the tool duplicated the bike tires on the left in the output composite. I thought the blur might hide that and I would not have to address it otherwise. But not enough. Looks like I need to do some clone stamping to get right of the obvious repetition. Please let me know if it looks like I have done this right otherwise. I think it will work well with my other images where these compositing problems aren't in the background.
Copy link to clipboard
Copied
Looking good. You could make the gradient smaller, so it goes to a blur faster, and blurs the tire.
Copy link to clipboard
Copied
Mission accomplished. Thank you so much! I could have never figured this out on my own.
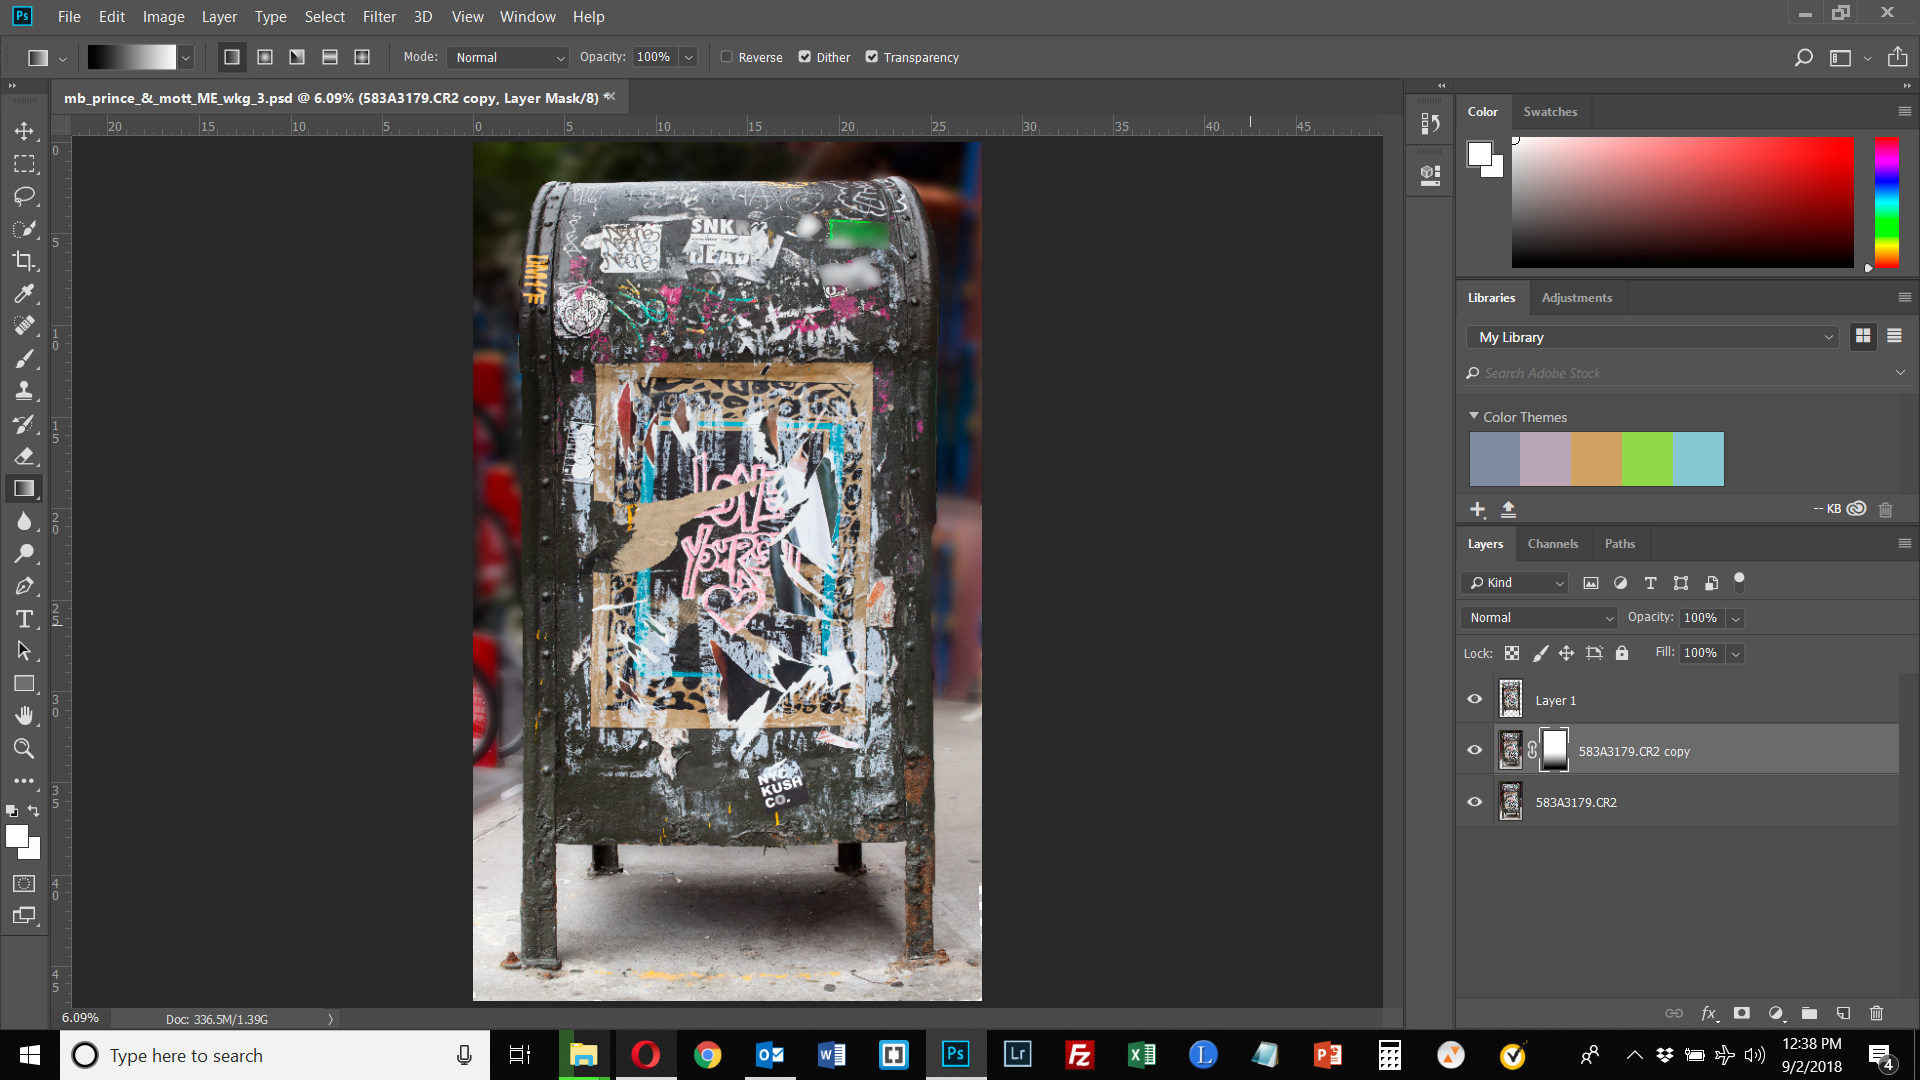
Copy link to clipboard
Copied
One final question. After you finish cloning in the area around the dog, you then go to the dog layer and show it selected to show the cloned areas in the selection. Then you go back to the background copy layer and invert that selection before blurring it. I had to reselect the mailbox but now the mailbox has blurred edges so it's not selecting so well. How did you apply or dupe the selection in the dog layer to the background copy later - at least it looks like that's what you did (you did not in the video reselect the dog in that layer). Thanks.
Copy link to clipboard
Copied
Yes, first thing I did was to make a selection of the dog. I saved that as an alpha channel, just for the demo, so I wouldn't have to do it again. Second step was to use that selection to put the dog on it's own layer ctrl-J. You shouldn't have the mailbox layer blurred at all. And if you're getting bits of the mailbox blurred in your blur layer, you didn't clone into the mailbox area far enough, before you blurred that layer.
Copy link to clipboard
Copied
Maybe the issue is that I don't know how alpha channels work. When you got done cloning around he dog, you didn't have anything selected in your background layer. Then you went up to the dog layer and showed the dog selected. Then you went back to your background layer and the dog was *magically* selected there. My question is, how did you do that? Otherwise, if I selected the mailbox in my background layer, it will be imperfect as the selection will be defined based on the content aware cloned edges.
Copy link to clipboard
Copied
You just ctrl-click on the dog to mailbox layer's thumbnail. That will load the selection. You don't need to do an alpha channel. I just did that to save the selection for the video, so that I would not have to spend time in the video doing that.
Copy link to clipboard
Copied
Got it. Thanks again! This is a great skill set to have and I can't thank you enough for showing me (did I say that already?)!
-
- 1
- 2
