- Home
- Photoshop ecosystem
- Discussions
- Line Work: Colouring in and Hiding Line Layer
- Line Work: Colouring in and Hiding Line Layer
Line Work: Colouring in and Hiding Line Layer
Copy link to clipboard
Copied
Hi,
I am trying to complete a render of a line drawing. I use the magic wand to select the shapes and colour them in a new layer, but when I switch off the line drawing layer, there is a white gap between the shapes where the black line drawing would be. How do I prevent this from happening? As I need a final render which does not have gaps between shapes and no black lines. I have tried matting them.
Thanks
Explore related tutorials & articles
Copy link to clipboard
Copied
Please post meaningful screenshots including the pertinent Panels.
Expanding the Selection before filling might be an option but I suspect your approach may be flawed.
What are the ultimate output requirements?
Have you considered using Illustrator for this?
Copy link to clipboard
Copied
The accepted method in the comic colouring business is to select an area you want to add colour to by using the Lasso too, and alternate between the normal Lasso and the plygon Lasso by holding down the Option (Mac) or Alt (Windows) key.
Then pick a colour, and fill the selected area with the Option-Delete / Alt-Delete (or Backspace). Do this on a new layer beneath the original artwork, and be sure to create overfills.
The Fill tool is only partially useful for this type of work, because it does not overfill anti-aliased edges, nor is it very controllable when gaps exist.
A faster method (depending on your art) is to use alternative software to create the flatting and holds, and continue to work in Photoshop afterwards.
Copy link to clipboard
Copied
As I need a final render which does not have gaps between shapes and no black lines. I have tried matting them.
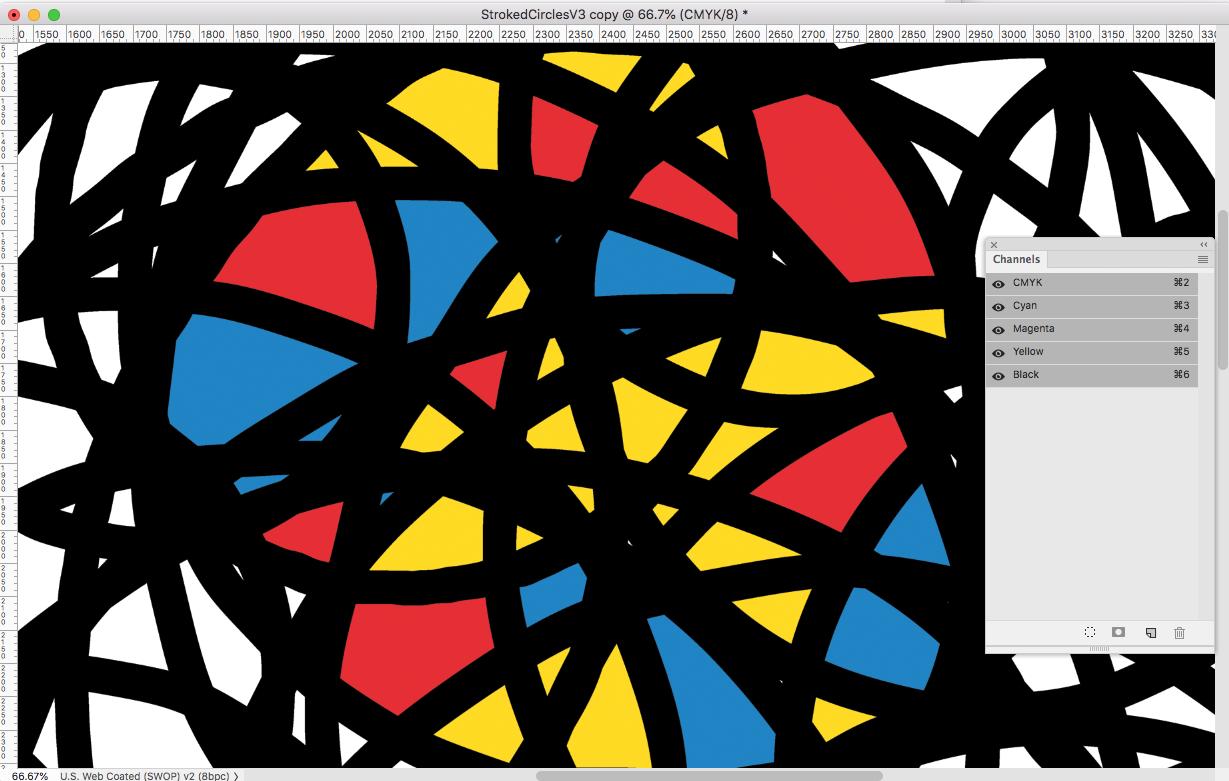
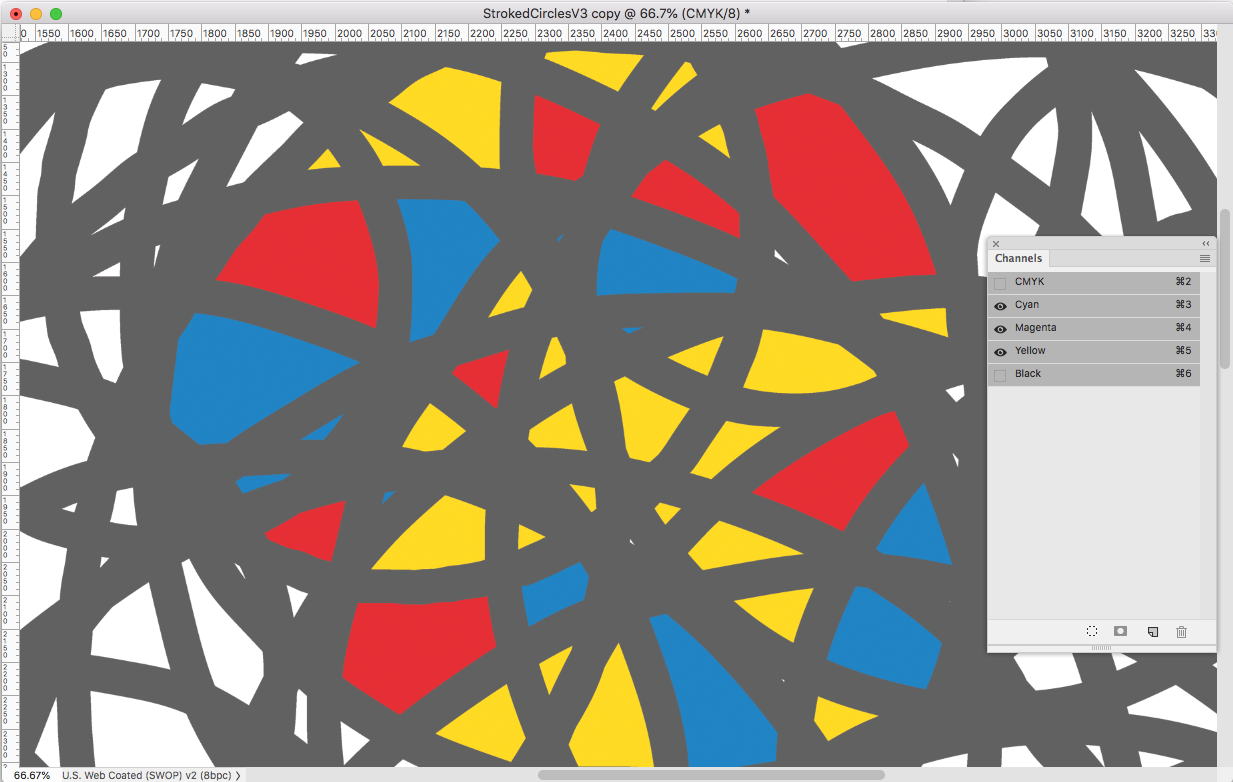
What color mode are working in and what is the output going to be? If the mode is RGB, the black lines will be converted into 4-color black when the art gets converted to CMYK for output—the gaps won't be black only. For example here I'm hiding the CMYK Black channel after the color conversion:


Copy link to clipboard
Copied
After you make the selection you need to expand it slightly. You will find that in the Selection menu. (I can’t remember if it says expand, or grow.) The necessary amount will depend on the size of your image. I’d start with at least 3 pixels. After you expand the selection you can fill the selection with a color on a layer below the line drawing. Set the line art layer blend mode to multiply. Now the color fill tucks under the black lines so you won’t see that white halo anymore.
If this is going to offset printing, follow rob day instructions above. If it is going to be inkjet printed, you can leave it in the RGB colorspace.
Copy link to clipboard
Copied
After you make the selection you need to expand it slightly. You will find that in the Selection menu. (I can’t remember if it says expand, or grow.) The necessary amount will depend on the size of your image. I’d start with at least 3 pixels.
Just note that to manually trap the black, you have to edit in CMYK mode and make sure the black line art is only in the Black channel. A conversion from RGB to CMYK would remove any layer expansions because the black line above would normally convert to 4-color.
Find more inspiration, events, and resources on the new Adobe Community
Explore Now


