Answered
Looking for an image manipulation tutorial
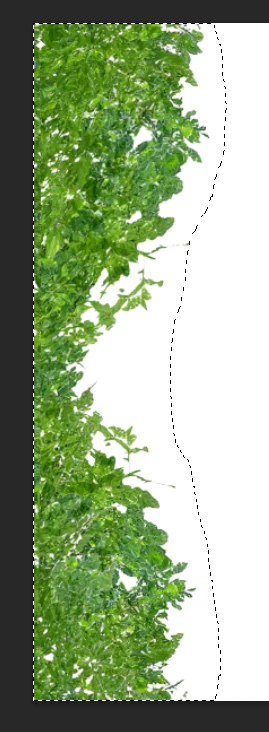
Anyone has a tutorial on how to go about this image manipulation?
A step by step video tutorial would be great.
Thank you.


Anyone has a tutorial on how to go about this image manipulation?
A step by step video tutorial would be great.
Thank you.
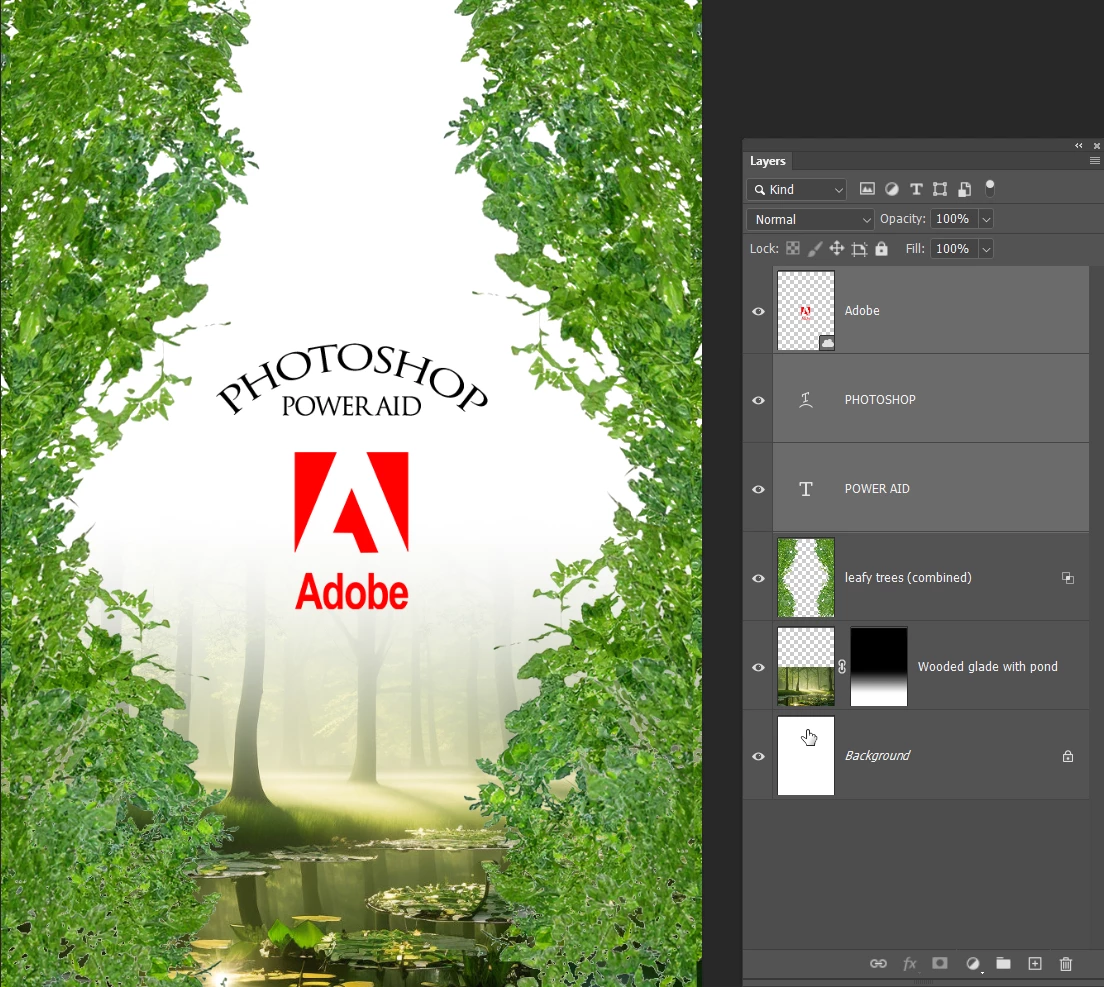
It's all getting so much easier with the Ai tools Photoshop has now. Generative Fill and the Remove Background tools, for instance, are a huge time saver even for the most experience Photoshop user.
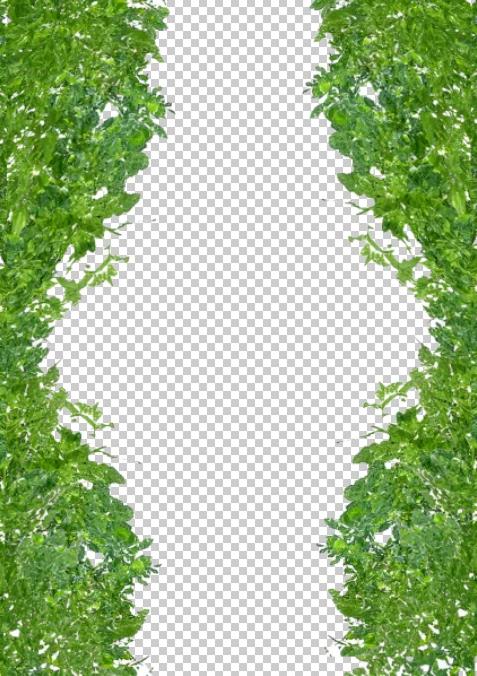
So if you make a rough selection of the shape you need with a white background, and use Generative Fill with prompts like Leafy trees, deciduous trees etc. you'll get something like this. You might double up by copying the layer and warping to better fit the shape you need.
Note: where Gen Fill has the advantage of searching Google for your trees, is that Google images won't have the white background, so won't remove that background so easily.
You need to make the background transparent, which you can do with Remove Background (in the Properties panel) but before you can do that with a Gen Fill layer you need to Rasterize it (by right clicking). You can then copy and flip to produce the leafy borders.
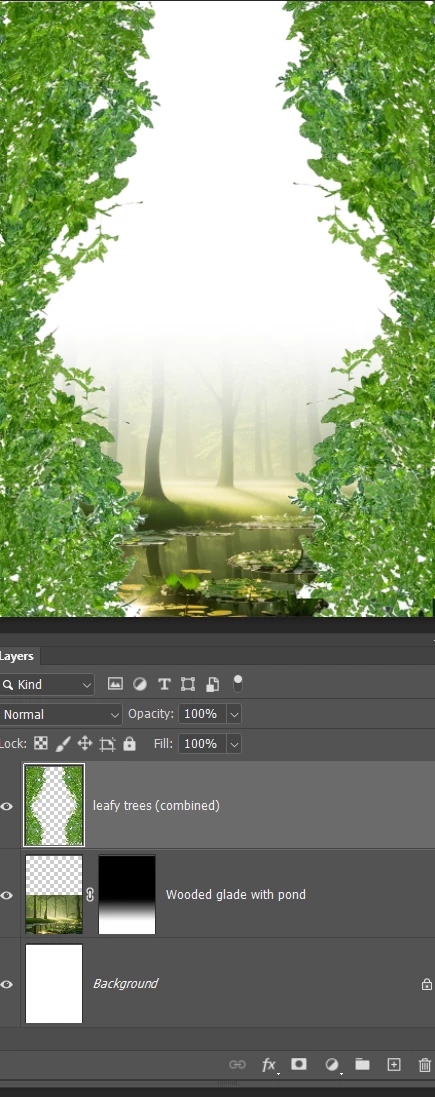
I chose to use Google images for the next step searching for Wooded glade with pond, and I did this because I want to be able to control the transparency.
I placed the wooded glade layer below the trees so they would appear to be bhind the trees.
Added a layer mask, and ran a black to white gradient down the mask. When you have done that, you can still move the layer to make more space for the advert.
Note: the trees still have areas of white covering the background. We'll fix that in the next step.
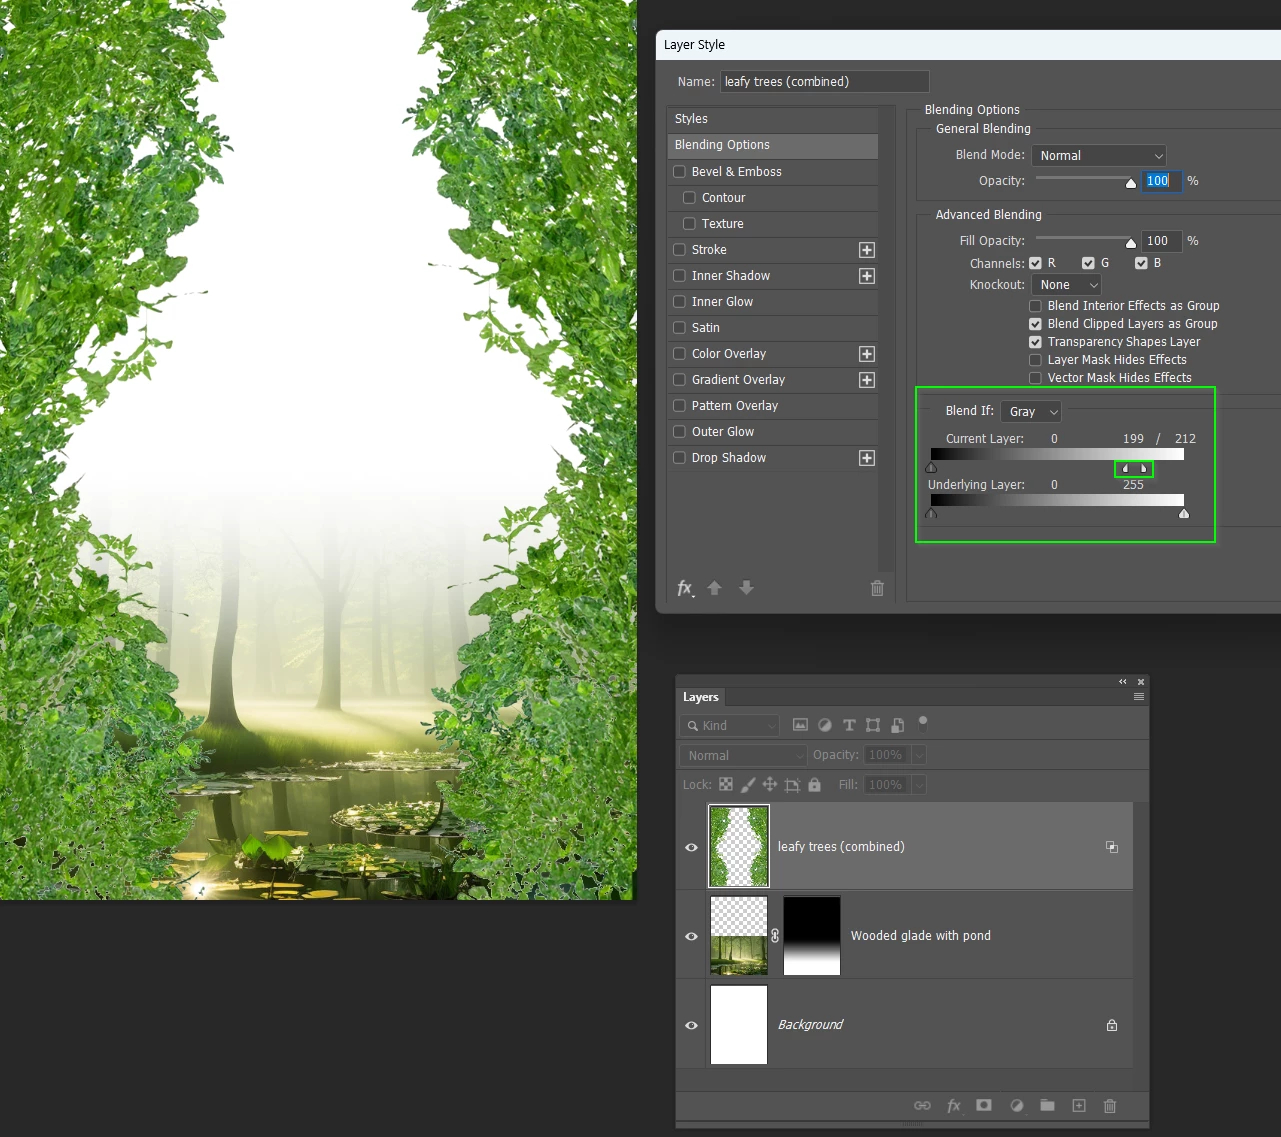
We can make whites or blacks transparent using Layer Styles > Blend If
Double click the layer to open Layer Styles, and move the Current Layer right side slider to the left. You can split the slider by holding down the Alt/Opt key which gives a smoother transition and looks better.
You need to move the sliders _just_ enough to make the whites disappear.
Add your text and logo etc. and any finish touches. I have just lookerd at the original again, and see I completely missed that the opening was bottle shape, and Gen Fill did not produce the best trees for us, but quick and dirty as this is, I hope you have enough top make a start. These are perfect projects to learn Photoshop. You might like to join in our SFTW threads where we get a start image and are free to turn it into something funny, interesting etc. Current thread
Already have an account? Login
Enter your E-mail address. We'll send you an e-mail with instructions to reset your password.