// convert smart object with four point vector mask into smart object and transform so that the vector mask is square according to the four guides;
// 2024, use it at your own risk;
if (app.documents.length > 0) {
// set to pixels;
var originalRulerUnits = app.preferences.rulerUnits;
app.preferences.rulerUnits = Units.PIXELS;
////////////////////////////////////
// determine the target area;
var theID = getLayerId ();
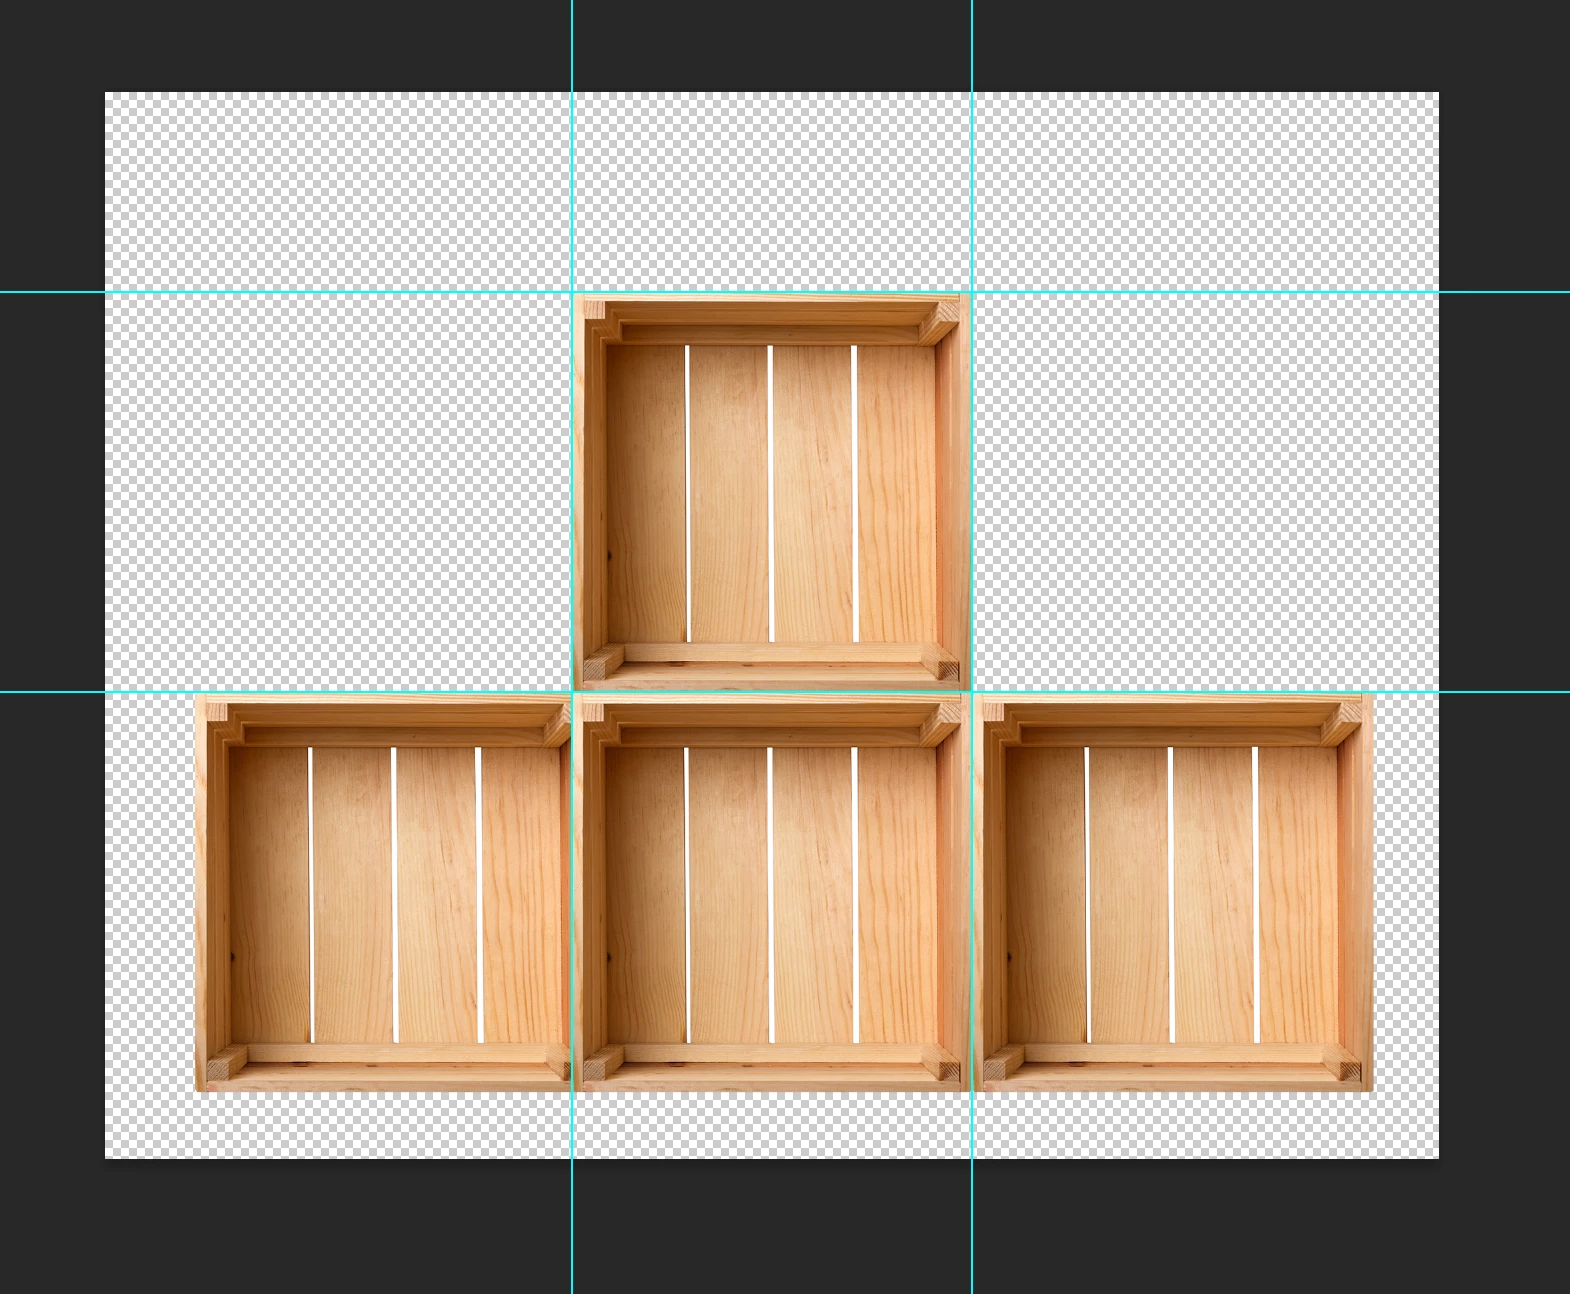
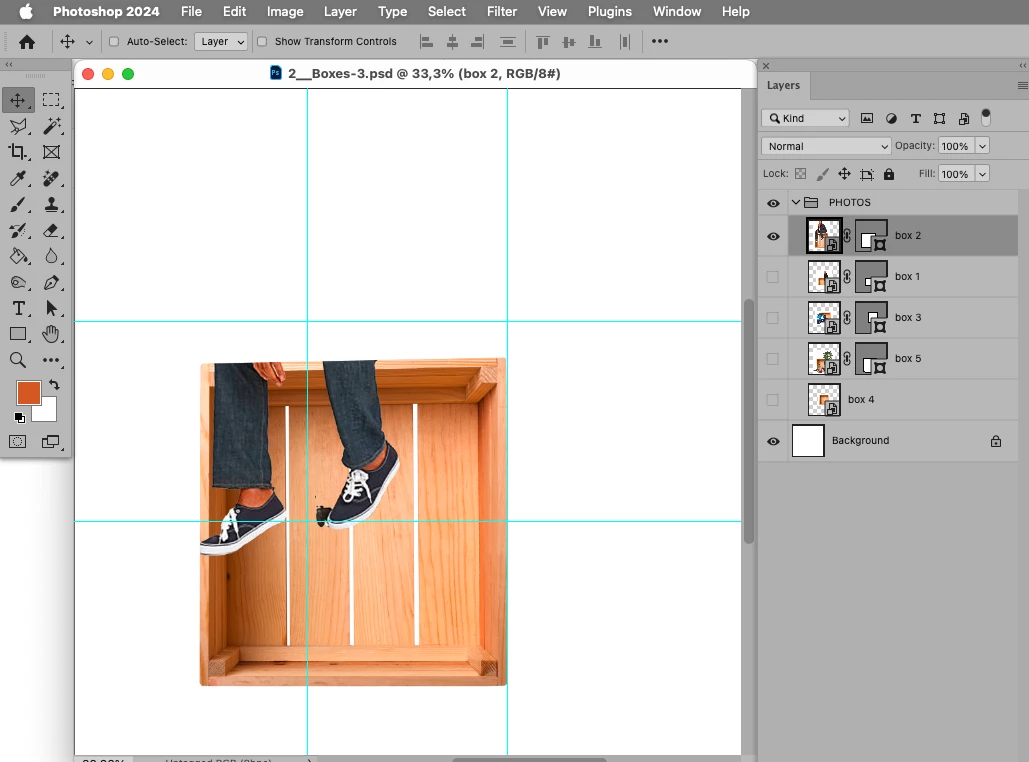
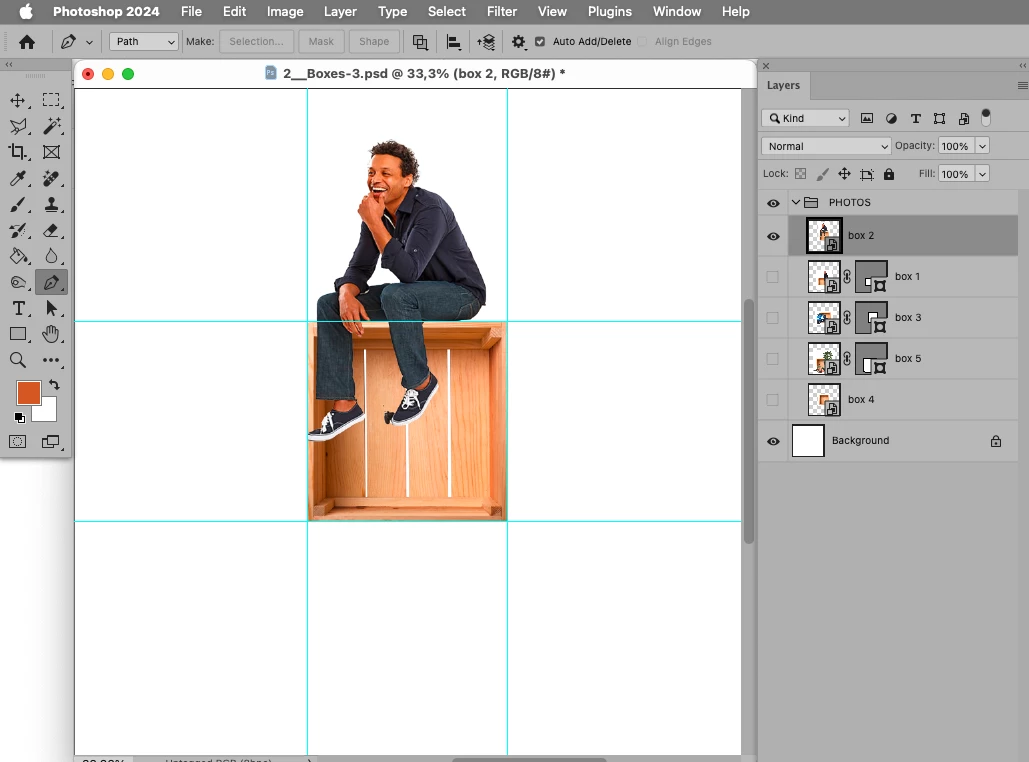
var theTargetArea = getGuidesSquare ();
if (theTargetArea) {var theTarget = theTargetArea[2]-theTargetArea[0]}
else {var theTarget = 600};
// check for appropriate four point vector mask;
var isSO = isSmartObject();
var thePath = collectPathInfoFromVectorMask();
if (isSO == true && thePath.length == 1 && thePath[0].length == 6) {
// select pen tool;
var desc221 = new ActionDescriptor();
var ref1 = new ActionReference();
ref1.putClass( stringIDToTypeID( "penTool" ) );
desc221.putReference( stringIDToTypeID( "null" ), ref1 );
executeAction( stringIDToTypeID( "select" ), desc221, DialogModes.NO );
// select vector mask;
var desc11 = new ActionDescriptor();
var ref2 = new ActionReference();
ref2.putEnumerated( stringIDToTypeID( "path" ), stringIDToTypeID( "path" ), stringIDToTypeID( "vectorMask" ) );
ref2.putEnumerated( stringIDToTypeID( "layer" ), stringIDToTypeID( "ordinal" ), stringIDToTypeID( "targetEnum" ) );
desc11.putReference( stringIDToTypeID( "null" ), ref2 );
executeAction( stringIDToTypeID( "select" ), desc11, DialogModes.NO );
// copy;
var desc12 = new ActionDescriptor();
desc12.putString( stringIDToTypeID( "copyHint" ), "path" );
executeAction( stringIDToTypeID( "copyEvent" ), desc12, DialogModes.NO );
// deselect vector mask;
deselectVectorMask();
// convert to smart object;
executeAction( stringIDToTypeID( "newPlacedLayer" ), undefined, DialogModes.NO );
// paste path;
executeAction( stringIDToTypeID( "paste" ), undefined, DialogModes.NO );
// deselect vector mask;
deselectVectorMask();
var theID = getLayerId ();
////////////////////////////////////
// rotate shortest side to 0˚;
var theX = new Array;
// get lengths and angles;
for (var m = 0; m < 4; m++) {
var theNext = m+1;
if (theNext == 4) {theNext = 0};
theX.push([getDistance(thePath[0][m][0], thePath[0][theNext][0]), getAngle(thePath[0][m][0], thePath[0][theNext][0]), thePath[0][m][0], thePath[0][theNext][0]])
};
theX.sort(sortArrayByIndexedItem);
duplicateMoveRotateScale(theID, 0, 0, 100, 100, 360-theX[0][1], 0, false);
////////////////////////////////////
// skew second shortest side to 90˚;
var thePath = collectPathInfoFromVectorMask();
var theHor = new Array;
for (var m = 0; m < 4; m++) {
theHor.push(thePath[0][m][0])
};
theHor.sort(sortArrayByIndexedItem);
var theLeft = theHor.slice(0,2).sort(sortArrayByIndexedItem2);
var theRight = theHor.slice(2).sort(sortArrayByIndexedItem2);
var theAngle = getAngle(theLeft[0], theLeft[1]);
duplicateMoveRotateScale(theID, 0, 0, 100, 100, 0, theAngle-90, false);
////////////////////////////////////
// get target corners;
var thePath = collectPathInfoFromVectorMask();
var theHor = new Array;
for (var m = 0; m < 4; m++) {
theHor.push(thePath[0][m][0])
};
theHor.sort(sortArrayByIndexedItem);
var theLeft = theHor.slice(0,2).sort(sortArrayByIndexedItem2);
var theRight = theHor.slice(2).sort(sortArrayByIndexedItem2);
var theA = intersectionOfLines ([theLeft[1], theRight[1]], [theRight[0], [theRight[0][0], theRight[1][1]]]);
var theB = intersectionOfLines ([theRight[0], theRight[1]], [theLeft[1], [theRight[1][0], theLeft[1][1]]]);
// define the four cornerpoints;
var aTopLeft = [theLeft[0][0], theLeft[0][1]]
var aTopRight = [theB[0], theRight[0][1]];
var aBottomRight = [theRight[0][0], theLeft[1][1]];
var aBottomLeft = [theLeft[1][0], theA[1]];
// transform to points;
enableDisableVectorMask (false);
app.activeDocument.pathItems[app.activeDocument.pathItems.length-1].deselect();
transformByCornerpoints (aTopLeft, aTopRight, aBottomRight, aBottomLeft);
enableDisableVectorMask ();
// scale to 600px by 600px;
var theBounds = activeDocument.activeLayer.bounds;
var currentWidth = (Number(theBounds[2])-Number(theBounds[0]));
var currentHeight = (Number(theBounds[3])-Number(theBounds[1]));
duplicateMoveRotateScale (theID, 0, 0, theTarget/currentWidth*100, theTarget/currentHeight*100, 0, 0, false);
};
////////////////////////////////////
// determine rotation;
var ref = new ActionReference();
ref.putEnumerated( charIDToTypeID("Lyr "), charIDToTypeID("Ordn"), charIDToTypeID("Trgt") );
var layerDesc = executeActionGet(ref);
var nonAffineTransform = layerDesc.getObjectValue(stringIDToTypeID('smartObjectMore')).getList(stringIDToTypeID("nonAffineTransform"));
var nonAffineTransf = new Array;
for (var n = 0; n < nonAffineTransform.count/2; n++) {
nonAffineTransf.push([nonAffineTransform.getDouble(n*2), nonAffineTransform.getDouble(n*2+1), n])
};
nonAffineTransf.sort(sortArrayByIndexedItem);
if (nonAffineTransf[0][1] < nonAffineTransf[1][1]) {var theRotation = nonAffineTransf[0][2]}
else {var theRotation = nonAffineTransf[1][2]};
// counter rotate;
duplicateMoveRotateScale (theID, 0, 0, 100, 100, theRotation*90, 0, false);
var currentBounds = getBounds ();
////////////////////////////////////
// unmask the smart object’s content;
var theSO = openSmartObject ();
removeVectorMask();
var theBounds = theSO.activeLayer.bounds;
var horAdd = Math.max(0, Math.max(theBounds[0]*(-1), theBounds[2]-theSO.width))*2;
var verAdd = Math.max(0, Math.max(theBounds[1]*(-1), theBounds[3]-theSO.height))*2;
theSO.resizeCanvas(theSO.width+horAdd, theSO.height+verAdd, AnchorPosition.MIDDLECENTER);
theSO.close(SaveOptions.SAVECHANGES);
enableDisableVectorMask (false);
////////////////////////////////////
duplicateMoveRotateScale (theID, Number(theTargetArea[0])-currentBounds[0][0], Number(theTargetArea[1])-currentBounds[0][1], 100, 100, 0, 0, false);
removeVectorMask();
////////////////////////////////////
// reset;
app.preferences.rulerUnits = originalRulerUnits;
};
////// duplicate layer and move, rotate and scale it //////
function duplicateMoveRotateScale (theID, theX, theY, theScaleX, theScaleY, theRotation, theSkew, theDuplicate) {
selectLayerByID(theID,false);
try{
var idTrnf = charIDToTypeID( "Trnf" );
var desc10 = new ActionDescriptor();
var idnull = charIDToTypeID( "null" );
var ref6 = new ActionReference();
ref6.putIdentifier( charIDToTypeID( "Lyr " ), theID );
/* ref6.putEnumerated( charIDToTypeID( "Lyr " ), charIDToTypeID( "Ordn" ), charIDToTypeID( "Trgt" ) );*/
desc10.putReference( idnull, ref6 );
var idFTcs = charIDToTypeID( "FTcs" );
var idQCSt = charIDToTypeID( "QCSt" );
var idQcsa = charIDToTypeID( "Qcsa" );
desc10.putEnumerated( idFTcs, idQCSt, idQcsa );
var idOfst = charIDToTypeID( "Ofst" );
var desc11 = new ActionDescriptor();
var idHrzn = charIDToTypeID( "Hrzn" );
var idPxl = charIDToTypeID( "#Pxl" );
desc11.putUnitDouble( idHrzn, idPxl, theX );
var idVrtc = charIDToTypeID( "Vrtc" );
var idPxl = charIDToTypeID( "#Pxl" );
desc11.putUnitDouble( idVrtc, idPxl, theY );
var idOfst = charIDToTypeID( "Ofst" );
desc10.putObject( idOfst, idOfst, desc11 );
var idWdth = charIDToTypeID( "Wdth" );
var idPrc = charIDToTypeID( "#Prc" );
desc10.putUnitDouble( idWdth, idPrc, theScaleX );
var idHght = charIDToTypeID( "Hght" );
var idPrc = charIDToTypeID( "#Prc" );
desc10.putUnitDouble( idHght, idPrc, theScaleY );
var idAngl = charIDToTypeID( "Angl" );
var idAng = charIDToTypeID( "#Ang" );
desc10.putUnitDouble( idAngl, idAng, theRotation );
var idskew = stringIDToTypeID( "skew" );
var desc358 = new ActionDescriptor();
var idhorizontal = stringIDToTypeID( "horizontal" );
var idangleUnit = stringIDToTypeID( "angleUnit" );
desc358.putUnitDouble( idhorizontal, idangleUnit, theSkew );
var idvertical = stringIDToTypeID( "vertical" );
var idangleUnit = stringIDToTypeID( "angleUnit" );
desc358.putUnitDouble( idvertical, idangleUnit, 0.000000 );
var idpaint = stringIDToTypeID( "paint" );
desc10.putObject( idskew, idpaint, desc358 );
var idIntr = charIDToTypeID( "Intr" );
var idIntp = charIDToTypeID( "Intp" );
var idbicubicAutomatic = stringIDToTypeID( "bicubicAutomatic" );
desc10.putEnumerated( idIntr, idIntp, idbicubicAutomatic );
var idCpy = charIDToTypeID( "Cpy " );
desc10.putBoolean( idCpy, theDuplicate );
executeAction( idTrnf, desc10, DialogModes.NO );
} catch (e) {}
};
////// based on code by mike hale, via paul riggott //////
function selectLayerByID(id,add){
add = undefined ? add = false:add
var ref = new ActionReference();
ref.putIdentifier(charIDToTypeID("Lyr "), id);
var desc = new ActionDescriptor();
desc.putReference(charIDToTypeID("null"), ref );
if(add) desc.putEnumerated( stringIDToTypeID( "selectionModifier" ), stringIDToTypeID( "selectionModifierType" ), stringIDToTypeID( "addToSelection" ) );
desc.putBoolean( charIDToTypeID( "MkVs" ), false );
try{
executeAction(charIDToTypeID("slct"), desc, DialogModes.NO );
}catch(e){
alert(e.message);
}
};
////// bounds of active layer //////
function getBounds () {
var ref = new ActionReference();
ref.putProperty (stringIDToTypeID ("property"), stringIDToTypeID ("bounds"));
ref.putEnumerated( charIDToTypeID("Lyr "), charIDToTypeID("Ordn"), charIDToTypeID("Trgt") );
var layerDesc = executeActionGet(ref);
var theBounds = layerDesc.getObjectValue(stringIDToTypeID("bounds"));
var theseBounds = [theBounds.getUnitDoubleValue(stringIDToTypeID("left")), theBounds.getUnitDoubleValue(stringIDToTypeID("top")), theBounds.getUnitDoubleValue(stringIDToTypeID("right")), theBounds.getUnitDoubleValue(stringIDToTypeID("bottom"))];
var theW = theBounds.getUnitDoubleValue(stringIDToTypeID("right")) - theBounds.getUnitDoubleValue(stringIDToTypeID("left"));
var theH = theBounds.getUnitDoubleValue(stringIDToTypeID("bottom")) - theBounds.getUnitDoubleValue(stringIDToTypeID("top"));
var horCenter = theseBounds[0] + theW / 2;
var verCenter = theseBounds[1] + theH / 2;
return ([theseBounds, theW, theH, horCenter, verCenter])
};
////// get active layer’s id //////
function getLayerId () {
var ref = new ActionReference();
ref.putProperty (stringIDToTypeID ("property"), stringIDToTypeID ("layerID"));
ref.putEnumerated( charIDToTypeID("Lyr "), charIDToTypeID("Ordn"), charIDToTypeID("Trgt") );
return executeActionGet(ref).getInteger(stringIDToTypeID("layerID"));
};
////// is smart object //////
function isSmartObject () {
var ref = new ActionReference();
ref.putProperty (stringIDToTypeID ("property"), stringIDToTypeID ("smartObject"));
ref.putEnumerated( charIDToTypeID("Lyr "), charIDToTypeID("Ordn"), charIDToTypeID("Trgt") );
var layerDesc = executeActionGet(ref);
var isSmartObject = layerDesc.hasKey(stringIDToTypeID("smartObject"));
return isSmartObject
};
////// get an angle, 3:00 being 0˚, 6:00 90˚, etc. //////
function getAngle (pointOne, pointTwo) {
// calculate the triangle sides;
var width = pointTwo[0] - pointOne[0];
var height = pointTwo[1] - pointOne[1];
var sideC = Math.sqrt(Math.pow(width, 2) + Math.pow(height, 2));
// calculate the angles;
if (width+width > width) {theAngle = Math.asin(height / sideC) * 360 / 2 / Math.PI}
else {theAngle = 180 - (Math.asin(height / sideC) * 360 / 2 / Math.PI)};
if (theAngle < 0) {theAngle = (360 + theAngle)};
// if (theAngle > 180) {theAngle = (360 - theAngle) * (-1)};
return theAngle
};
////// get a distance between two points //////
function getDistance (pointOne, pointTwo) {
// calculate the triangle sides;
var width = pointTwo[0] - pointOne[0];
var height = pointTwo[1] - pointOne[1];
var sideC = Math.sqrt(Math.pow(width, 2) + Math.pow(height, 2));
return sideC
};
////// collect path info from actiondescriptor, smooth added //////
function collectPathInfoFromVectorMask () {
var originalRulerUnits = app.preferences.rulerUnits;
app.preferences.rulerUnits = Units.PIXELS;
// based of functions from xbytor’s stdlib;
var ref = new ActionReference();
var idPath = charIDToTypeID( "Path" );
ref.putEnumerated( idPath, idPath, stringIDToTypeID( "vectorMask" ) );
var desc = app.executeActionGet(ref);
var pname = desc.getString(cTID('PthN'));
// create new array;
var theArray = new Array;
var pathComponents = desc.getObjectValue(cTID("PthC")).getList(sTID('pathComponents'));
// for subpathitems;
for (var m = 0; m < pathComponents.count; m++) {
var listKey = pathComponents.getObjectValue(m).getList(sTID("subpathListKey"));
var operation1 = pathComponents.getObjectValue(m).getEnumerationValue(sTID("shapeOperation"));
switch (operation1) {
case 1097098272:
var operation = 1097098272 //cTID('Add ');
break;
case 1398961266:
var operation = 1398961266 //cTID('Sbtr');
break;
case 1231975538:
var operation = 1231975538 //cTID('Intr');
break;
default:
// case 1102:
var operation = sTID('xor') //ShapeOperation.SHAPEXOR;
break;
};
// for subpathitem’s count;
for (var n = 0; n < listKey.count; n++) {
theArray.push(new Array);
var points = listKey.getObjectValue(n).getList(sTID('points'));
try {var closed = listKey.getObjectValue(n).getBoolean(sTID("closedSubpath"))}
catch (e) {var closed = false};
// for subpathitem’s segment’s number of points;
for (var o = 0; o < points.count; o++) {
var anchorObj = points.getObjectValue(o).getObjectValue(sTID("anchor"));
var anchor = [anchorObj.getUnitDoubleValue(sTID('horizontal')), anchorObj.getUnitDoubleValue(sTID('vertical'))];
var thisPoint = [anchor];
try {
var left = points.getObjectValue(o).getObjectValue(cTID("Fwd "));
var leftDirection = [left.getUnitDoubleValue(sTID('horizontal')), left.getUnitDoubleValue(sTID('vertical'))];
thisPoint.push(leftDirection)
}
catch (e) {
thisPoint.push(anchor)
};
try {
var right = points.getObjectValue(o).getObjectValue(cTID("Bwd "));
var rightDirection = [right.getUnitDoubleValue(sTID('horizontal')), right.getUnitDoubleValue(sTID('vertical'))];
thisPoint.push(rightDirection)
}
catch (e) {
thisPoint.push(anchor)
};
try {
var smoothOr = points.getObjectValue(o).getBoolean(cTID("Smoo"));
thisPoint.push(smoothOr)
}
catch (e) {thisPoint.push(false)};
theArray[theArray.length - 1].push(thisPoint);
};
theArray[theArray.length - 1].push(closed);
theArray[theArray.length - 1].push(operation);
};
};
// by xbytor, thanks to him;
function cTID (s) { return app.charIDToTypeID(s); };
function sTID (s) { return app.stringIDToTypeID(s); };
// reset;
app.preferences.rulerUnits = originalRulerUnits;
return theArray;
};
////// sort a double array, thanks to sam, http://www.rhinocerus.net/forum/lang-javascript/ //////
function sortArrayByIndexedItem(a,b) {
var theIndex = 0;
if (a[theIndex]<b[theIndex]) return -1;
if (a[theIndex]>b[theIndex]) return 1;
return 0;
};
function sortArrayByIndexedItem2(a,b) {
var theIndex = 1;
if (a[theIndex]<b[theIndex]) return -1;
if (a[theIndex]>b[theIndex]) return 1;
return 0;
};
////// intersection point of linear functions //////
function intersectionOfLines (lineA, lineB) {
try {
// process lineA;
var wA = lineA[1][0] - lineA[0][0];
var hA = lineA[1][1] - lineA[0][1];
var inclineA = hA / wA ;
// process lineB;
var wB = lineB[1][0] - lineB[0][0];
var hB = lineB[1][1] - lineB[0][1];
var inclineB = hB / wB ;
// break if parrallel;
if (inclineA == inclineB) {return undefined};
// check for horizontal or vertical;
if (wA == 0) {var theX = lineA[1][0]};
if (hA == 0) {var theY = lineA[1][1]};
if (wB == 0) {var theX = lineB[1][0]};
if (hB == 0) {var theY = lineB[1][1]};
// do stuff;
var yZeroA = lineA[0][1] - (lineA[0][0] * inclineA);
var yZeroB = lineB[0][1] - (lineB[0][0] * inclineB);
if (theX == undefined) {var theX = (yZeroB - yZeroA) / (inclineA - inclineB)};
if (theY == undefined) {var theY = theX * inclineA + yZeroA};
// result;
return [theX, theY]
}
catch (e) {return undefined}
};
////// transform by corner points //////
function transformByCornerpoints (aTopLeft, aTopRight, aBottomRight, aBottomLeft) {
//////////// transformation ////////////
// from adobe’s terminology.jsx;
const classChannel = app.charIDToTypeID('Chnl');
const enumNone = app.charIDToTypeID('None');
const eventSet = app.charIDToTypeID('setd');
const eventTransform = app.charIDToTypeID('Trnf');
const keySelection = app.charIDToTypeID('fsel');
const krectangleStr = app.stringIDToTypeID("rectangle");
const kquadrilateralStr = app.stringIDToTypeID("quadrilateral");
const keyBottom = app.charIDToTypeID('Btom');
const keyLeft = app.charIDToTypeID('Left');
const keyNull = app.charIDToTypeID('null');
const keyRight = app.charIDToTypeID('Rght');
const keyTo = app.charIDToTypeID('T ');
const keyTop = app.charIDToTypeID('Top ');
const typeOrdinal = app.charIDToTypeID('Ordn');
const unitPixels = app.charIDToTypeID('#Pxl');
// from adobe’s geometry.jsx;
//
// =================================== TPoint ===================================
//
function TPoint( x, y )
{
this.fX = x;
this.fY = y;
}
// TPoint Constants
const kTPointOrigion = new TPoint( 0, 0 );
TPoint.kOrigin = kTPointOrigion;
const kTPointInfinite = new TPoint( Infinity, Infinity );
TPoint.kInfinite = kTPointInfinite;
const kTPointClassname = "TPoint";
TPoint.prototype.className = kTPointClassname;
// Overloaded math operators
TPoint.prototype["=="] = function( Src )
{
return (this.fX == Src.fX) && (this.fY == Src.fY);
}
TPoint.prototype["+"] = function( b )
{
return new TPoint( this.fX + b.fX, this.fY + b.fY );
}
TPoint.prototype["-"] = function( b, reversed )
{
if (typeof(b) == "undefined") // unary minus
return new TPoint( -this.fX, -this.fY )
else
{
if (reversed)
return new TPoint( b.fX - this.fX, by.fY - this.fY );
else
return new TPoint( this.fX - b.fX, this.fY - b.fY);
}
}
//
// Multiply and divide work with scalars as well as points
//
TPoint.prototype["*"] = function( b )
{
if (typeof(b) == 'number')
return new TPoint( this.fX * b, this.fY * b );
else
return new TPoint( this.fX * b.fX, this.fY * b.fY );
}
TPoint.prototype["/"] = function( b, reversed )
{
if (reversed)
{
if (typeof(b) == "number")
debugger;
// Can't divide a number by a point
else
return new TPoint( b.fX / this.fX, b.fY / this.fY );
}
else
{
if (typeof(b) == 'number')
return new TPoint( this.fX / b, this.fY / b );
else
return new TPoint( this.fX / b.fX, this.fY / b.fY );
}
}
TPoint.prototype.toString = function()
{
return "[" + this.fX.toString() + "," + this.fY.toString() + "]";
}
TPoint.prototype.vectorLength = function()
{
return Math.sqrt( this.fX * this.fX + this.fY * this.fY );
}
//////////// the new corners ////////////
transformActiveLayer( [new TPoint(aTopLeft[0], aTopLeft[1]), new TPoint(aTopRight[0], aTopRight[1]), new TPoint(aBottomRight[0], aBottomRight[1]), new TPoint(aBottomLeft[0], aBottomLeft[1])]);
// from adobe’s stacksupport.jsx;
// Apply a perspective transform to the current layer, with the
// corner TPoints given in newCorners (starts at top left, in clockwise order)
// Potential DOM fix
function transformActiveLayer( newCorners )
{
function pxToNumber( px )
{
return px.as("px");
}
var saveUnits = app.preferences.rulerUnits;
app.preferences.rulerUnits = Units.PIXELS;
var i;
var setArgs = new ActionDescriptor();
var chanArg = new ActionReference();
chanArg.putProperty( classChannel, keySelection );
// setArgs.putReference( keyNull, chanArg );
var boundsDesc = new ActionDescriptor();
var layerBounds = app.activeDocument.activeLayer.bounds;
boundsDesc.putUnitDouble( keyTop, unitPixels, pxToNumber( layerBounds[1] ) );
boundsDesc.putUnitDouble( keyLeft, unitPixels, pxToNumber( layerBounds[0] ) );
boundsDesc.putUnitDouble( keyRight, unitPixels, pxToNumber( layerBounds[2] ) );
boundsDesc.putUnitDouble( keyBottom, unitPixels, pxToNumber( layerBounds[3] ) );
// executeAction( eventSet, setArgs );
var result = new ActionDescriptor();
var args = new ActionDescriptor();
var quadRect = new ActionList();
quadRect.putUnitDouble( unitPixels, pxToNumber( layerBounds[0] ) );
// ActionList put is different from ActionDescriptor put
quadRect.putUnitDouble( unitPixels, pxToNumber( layerBounds[1] ) );
quadRect.putUnitDouble( unitPixels, pxToNumber( layerBounds[2] ) );
quadRect.putUnitDouble( unitPixels, pxToNumber( layerBounds[3] ) );
var quadCorners = new ActionList();
for (i = 0; i < 4; ++i)
{
quadCorners.putUnitDouble( unitPixels, newCorners[i].fX );
quadCorners.putUnitDouble( unitPixels, newCorners[i].fY );
}
args.putList( krectangleStr, quadRect );
args.putList( kquadrilateralStr, quadCorners );
executeAction( eventTransform, args );
// Deselect
deselArgs = new ActionDescriptor();
deselRef = new ActionReference();
deselRef.putProperty( classChannel, keySelection );
deselArgs.putReference( keyNull, deselRef );
deselArgs.putEnumerated( keyTo, typeOrdinal, enumNone );
executeAction( eventSet, deselArgs );
app.preferences.rulerUnits = saveUnits;
}
};
////// disable vector mask //////
function enableDisableVectorMask (theBoolean) {
try {
var ref = new ActionReference();
ref.putEnumerated( charIDToTypeID("Lyr "), charIDToTypeID("Ordn"), charIDToTypeID("Trgt") );
var layerDesc = executeActionGet(ref);
var vmEnabled = layerDesc.getBoolean(stringIDToTypeID( "vectorMaskEnabled" ));
if (theBoolean == undefined) {
if (vmEnabled == false) {var theBoolean = true}
else {var theBoolean = false};
};
// =======================================================
var idlayer = stringIDToTypeID( "layer" );
var desc5 = new ActionDescriptor();
var ref1 = new ActionReference();
ref1.putEnumerated( idlayer, stringIDToTypeID( "ordinal" ), stringIDToTypeID( "targetEnum" ) );
desc5.putReference( stringIDToTypeID( "null" ), ref1 );
var desc6 = new ActionDescriptor();
desc6.putBoolean( stringIDToTypeID( "vectorMaskEnabled" ), theBoolean );
desc5.putObject( stringIDToTypeID( "to" ), idlayer, desc6 );
executeAction( stringIDToTypeID( "set" ), desc5, DialogModes.NO );
} catch (e) {}
};
////// deselect vector mask //////
function deselectVectorMask () {
var desc5 = new ActionDescriptor();
var ref2 = new ActionReference();
ref2.putEnumerated( stringIDToTypeID( "path" ), stringIDToTypeID( "ordinal" ), stringIDToTypeID( "targetEnum" ) );
desc5.putReference( stringIDToTypeID( "null" ), ref2 );
executeAction( stringIDToTypeID( "deselect" ), desc5, DialogModes.NO );
};
////// open smart object //////
function openSmartObject () {
var desc2 = new ActionDescriptor();
executeAction( stringIDToTypeID( "placedLayerEditContents" ), desc2, DialogModes.NO );
return activeDocument;
};
///// thanky to xbytor //////
function removeVectorMask () {
cTID = function(s) { return app.charIDToTypeID(s); };
var desc317 = new ActionDescriptor();
var ref302 = new ActionReference();
ref302.putEnumerated( cTID('Path'), cTID('Path'), stringIDToTypeID('vectorMask') );
ref302.putEnumerated( cTID('Lyr '), cTID('Ordn'), cTID('Trgt') );
desc317.putReference( cTID('null'), ref302 );
executeAction( cTID('Dlt '), desc317, DialogModes.NO );
};
////// disable vector mask //////
function enableDisableVectorMask (theBoolean) {
try {
var ref = new ActionReference();
ref.putEnumerated( charIDToTypeID("Lyr "), charIDToTypeID("Ordn"), charIDToTypeID("Trgt") );
var layerDesc = executeActionGet(ref);
var vmEnabled = layerDesc.getBoolean(stringIDToTypeID( "vectorMaskEnabled" ));
if (theBoolean == undefined) {
if (vmEnabled == false) {var theBoolean = true}
else {var theBoolean = false};
};
// =======================================================
var idlayer = stringIDToTypeID( "layer" );
var desc5 = new ActionDescriptor();
var ref1 = new ActionReference();
ref1.putEnumerated( idlayer, stringIDToTypeID( "ordinal" ), stringIDToTypeID( "targetEnum" ) );
desc5.putReference( stringIDToTypeID( "null" ), ref1 );
var desc6 = new ActionDescriptor();
desc6.putBoolean( stringIDToTypeID( "vectorMaskEnabled" ), theBoolean );
desc5.putObject( stringIDToTypeID( "to" ), idlayer, desc6 );
executeAction( stringIDToTypeID( "set" ), desc5, DialogModes.NO );
} catch (e) {}
};
////// get square circumscribed by four guides //////
function getGuidesSquare () {
// set to pixels;
var myDocument = app.activeDocument;
var originalRulerUnits = app.preferences.rulerUnits;
app.preferences.rulerUnits = Units.PIXELS;
// collect guides;
var theVerticalArray = new Array;
var theHorizontalArray = new Array;
for (var m = 0; m < myDocument.guides.length; m++) {
if (myDocument.guides[m].direction == Direction.HORIZONTAL) {theHorizontalArray.push(Number(myDocument.guides[m].coordinate))}
else {theVerticalArray.push(Number(myDocument.guides[m].coordinate))}
};
theHorizontalArray.sort(sortByDate);
theVerticalArray.sort(sortByDate);
// if rectangle;
if (theHorizontalArray.length == 2 && theVerticalArray.length == 2) {
if (theHorizontalArray[1]-theHorizontalArray[0] == theVerticalArray[1]-theVerticalArray[0]) {
return [theVerticalArray[0], theHorizontalArray[0], theVerticalArray[1], theHorizontalArray[1]]
}
};
app.preferences.rulerUnits = originalRulerUnits;
function sortByDate(a,b) {
if (Number(a)<Number(b)) return -1;
if (Number(a)>Number(b)) return 1;
return 0;
};
};