Make your photos extraordinary in seconds with the Camera Raw Filter: 🔎 Photoshop Quick Tip

How to use the Camera Raw filter
Have you ever wished you could enhance your photos with the ease and precision of Lightroom, right inside Photoshop? Well, you actually can! The Camera Raw Filter in Photoshop is a powerful editing tool that offers a Lightroom-like interface and a comprehensive set of sliders, making it the perfect tool for quick and effortless photo editing. This is just one of the many ways you can edit images in Photoshop. You can continue using all of Photoshop's other features after using the filter, such as adjustment layers. Read about the filter, watch the video, and follow the steps to try it yourself. Once you use it, you'll wonder how you ever lived without it!
AdobeCare on YouTube: How to use the Camera Raw Filter in Photoshop

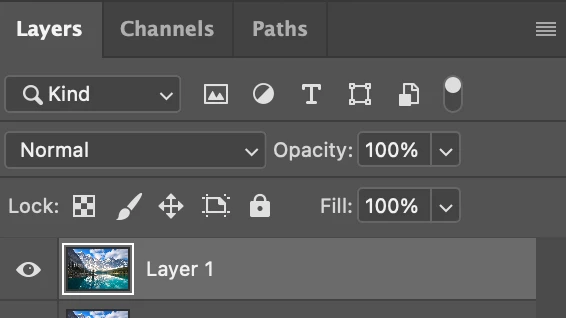
❶ Select the layer you want to edit
In the Layers Panel, click on the layer you want to edit if it is not already active.
❷ Create a Smart Object (optional)
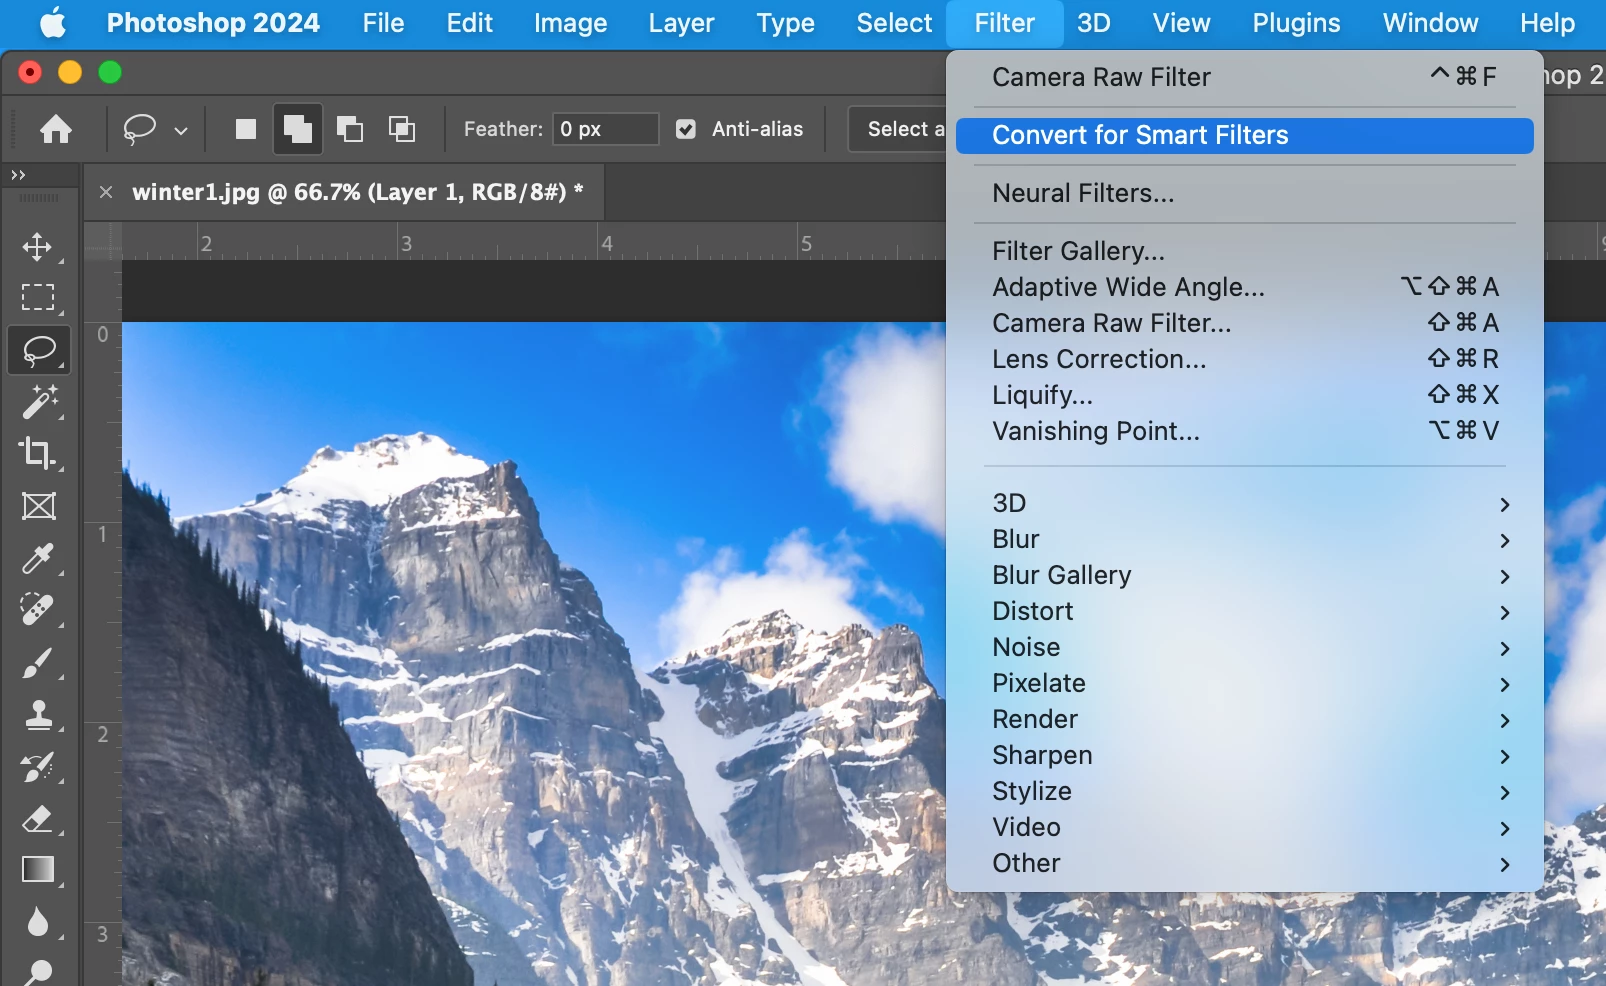
If you want the option to go back and edit your changes in the future, you can turn the contents of the layer into a Smart Object before opening the filter. To learn more about Smart Objects, you can read Work with Smart Objects in Photoshop. To create the Smart Object, go to filter > Convert for Smart Filters from the main menu. If you get a pop-up with the message “To enable re-editable smart filters, the selected layer will be converted into a smart object.”, Click OK.
❸ Open the Camera Raw Filter
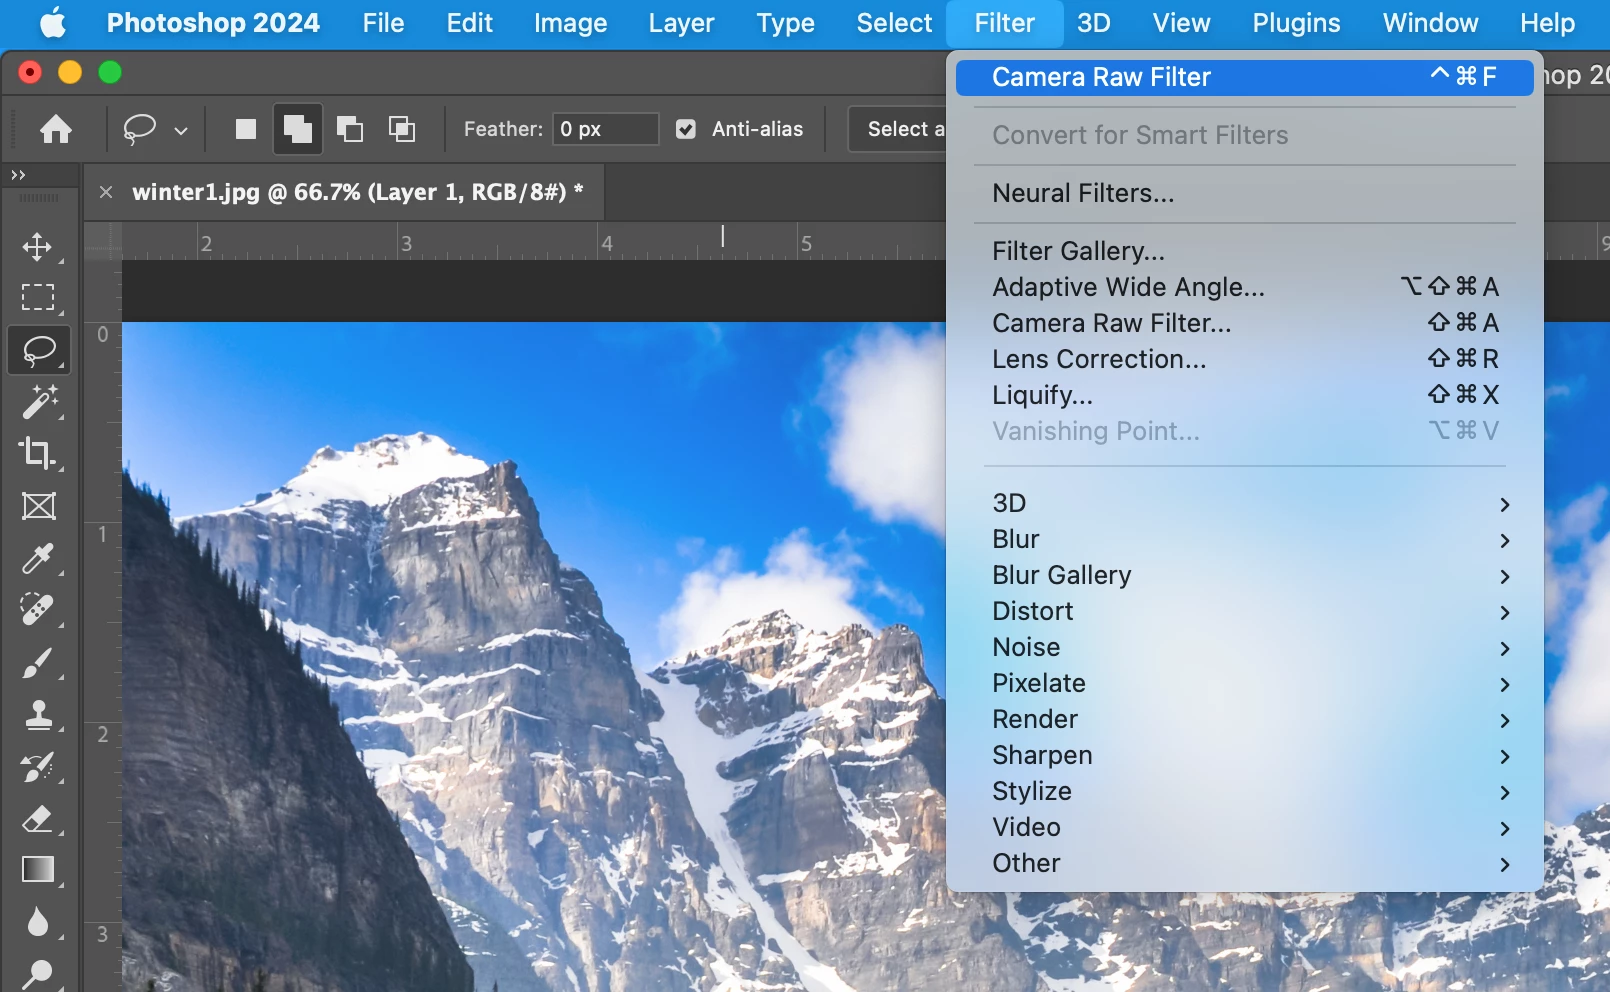
Now that you created a smart object, you can open the filter by going to filter > Camera Raw Filter from the main menu
❹ Make edits to your image
Click on the sliders icon in the top right of the interface. You will see several collapsed categories. Each contains a group of related topics that you can edit for a given category.
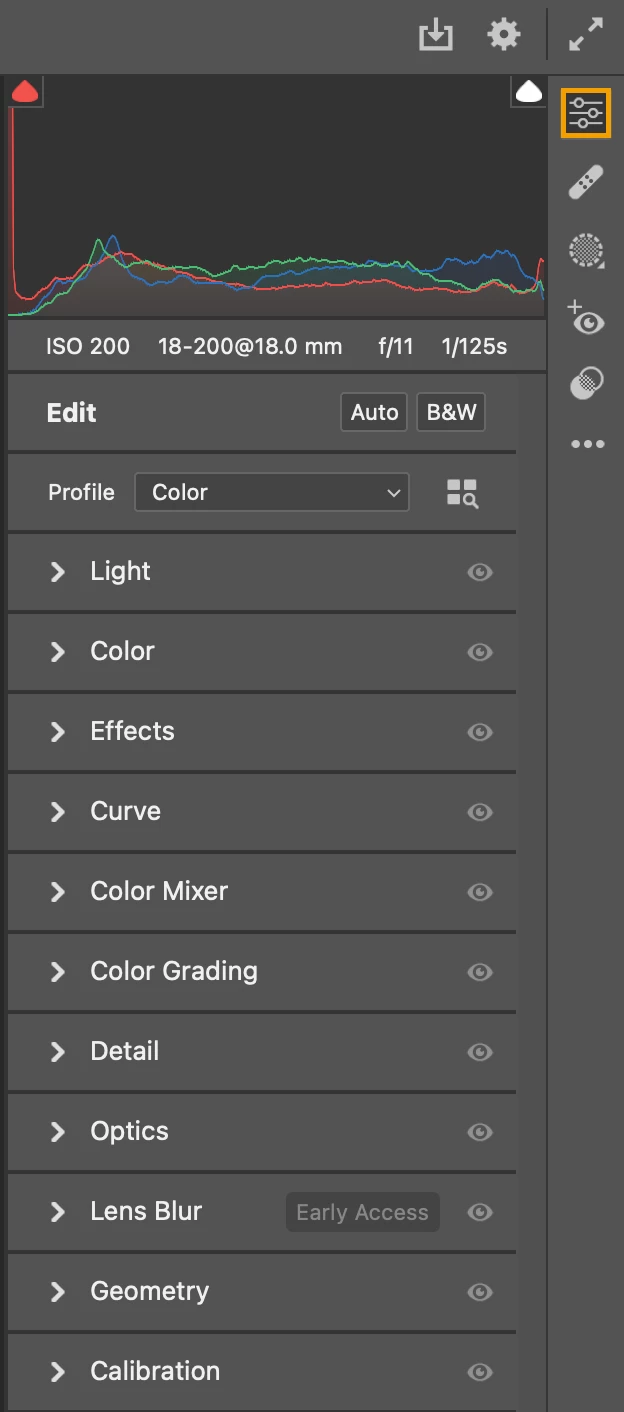
Click on a section to expose the sliders and make edits. Most people are very familiar with the sliders for Light and Color, but not everyone knows about the amazing edits you can make using Dehaze, Color Mixer, Lens Blur, and others. Try everything to see what is possible, and you may find some new favorites! For more detailed information, see Make color and tonal adjustments in Camera Raw.
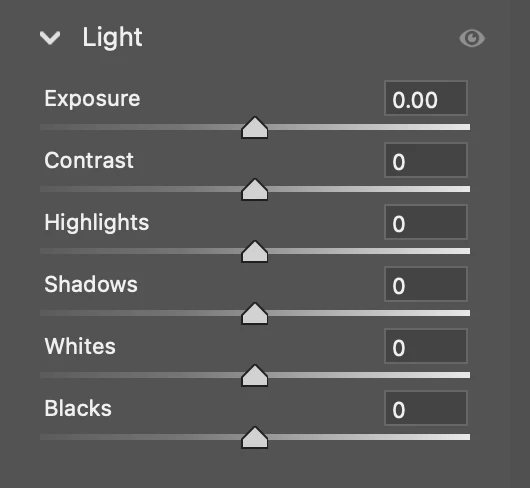
You can make the following adjustments from the panels:
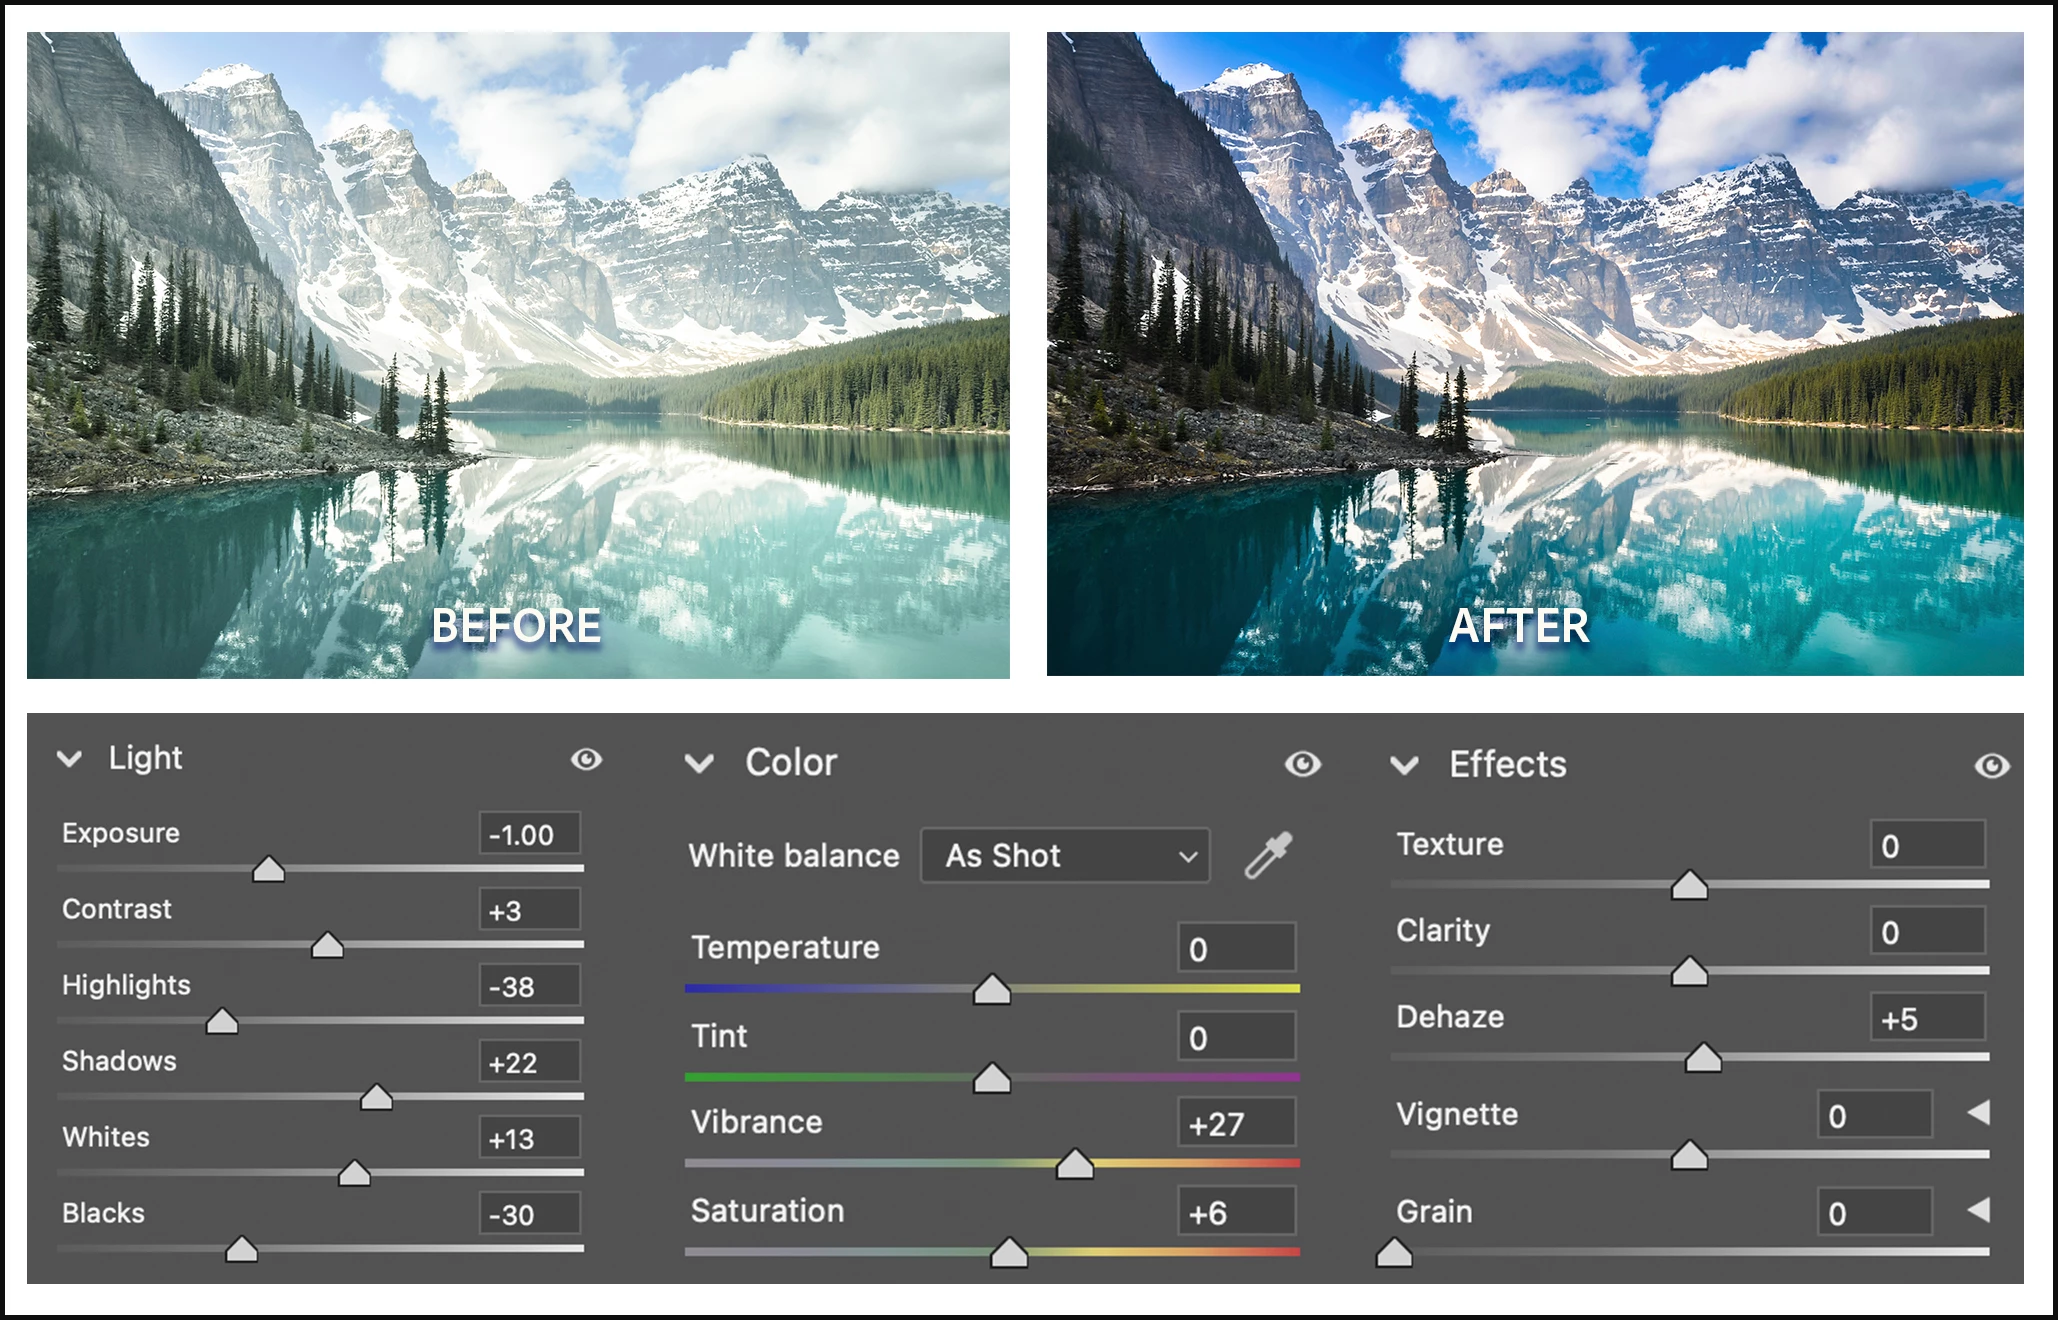
Light: Exposure, Contrast, Highlights, Shadows, Whites and Blacks
Color: White Balance, Temperature, Tint, Vibrance, and Saturation
Effects: Texture, Clarity, Dehaze, Vignette, and Grain
Curve: Fine-tune the tonal scale using curves - Parametric Curve, Point Curve, Red, Green, and Blue Channels
Color Mixer: Hue, Saturation, Luminance, and Color
Color Grading: Adjust hues in Shadows, Midtones, and Highlights
Detail: Sharpening, Noise Reduction, and Color Noise Reduction
Optics: Remove chromatic aberration or Distortion and Vignette and Defringe
Lens Blur: Customize blur and bokeh effects
Geometry: Adjust different types of perspective and level corrections
Calibration: Shadows, Red Primary, Green Primary, and Blue Primary
Below the slider icon, there are other icons for Healing, Masking, Red Eye, and Presets. Masking lets you limit the areas where the edits will take effect. Presets let you make a group of changes with just one click. Take a look at the presets that are already there. There are quite a few, and you may find they save you time when you are editing. Click OK in the bottom right corner when you are done editing to return to the regular Photoshop interface.
NOTE: If you save images in a raw format from your camera, you may want to look into the Adobe Camera Raw plug-in so you can benefit from the additional information captured in raw files, especially to remove noise and to recover highlights and shadows if your exposure is off. The plug-in allows you to view and edit the raw files before opening them for further editing in Photoshop, or before exporting them to image formats such as JPG or TIFF. You can find the plug-in here: Camera Raw plug-in installer. To learn about the differences between JPEG and RAW, check out What is the difference between JPG and RAW files.
Related Topics:
Improve image quality using Camera Raw
Apply masking for local adjustments
Differences between Adobe Camera Raw and the Camera Raw Filter
If you want to learn more about Photoshop in bite-sized chunks, visit the Quick Tips home page.
