• Global community
    • Language:
      • Deutsch
      • English
      • Español
      • Français
      • Português
  • 日本語コミュニティ
    Dedicated community for Japanese speakers
  • 한국 커뮤니티
    Dedicated community for Korean speakers
Exit
2

Making a circular object straight

Community Beginner ,
Aug 26, 2024 Aug 26, 2024

Copy link to clipboard

Copied

I would like to edit this circular picture to a straight one, because it would be a tattoo on the wrist. I've been trying for a week, but it's not working. Can someone help me with this? Thank you very much!


TOPICS
Windows

Views

265

Translate

Translate

Report

Report
Community guidelines
Be kind and respectful, give credit to the original source of content, and search for duplicates before posting. Learn more
community guidelines

correct answers 1 Correct answer

Community Expert , Aug 27, 2024 Aug 27, 2024

The tricky part is that you have to make enough of a gap so that Puppet Warp doesn't interpret the shape as a circle. Here's what my initial selection (that didn't work) that went between the tail and the mouth looked like:
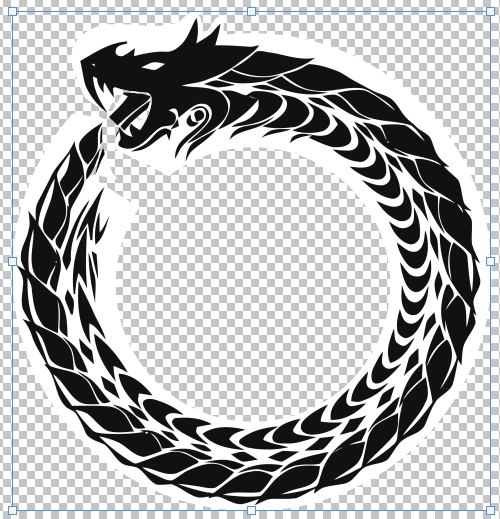
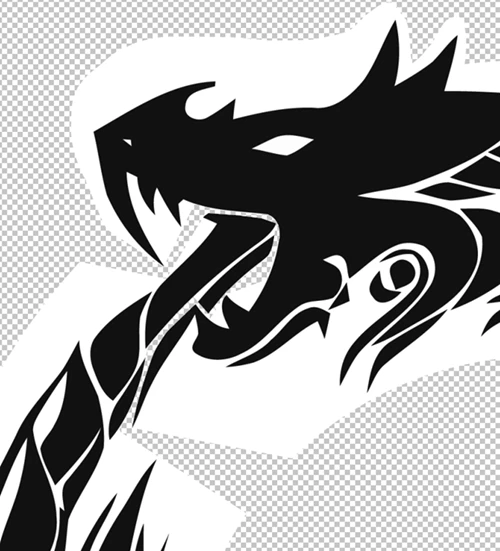
2024-08-27_8-07-08.png

2024-08-27_8-10-55-2.png

And here's how Puppet Warp got applied:
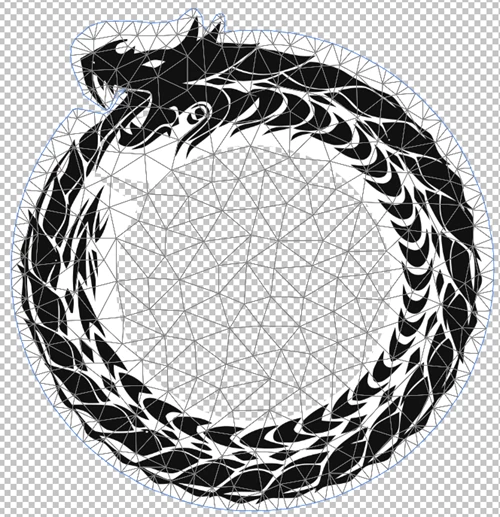
2024-08-27_8-08-38.png

When I removed more of the tail to create a bigger gap, then Puppet Warp applied along the curved shape:
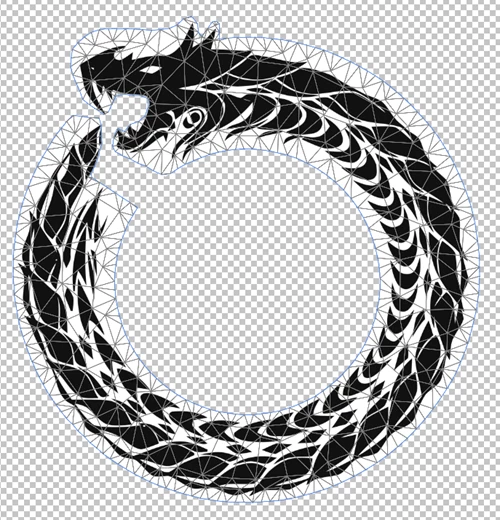
2024-08-27_8-20-47.png

Then, using Puppet Warp, you place pins along the mesh to control the placement of the mesh. I started by placing the first pin

...

Votes

Translate

Translate
Adobe
Community Expert ,
Aug 26, 2024 Aug 26, 2024

Copy link to clipboard

Copied

You can straighten it out using Puppet Warp (Edit > Puppet Warp). It's not an automatic process, and may require a few passes to get it where you want.


Here's what I got after 3 applications of Puppet Warp (you may want to spend more time to make it straighter-this was just for a proof of concept):

2024-08-26_8-51-49.png


To make Puppet Warp work on a circular image, I made a selection inside and outside the dragon and another one that created a gap between the mouth and tail. Without the gap, Puppet Warp gets applied to it as a circle.


Once it's in the shape of a backwards C, then you can apply Puppet Warp. I added a pin behind the head and in small segments that let me "unwind" it. The first pass made it a little curved. You can accept the application and apply it again as needed.

Votes

Translate

Translate

Report

Report
Community guidelines
Be kind and respectful, give credit to the original source of content, and search for duplicates before posting. Learn more
community guidelines
Community Beginner ,
Aug 26, 2024 Aug 26, 2024

Copy link to clipboard

Copied

Thank you so much! Can you send the modified file? Psd would be perfect.

Votes

Translate

Translate

Report

Report
Community guidelines
Be kind and respectful, give credit to the original source of content, and search for duplicates before posting. Learn more
community guidelines
Community Beginner ,
Aug 27, 2024 Aug 27, 2024

Copy link to clipboard

Copied

I tried for 3 hours, but I couldn't do it. Can you help me please?

Votes

Translate

Translate

Report

Report
Community guidelines
Be kind and respectful, give credit to the original source of content, and search for duplicates before posting. Learn more
community guidelines
Community Expert ,
Aug 27, 2024 Aug 27, 2024

Copy link to clipboard

Copied

The tricky part is that you have to make enough of a gap so that Puppet Warp doesn't interpret the shape as a circle. Here's what my initial selection (that didn't work) that went between the tail and the mouth looked like:

2024-08-27_8-07-08.png

2024-08-27_8-10-55-2.png

And here's how Puppet Warp got applied:

2024-08-27_8-08-38.png

When I removed more of the tail to create a bigger gap, then Puppet Warp applied along the curved shape:

2024-08-27_8-20-47.png

Then, using Puppet Warp, you place pins along the mesh to control the placement of the mesh. I started by placing the first pin on the neck and added pins about ever large scale or so. 
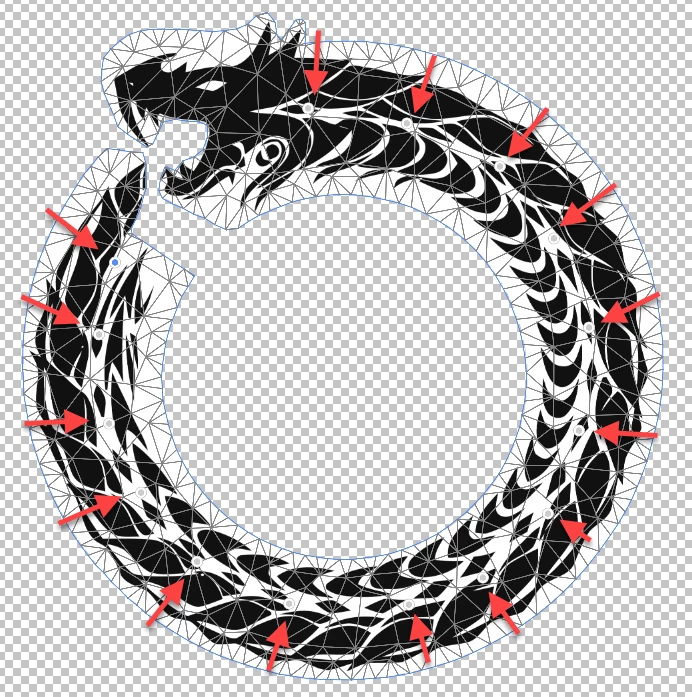
2024-08-27_8-24-48.png

I'd recommend starting from the pin in the tail. Move it slightly outward to the left. Then select the next pin closest to it and drag it slightly to the left and down. Continue shifting the pins to unfurl the shape. You can move the pins a greater distance, but you may wind up distorting the content.
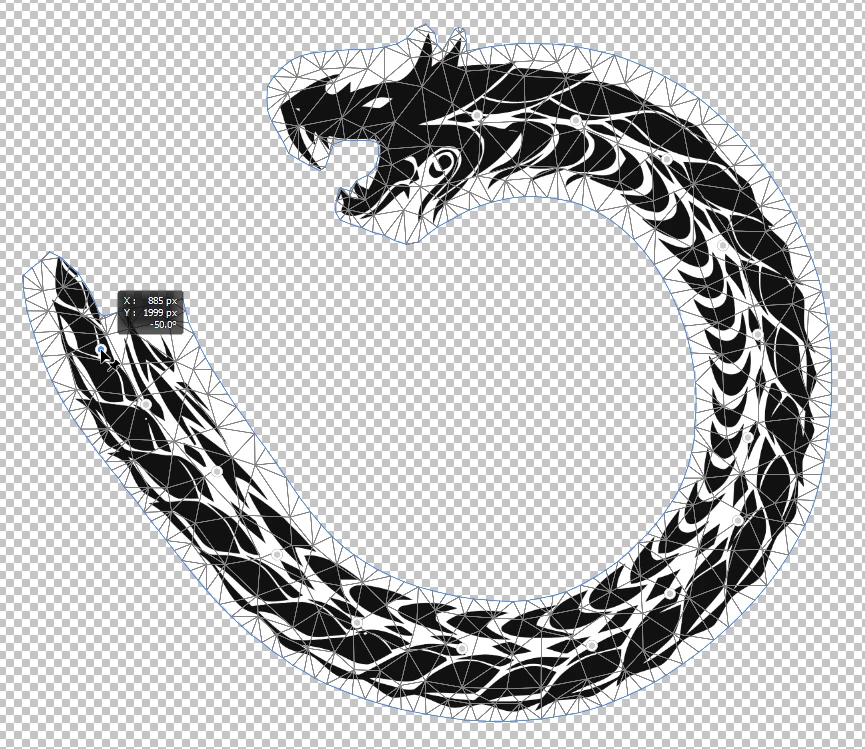
2024-08-27_8-28-29.png

At any time, you can accept the Puppet Warp if you want to check it. In my case, I accepted it to add more canvas (Image > Canvas Size...).
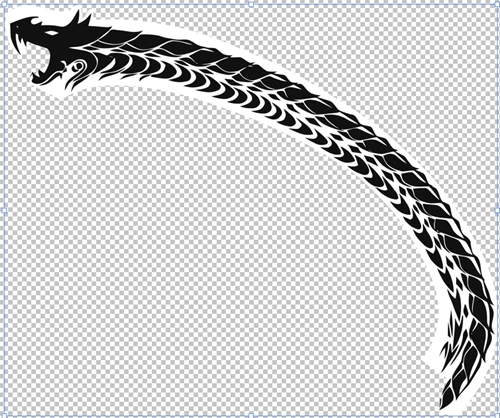
2024-08-27_8-06-45.png

Then I applied Puppet Warp and moved pins again to continue unwrapping it.

2024-08-27_8-06-07.png

As it got straighter, I accepted the Puppet Warp again and used Free Transform to rotate it.


That's when I got the result that I posted earlier. The sample I made wasn't completely straight, so you would probably need to work on moving the pins a bit more.


Once it's straight, you'll want to include the part of the tail that needed to be remove to make Puppet Warp apply the mesh to the subject and not as circle.

Votes

Translate

Translate

Report

Report
Community guidelines
Be kind and respectful, give credit to the original source of content, and search for duplicates before posting. Learn more
community guidelines
Community Beginner ,
Aug 27, 2024 Aug 27, 2024

Copy link to clipboard

Copied

Thank you so much!

Votes

Translate

Translate

Report

Report
Community guidelines
Be kind and respectful, give credit to the original source of content, and search for duplicates before posting. Learn more
community guidelines
Community Expert ,
Aug 27, 2024 Aug 27, 2024

Copy link to clipboard

Copied

You're very welcome. 🙂

Votes

Translate

Translate

Report

Report
Community guidelines
Be kind and respectful, give credit to the original source of content, and search for duplicates before posting. Learn more
community guidelines
Community Expert ,
Aug 26, 2024 Aug 26, 2024

Copy link to clipboard

Copied

Here is one way:


-Duplicate the layer to retain the original

-Select the head area and go Select>Inverse and Edit>Cut

A1.jpg


-Bring up the dupe and duplicate it too, always keeping an untouched original version. Select around various elements and move them over:     --- (edit typo)a2.jpg

-I turned some of them upside down and made some of my own elements to keep the shape flowingA3.jpgA4.jpgA5.jpg

Votes

Translate

Translate

Report

Report
Community guidelines
Be kind and respectful, give credit to the original source of content, and search for duplicates before posting. Learn more
community guidelines
Community Beginner ,
Aug 26, 2024 Aug 26, 2024

Copy link to clipboard

Copied

Thank you!

Votes

Translate

Translate

Report

Report
Community guidelines
Be kind and respectful, give credit to the original source of content, and search for duplicates before posting. Learn more
community guidelines
Community Expert ,
Aug 27, 2024 Aug 27, 2024

Copy link to clipboard

Copied

One way to do this is make sure the body of the serpent is centered in a square document. A few concentric circular paths can serve as guides. Run Fiter >  Distort > Polar Coordinates with Polar to rectangular. Use Image Size to expand the width by 314% (the value of pi).

snake.png

Votes

Translate

Translate

Report

Report
Community guidelines
Be kind and respectful, give credit to the original source of content, and search for duplicates before posting. Learn more
community guidelines
Community Beginner ,
Aug 27, 2024 Aug 27, 2024

Copy link to clipboard

Copied

LATEST

Thank you!

Votes

Translate

Translate

Report

Report
Community guidelines
Be kind and respectful, give credit to the original source of content, and search for duplicates before posting. Learn more
community guidelines