• Global community
    • Language:
      • Deutsch
      • English
      • Español
      • Français
      • Português
  • 日本語コミュニティ
    Dedicated community for Japanese speakers
  • 한국 커뮤니티
    Dedicated community for Korean speakers
Exit
0

Masking type in photoshop

Community Beginner ,
Aug 03, 2017 Aug 03, 2017

Copy link to clipboard

Copied

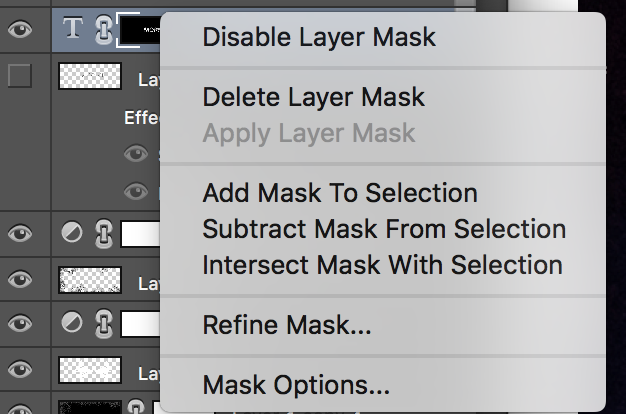
So I made a type layer. I added a mask to it so I could make the type look grungy. Now I am trying to make the mask "stick" to the type so that if I want to put a space between a letter, the mask stays on the type where I put it. How can I do this? "Apply Layer Mask" option is greyed out so I can't do that.
Please Help!!!

Views

1.1K

Translate

Translate

Report

Report
Community guidelines
Be kind and respectful, give credit to the original source of content, and search for duplicates before posting. Learn more
community guidelines
Adobe
Community Beginner ,
Aug 03, 2017 Aug 03, 2017

Copy link to clipboard

Copied

Screen Shot 2017-08-03 at 2.23.48 PM.png

Votes

Translate

Translate

Report

Report
Community guidelines
Be kind and respectful, give credit to the original source of content, and search for duplicates before posting. Learn more
community guidelines
Community Expert ,
Aug 03, 2017 Aug 03, 2017

Copy link to clipboard

Copied

Hi

A better way is to use clipping.

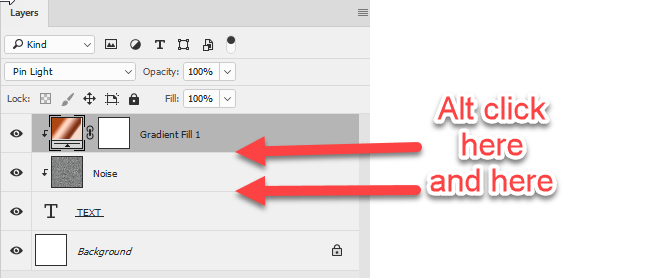
Put your "grunge" layers above the text layer. Alt-Click (opt-Click on Mac) on the border between the new layer and the layer below.  A small arrow will appear to show the layer is clipped to the layer below.

Now the text itself will act as a mask and is fully editable

I hope that helps you

Dave

Votes

Translate

Translate

Report

Report
Community guidelines
Be kind and respectful, give credit to the original source of content, and search for duplicates before posting. Learn more
community guidelines
Community Expert ,
Aug 03, 2017 Aug 03, 2017

Copy link to clipboard

Copied

Darn it, Dave. I spent too long working on my grunge.

Votes

Translate

Translate

Report

Report
Community guidelines
Be kind and respectful, give credit to the original source of content, and search for duplicates before posting. Learn more
community guidelines
Community Expert ,
Aug 03, 2017 Aug 03, 2017

Copy link to clipboard

Copied

We're both too slow.

Votes

Translate

Translate

Report

Report
Community guidelines
Be kind and respectful, give credit to the original source of content, and search for duplicates before posting. Learn more
community guidelines
Community Expert ,
Aug 03, 2017 Aug 03, 2017

Copy link to clipboard

Copied

ACPs - we're like buses. Wait around long enough and three turn up at once ..

Dave

Votes

Translate

Translate

Report

Report
Community guidelines
Be kind and respectful, give credit to the original source of content, and search for duplicates before posting. Learn more
community guidelines
Community Expert ,
Aug 03, 2017 Aug 03, 2017

Copy link to clipboard

Copied

LOL. At least we all came up with the exact same answer.

P.S. I hate it when a bunch of us answer at once and my answer is the one that totally misses the mark.

Votes

Translate

Translate

Report

Report
Community guidelines
Be kind and respectful, give credit to the original source of content, and search for duplicates before posting. Learn more
community guidelines
Community Beginner ,
Aug 03, 2017 Aug 03, 2017

Copy link to clipboard

Copied

So that sounds great but the thing is, it's not a layer. I made a mask on the type layer and drew in the mask. So yeah. I'm pretty stumped here.

I just made the edges of the type kind of ragged and I want to keep it that way but I need to adjust some spacing in the letters.

Votes

Translate

Translate

Report

Report
Community guidelines
Be kind and respectful, give credit to the original source of content, and search for duplicates before posting. Learn more
community guidelines
Community Expert ,
Aug 03, 2017 Aug 03, 2017

Copy link to clipboard

Copied

How about using a clipping mask?
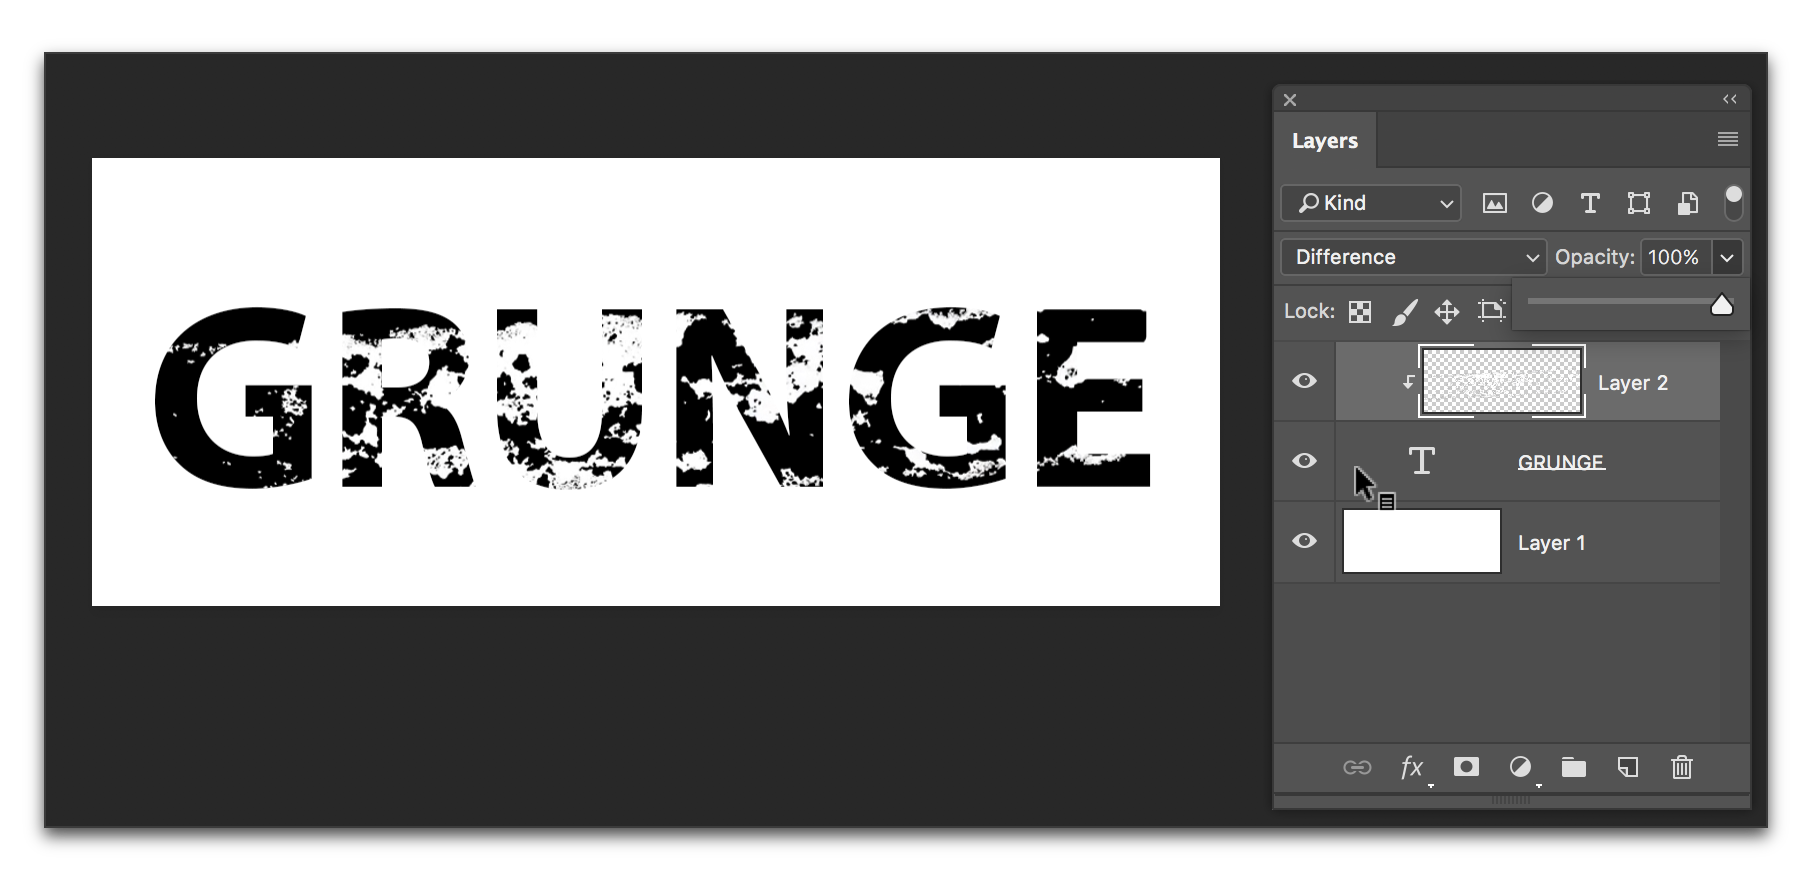
Photoshop CCss_006.png

Votes

Translate

Translate

Report

Report
Community guidelines
Be kind and respectful, give credit to the original source of content, and search for duplicates before posting. Learn more
community guidelines
Community Beginner ,
Aug 03, 2017 Aug 03, 2017

Copy link to clipboard

Copied

I'm stuck with how I did it unfortunately. Next time I will use clipping mask but for this I need it to be what I drew in. Eek
So I have to find a way to make the mask stick if that makes any sense to you.

Votes

Translate

Translate

Report

Report
Community guidelines
Be kind and respectful, give credit to the original source of content, and search for duplicates before posting. Learn more
community guidelines
Community Expert ,
Aug 03, 2017 Aug 03, 2017

Copy link to clipboard

Copied

Is this what you have now?
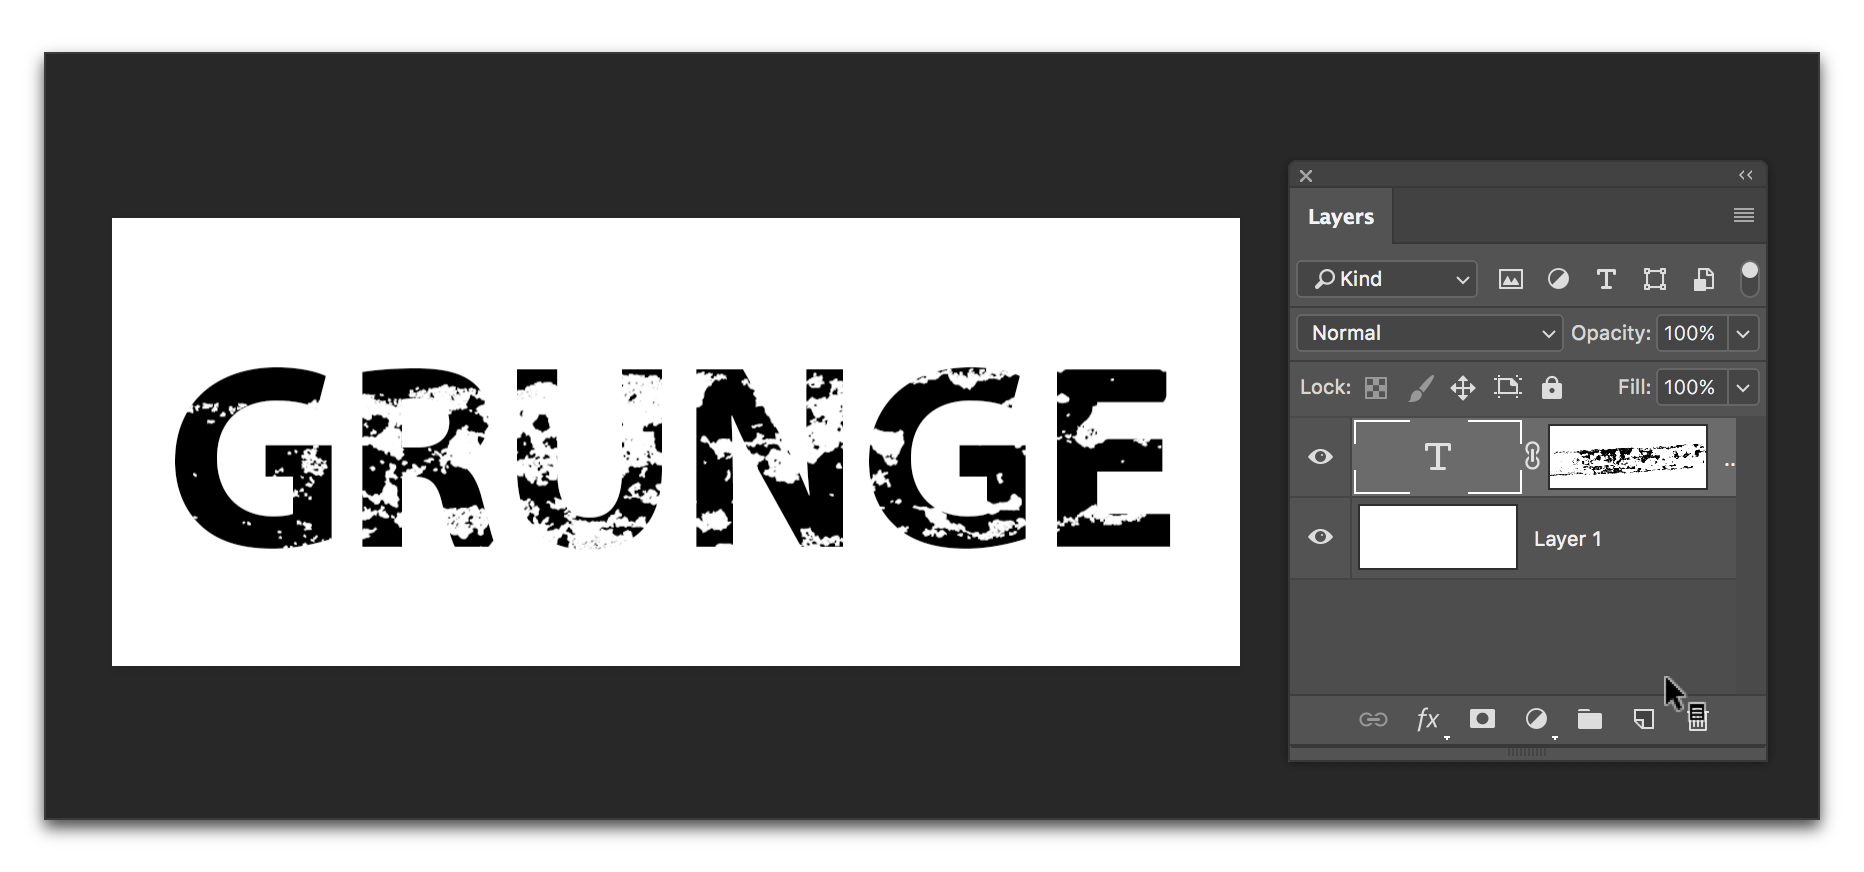
Photoshop CCss_008.png

Votes

Translate

Translate

Report

Report
Community guidelines
Be kind and respectful, give credit to the original source of content, and search for duplicates before posting. Learn more
community guidelines
Community Beginner ,
Aug 03, 2017 Aug 03, 2017

Copy link to clipboard

Copied

pretty much

yes

Votes

Translate

Translate

Report

Report
Community guidelines
Be kind and respectful, give credit to the original source of content, and search for duplicates before posting. Learn more
community guidelines
Community Expert ,
Aug 03, 2017 Aug 03, 2017

Copy link to clipboard

Copied

If so, it's an easy transition to what we are all recommending:

  1. Ctrl/Cmd click on your mask (in the layers panel) to select it
  2. Select > Inverse
  3. Add a new layer above the type layer
  4. Click on the new layer to make it active
  5. Edit > Fill (I used white)
  6. Right click the new layer > Make Clipping mask
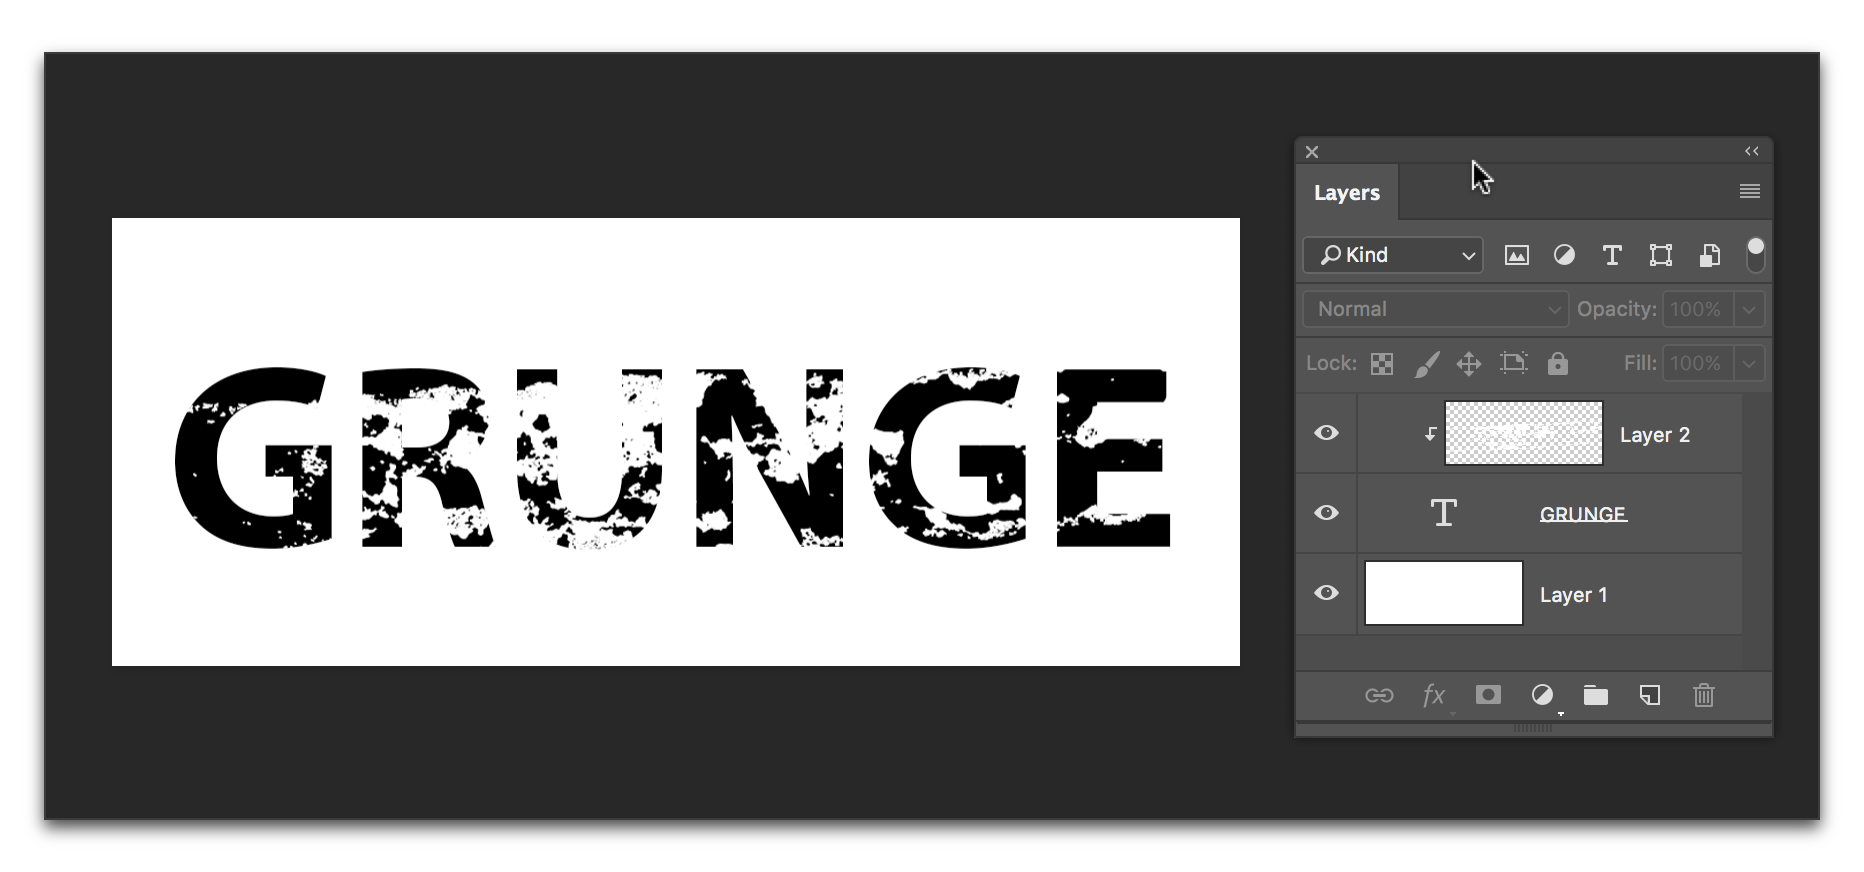
Photoshop CCss_009.png

Votes

Translate

Translate

Report

Report
Community guidelines
Be kind and respectful, give credit to the original source of content, and search for duplicates before posting. Learn more
community guidelines
Community Beginner ,
Aug 03, 2017 Aug 03, 2017

Copy link to clipboard

Copied

cntrl/cmd/ and click does not give me an option for inverse

Votes

Translate

Translate

Report

Report
Community guidelines
Be kind and respectful, give credit to the original source of content, and search for duplicates before posting. Learn more
community guidelines
Community Expert ,
Aug 03, 2017 Aug 03, 2017

Copy link to clipboard

Copied

No. There are two separate steps.

First load your mask as a selection: hover over the mask in the layers panel and hold the Control key on Windows (Command key on a Mac) and click. You will see marching ants.
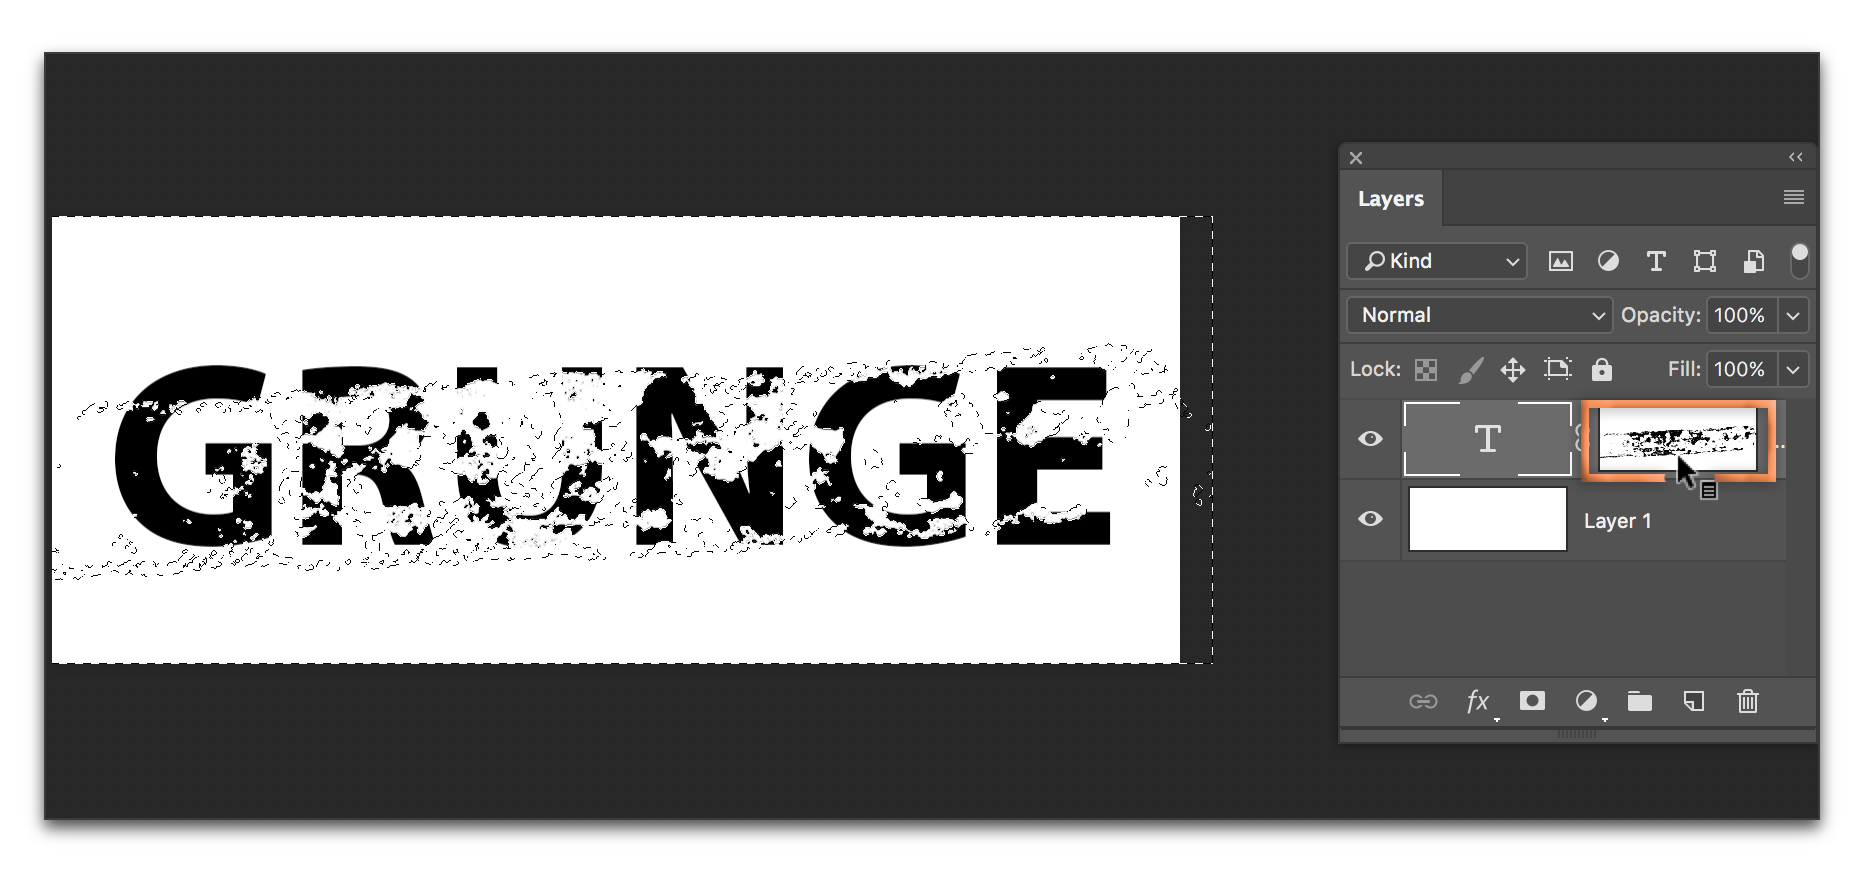
Photoshop CCss_010.png

Then, go the Select menu and choose Inverse.

Votes

Translate

Translate

Report

Report
Community guidelines
Be kind and respectful, give credit to the original source of content, and search for duplicates before posting. Learn more
community guidelines
Community Beginner ,
Aug 03, 2017 Aug 03, 2017

Copy link to clipboard

Copied

Ok so thanks so much.

Yeah this still doesn't so what I need it to though. so when I adjust the type, the mask doesn't move with it. I need the edged on the type to stay exactly the same. I don't know if this makes sense. As if if was just how the typeface was. When I add a space since the mask stays where it is, the edges change. And I need them to stay as is.

Maybe this is not possible and I just have to make each letter and object just move them around independently.

I just figured there was a way to do this. hmmm

Votes

Translate

Translate

Report

Report
Community guidelines
Be kind and respectful, give credit to the original source of content, and search for duplicates before posting. Learn more
community guidelines
Community Expert ,
Aug 03, 2017 Aug 03, 2017

Copy link to clipboard

Copied

If you adjust the type, you may need to adjust the mask. Neither regular masks nor clipping masks auto-adjust. Just use Edit > Free Transform. The three of us who have contributed to this thread would all approach this with clipping masks, and that's still the recommendation.

Votes

Translate

Translate

Report

Report
Community guidelines
Be kind and respectful, give credit to the original source of content, and search for duplicates before posting. Learn more
community guidelines
Community Beginner ,
Aug 03, 2017 Aug 03, 2017

Copy link to clipboard

Copied

thank you!
Yeah that was my problem and that was what I was hoping to do. Wish I could just apply the mask and be done. Could always create a typeface, yeah forget that. haha
But thanks

Votes

Translate

Translate

Report

Report
Community guidelines
Be kind and respectful, give credit to the original source of content, and search for duplicates before posting. Learn more
community guidelines
Community Expert ,
Aug 03, 2017 Aug 03, 2017

Copy link to clipboard

Copied

LATEST

always happy to help.

Votes

Translate

Translate

Report

Report
Community guidelines
Be kind and respectful, give credit to the original source of content, and search for duplicates before posting. Learn more
community guidelines
Community Expert ,
Aug 03, 2017 Aug 03, 2017

Copy link to clipboard

Copied

A better way would be to use a clipping mask:

Add your grunge layers above the text layer, then press alt/opt, while clicking between the grunge layer(s) and your text layer, This way you can edit your text layer.:
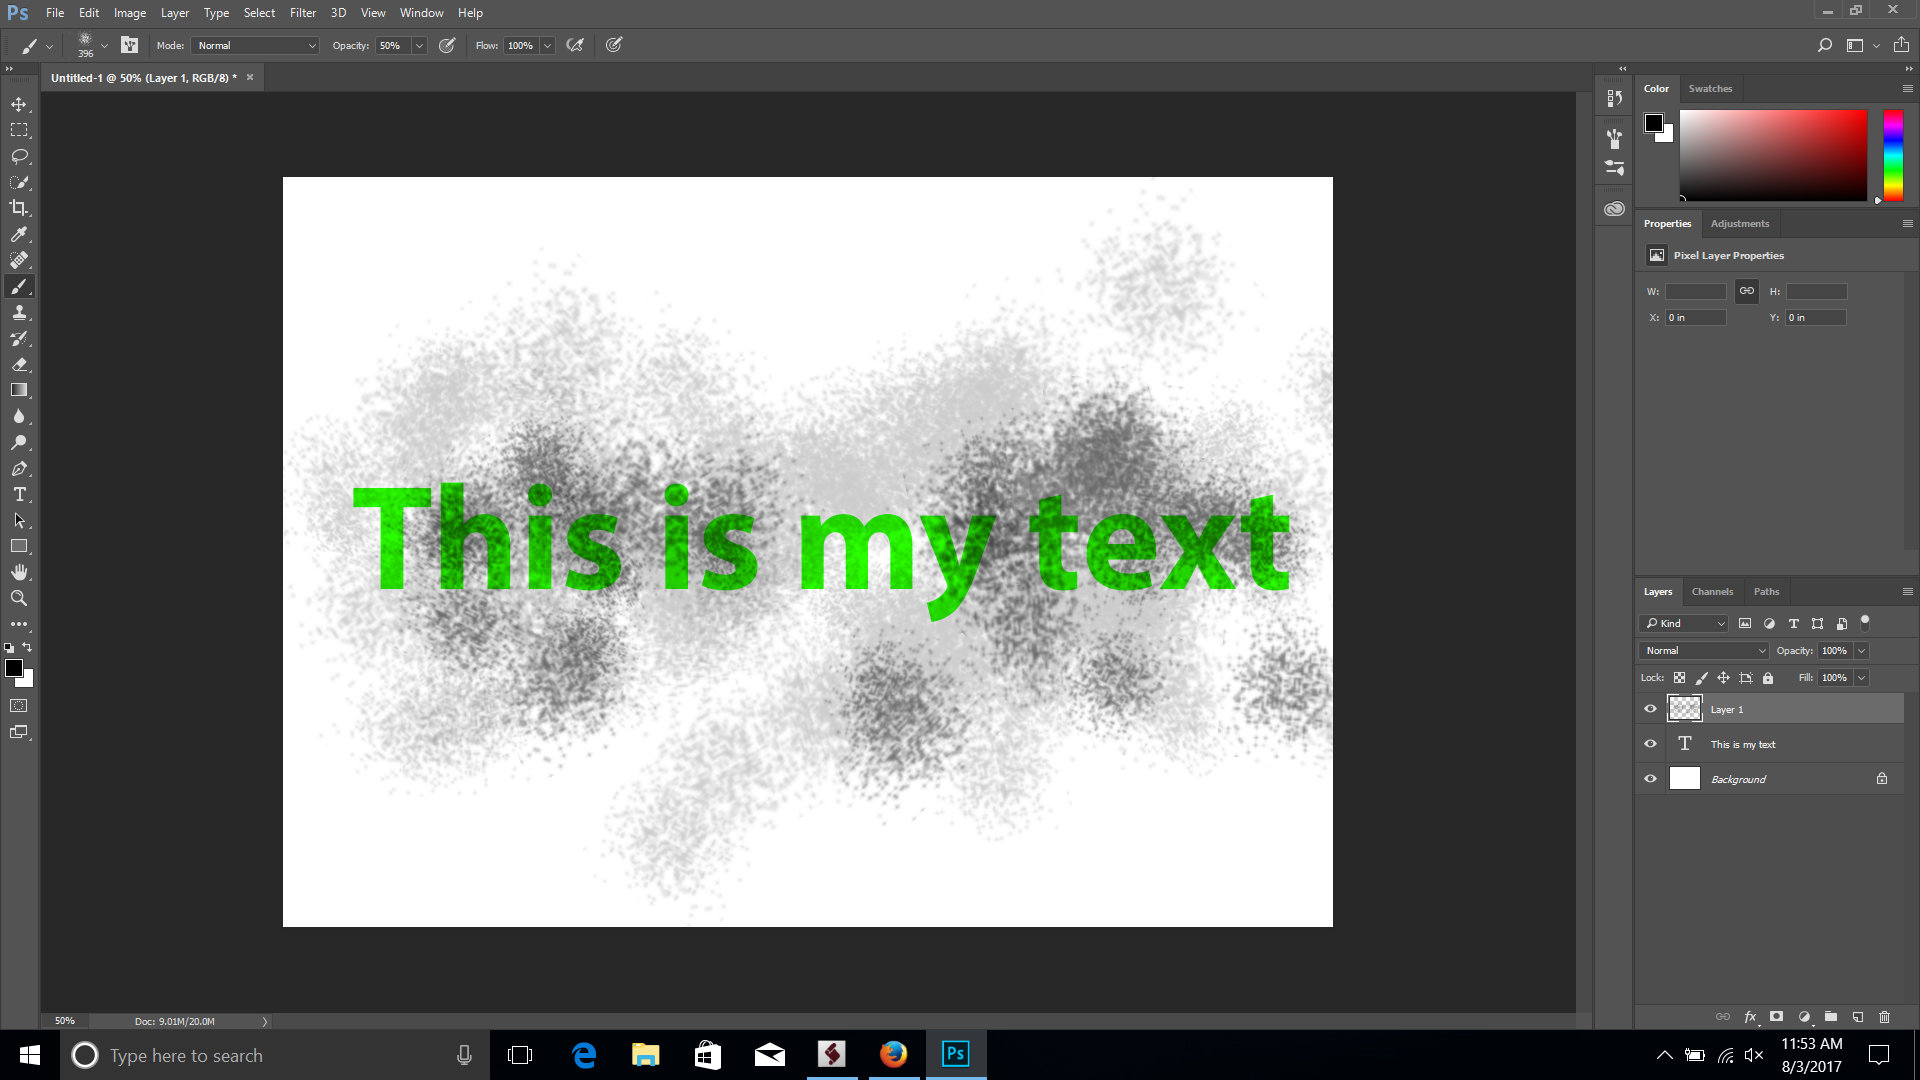
Damn, Dave & Barb I guess I'm a little too slow.

Votes

Translate

Translate

Report

Report
Community guidelines
Be kind and respectful, give credit to the original source of content, and search for duplicates before posting. Learn more
community guidelines