This was done entirely with the Camera RAW filter, although I pulled back a wee bit leaving less red reflected in the snow. Making the layer a Smart Object obviously lets you take multiple edits without loss of image quality. This was more desirable in this case as I was comparing to your edit.

You can see I did use a touch of magenta to match the reddish tint in your edit.
I balanced positive Shadow with a bit less exposure and a fair bit of reduced highlights.
Your image was pretty saturated so I used a lot of vibrance, and a touch of saturation.
High values of clarity have a big effect on contrast, working almost like the shadow slider.
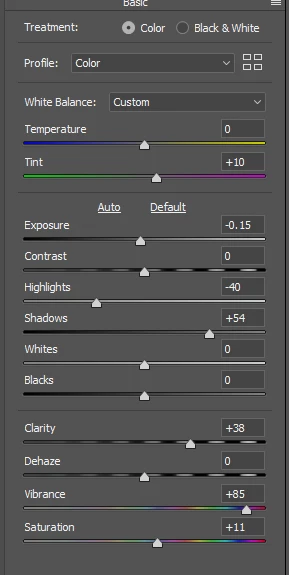
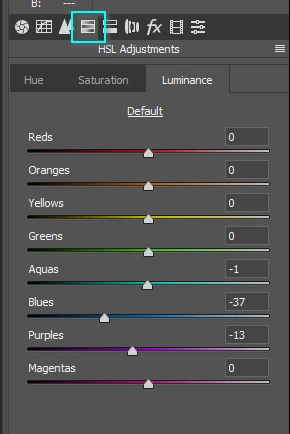
But the blues were still brighter in my edit, so I used the HSL sliders and reduced the blue luminance.
Saving the document as a layered PSD, and with the background layer a Smart Object, means you can keep going back and fine tuning. You can do the same thing when working with the RAW file by Shift clicking on Open in ACR. Note: I have a feeling that may have changed, so test that to make sure.

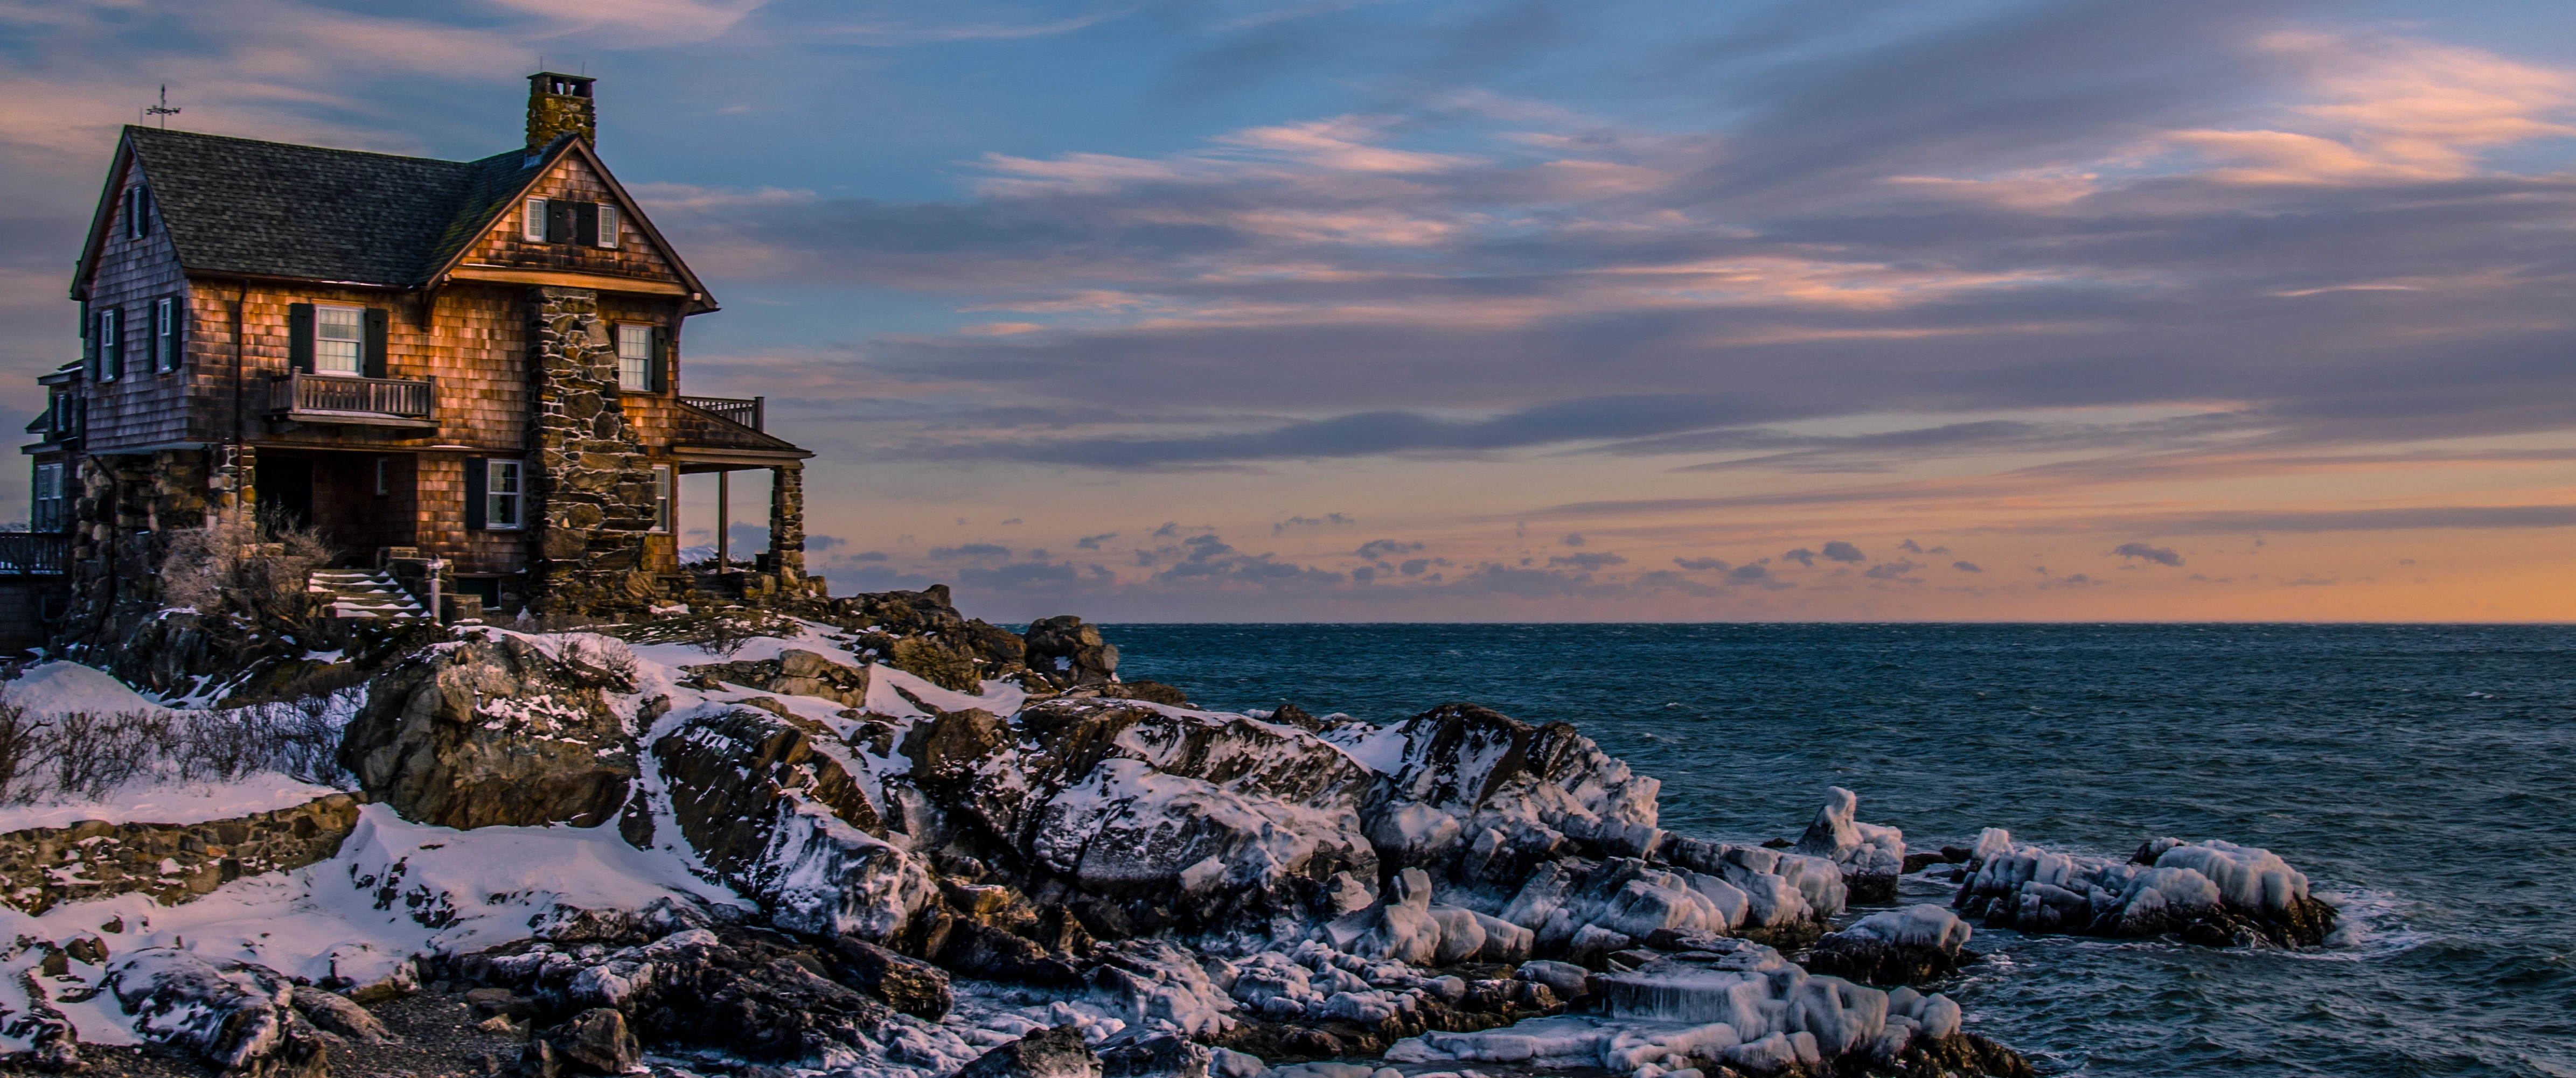
 Can anyone help me figure out how to make the second picture look like the first? Thanks!
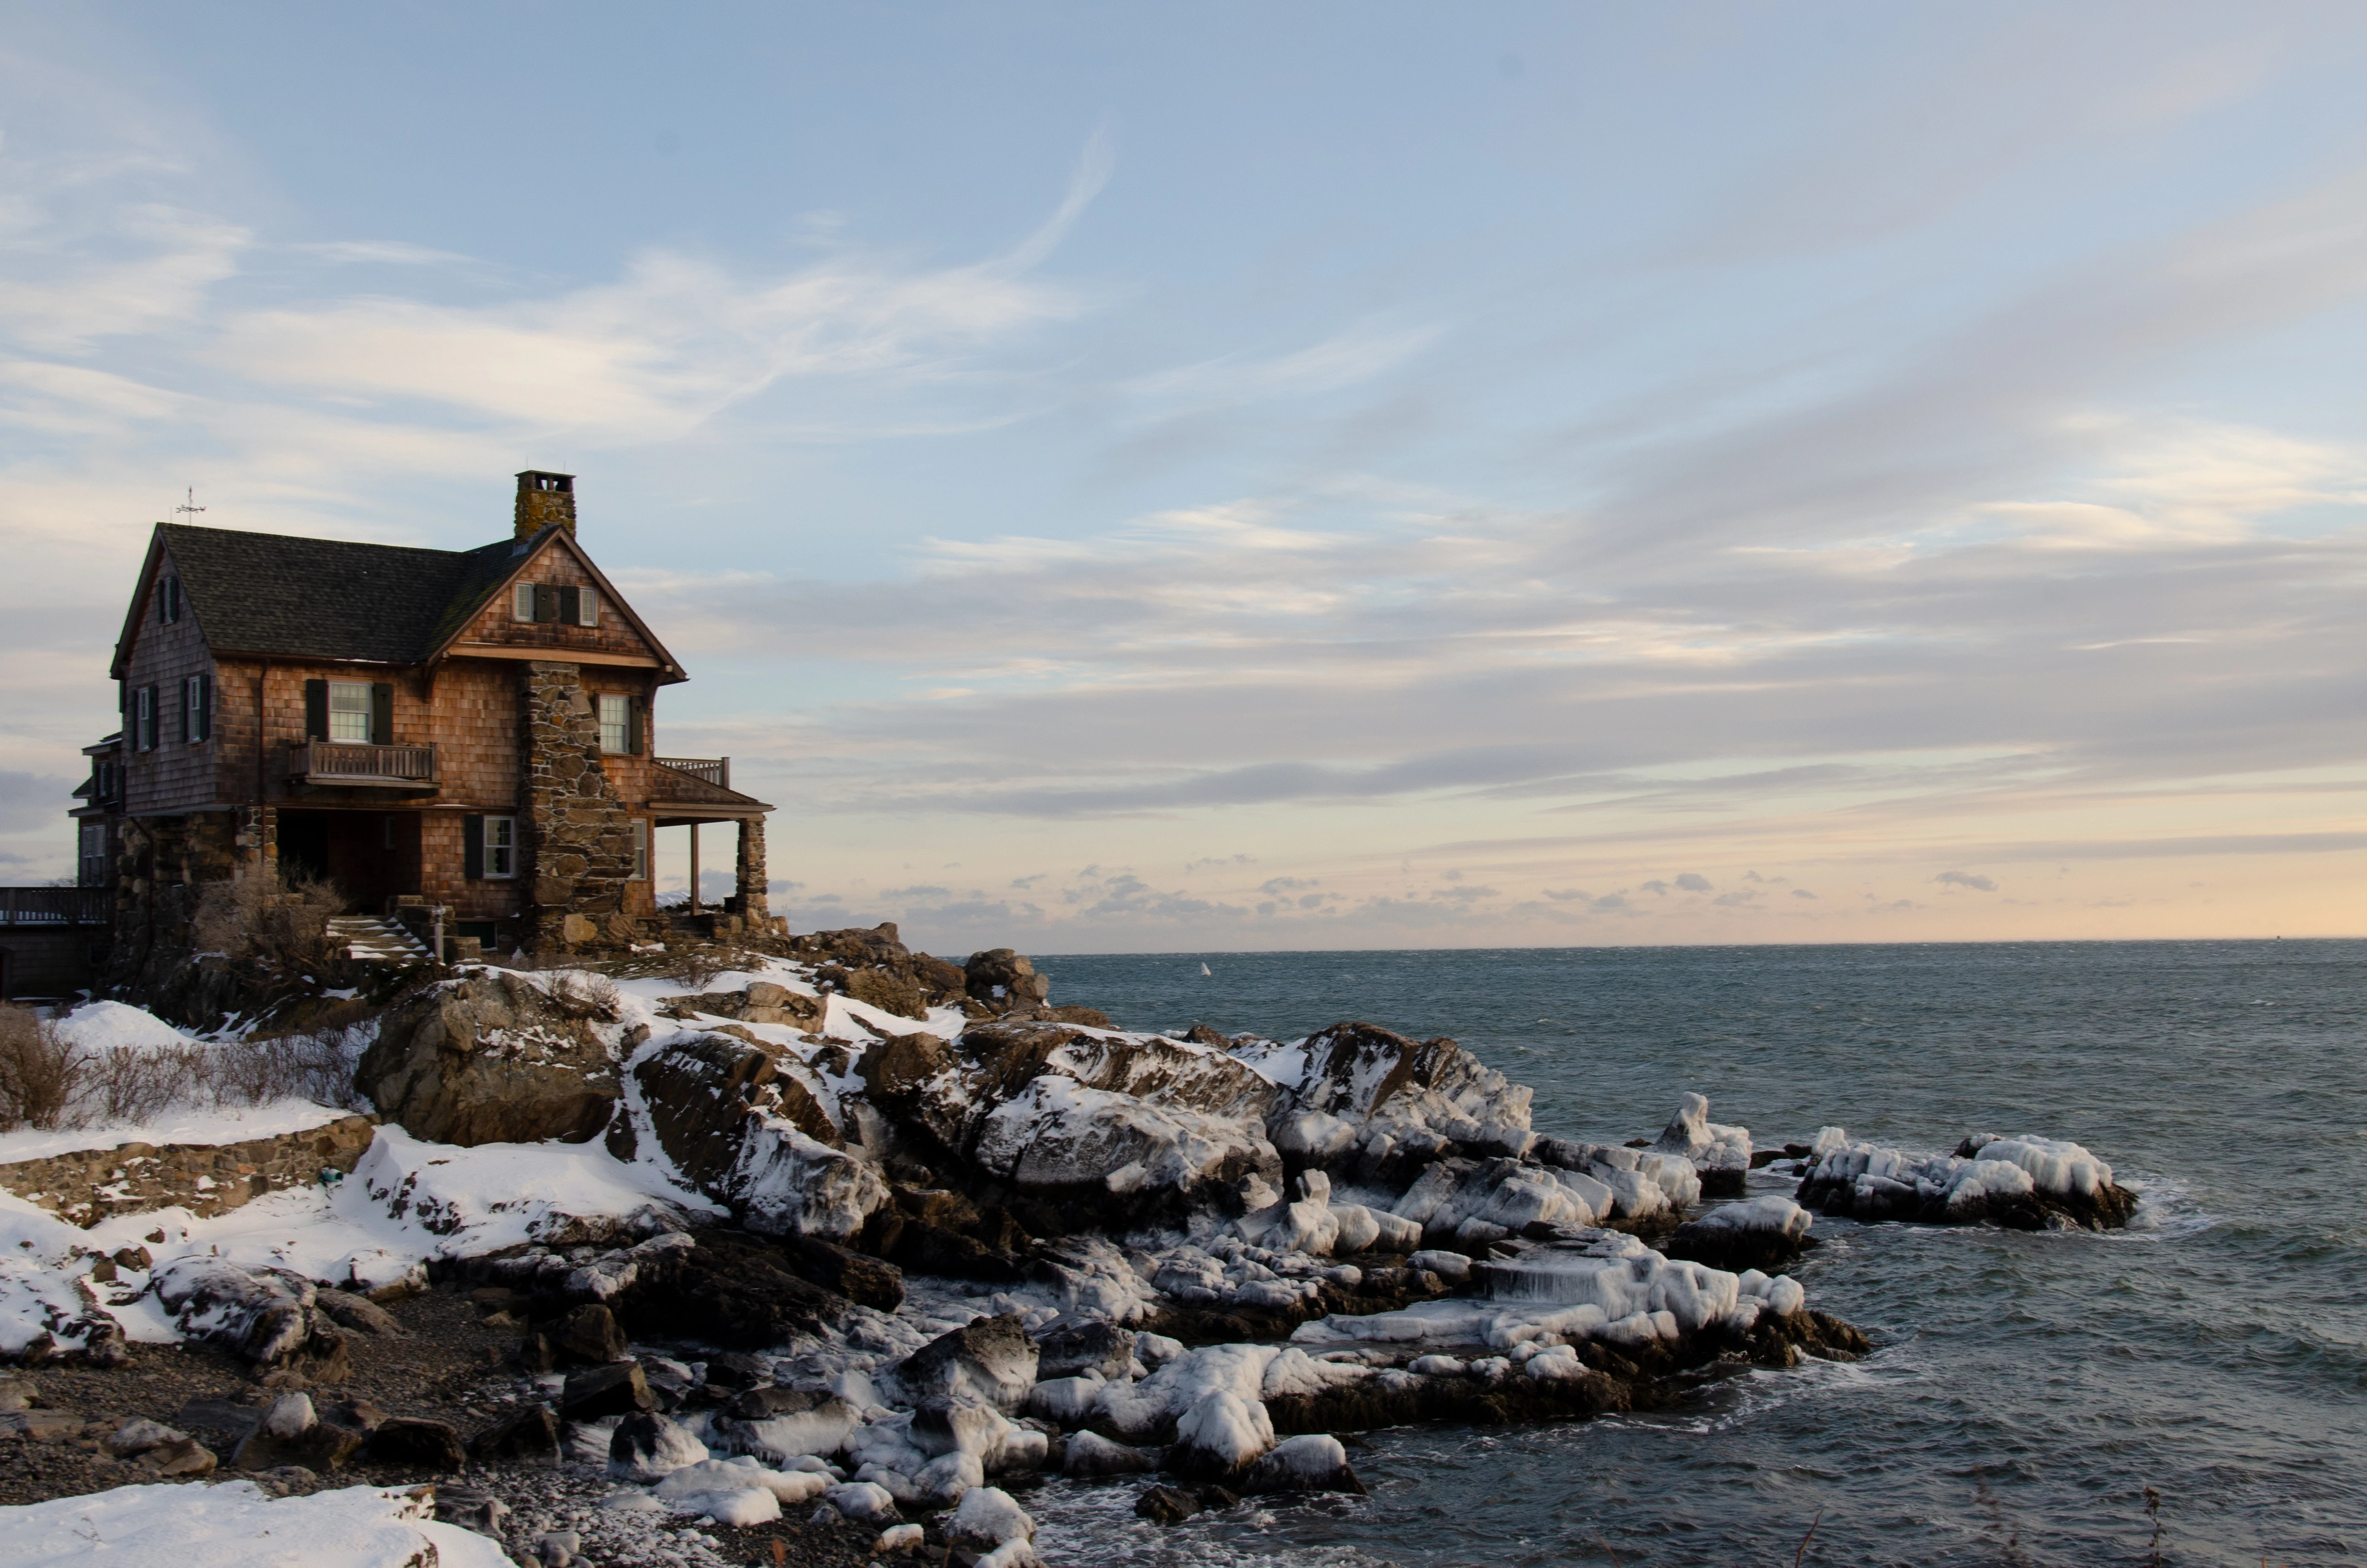