Matching product images

Copy link to clipboard
Copied
Hello, I am having trouble finding a correct approach to matching image settings across multiple pictures of the same product and my investigations on the net have not yielded a lot of results, so I would appreciate some guidance with this.
What I am doing is taking multiple photos of the same object. Obviously I am keeping the lowest ISO possible (100) and depending on the depth of field requirements based on the product angle I change the aperture size across images, although I tend to keep the number closer to f/8 if possible. What I am trying to say is that the exposure does not match exactly between images, also different lenses might be used between images. I also include white balance reference card visible in all the photos I take.
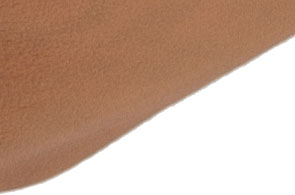
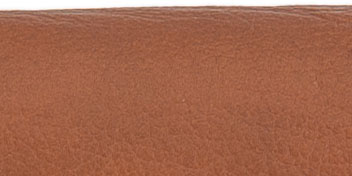
The issue I am facing is that after adjusting two images the color feel differs between them. I know that the white balance is correct as I am using same light source, synchronize color temperatures and even if I use the same sheet (that is included in every image) as white balance reference this 'color' mismatch between images does not go away. I am not sure what type of adjustments or tools I can use to 'scientifically' match two images to make them more consistent. It might be 'vibrance', 'saturation' and whatnot. I would prefer to utilize a technique in Camera Raw or, if not possible, within Photoshop itself. Lightroom might be a possibility as well, but I am currently not that familiar with this product.
I am relatively new to photo editing, so maybe I am missing something obvious or using incorrect forum to ask this question.
Anyways I would appreciate any feedback
Thank you.
Explore related tutorials & articles
Copy link to clipboard
Copied
For the examples you posted, a Selective Color layer should give you the most effective correction. Match Color might work as a quick'n'dirty auto correction.
In the future, rotate the object instead of moving the camera. Wear neutral-colored clothes! Keep away from any other strongly colored objects or walls.
Copy link to clipboard
Copied
You can use a curves adjustment layer. It's a bit tedious, but it should get you a satisfactory result.
First, sample the leather color that you want to match. Write down the RGB color values. I got R:162 G:111 B:80.
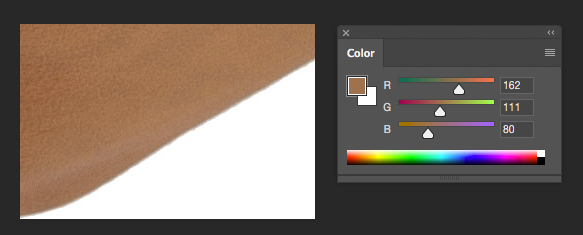
Next open the image you want to match, and add a curves adjustment layer.
Set the curve individually for each color channel. Choose the channel under the drop down menu that by default says RGB.
Click on the curve to add a point right in the middle of the spike in the histogram.
Change the output number to match the color you sampled in the first image. Here's what it looked like for me. Input and Output numbers are at the bottom under the curve.
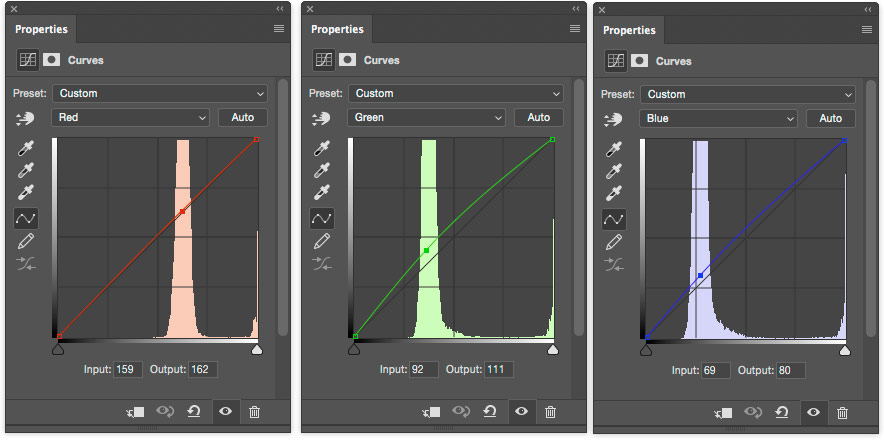
The leather color matched with this edit.
Copy link to clipboard
Copied
Try this
Put the image you want on the bottom layer and add a Hue & Saturation adjustment layer above it.
Put the image you want to match to on the top layer and transform it so that it only covers the left part of the image

Now get the eyedropper tool set to sample size 31x31 or greater - and All layers

Shift click on an area in the left and on an area in the right to set two sample points that you want to match
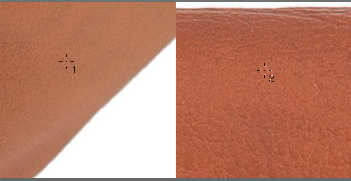
In the info panel set those two points to HSB

Now go to the properties panel and adjust the sliders until the HSB values match.
Note : you have to click on one of the pixel layers to check they match - the values shown for point #1 (top layer) whilst the adjustment layer is selected will be incorrect
So the aim in the example above aim was to adjust until point #2 reached H23 S50 B64. Watch the #2 values in the info panel - ignore the values in the HSL adjustment properties
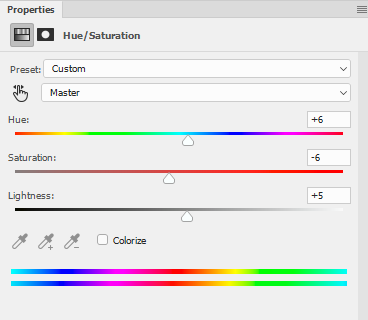
Check:
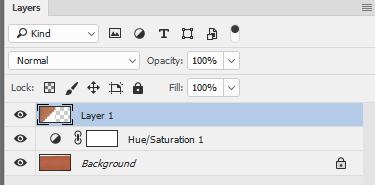


You can then delete the top layer with the second image
Dave
Copy link to clipboard
Copied
I am not entirely sure what product you are photographing, but I can tell you that as a commercial photographer, I do almost no post processing other than make clipping masks so the client can have the product on a transparent background. The look and colour of the products I shoot is 95% down to the way I light and shoot them.
Copy link to clipboard
Copied
Trevor.Dennis wrote:
The look and colour of the products I shoot is 95% down to the way I light and shoot them.
Yes, that was my point too.
There's a golden rule about this: do everything as early as possible in the process. Get it right the first time. Correcting things in Photoshop later, although tempting, usually takes you ten times longer even if you're good at it.
If the quality of the light changes between shots, it's almost impossible to equalize later. Correcting one difference just exaggerates another.
Copy link to clipboard
Copied
D Fosse wrote:
If the quality of the light changes between shots, it's almost impossible to equalize later. Correcting one difference just exaggerates another.
Very true, Dag. I do wonder just what the OP's light source is?
erixonn, what is your light source? A lower end strobe/flash can vary quite a bit from in both color and output from shot to shot. But the absolute worst is when you change a entry level light's power too much from shot to shot. That's on top of color casts from other elements around the room, as D Fosse mentioned.
Btw, not sure what camera you are using or the format you are shooting. Quite a long shot here, bit I know some cameras have a ability to automatically control saturation, etc. in the JPEG format. A raw file will be in its original state, with camera presets discarded, when opened in Adobe software.
So when you take the images, be sure the keep everything in the surroundings, light source, camera, etc. as consistent possible. I like to use an X-rite color checker (or Datcolor SpyderCheckr) to make a custom color profile for each shoot. Once you've done your shoot, make sure you use Lightroom or Camera raw to sync settings to eliminate any possible problems there as well.
99% unlikely you are suffering from the following, but perhaps still worth mentioning. A few years ago, one of the Nikon cameras had a bug in the firmware which caused color sliding with preset white balance and kelvin. The K value would remain the same, but the image would fluctuate in color. Moral of the story, keep your camera's firmware up to date, unless there is a specific problem wih a new release.

Copy link to clipboard
Copied
I am curious on how do you shoot the series? I mean if you want to keep constant ISO, but adjust the aperture or even change the lens to tilt/shift (I am not doing it right now, but why not) for some of the shots in series you cannot have perfect match of the exposures across images, at least if you are using constant lighting as I am doing right now. So, some adjustments need to happen at least on the exposure front. So I would want to match average exposure on a section of the RAW file with similar section of the same product in another RAW image.
And yes, I would not want to do this in Photoshop and make it during shooting or in ACR.
Let me know what you think I am doing wrong.


