 Adobe Community
- Home
- Photoshop ecosystem
- Discussions
- Re: Need help learning to see values in still life
- Re: Need help learning to see values in still life

Copy link to clipboard
Copied
Hi,
I am a beginning student with a little skill with photoshop. I am taking an online course, and we are trying to create a 3D look by just painting value in grayscale. I sort of cheat by snapping a photo of my still life, then convert to black and white or grayscale in PS.
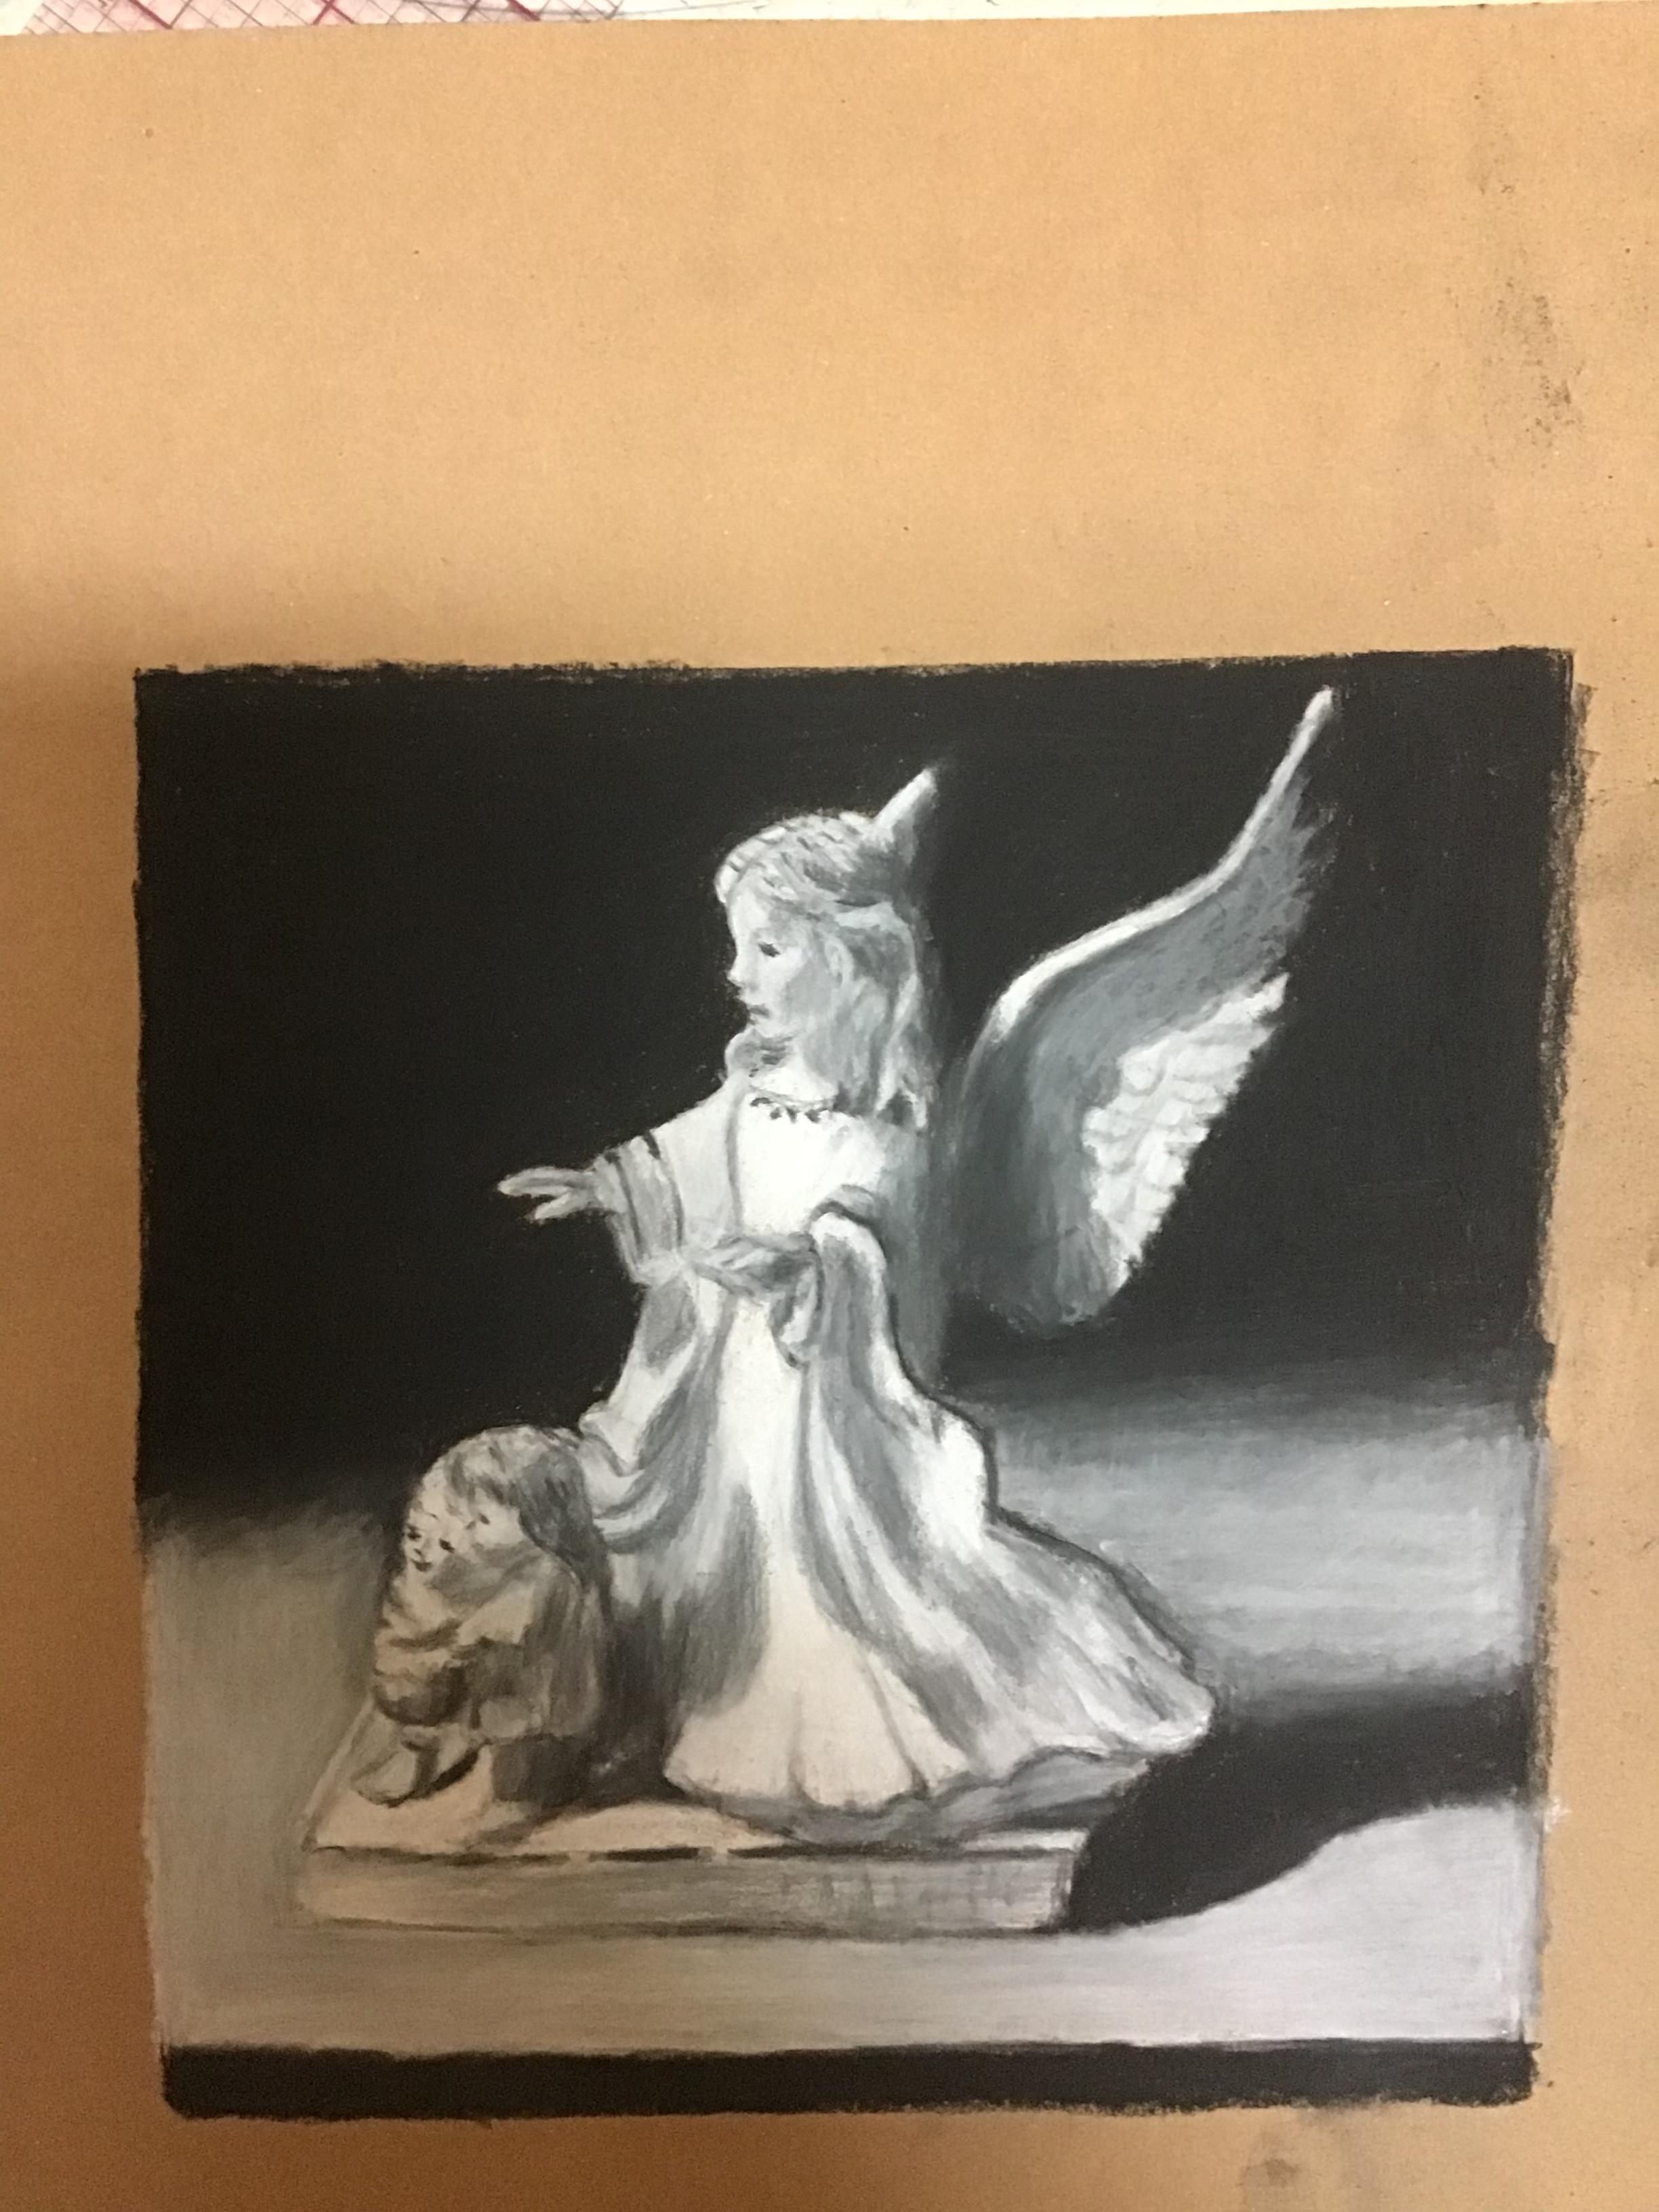
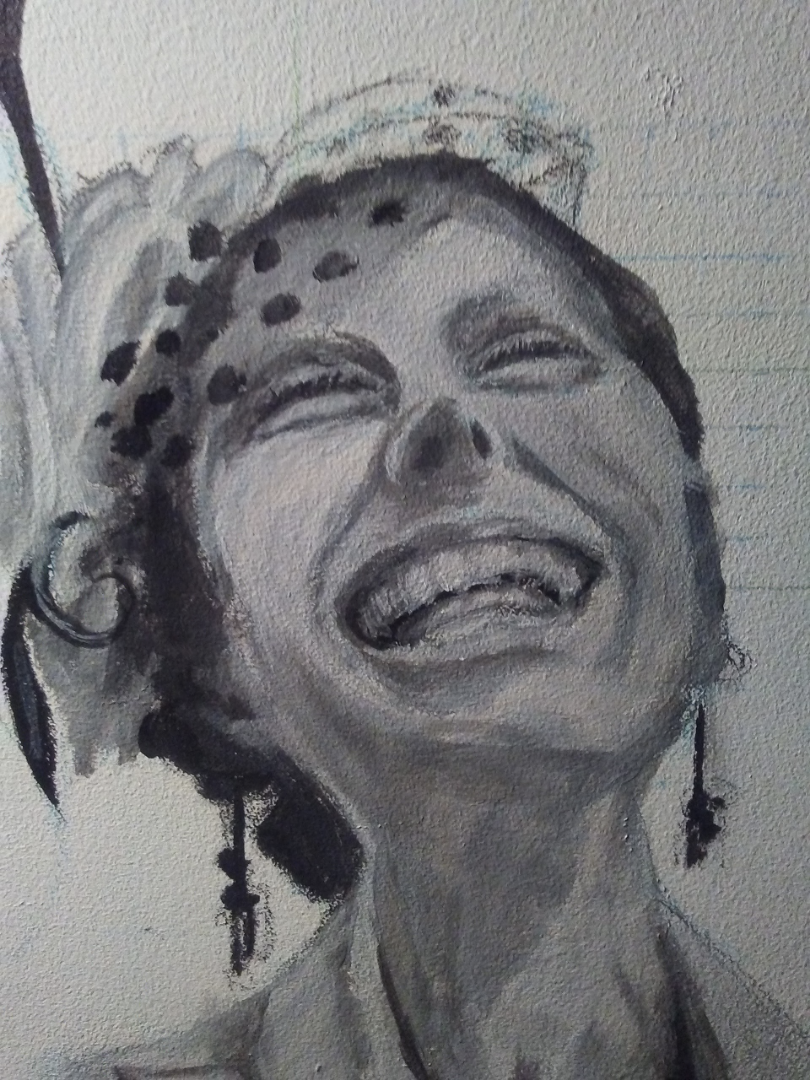
My instructor says I still leave too much detail in my homework submissions. A good example of what he wants is in the image attached. No eyes, but you get the 3D effect of 2 baby giraffes and a pyramid.(My images are out of order...sorry). I did a charcoal rendering of the angel, but it is definitely not good enough to submit. I didn't get the values(shading) clean or even completely correct.
Is there any way to use PS to help me in isolating the values(we are only using 4 to learn...extreme dark, extreme light, moderate dark, moderate light. However, even a grayscale rendering is not enough for me to accomplish what is required. I would like to do a greyscale of the angel(I will only draw the angel, not the children).s there any other software/technique to accomplish or help me with this? Any help will be appreciated. Thanks so much in advance.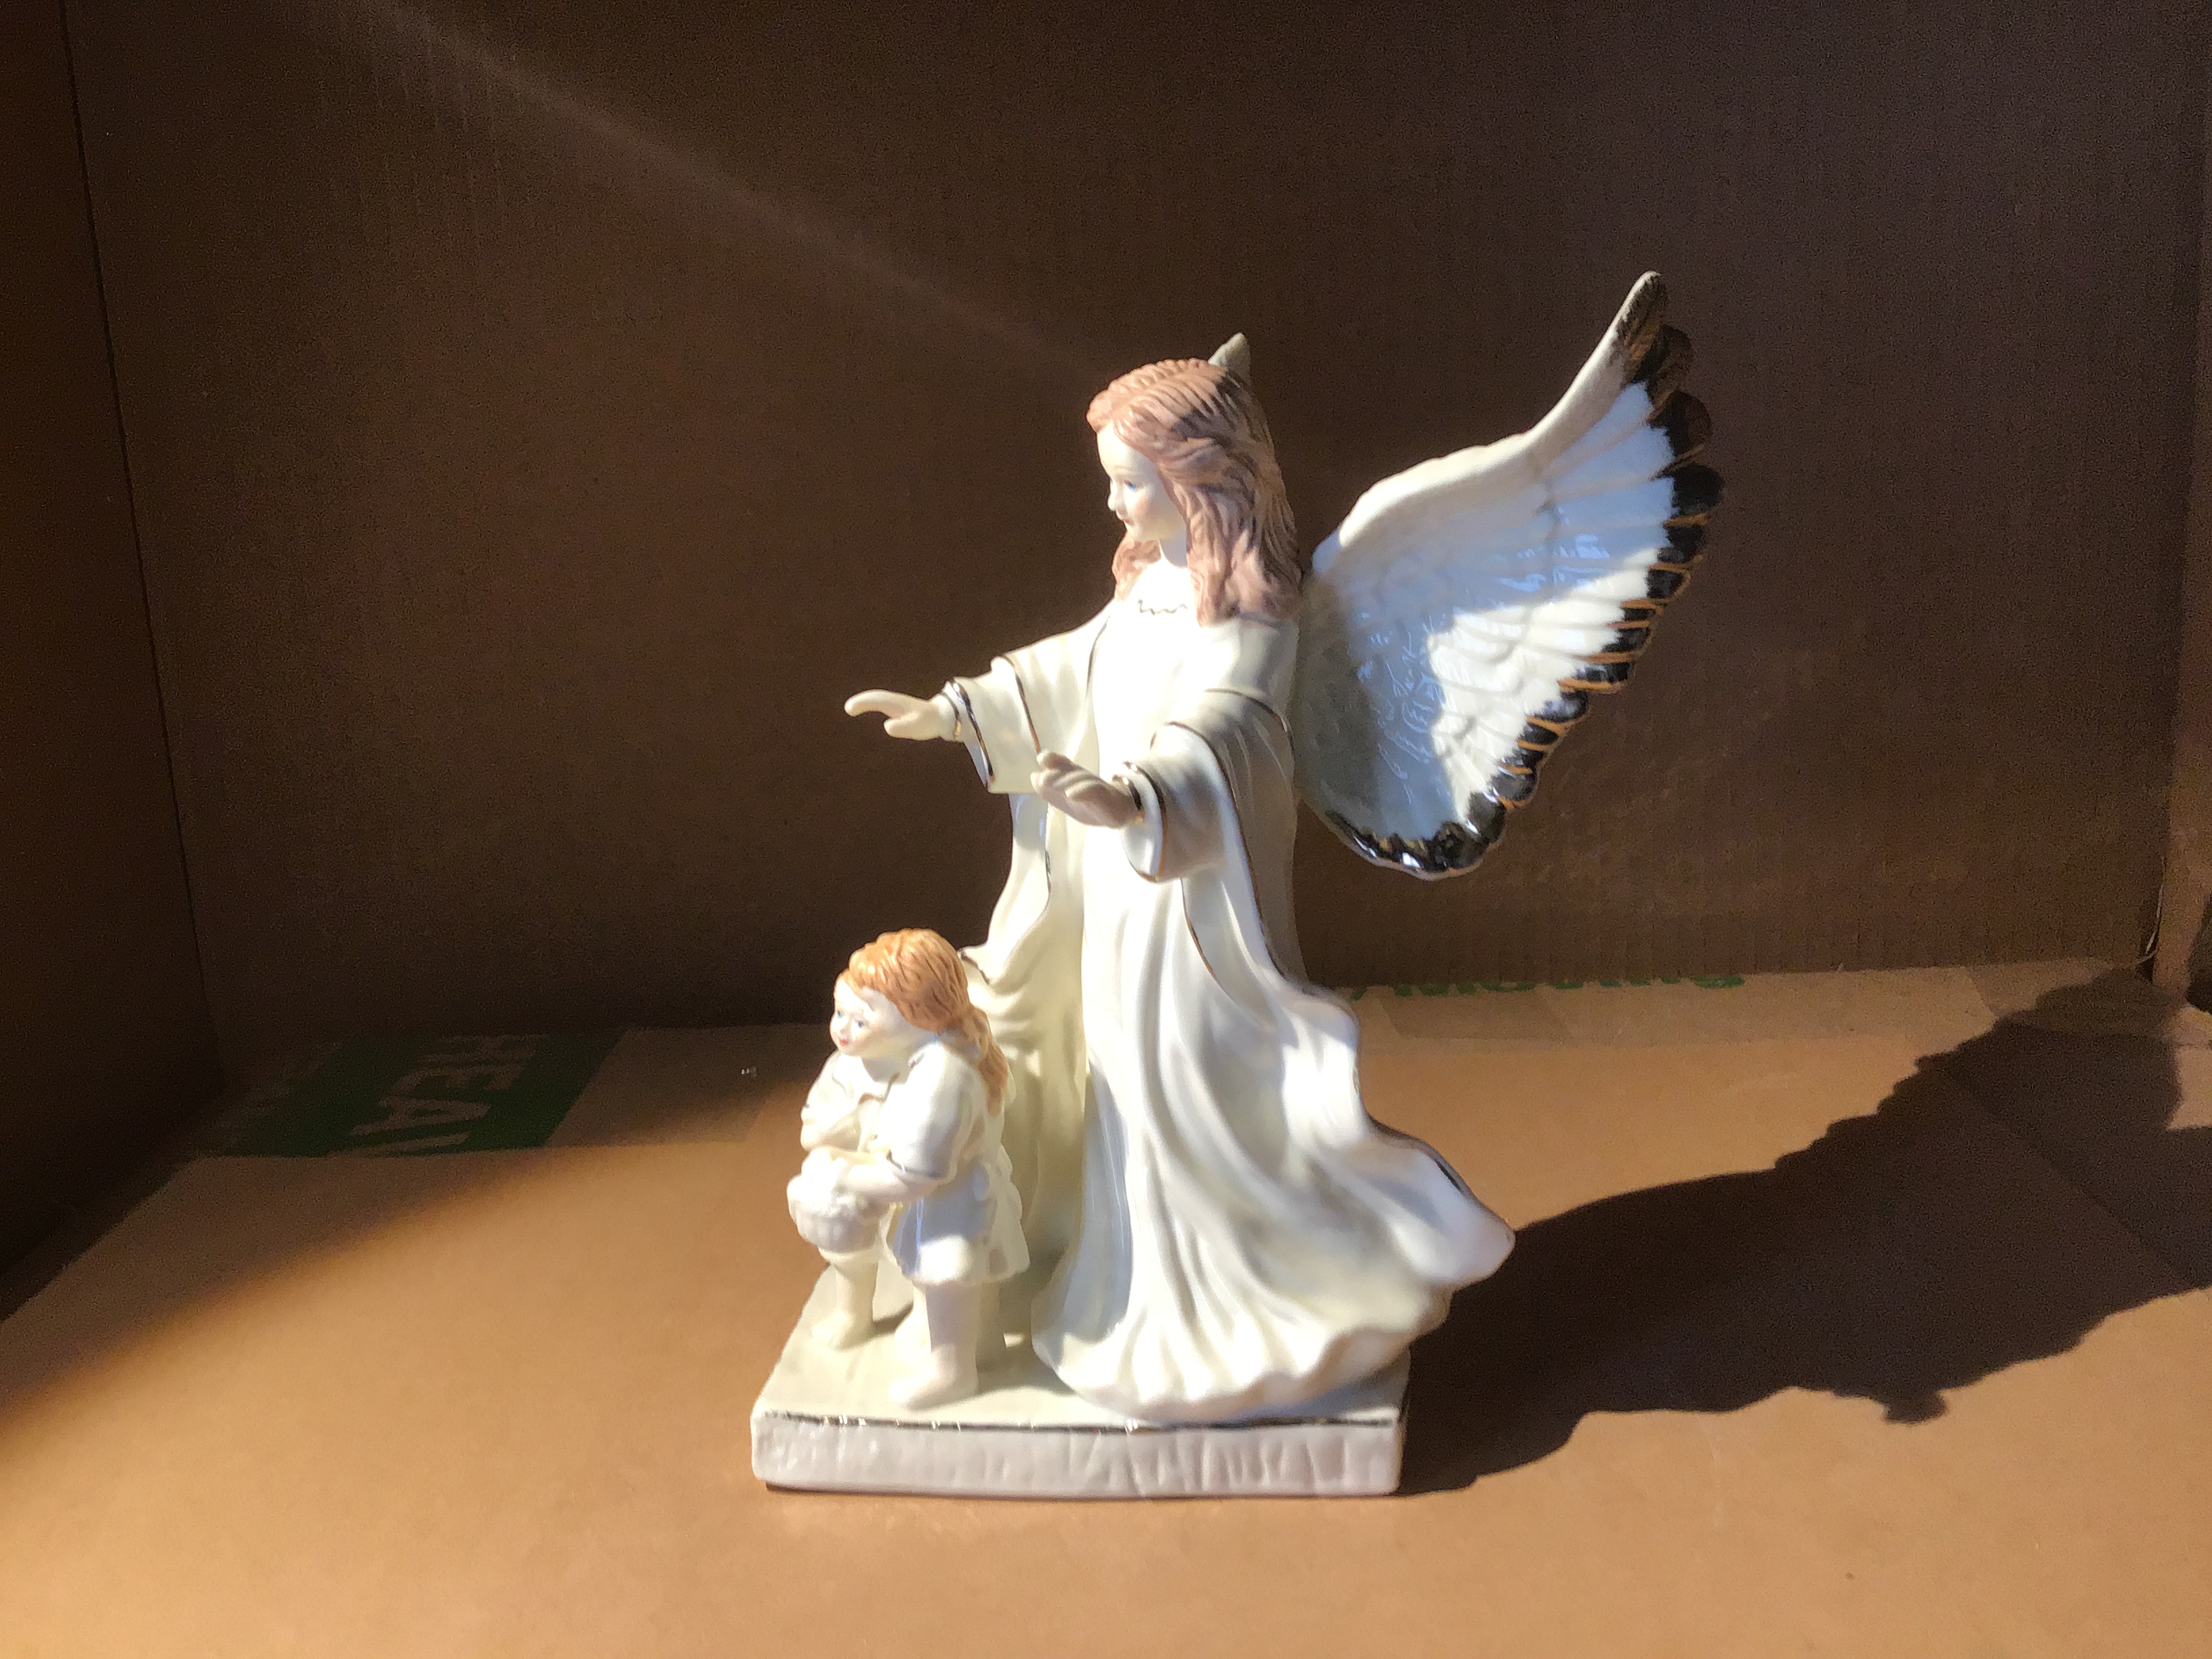
Is there any other software/technique to accomplish or help me with this? Any help will be appreciated. Thanks so much in advance.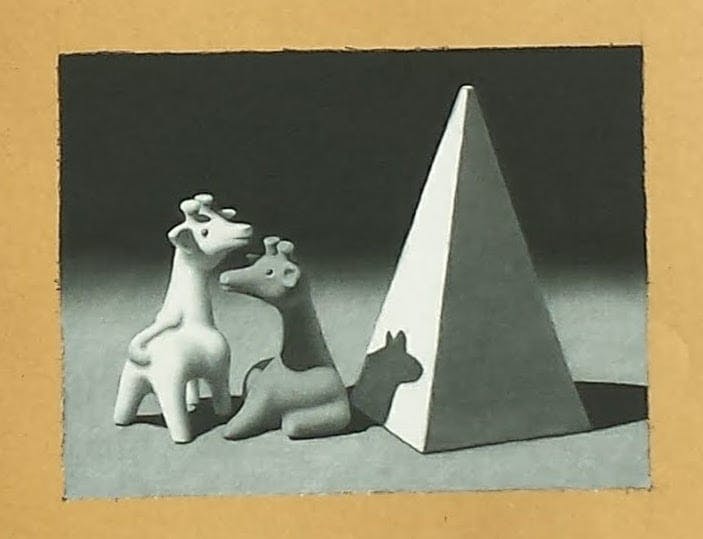


 1 Correct answer

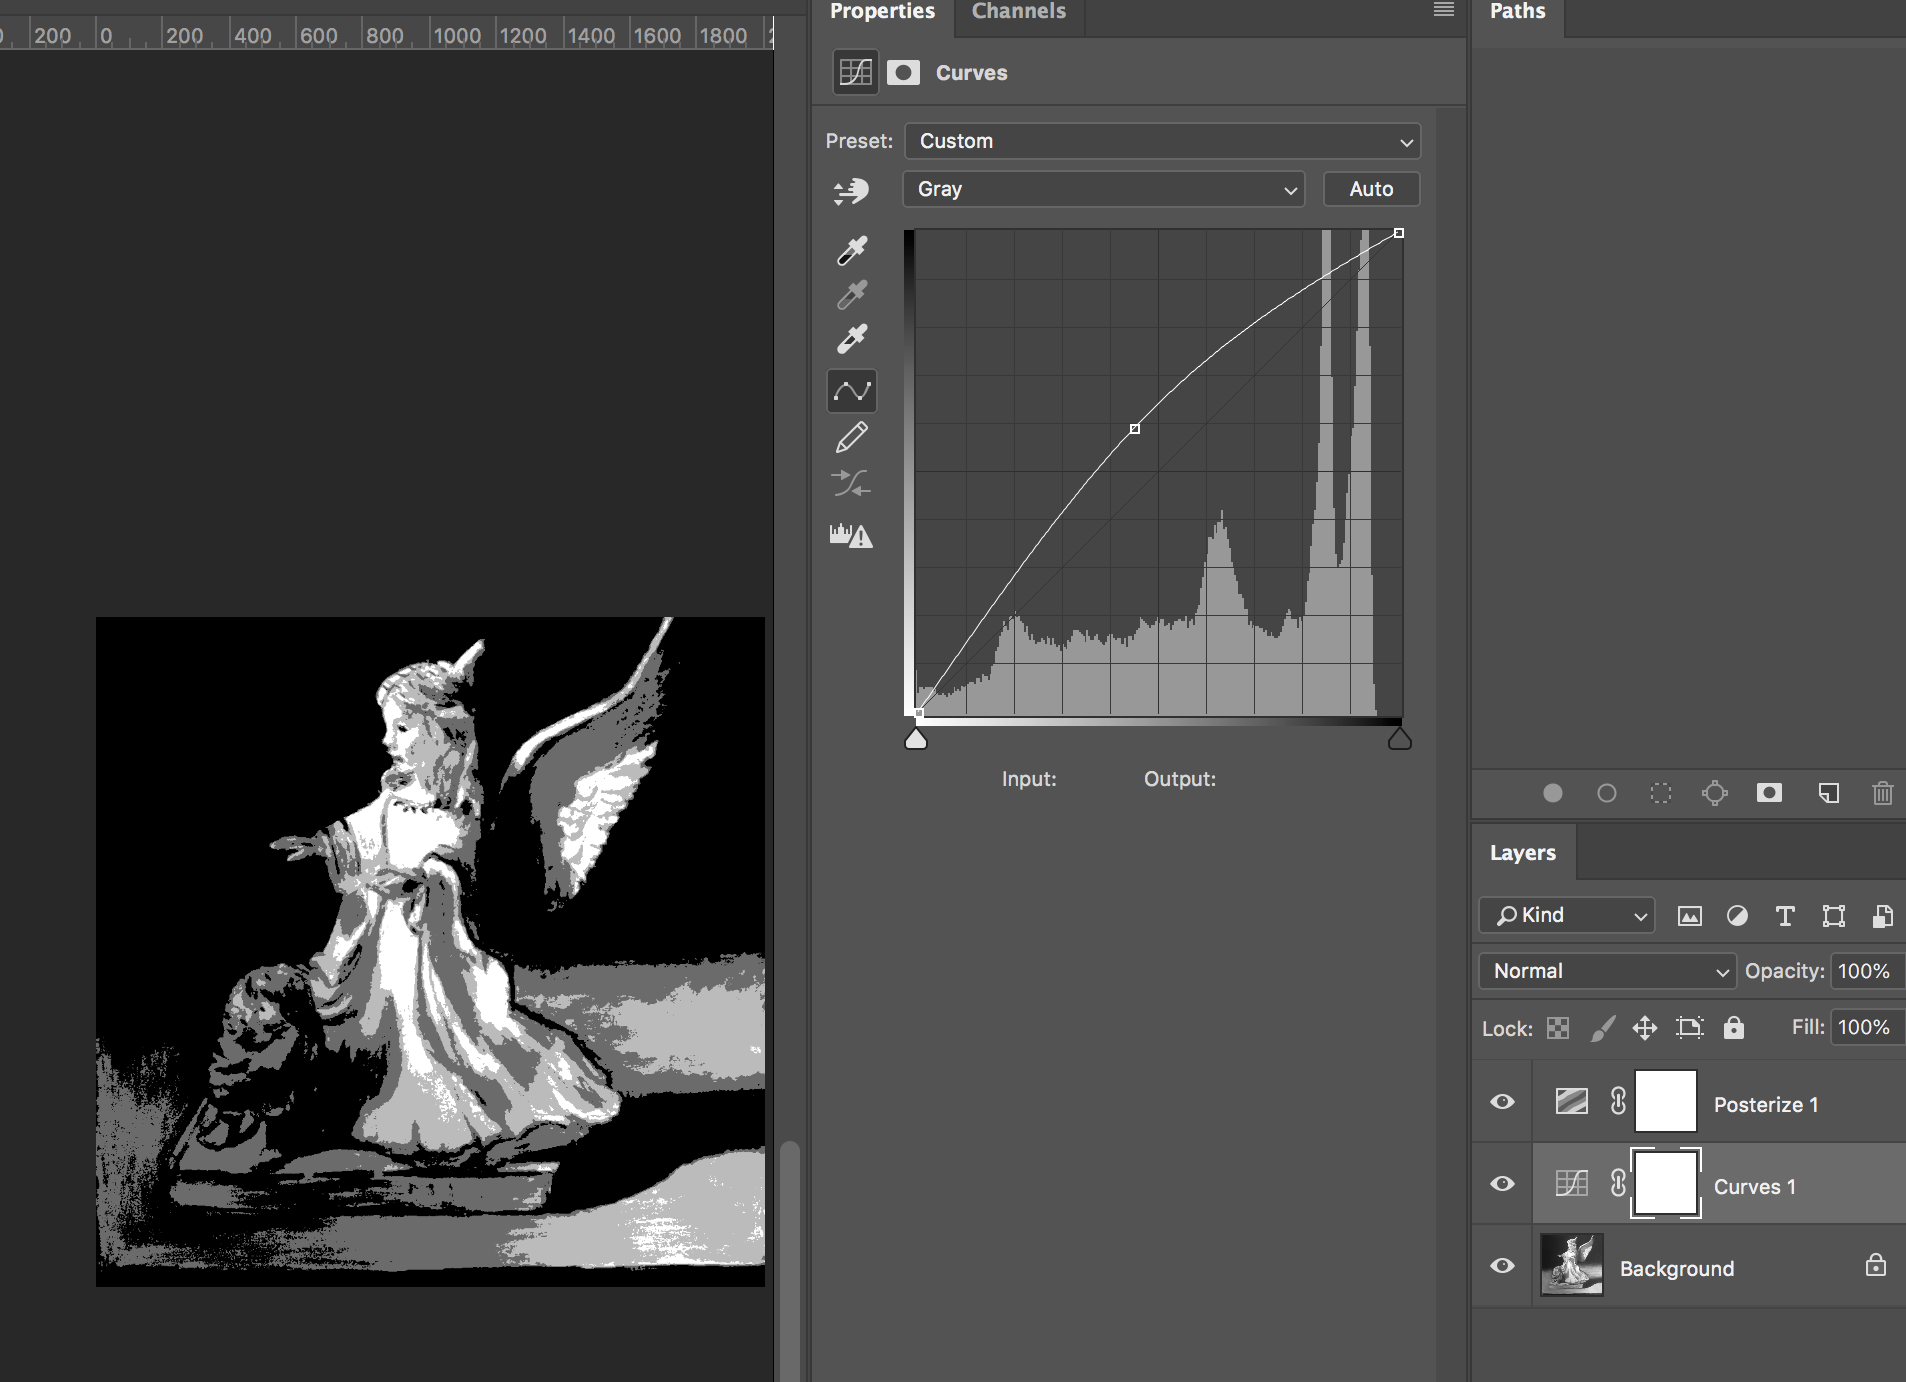
You can use posterize adjustment layer.
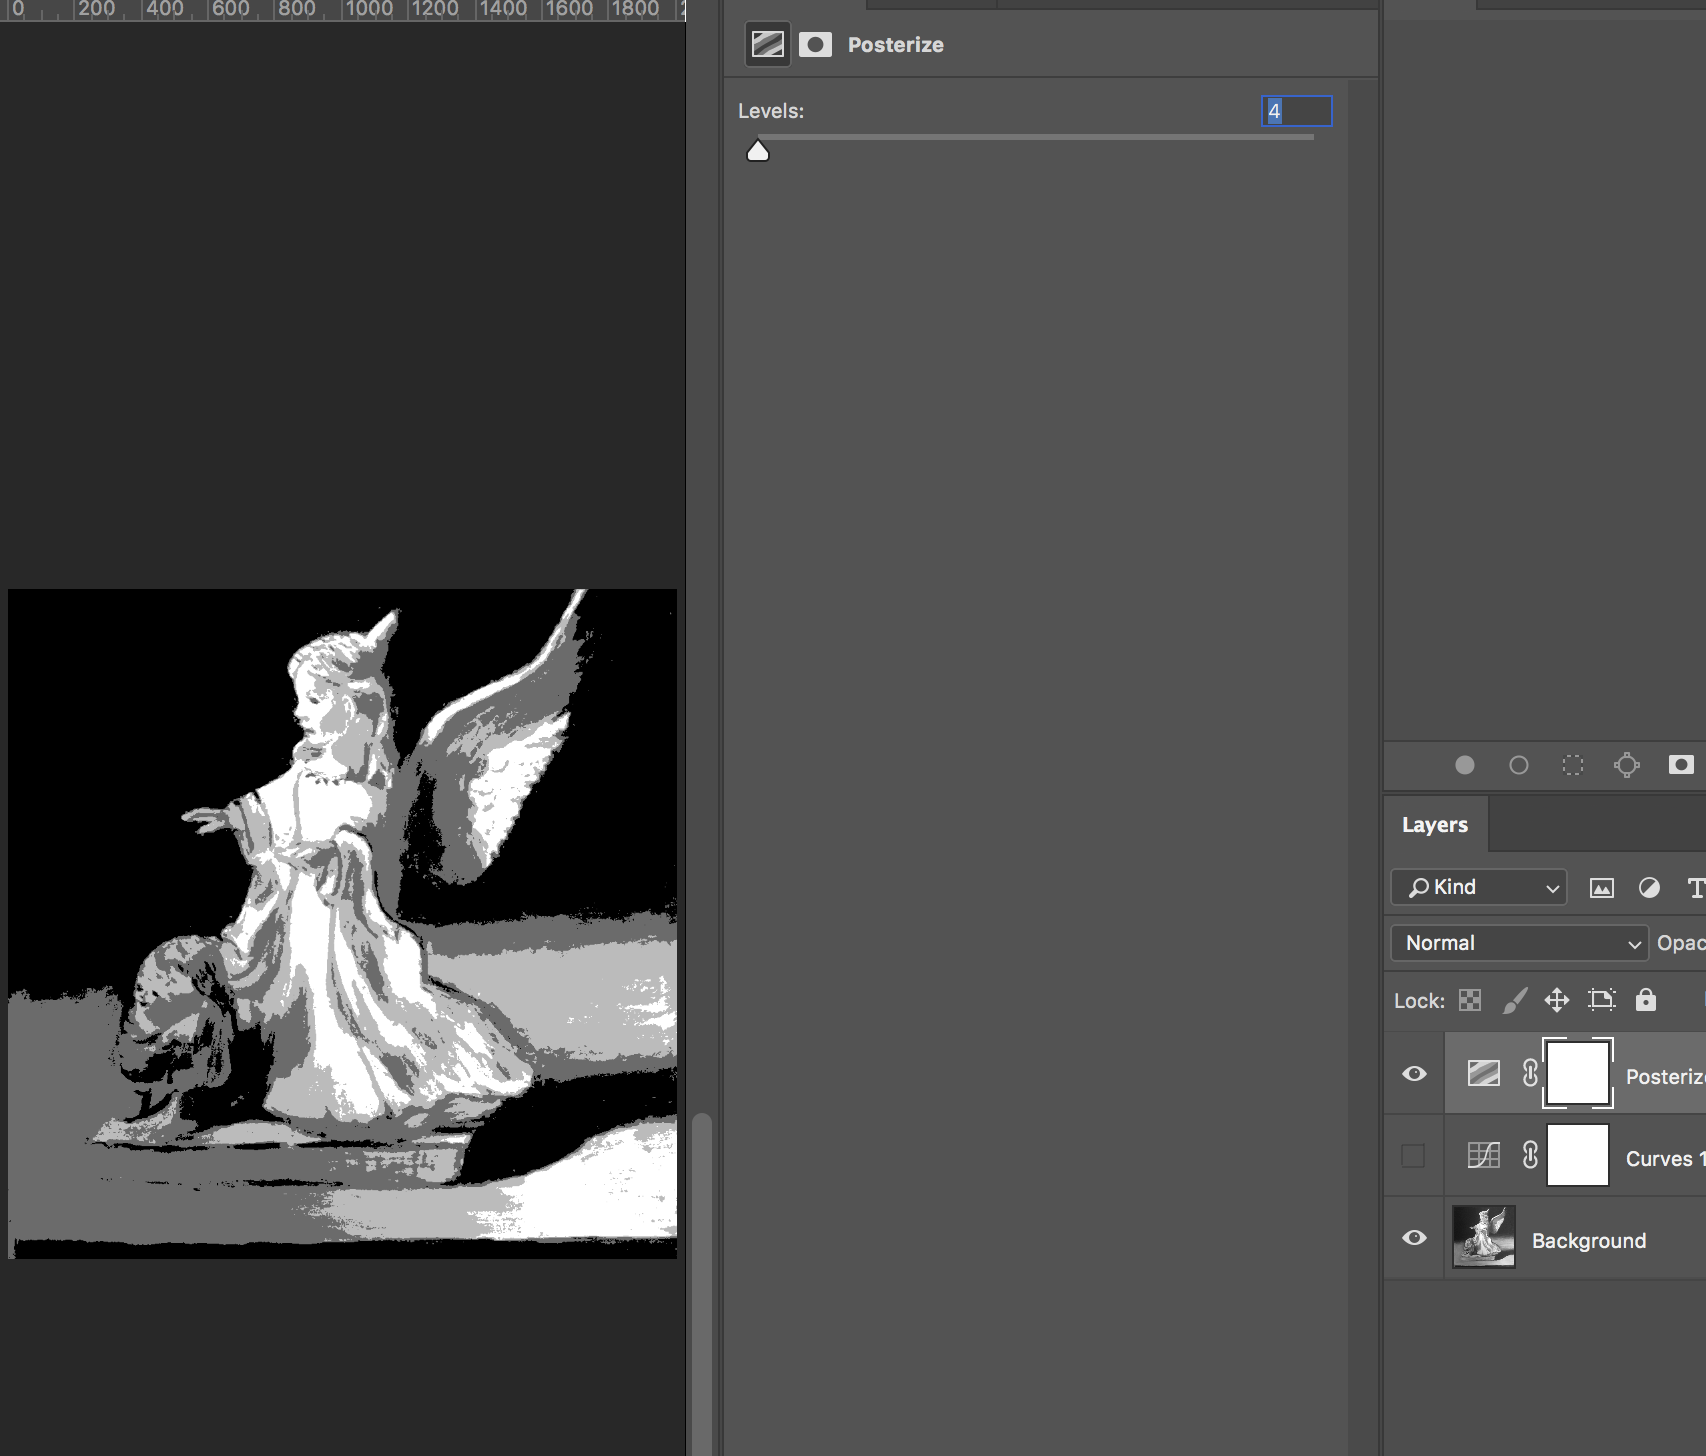
Add a curves to fine tune what goes into the 4 colors
Explore related tutorials & articles
 12
Replies
12
12
Replies
12

Copy link to clipboard
Copied
The following are some things to consider, elements that determine the shadow modeling in an object. Visualize the position of the light source, its intensity and its type (direct, diffused or same value between). Postiion will determinne the direction of the cast shadow, Distance of the object from the light source will determine the intensity and the sharpness of the shadow cast by the light.
The further direct light is from the subject, the sharper the shadow. The closer the light the softer the edges of the shadow and the brighter the value. (There is a simple formula for calculating light fallloff but it would not be practical when dealing with small objects.) Considering light falloff in your example, it is not logical that the shadow of the pyramid should be darker than the shadow cast by the animal. With these factors for a start, you will find it easier to simulate the shadow modeling required by the assignment. Good luck.
Copy link to clipboard
Copied
You can use posterize adjustment layer.
Add a curves to fine tune what goes into the 4 colors
Copy link to clipboard
Copied
I know I have to train my eye, but this is extremely helpful. Thank you so much!
Copy link to clipboard
Copied
You are welcome.
You can also create a blank layer above curves, set to blending mode soft light, and paint in there with a soft medium to large sized brush in black or white. Acts like a great dodge/burn. Would work great on the bottom black part of wing to match overall lighter wing color, and give me an edge against the background.

Copy link to clipboard
Copied
Photoshop can be a great tool for analog art ( drawing, painting, etc ) One being what you are doing here, changing a reference photo to b/w and cranking the levels a bit for light/dark values. I also use it for color reference, and resizing images to fit on a canvas, and setting up a grid for transfer as well.
Copy link to clipboard
Copied
Hi ScooterD76, I agree that PS is extremely useful to aid in traditional mediums. Can you tell me a little more how you set up a grid, resize for canvas? Do you use the color picker to determine the exact color described as RGB? Thanks in advance!
Copy link to clipboard
Copied
I use the color picker, but not necesarily for exact numerical rgb values.. If I am having trouble matching a color ill use the picker to select a good avereage and fill a large area to give myself a visual aid.
If i am using a photo reference, ill make a document at the size of my canvas, for example 10 X 17 @ 300Dpi and frame my reference photo in there as i like it. Then i bring down guides usually at 1 inch incriments ( you can also view > show> grid but i like the colored guides better). I then blue-line the same grid onto my actual canvas. Now I can use my screen as reference, even zooming in and out as needed, to draw my sketch onto the canvas. Copying a black and white layer helps here as well. This B/W layer can also be used to aid underpainting, if that is what i'm doing, then color turned back on for color.
Ive found Photoshop can be a powerful tool, even if its not being used to create the final piece.
Copy link to clipboard
Copied
Thanks for responding so promptly! Do you draw in the blue guide lines on PS yourself. I am assuming you use a blue pencil on the physical canvas.
Copy link to clipboard
Copied
Most of the time I use a light blue pencil, if it is on a white panel ( I paint on different surfaces so sometimes pencil doesnt work) I use the blue guides that come out of the ruler, you can also change their color in preferences.
Also you have the freedom to tighten the grid in areas that need more detail, i just did a portrait where most of the painting was a 1 in grid but for the face i needed 1/4 inch squares. Using this method ( and some careful measuring) you can choose to not draw any grid lines where they are not needed.
( surprisingly i found a photo lol )
you can kind of see where i localized the smaller 1/4 inch grid, this was made easy by using photoshop's built-in grid
Copy link to clipboard
Copied
I forgot to add how extremely clever your method of using PS is! Thanks again for the wonderful advice, it will help me immeasurably.
Copy link to clipboard
Copied
sheana2014 wrote
I forgot to add how extremely clever your method of using PS is! Thanks again for the wonderful advice, it will help me immeasurably.
youre very welcome
Keep in mind as you learn new techniques in photoshop how they can be applied in your arts. 
Copy link to clipboard
Copied
Again, I can't thank you enough!

 AdChoices