- Home
- Photoshop ecosystem
- Discussions
- Orange Distortion [light flare] in Photo
- Orange Distortion [light flare] in Photo
Copy link to clipboard
Copied
Hi,
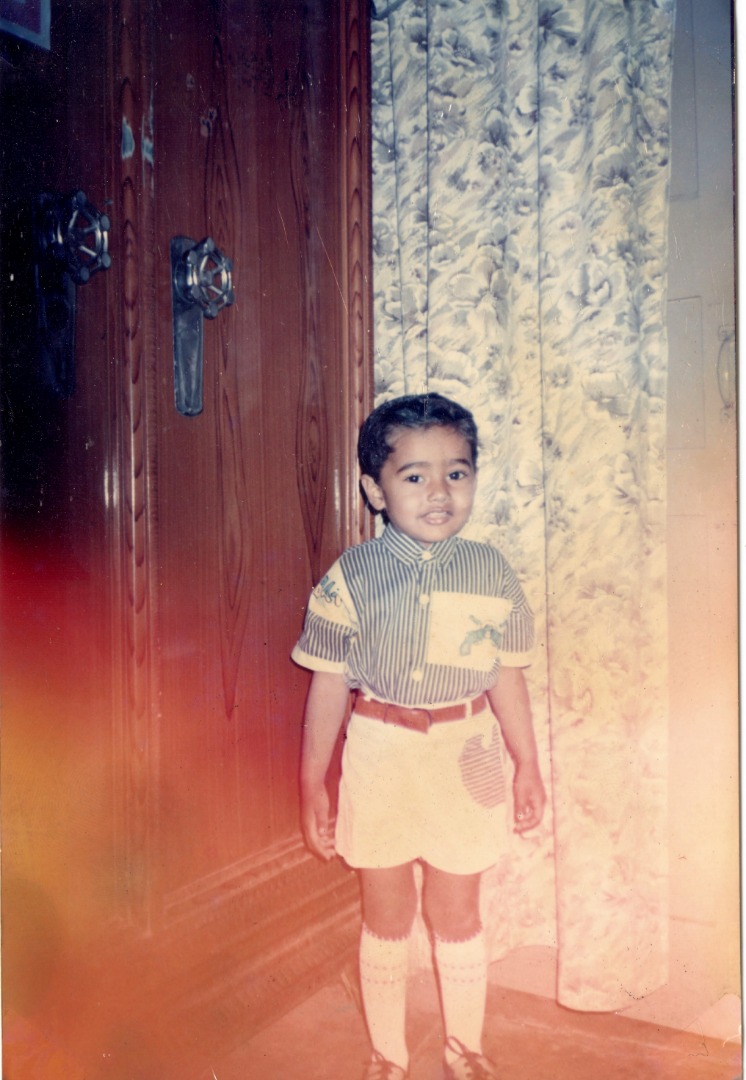
I am unable to remove orange distortion in attached photo. Help needed, thanks in advance.
 1 Correct answer
Oops! Posted the wrong one.
And Peter, at my age even tying my shoelaces is a challenge.

Explore related tutorials & articles
Copy link to clipboard
Copied
This distortion is too irregularly shaped to use any kind of automated correction. So I'm afraid you'll need a keen eye and some manual brushing (plus time and precision) to make it appear okay again. It might even require two or three separate color corrections. I'd give Color Balance adjustment layers a try, and use masks for each of the layers, to easily edit them without destroying any original imagery.
Note: some parts in the lower left corner of the image are too heavily affected. There's almost no nuance left in these areas, so you won't be able to restore any original details.
Copy link to clipboard
Copied


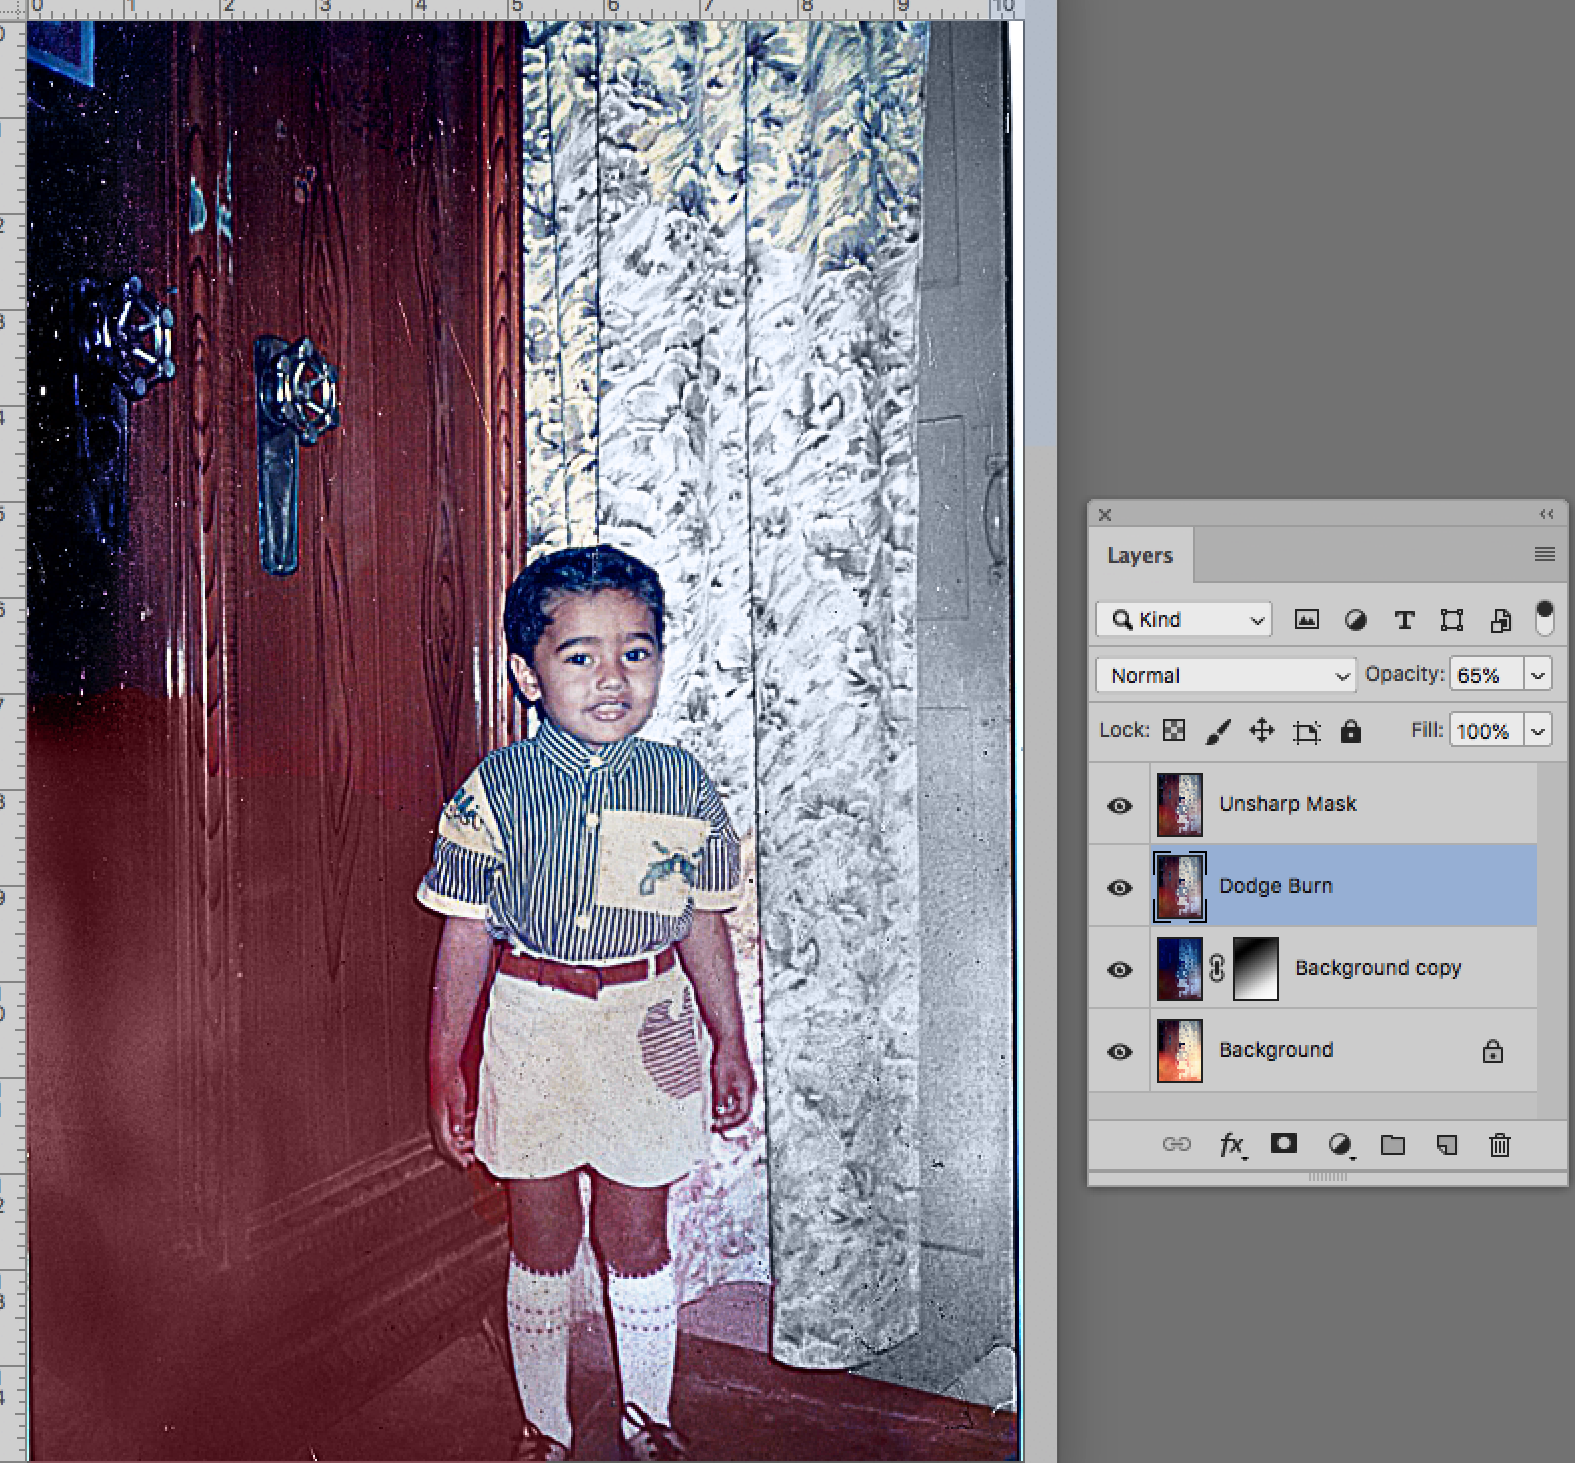
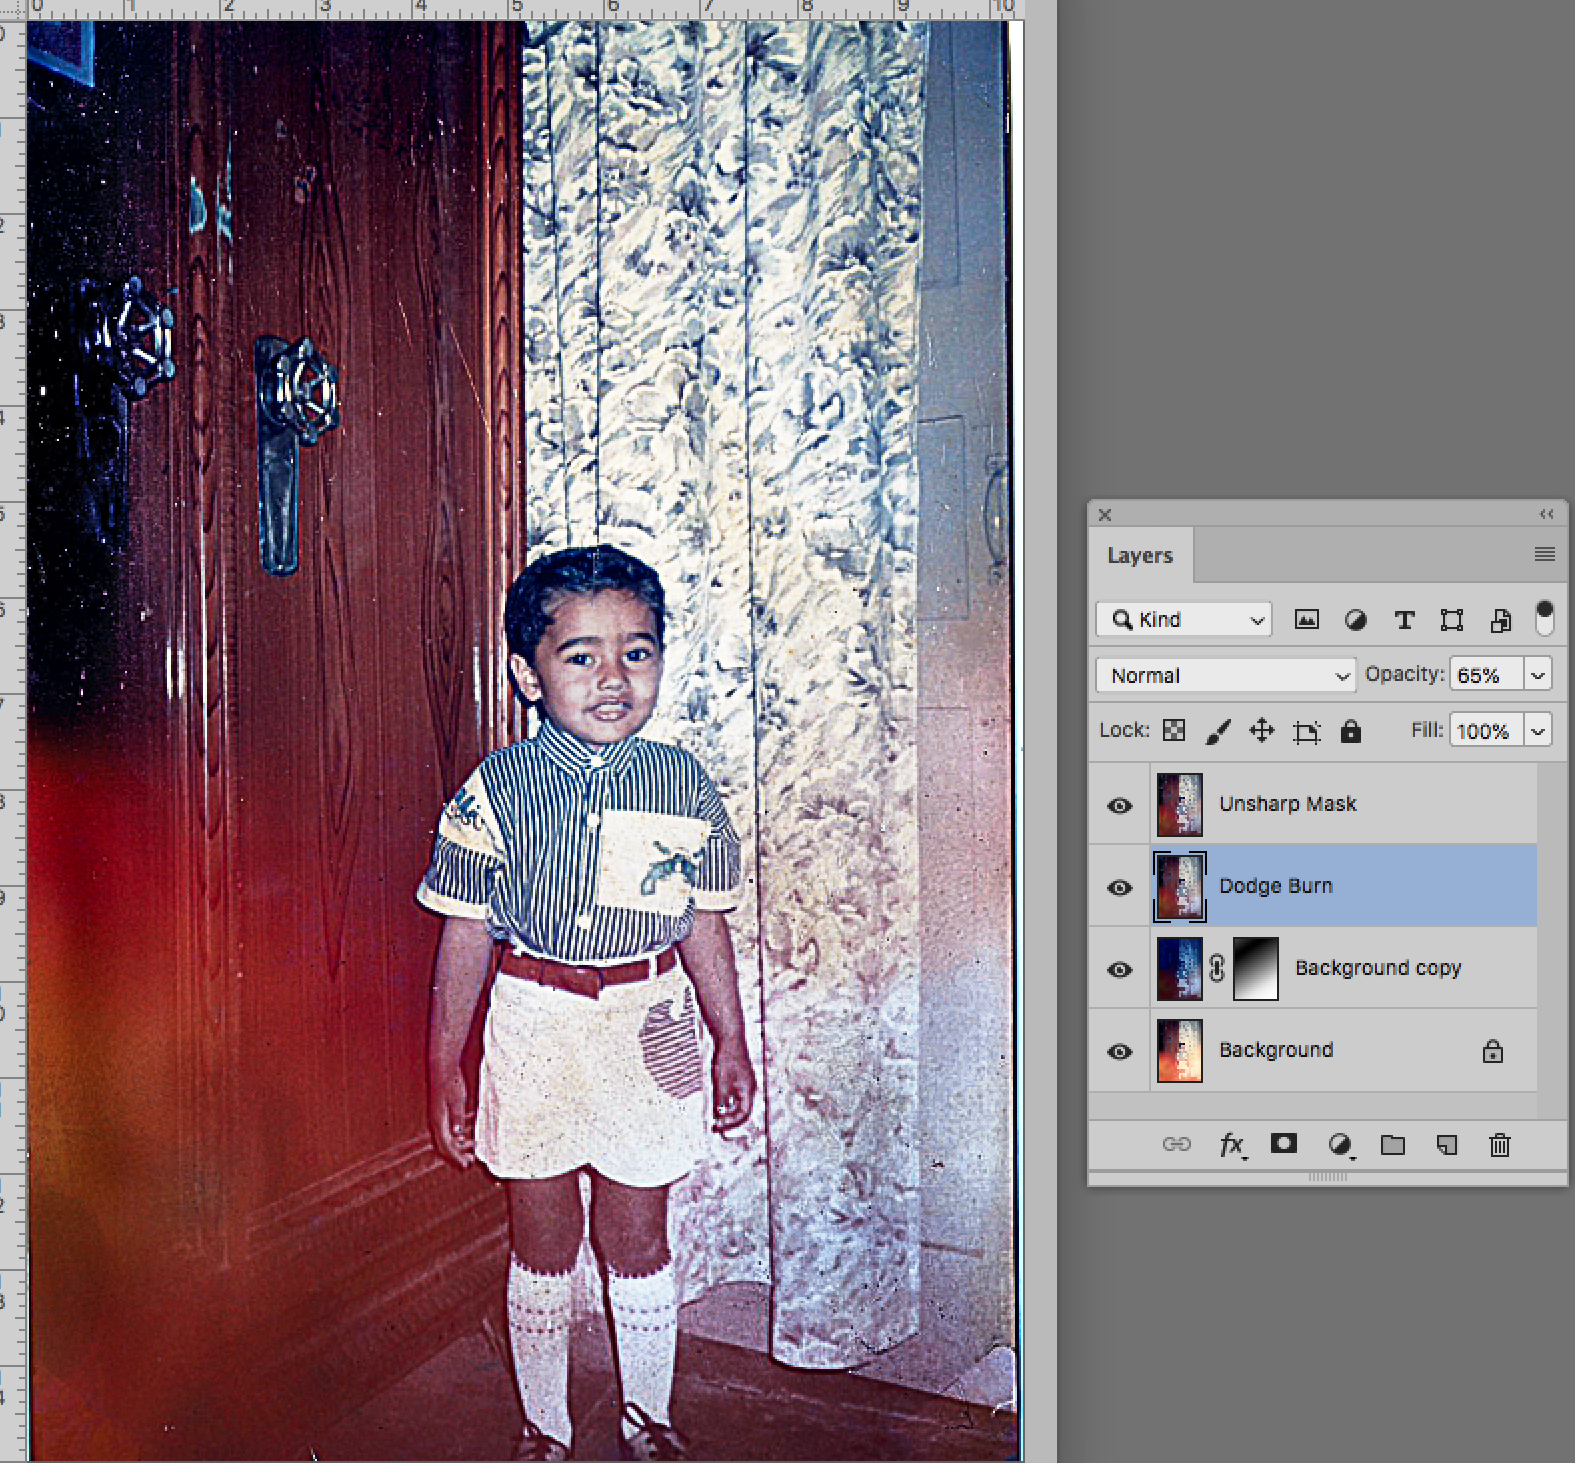
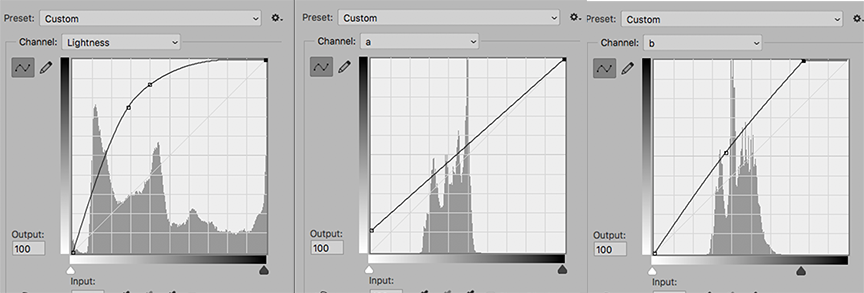
Lab Color, Gradation Mask and the Curves shown above. Dodge and Burb right and left side. Unsharp Mask. Re turn to RGB
At this point additional color adjustment and local dodge and burn are needed but I hope this gets you started.
Copy link to clipboard
Copied
Hahahaa, you were challenged, just admit it ![]()
Good job, and now those two remaining ghosts...
Copy link to clipboard
Copied
Oops! Posted the wrong one.
And Peter, at my age even tying my shoelaces is a challenge.

Copy link to clipboard
Copied
I know my idea is going to sound crazy to some.
But I would first turn the image to black and white / greyscale, and then clean up the ligher areas. if you can see them.
Then I would paint everything with in an overlay area with a brush. I used to do this back in the day. But you can create some really cool photo effects by doing this. And today with coloriazation tutorials online.... you can really make this look like a modern photo.
Get ready! An upgraded Adobe Community experience is coming in January.
Learn more

