While you could save a preset style to apply the same "effect" the result will always be dependent on the underlying image - that to which it is blending.
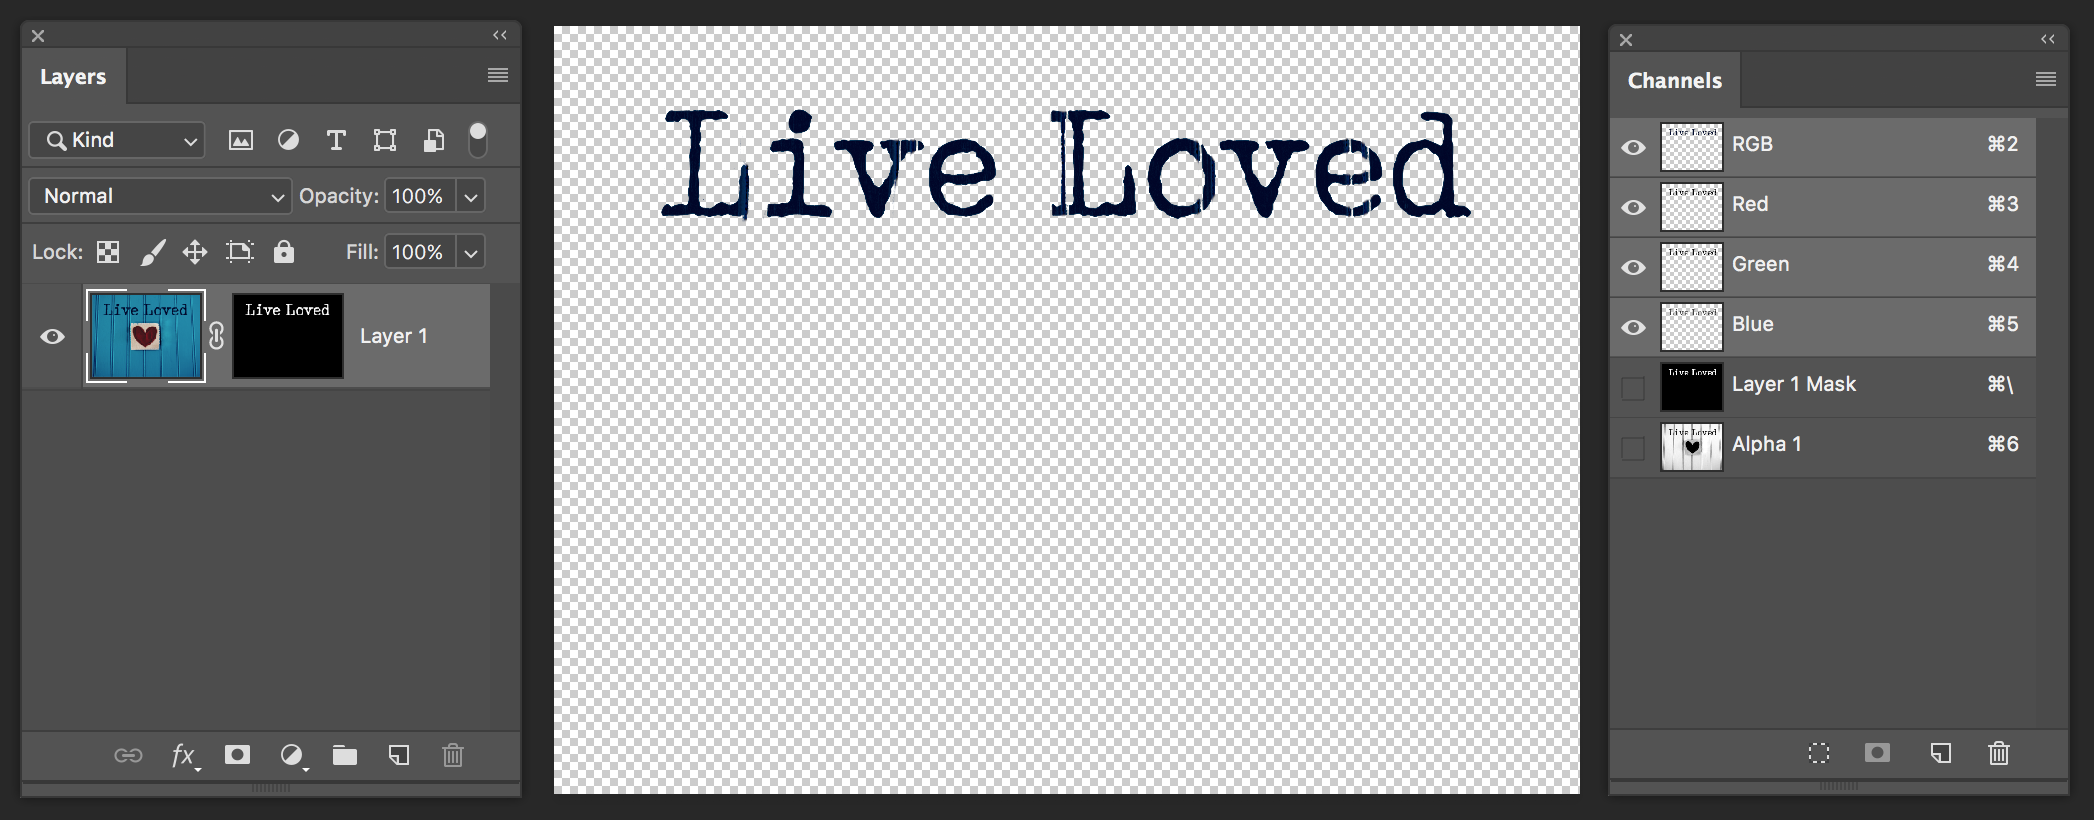
If your intention is to preserve a rasterized version of the text you have without the background image you can achieve it by essentially erasing the background images data.
Using Image > Calculations you can make a new channel.
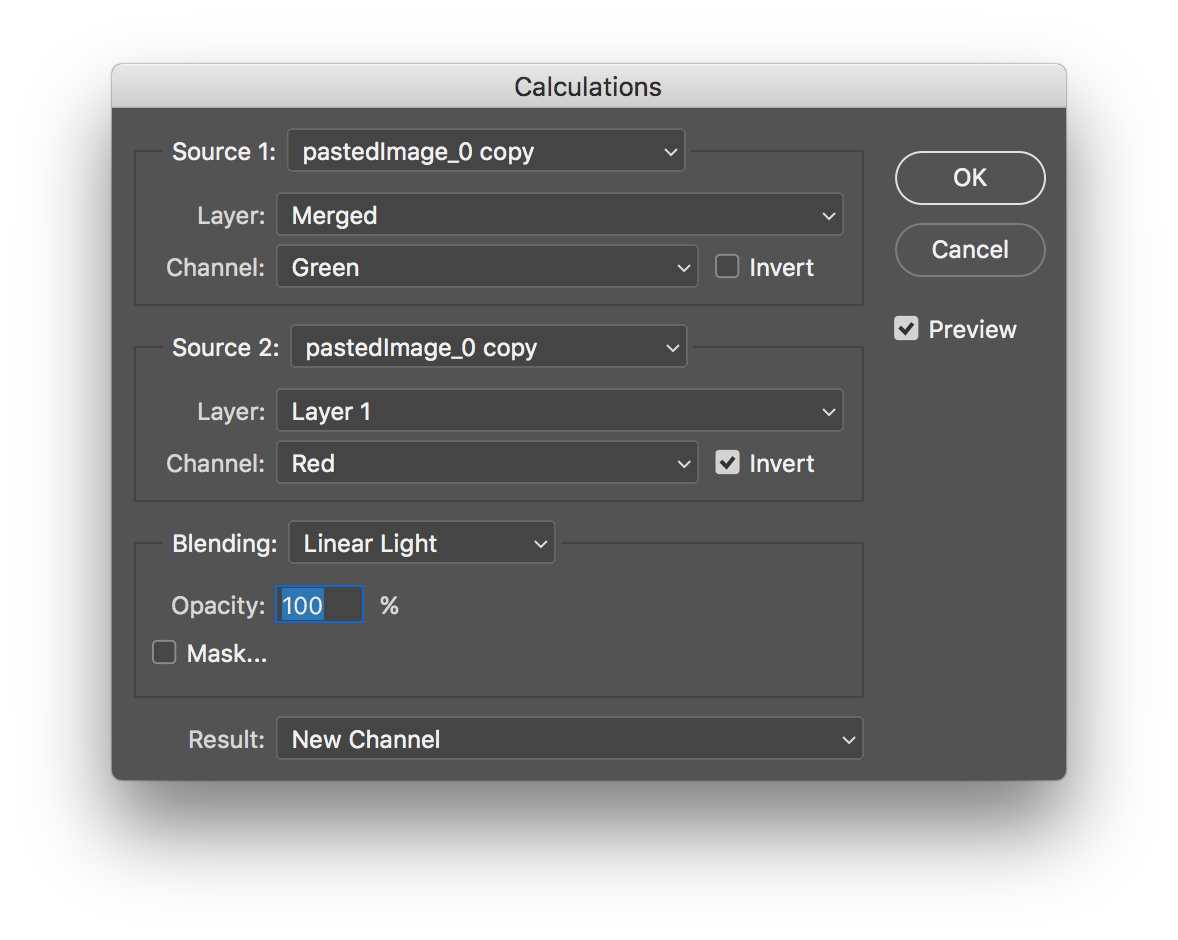
Then apply that channel as a mask on a merged text and background layer. Invert it. Most of the image will now be transparent.
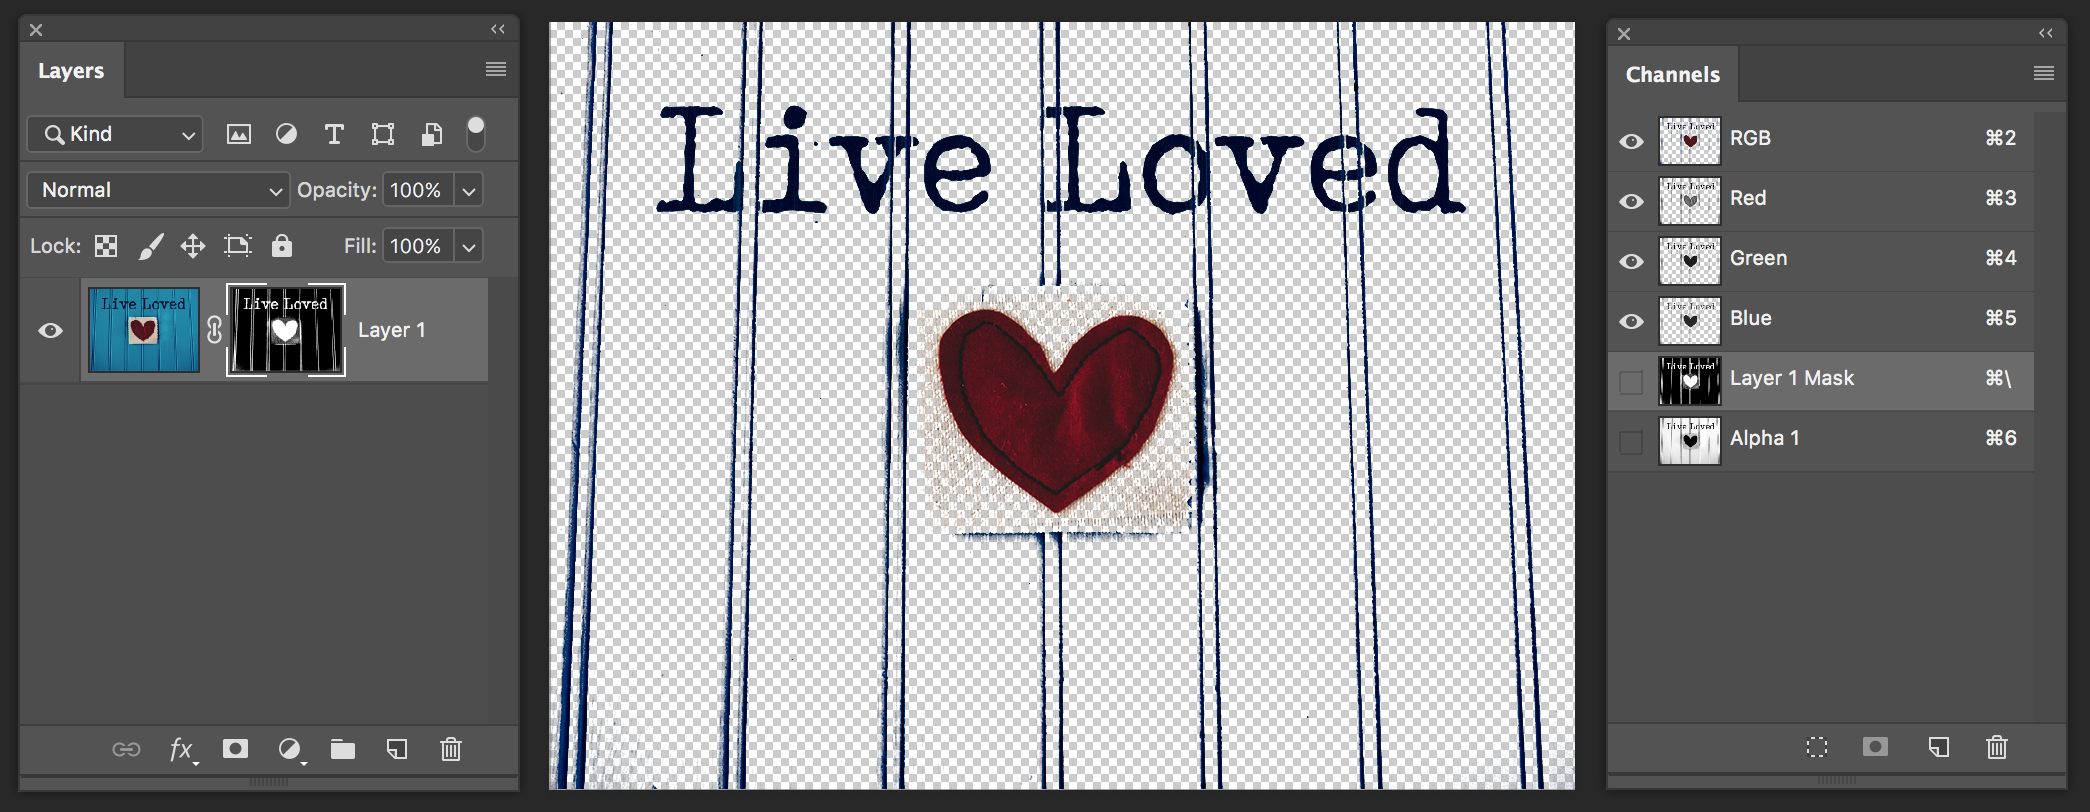
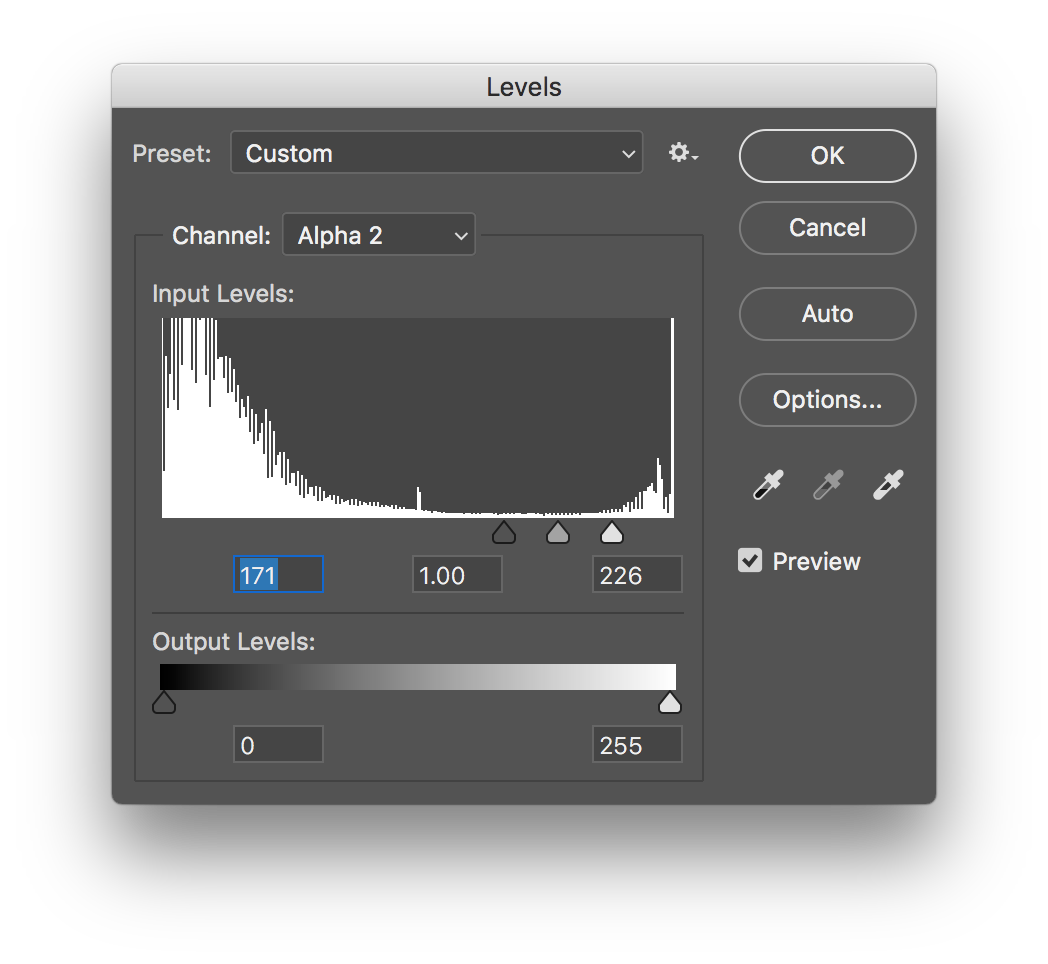
Apply an amount off levels adjustment to the MASK to increase the contrast.
Then carefully on the mask use a black brush to "erase" or hide the remaining areas of the background that are not part of the text.
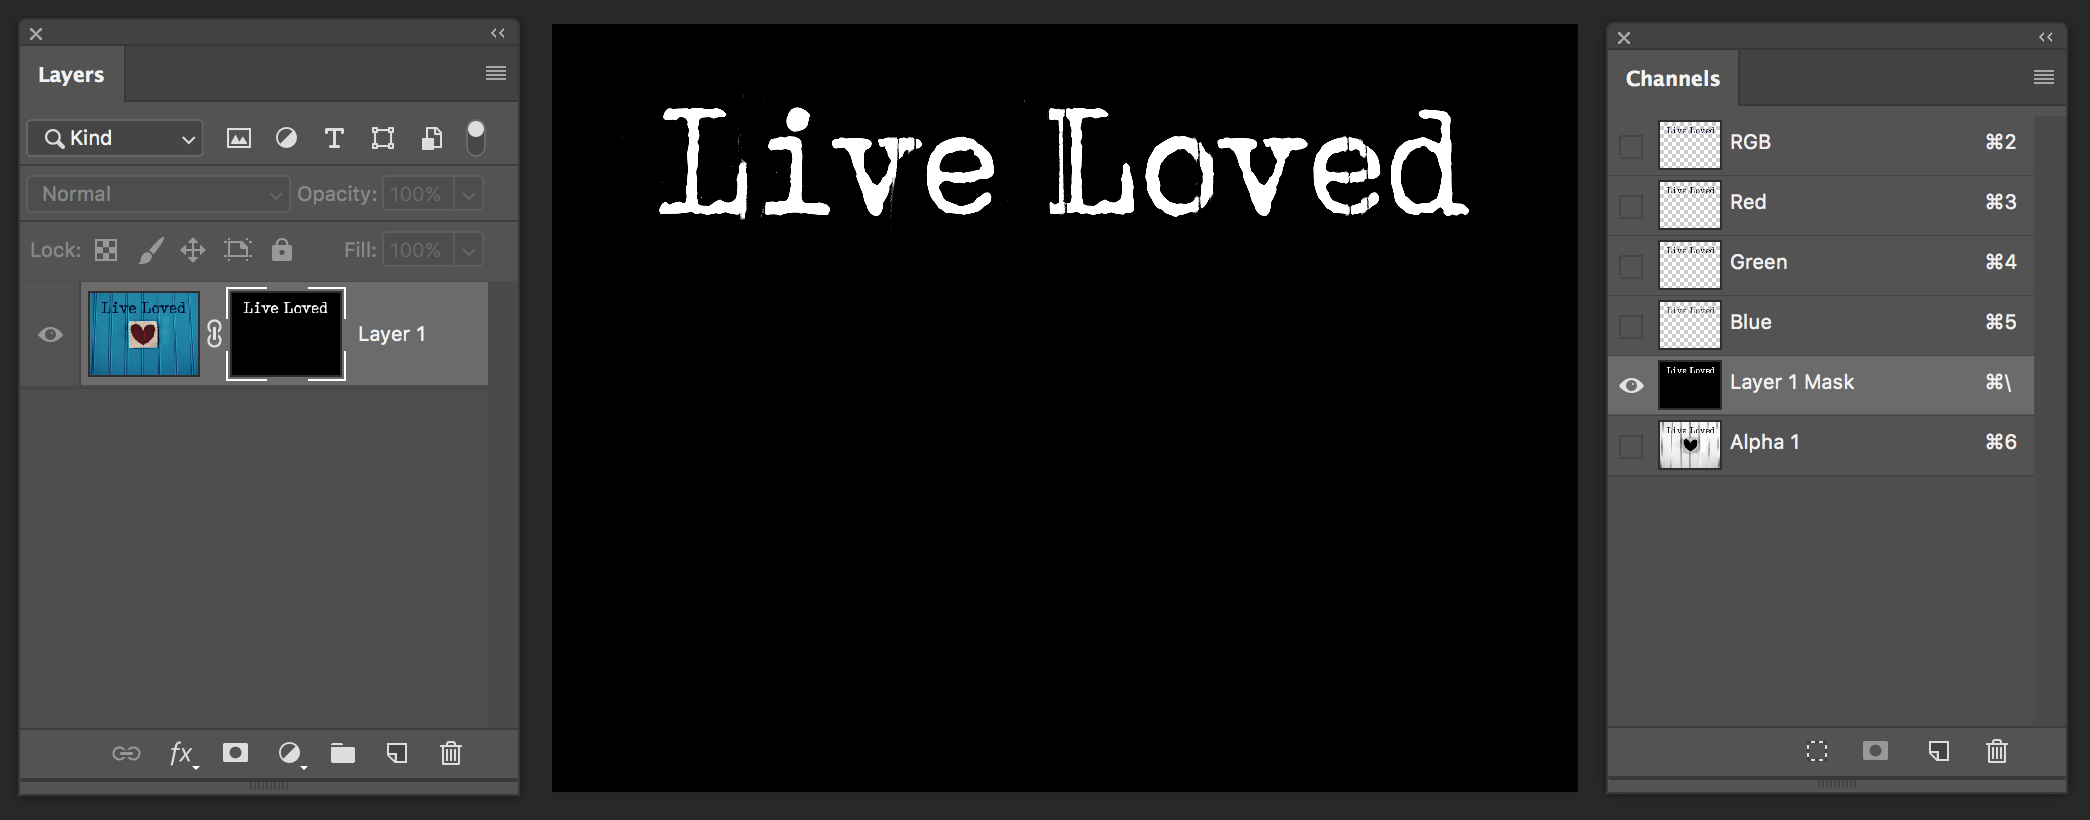
The result is the text on a layer with the included degradation.
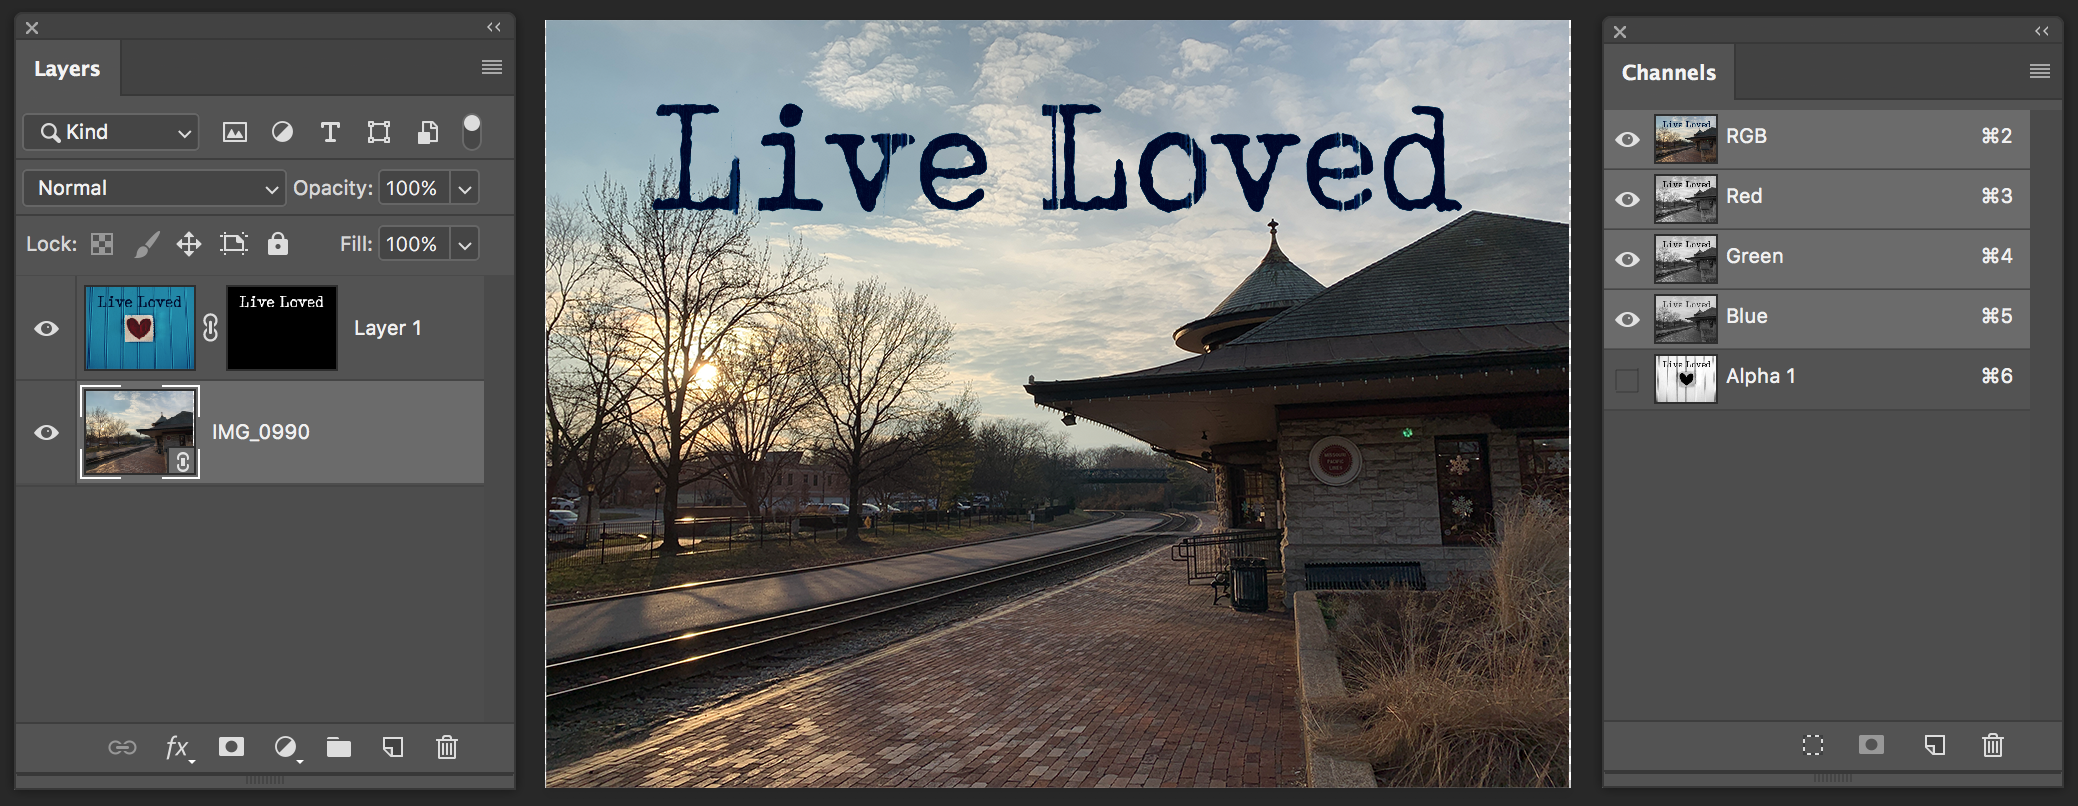
This can be placed over any image if the image is below it. Note that this is not editable text and will always have the distressed look based on the original blue boarding you show.


 3
Replies
3
Replies


 AdChoices