A couple of years ago I posted this Tech Sheet that I had written for my students. I hope it helps you.
The Unique Effect of Displacement Mapping
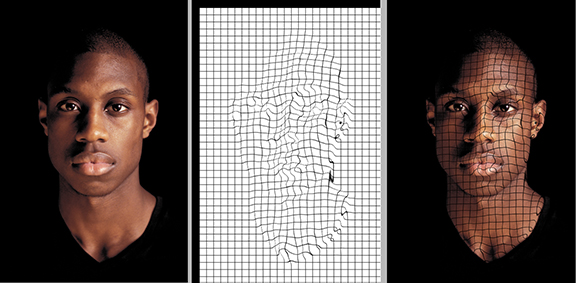
Displacement Mapping is the process of changing the geometry of an image so that such things as straight lines are contoured according to the tones appearing the in image in the layer below. This is how it is done in Photoshop
1. Open a file
2. Choose Image > Duplicate. In the As: field enter file name as: filename_map.psd. (Example: man_map.psd). This file, which will ultimately serve as the Displacement Map must be in psd format.
3. Choose Image > Mode > Grayscale. Increase the image contrast using Curves or Levels. Since each image is unique, there is no exact setting. Then choose Filter > Blur > Gaussian Blur. Once again, there is no set amount. The sample below is a useful guide.
4. Save this file – filename_map.psd -- to the desktop.
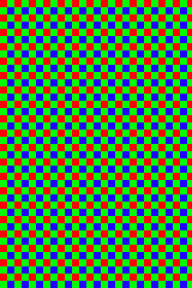
5. Open another file consisting of a pattern or type*. Drag that image over the full color image. It will be Layer 1. For the samples below, this was the image that was used. (You may recognize it as the Bayer array camera chip design discussed in the article related to image sharpening.)
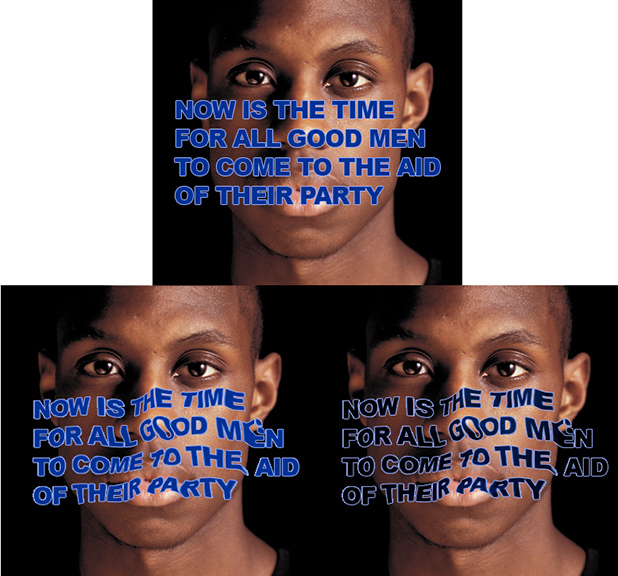
* If you choose to use type for Layer 1, it must be rasterized. After typing, choose Layer > Rasterize > Type.
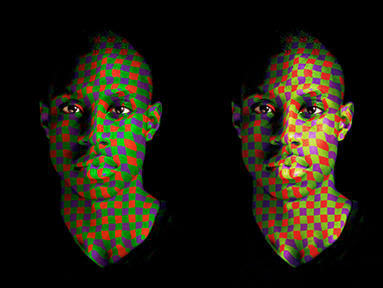
6. Choose Filter > Distort > Displace. The default numbers of 10 for Vertical and Horizontal Scale usually work very well. For greater displacement,15 is satisfactory, as well. Radio buttons should be set to Stretch to Fit and Repeat Pixel Edges. Click OK.
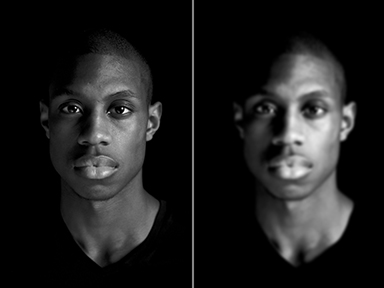
7. Choose a Blend Mode of Multiply or Overlay (the results appear on the following page). Experiment with other Blend Modes, as well. Adjust the opacity of Layer 1 for the most pleasing effect.
8. In the images below, a mask was added to Layer 1 by clicking on the mask symbol at the bottom of the Layers panel. Then, by painting in black on the eyes, that area of the bottom layer was revealed.
Multiply Overlay
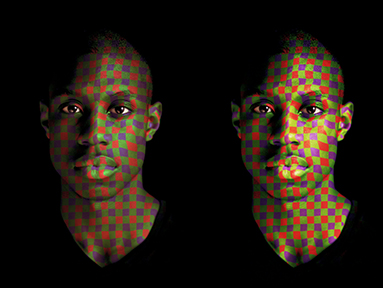
Opacity at 50%
In the example below, the same Displacement Map was applied as had been used in the previous example. A light blue Stroke was applied to the rasterized type so that it would be readable against the black background of the image when the 100% Multiply Blending Mode was added, as shown at the bottom/right.


 7
Replies
7
Replies


 AdChoices