Picture too red
Copy link to clipboard
Copied
I am new to photoshop and seek what i think is fairly basic guidance.
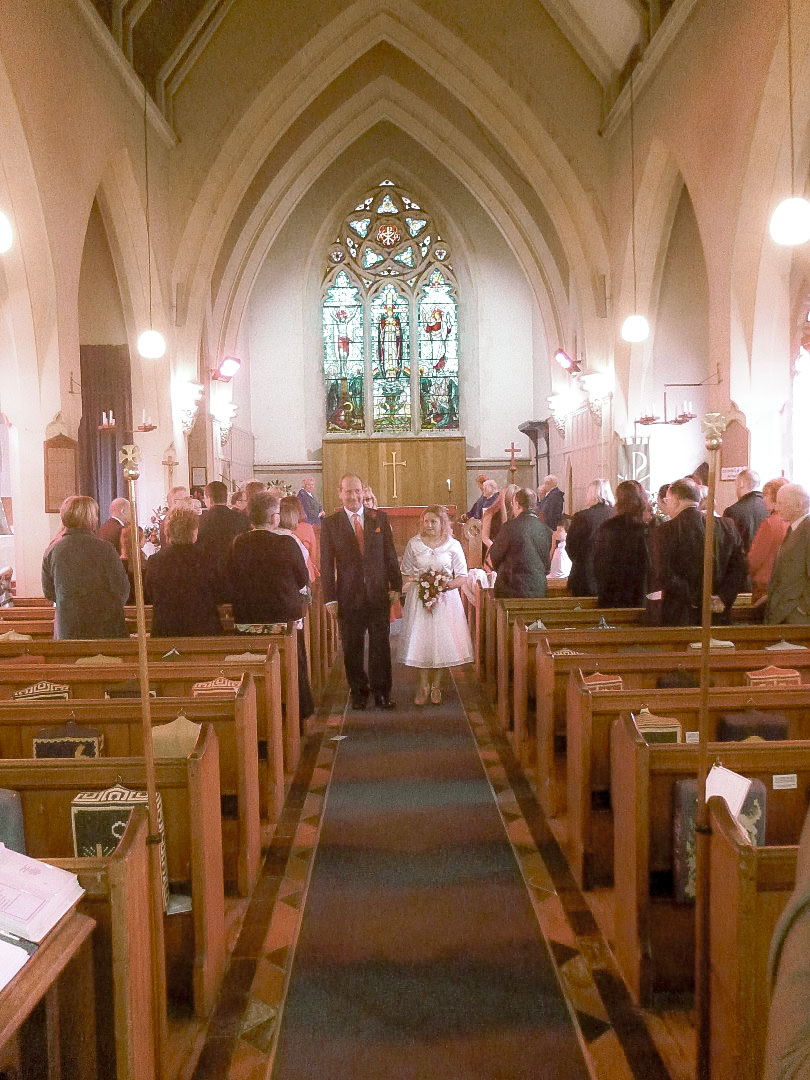
I have taken several pictures inside a church that was using infrared heaters to warm the space. All of these pictures are, as expected, predominantly too red and i would like to edit them as if shot in a more neutral light.
Is there an easy fix them someone could explain please,
Explore related tutorials & articles
Copy link to clipboard
Copied
Hello Pete, please post the photo you wish us to examine and offer insights. Regards jh
Copy link to clipboard
Copied
i have posted a picture in another response
Copy link to clipboard
Copied
Are these images captured in RAW?
Copy link to clipboard
Copied
no jpeg
Copy link to clipboard
Copied
Hi. There are many options for balance color in an image, for example, you can use the Color Balance adjustment or the Photo filter command: Color Balance adjustment in Photoshop
Also, maybe this tutorial can help you: https://photoblogstop.com/photoshop/accurate-white-balance-adjustments-in-photoshop
Copy link to clipboard
Copied
if you could show us the pic and the settings of the image, we'd be able to help you more. As of right now, all we can do is speculate and help from there, which may or may not help you
Copy link to clipboard
Copied
Thank you Dave - picture attached. it is saved as a jpeg
Copy link to clipboard
Copied
Open them in the Camera Raw filter and use the auto white balance to correct the cast.
Copy link to clipboard
Copied
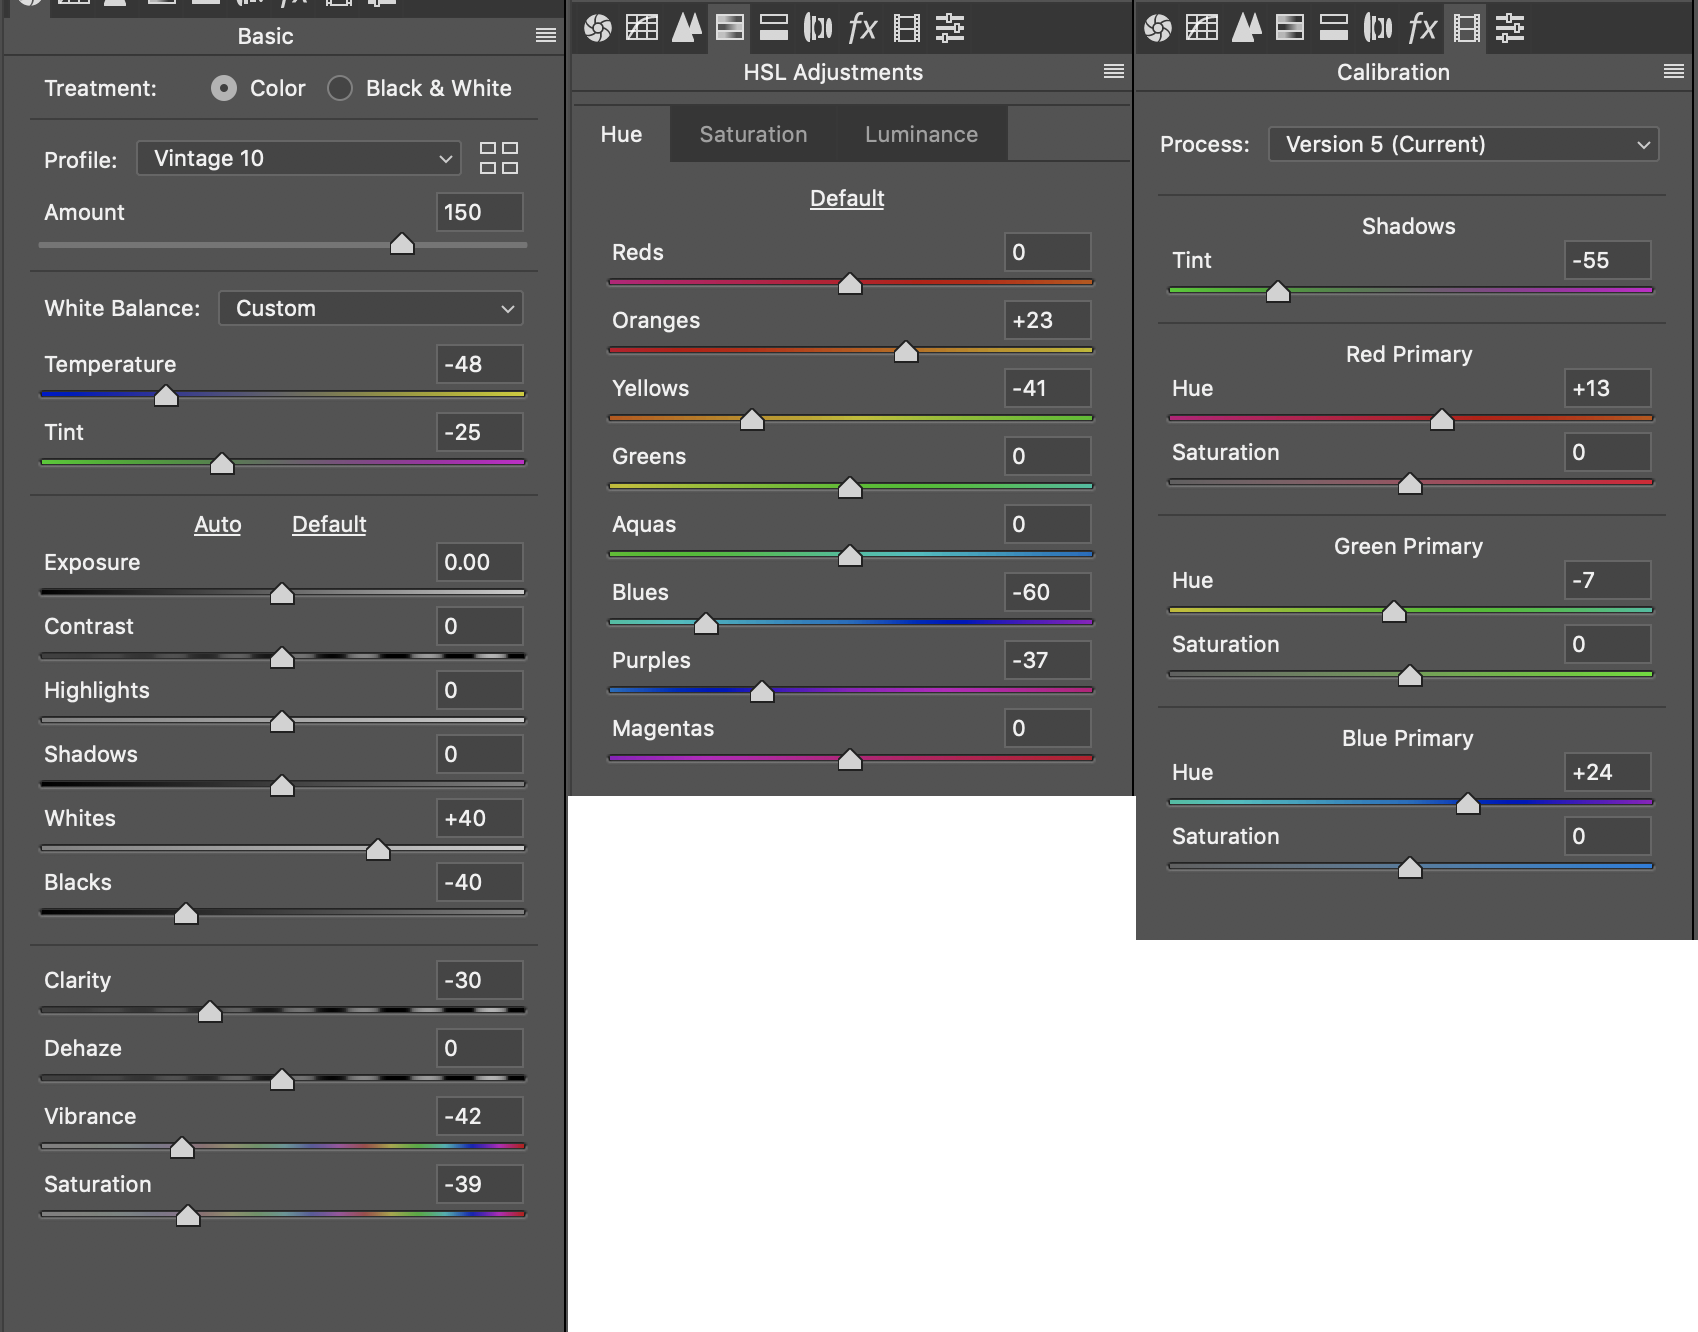
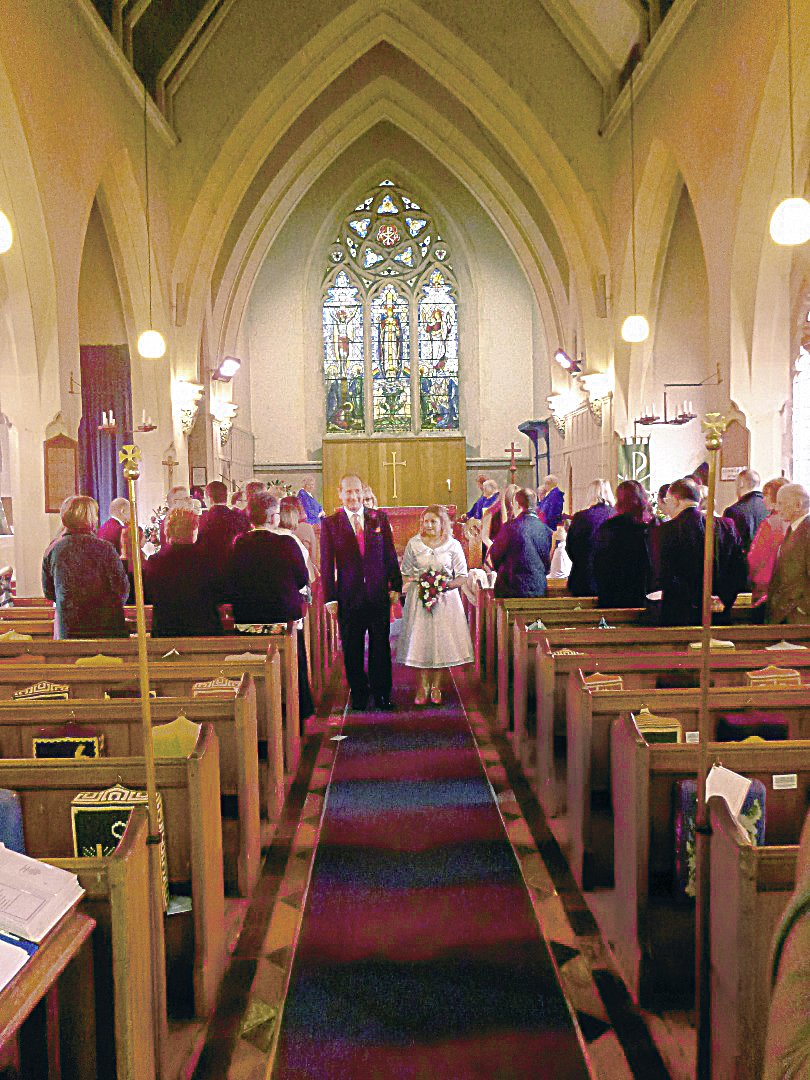
Here's a quick fix. Shooting a wedding in jpg format is dangerous, to both the clients and the photographer. Raw files only are the safest and highest quality way to record this type of work. Mixed lighting and bad lighting are common in these situations so do prepare for that.

Here are the settings used:

Copy link to clipboard
Copied
My approach involved making a duplicate image, changing its Mode to CMYK and creating an Alpha channel of the Magenta channel. It was modified and moved to the original RGB file and applied as a mask.) Then Curves were used to make the color, saturation and contrast adjustments. (The mask was responsible in part for maintaining the red in the carpet and the woman's dress on the right. Unfortunately, the original image is soft and includes some flare. It required more than normal sharpening and Image > Apply Image using the red channel to create a Luminosity channel to enhance contrast .

Copy link to clipboard
Copied
Many thanks,
Showing the settings is really helpful to guide me on the others.
Copy link to clipboard
Copied
In situations where lighting doesn't produce very good images in color, I have had more client satisfaction when providing B&W images.
Copy link to clipboard
Copied
You can approach this two ways.
One, open the image in your RAW editor, either Adobe Camera RAW or use Lightroom. And adjust with the White Balance slider. There is also a whitebalance eye dropper that you could use to sample the white paper on the left and it will autocalculate for you.
The second would be to go to Image > Adjustments > Levels and then when it's open, press the Auto button. If this doesn't give you the result you desire than try it again but hold Option or ALT (depends if you're windows or mac) and press the Auto button again. This will present you with some options for how it can color correct the image.
Good luck.


