• Global community
    • Language:
      • Deutsch
      • English
      • Español
      • Français
      • Português
  • 日本語コミュニティ
    Dedicated community for Japanese speakers
  • 한국 커뮤니티
    Dedicated community for Korean speakers
Exit
1

Problem with the patch tool

Community Beginner ,
Apr 12, 2020 Apr 12, 2020

Copy link to clipboard

Copied

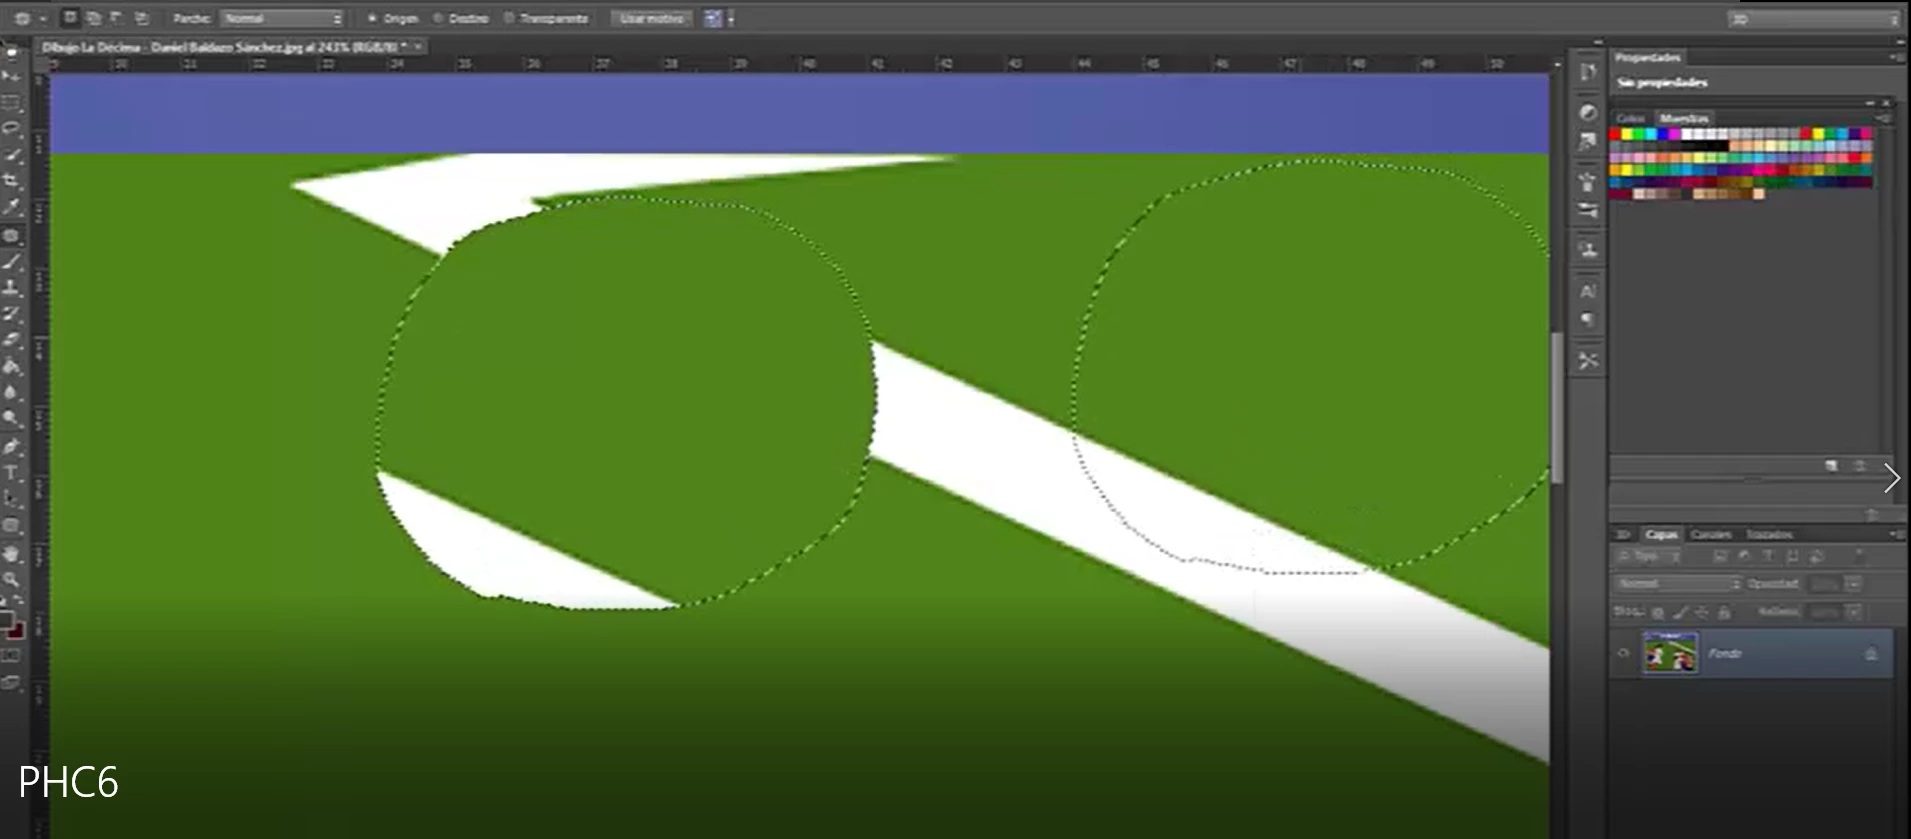
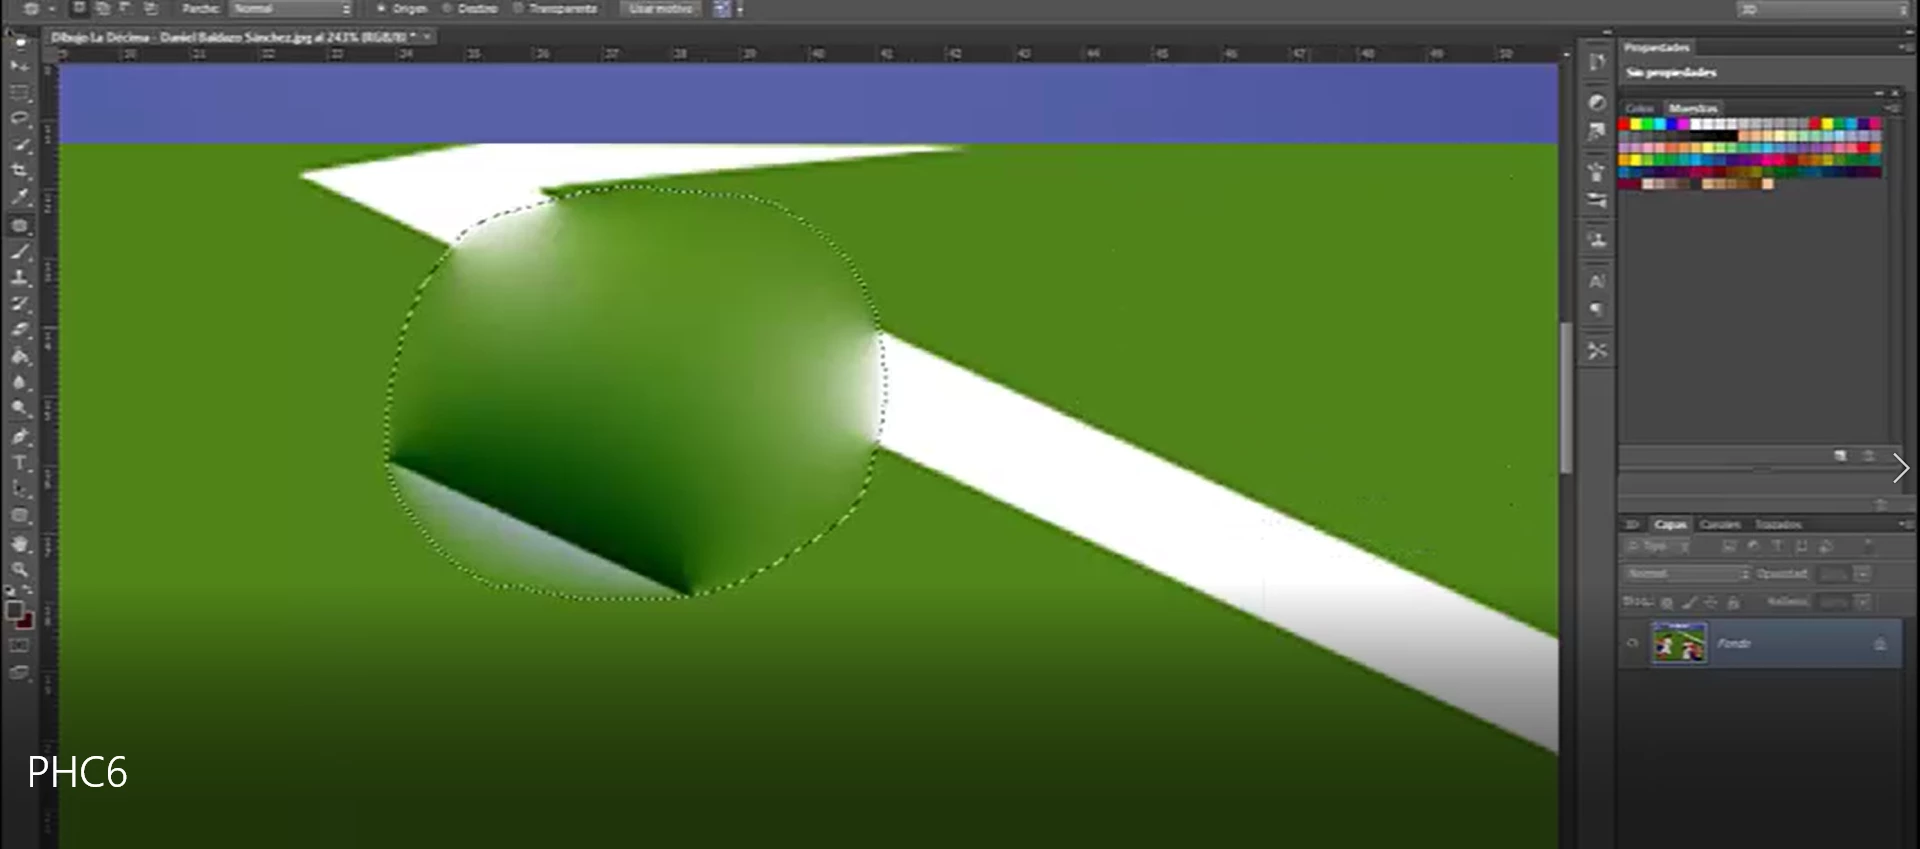
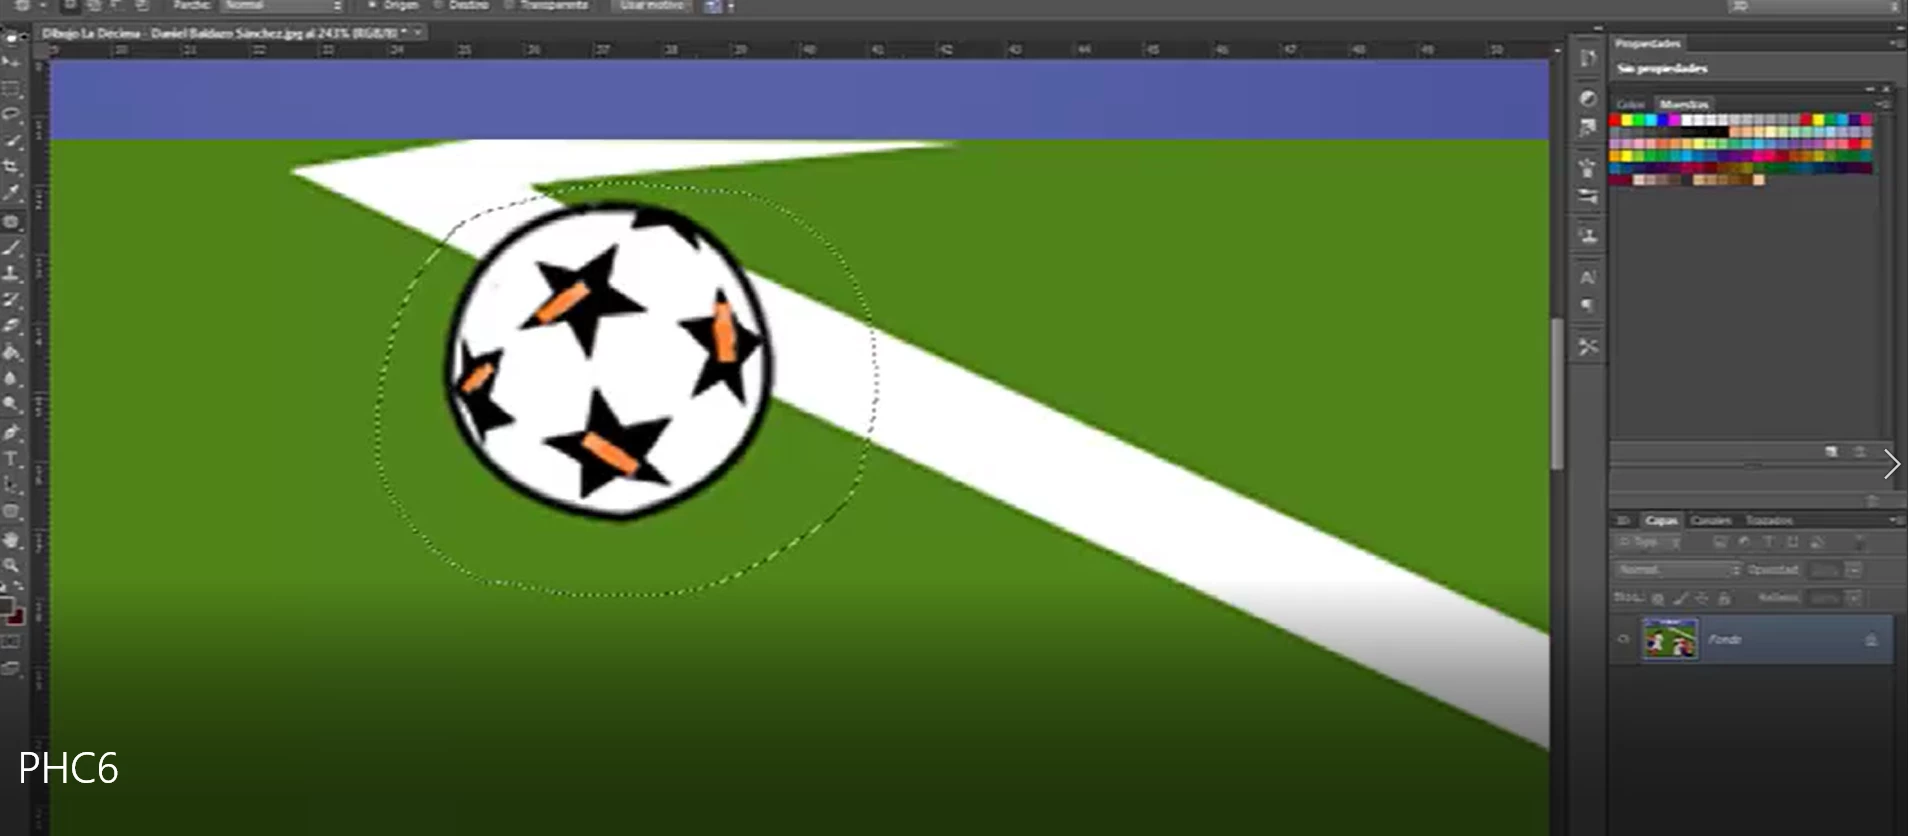
Hello everyone, this afternoon I have been using the patch tool and when using it I have had this problem, using it creates an effect that I do not want. What is happening? it's like an effect ...

Thank you!1.PNG2.PNG3.PNG

Views

8.7K

Translate

Translate

Report

Report
Community guidelines
Be kind and respectful, give credit to the original source of content, and search for duplicates before posting. Learn more
community guidelines

correct answers 1 Correct answer

Community Expert , Apr 12, 2020 Apr 12, 2020

Maybe you never applied it smack dab across a sharp white shape on a colored background? 


Have you considered using a Content Aware Fill? 


Likes


Votes

Translate

Translate
Adobe
Community Expert ,
Apr 12, 2020 Apr 12, 2020

Copy link to clipboard

Copied

What other effect did you expect?

The source you apparently chose is no fit for the destination so the result does not seem surprising. 


Have you considered using a Content Aware Fill? 

Votes

Translate

Translate

Report

Report
Community guidelines
Be kind and respectful, give credit to the original source of content, and search for duplicates before posting. Learn more
community guidelines
Community Beginner ,
Apr 12, 2020 Apr 12, 2020

Copy link to clipboard

Copied

Is in normal mode, the other mode have the same result.

Here is another example, I want the area I have selected to stay green but then it looks blurry. That's the effect I don't want blur.

I can fix it anyway with the buffer tool, but I've never had this problem with the patch tool.1.PNG2.PNG3.PNG

Votes

Translate

Translate

Report

Report
Community guidelines
Be kind and respectful, give credit to the original source of content, and search for duplicates before posting. Learn more
community guidelines
Community Expert ,
Apr 12, 2020 Apr 12, 2020

Copy link to clipboard

Copied

Maybe you never applied it smack dab across a sharp white shape on a colored background? 


Have you considered using a Content Aware Fill? 


Likes


Votes

Translate

Translate

Report

Report
Community guidelines
Be kind and respectful, give credit to the original source of content, and search for duplicates before posting. Learn more
community guidelines
Community Beginner ,
Apr 12, 2020 Apr 12, 2020

Copy link to clipboard

Copied

The problem is solved 🙂 Thanks!

Votes

Translate

Translate

Report

Report
Community guidelines
Be kind and respectful, give credit to the original source of content, and search for duplicates before posting. Learn more
community guidelines
Contributor ,
May 06, 2020 May 06, 2020

Copy link to clipboard

Copied

Hi, I have had the same issue as you demonstrated: I select an area with the patch-tool (your first secreenshot), move the selected area where I want it to copy from, it looks exactly the way I want it too (your second screenshot), then I release the button only to see the perfect result that I wanted replaced with a big fuzzy mess (your third screenshot)! I tried changing the parameters and settings of the tool but could not get it to work the way i expected. There has to be a way to end up with what we get when we move the mouse, otherwise what is the tool for? Apply a Gaussian blur the patch you're moving???


Thanks!

Votes

Translate

Translate

Report

Report
Community guidelines
Be kind and respectful, give credit to the original source of content, and search for duplicates before posting. Learn more
community guidelines
Community Expert ,
May 07, 2020 May 07, 2020

Copy link to clipboard

Copied

»otherwise what is the tool for?«

Have you bothered reading up on it? 

https://helpx.adobe.com/photoshop/using/retouching-repairing-images.html

And a quote from the reference: 

»The new healing algorithm is better in diffusing the color and spreading them over an area. However, you need to be very clear about the area being sampled or filled. For soft selection, Photoshop thresholds the soft selection at 128 to display an 8-bit mask. As a result, the screen feedback in patch tool can misrepresent what user is actually sampling or trying to heal. This can manifest itself in bright or dark color contamination at the boundary of the filled area, which will be spread over the filled area. The new algorithm is enhanced to deal with very soft brushes. To limit the contamination, you may want to try different diffusion slider values and be careful with the sampling region. The patch tool can be prone to this sort of error as illustrated in the next example.«

Votes

Translate

Translate

Report

Report
Community guidelines
Be kind and respectful, give credit to the original source of content, and search for duplicates before posting. Learn more
community guidelines
Community Beginner ,
May 13, 2020 May 13, 2020

Copy link to clipboard

Copied

Hello, sorry for not answering before ... the problem I think was that since it is a solid background the program does not detect which area you want to patch. The patch tool works to hide things in a photo by copying nearby textures. The solution is simply to use the Clone Stamp tool is 100% effective, I recommend it.

Votes

Translate

Translate

Report

Report
Community guidelines
Be kind and respectful, give credit to the original source of content, and search for duplicates before posting. Learn more
community guidelines
Contributor ,
May 13, 2020 May 13, 2020

Copy link to clipboard

Copied

Thanks for your reply. I've used the clone tool many times before and it's
great most of the time. But what many PS users need, I believe, is either:

1) Adding an option to the patch tool to disable the last step and just
give us what we see in the live preview. It's perfect!

2) Add an option to the clone tool to do a live preview while moving the
mouse, just like the patch tool uses.

Hoping one of those comes along soon. Doing the workaround of duplicating
the layer, adding a mask of the right size and shape, sliding the
underneath layer until you find what you want, then copying that region and
moving it to the destination area with pixel perfect placement... Ugh!

Votes

Translate

Translate

Report

Report
Community guidelines
Be kind and respectful, give credit to the original source of content, and search for duplicates before posting. Learn more
community guidelines
New Here ,
Jun 12, 2020 Jun 12, 2020

Copy link to clipboard

Copied

How did you solved it ? I have the exact same problem as you. 

Votes

Translate

Translate

Report

Report
Community guidelines
Be kind and respectful, give credit to the original source of content, and search for duplicates before posting. Learn more
community guidelines
Contributor ,
Jun 12, 2020 Jun 12, 2020

Copy link to clipboard

Copied

I haven't! I'm just hoping Adobe gives us the option to maintain the full
appearance of the patch as it looks while we drag it. Please, Adobe, please!

Votes

Translate

Translate

Report

Report
Community guidelines
Be kind and respectful, give credit to the original source of content, and search for duplicates before posting. Learn more
community guidelines
New Here ,
Aug 02, 2022 Aug 02, 2022

Copy link to clipboard

Copied

LATEST

Yes I agree with your suggestion about just maintaining the full
appearance of the patch as it looks while draging it. It's 2022 now lol... 

Votes

Translate

Translate

Report

Report
Community guidelines
Be kind and respectful, give credit to the original source of content, and search for duplicates before posting. Learn more
community guidelines