- Home
- Photoshop ecosystem
- Discussions
- PS CC - Applying the same crop to multiple images
- PS CC - Applying the same crop to multiple images
PS CC - Applying the same crop to multiple images
Copy link to clipboard
Copied
On a Mac, PS CC 2018
I would like to apply a crop and rotation to one image, then apply the same crop to other similar images without having to create a tool preset or action.
I've tried to follow along with this Julianne Kost video:
Quick Tip -- Cropping Two Images to the Same Size in Photoshop CS6 - YouTube
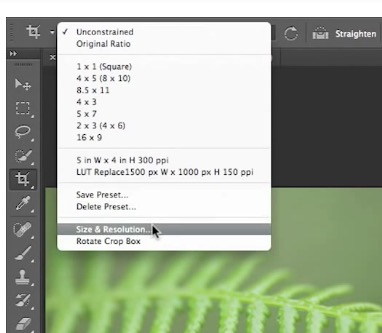
However, at about the 1 min mark, she goes into the crop pull down menu to select the Size & Resolution option, but in my version of PS CC that option isn't present.
From her video (PS CS6):
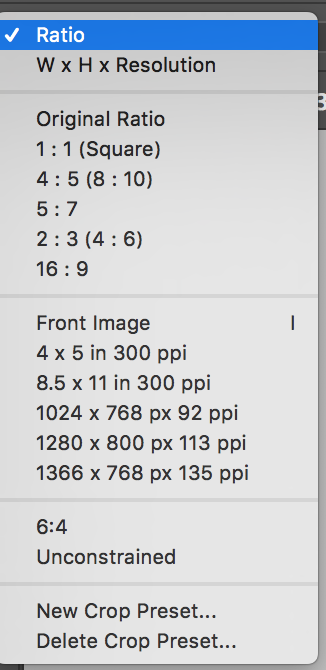
From my pull down (PS CC 2018):
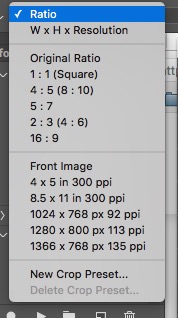
Where can I find that functionality in CC 2018, or how can I achieve similar.
Explore related tutorials & articles
Copy link to clipboard
Copied
She's only using the Size & Resolution dialog to grab the "front image" dimensions, which you can now pull directly from the drop-down menu (the other functions of Size & Resolution are available directly in the toolbar when you choose W x H x Resolution instead of Ratio)
Copy link to clipboard
Copied
I see what you are saying, and I see why even though I was seeing that my attempts to implement it were not working.
Where I am still stuck, though, is with the rotation as part of the crop. Is a duplication of that possible from one image to another? This "Front Image"approach seems to only work for pixel dimensions.
Copy link to clipboard
Copied
You do it with ACR. Open up all the documents you want to Crop, and select them in ACR with Ctrl A (Cmd A). Apply the crop and any other settings that you want synced, and its job done. You can do this with JPGs as well be selecting them all in Bridge, and opening with Ctrl R (Cmd R).

Or you could do it from Bridge by pasting the settings. Open the first image in ACR and apply the Crop and any other settings, and click on Done
Then right click that image in Bridge and Develop settings > Copy Settings
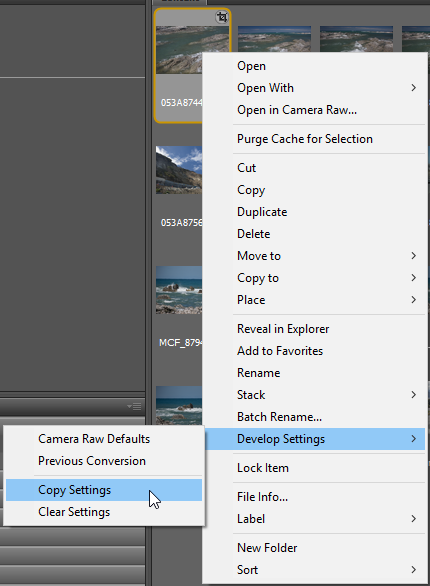
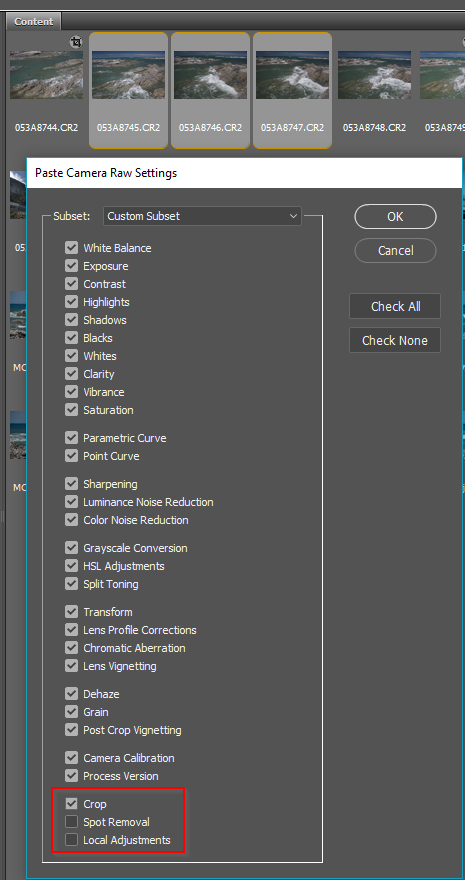
Then select the other images in Bridge and right click Develop Settings > Paste Settings.
This will open a dialog window in which you will need to check Crop which is off by default, and uncheck other settings you do not want to sync. This would work better than opening them all up in ACR if you are dealing with a lot of images.
Copy link to clipboard
Copied
Create the crop you want to achieve.
Go to the same pull down menu and select: New Crop Preset this will save your crop.

Copy link to clipboard
Copied
During the the when CS6 was the latest version available, I wrote the following Information Sheet for my students. I hope you find it useful.
How to Crop Images of Various Sizes
to a Common Size & Resolution using CS6: Front Image
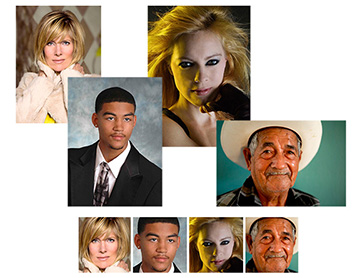
1. Open two or more images. Pick one.
a. Choose the Crop tool. Checkmark the “Delete Cropped Pixels” box in the Options bar and crop the image to the desired shape.
c. Choose Image > Image Size and enter the desired dimensions, and resolution. Confirm that the Resample Image box is checked and that
“Bicubic Automatic” appears in the field at the bottom of the menu.
Once OK’d, we will refer to this master as the Front Image.
2. With the Front Image still chosen, switch to the Crop tool. In the Options Bar’s first field use the double arrows to change the field designation from Unconstrained to Size & Resolution.
3. In the drop-down Menu that appears, change the Source field from Custom to Front Image. The size and resolution of that file will be automatically entered in the appropriate fields.
4. Click OK and then click the Esc key.
5. With the Crop tool still chosen, click a file to be changed. The cropped version of it will appear immediately. At this time, if desired, you may move, rotate and/or alter the crop area. (If you want to shift area chosen, click on a crop handle, then reposition to the desired area.) The image proportion will not change.
6. Click the Return key. The size and resolution of this cropped image will match the file you designated Front Image.
7. Save and close the file if desired.
8. Repeat Steps 5 through 7 for each the other files that require adjustment.
9. Finally, in the Crop tool’s Options Bar, use the double arrows to return the field designation to Unconstrained.
Get ready! An upgraded Adobe Community experience is coming in January.
Learn more
