Answered
putting camo on a car
how do i put camo on a car using the clipping mask?

how do i put camo on a car using the clipping mask?
So much depends on the colour and how bright the car is. Overlaying a colour works best over mid tones, but using blend modes to make the detail show through works best with lighter colour cars, with dark details.
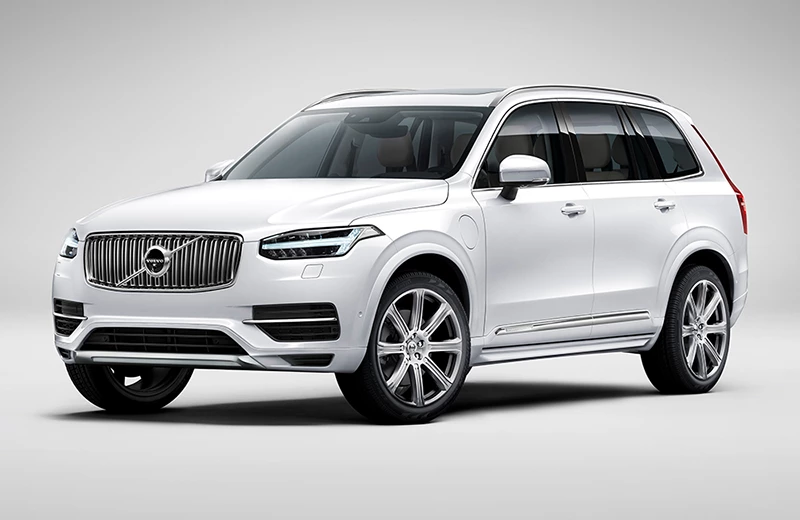
So starting with this vehicle
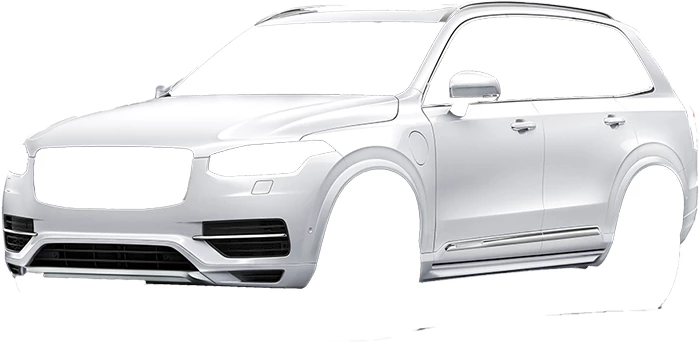
You really need to select the area you want the effect to cover. With a car, that is best done using the pen tool, but as I'm only demonstrating, I just used Quick Mask.
So the cut out car body is copied to a new layer
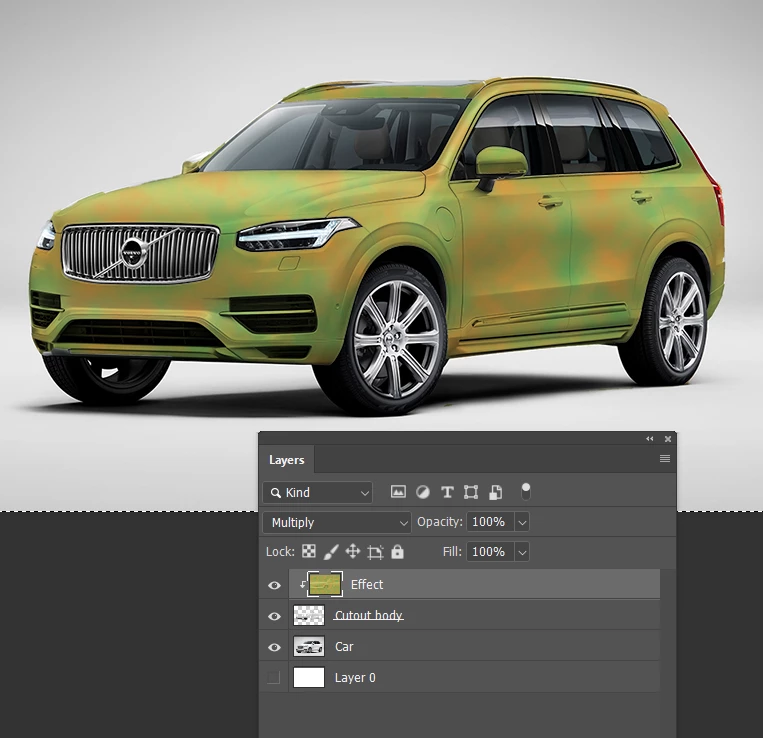
Placing a layer above the cutout car, and clipping it to the car layer.
Note I have use Dodge and burn to create some depth.

Setting the effect layer to Multiply lets the dark detail show through.
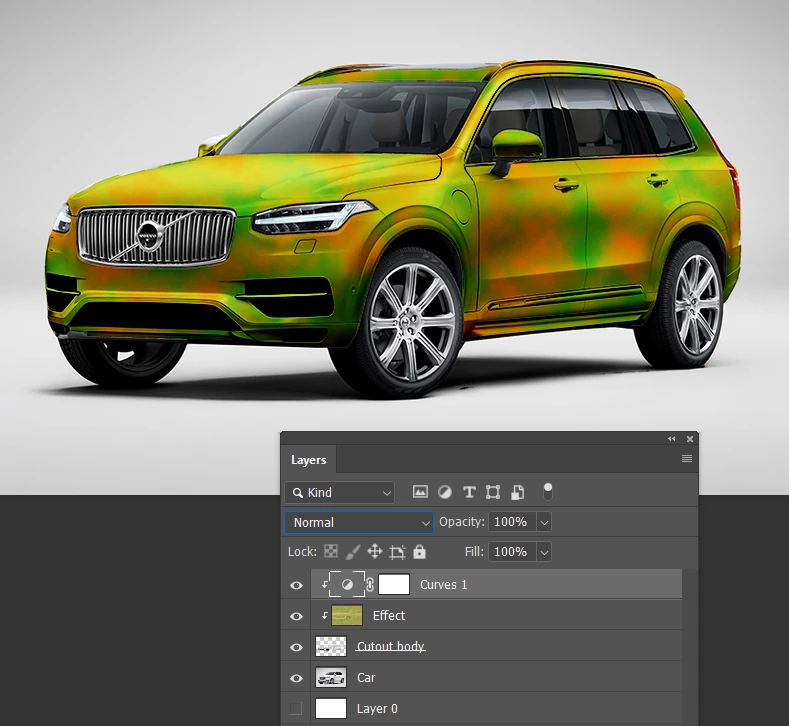
Turning on the car layer at the bottom of the stack, reveals the hidden detail like tires and screen
You can crisp up the effect with a clipped curves layer.
And change the colour with a Hue Sat layer.
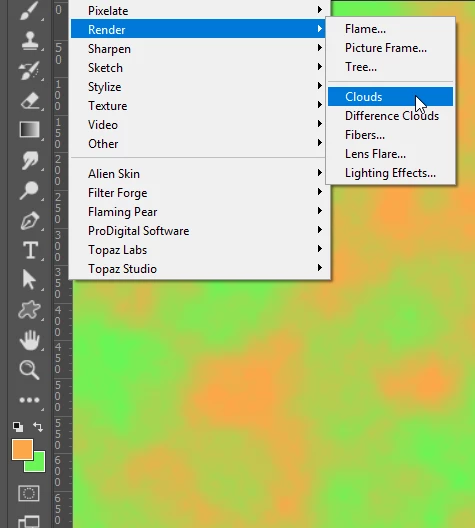
Hey, I ought to say how I made the camouflage effect.
Just set foreground and background colours to what you want, and go Filter > Render Clouds
Already have an account? Login
Enter your E-mail address. We'll send you an e-mail with instructions to reset your password.