Participant
January 5, 2018
Question

Putting stroke over brushes?

  • January 5, 2018
  • 2 replies
  • 423 views

So I wanted to make a frame out of bubbles for some text. I made a custom brush and made this.

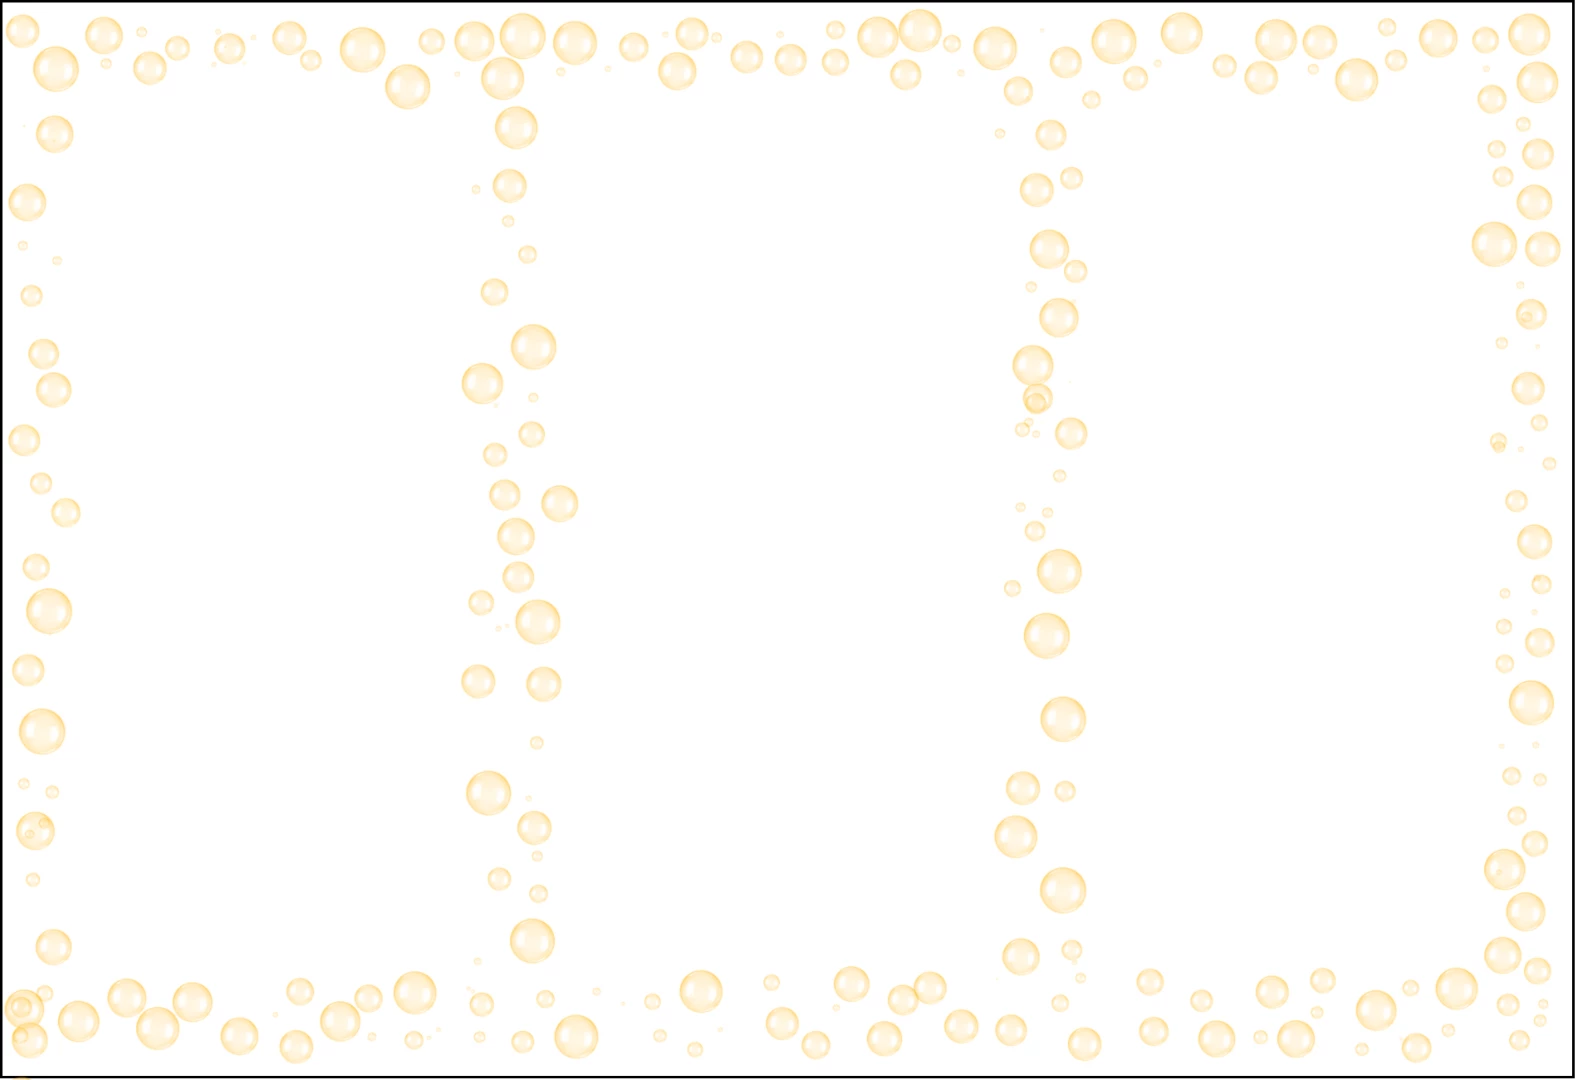
But I wanted to bring more attention to the bubbles because they look pale when printed out.

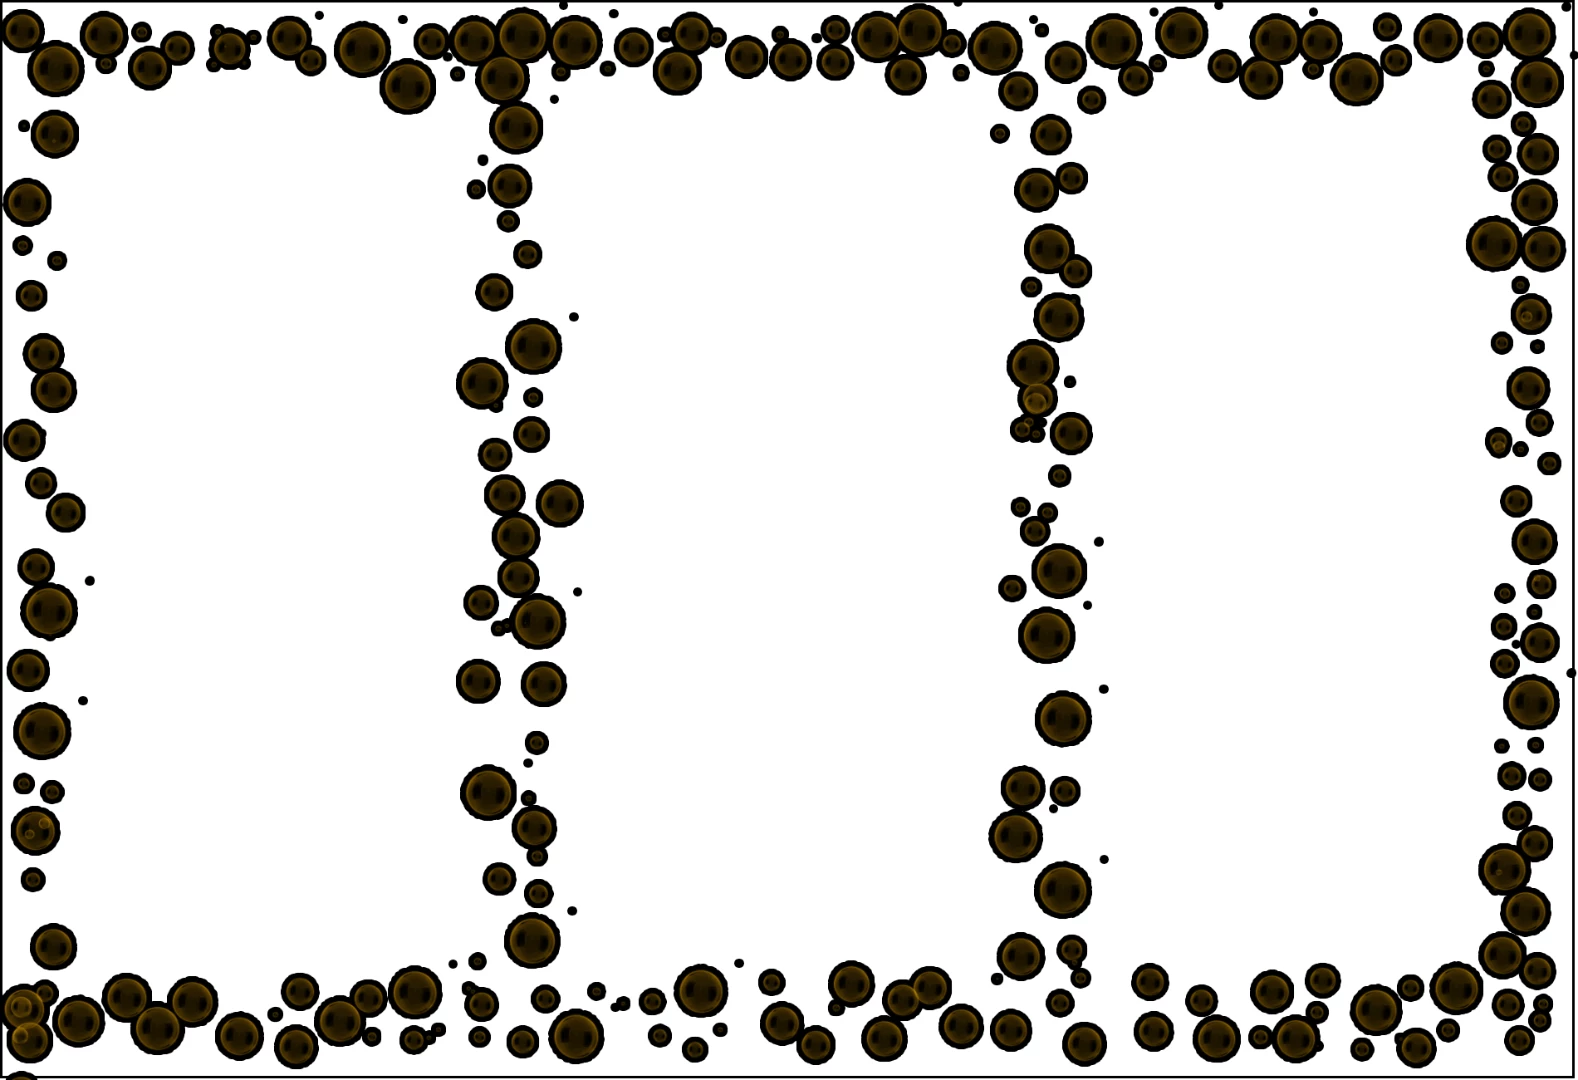
So the idea is to put a border around these tiny bubbles and I decided to put a outside stroke over the thing. But instead of making a thin black line around each bubble, it made this:

Just to test it out on another thing, I just pulled a simple line with a normal brush and stroking it gave the similar results. It seems to happen with every object that has less than 100% opacity.

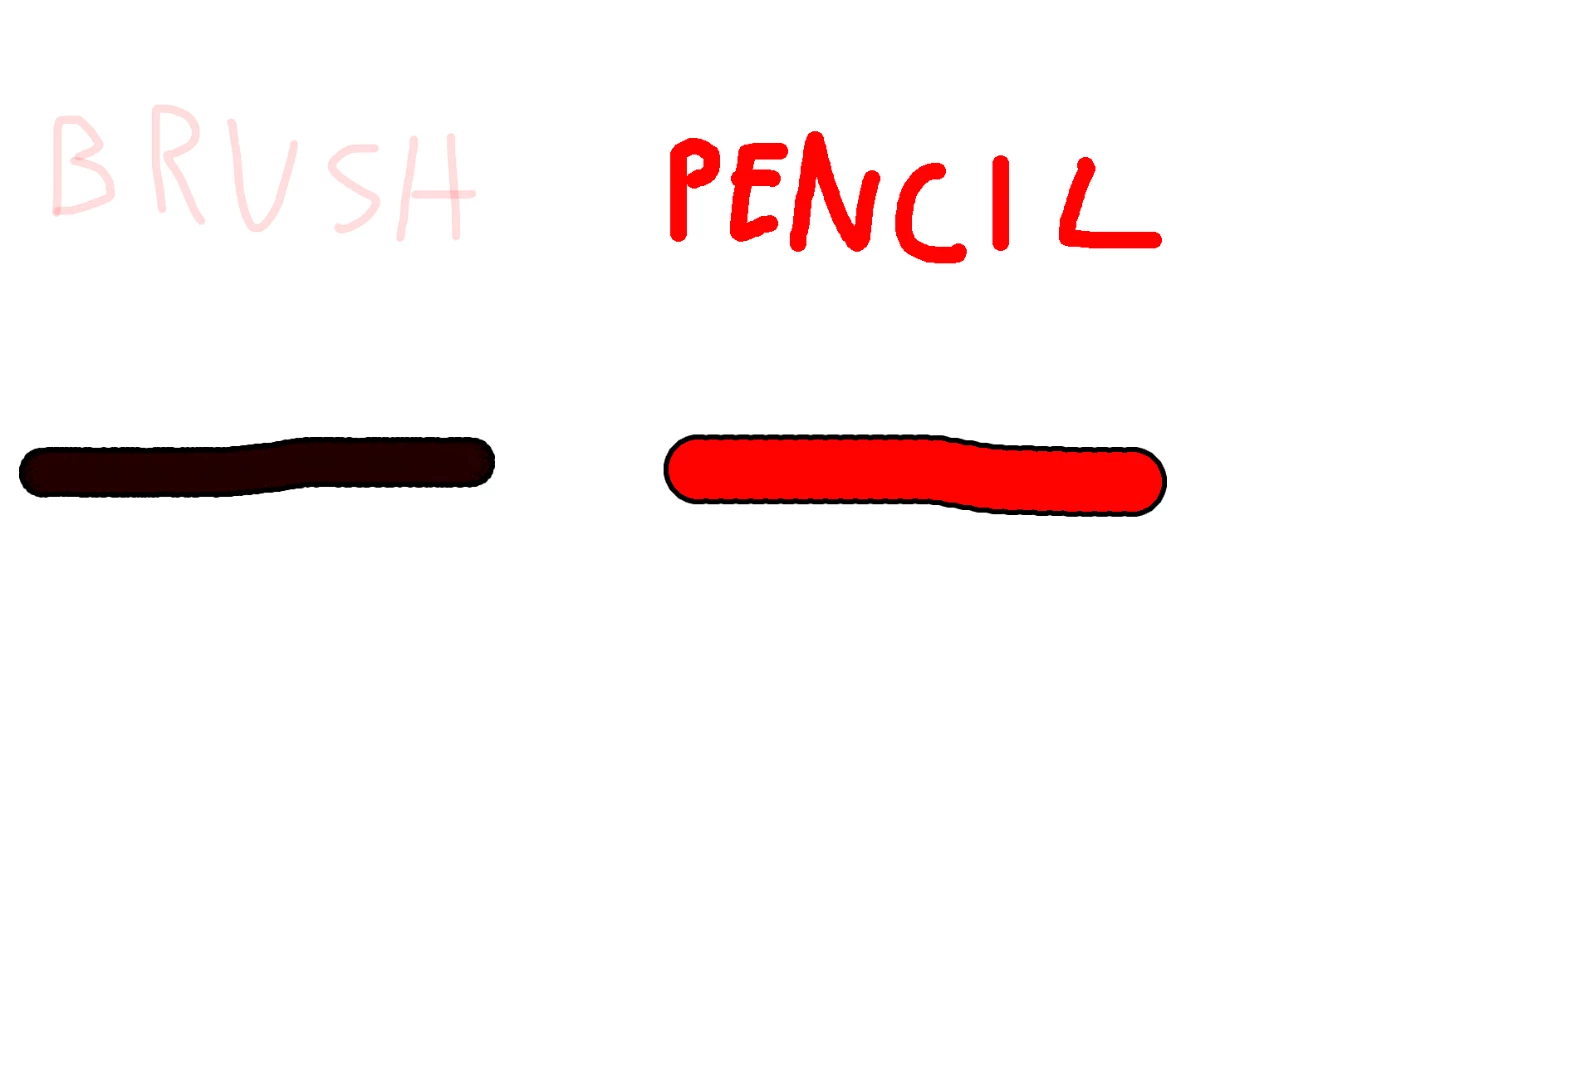
-stroking a brush and stroking a pencil

So I wonder how do you properly stroke a brush (or any object with less than 100% opacity)?

This topic has been closed for replies.

2 replies

chanaart
Community Expert
Community Expert
January 5, 2018

Here is what I do:

With the Vector rectangle create a path.

Choose the brush you want to work with.

From the flyout panel of the path choose stroke path . (make sure you have the correct brush selected and you assign a new layer to the activated path)

Here is a screen shot:

chanaart
Community Expert
Community Expert
January 5, 2018

If you need more in depth information I can send you a small video

Norman Sanders
Legend
January 5, 2018

Choose the Magic Wand and in the Option bar click Contiguous. Then click on a white area in the image. Next, Select > Inverse to select the rim of each bubble. Last, Edit > Stroke..about 2 px with a darker value of the color of the bubbles. Then deselect the marching ants

Semaphoric
Community Expert
Community Expert
January 5, 2018

Additionally, you could put the stroke on a separate layer, so that you would keep the original intact. You could also do things like blur the stoke, for an outer glow effect, without affecting the bubbles.