• Global community
    • Language:
      • Deutsch
      • English
      • Español
      • Français
      • Português
  • 日本語コミュニティ
    Dedicated community for Japanese speakers
  • 한국 커뮤니티
    Dedicated community for Korean speakers
Exit
7

🔎 Quick Tip : How to use content aware fill in Photoshop

Adobe Employee ,
Sep 28, 2022 Sep 28, 2022

Copy link to clipboard

Copied

SahilChawla_0-1652178921522.jpeg


Content Aware Fill

Did you know  Content aware fill is a great and powerful tool to remove unwanted objects from your image and seamlessly fill the selected portions from other parts of the image. If done correctly, you can make the image look as if the objects were not even there to begin with.


MohitGoyal_0-1679513295570.png


Quick steps to use Content Aware Fill
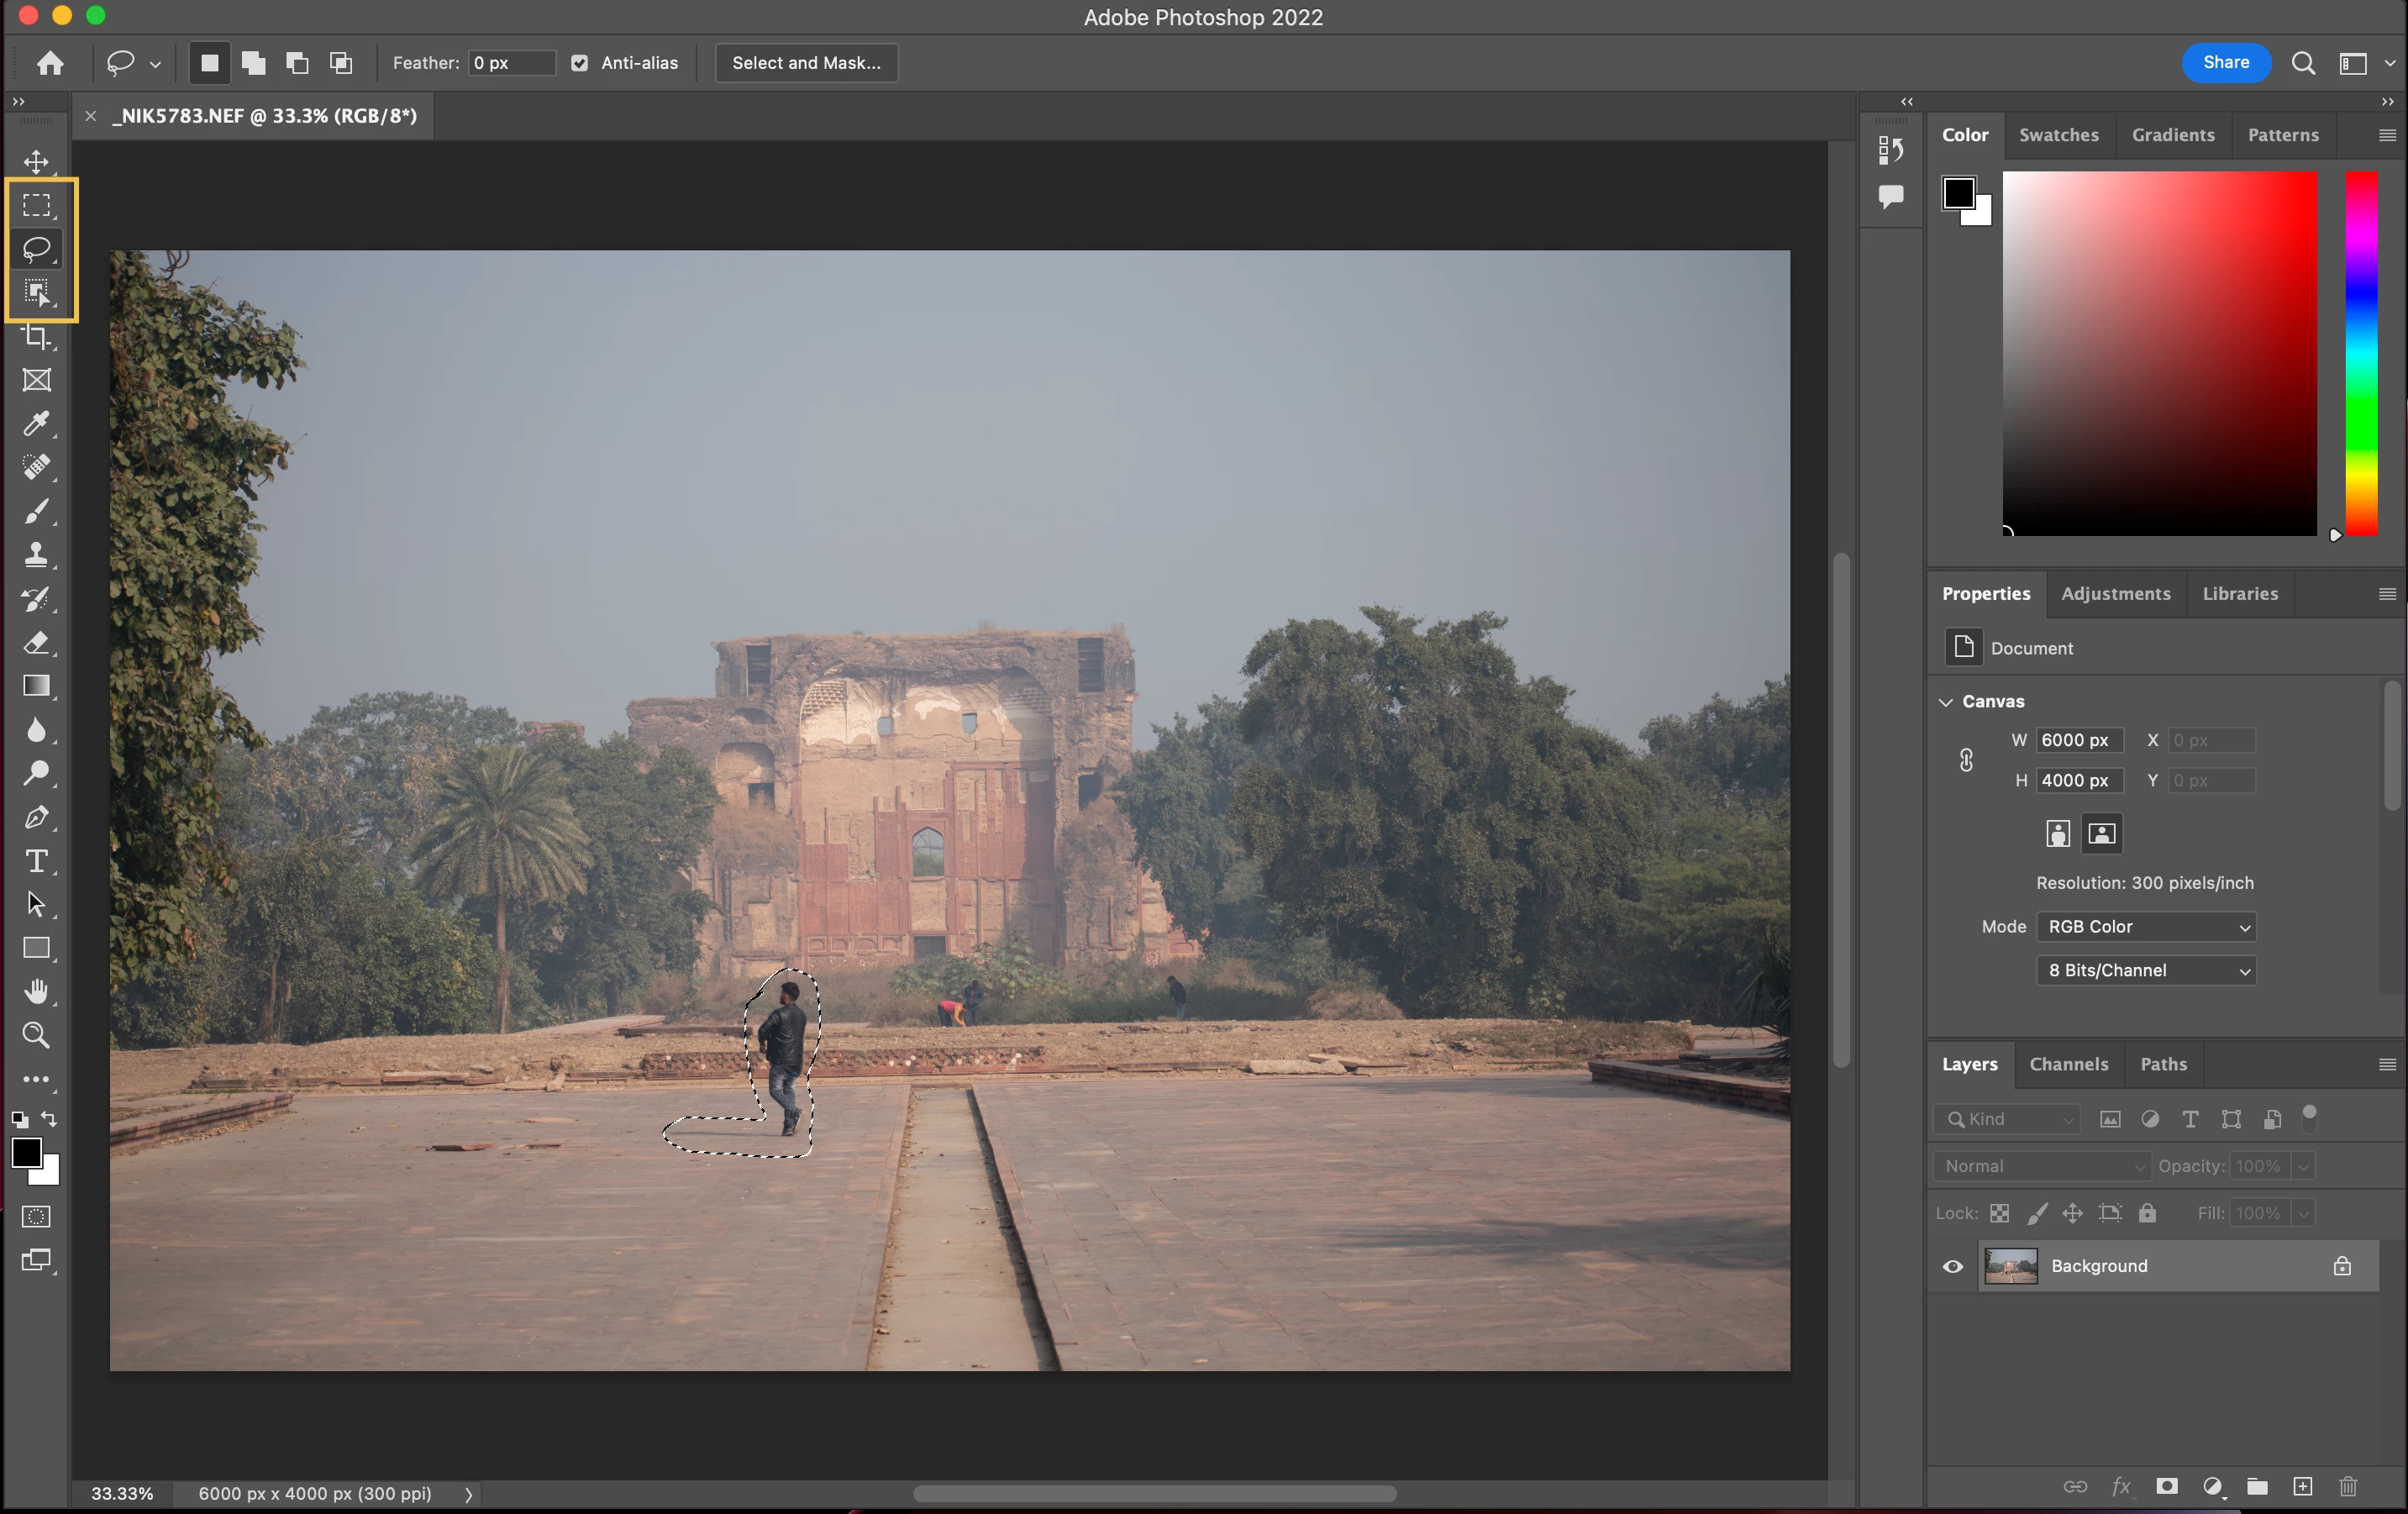
 

❶ Select the object

Make a quick selection of the object you want to remove using one of the wide range of selection tools available in Photoshop. You can use Select Subject, the Object Selection Tool, or even any of the Marquee tools.


Screenshot 1.png


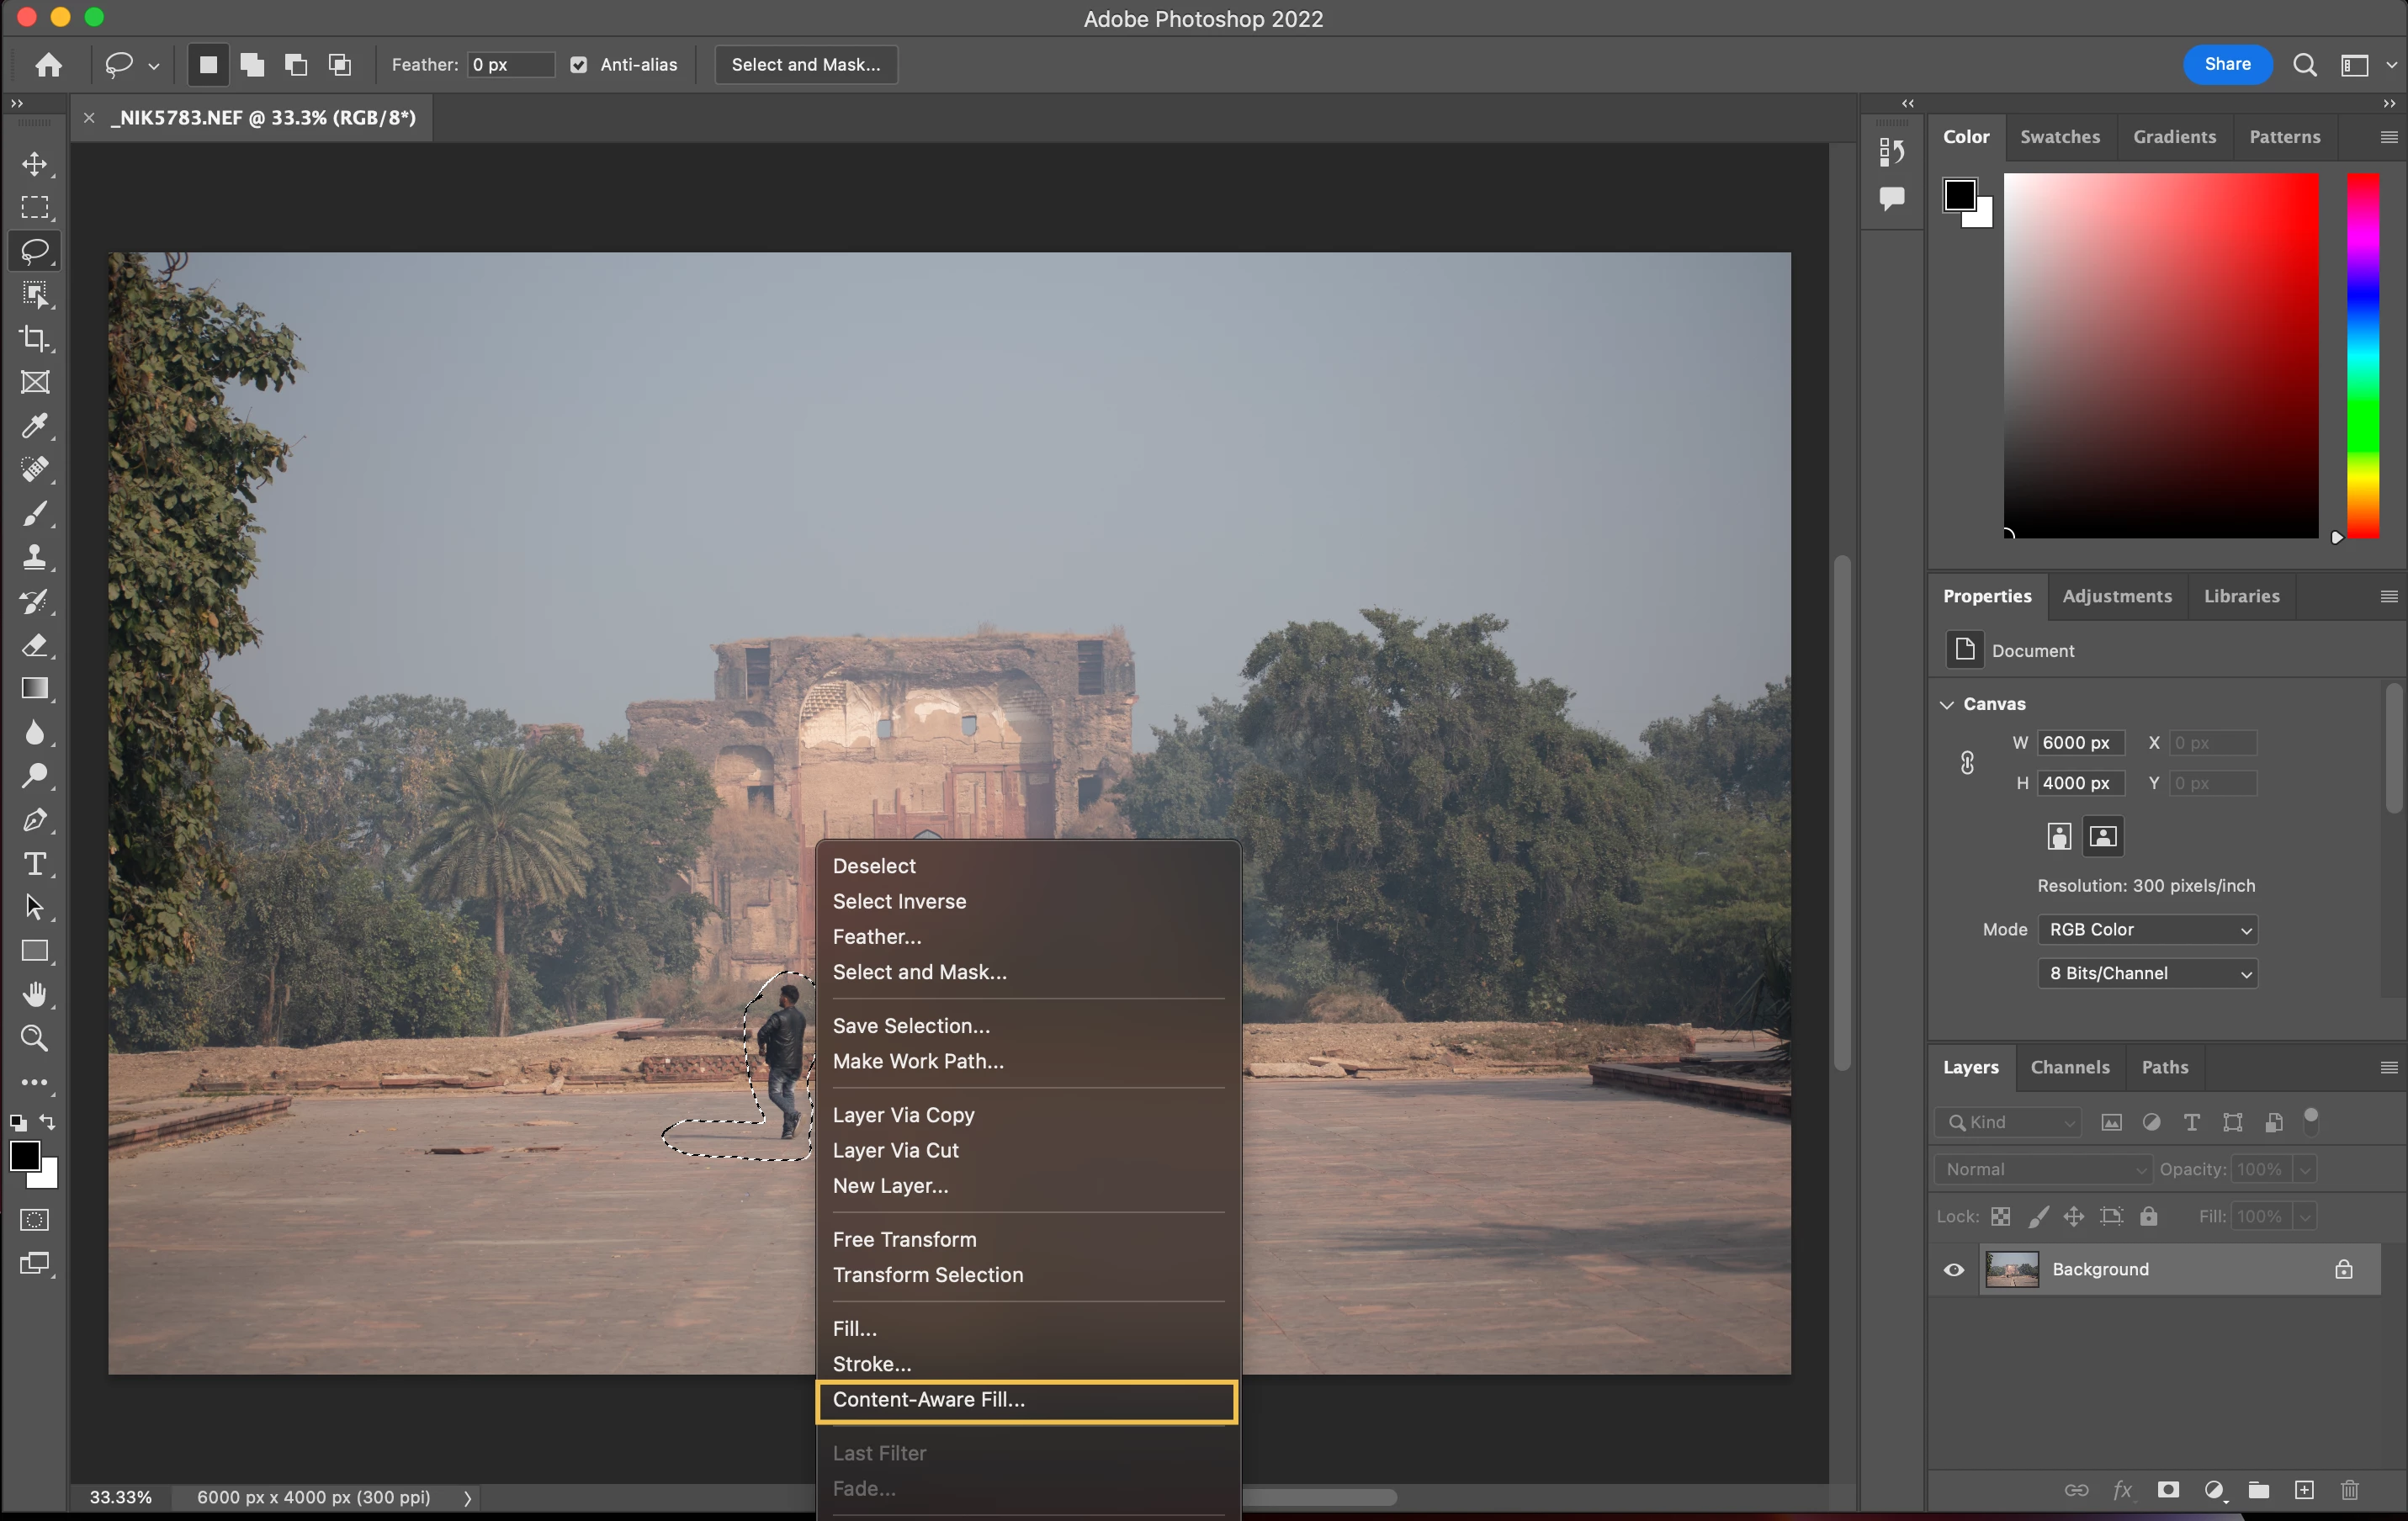
❷ Open Content-Aware Fill

  • Right-click the selection and choose Content-Aware Fill from the drop-down menu
  • Choose Edit > Content-Aware Fill


Screenshot 2.png


Refine the selection
In the Content-Aware Fill workspace you can refine the selection and also customize the sampling area using the panel on the right of the Photoshop interface. You can easily expand the selection edges around your object by selecting a Lasso tool from the left Toolbar and clicking the Expand button one or more times in the Options bar at the top. If you've expanded the selection too much, use the Contract button or Undo to reduce the selection edges. (For best results, we recommend leaving the Sampling Area Options on Auto)
 
 
❹ Commit to the selection when you're happy
When you're happy with the selection and the Sampling Area, Click OK and let Photoshop do it's magic.
 
Screenshot 3.png


Related links:

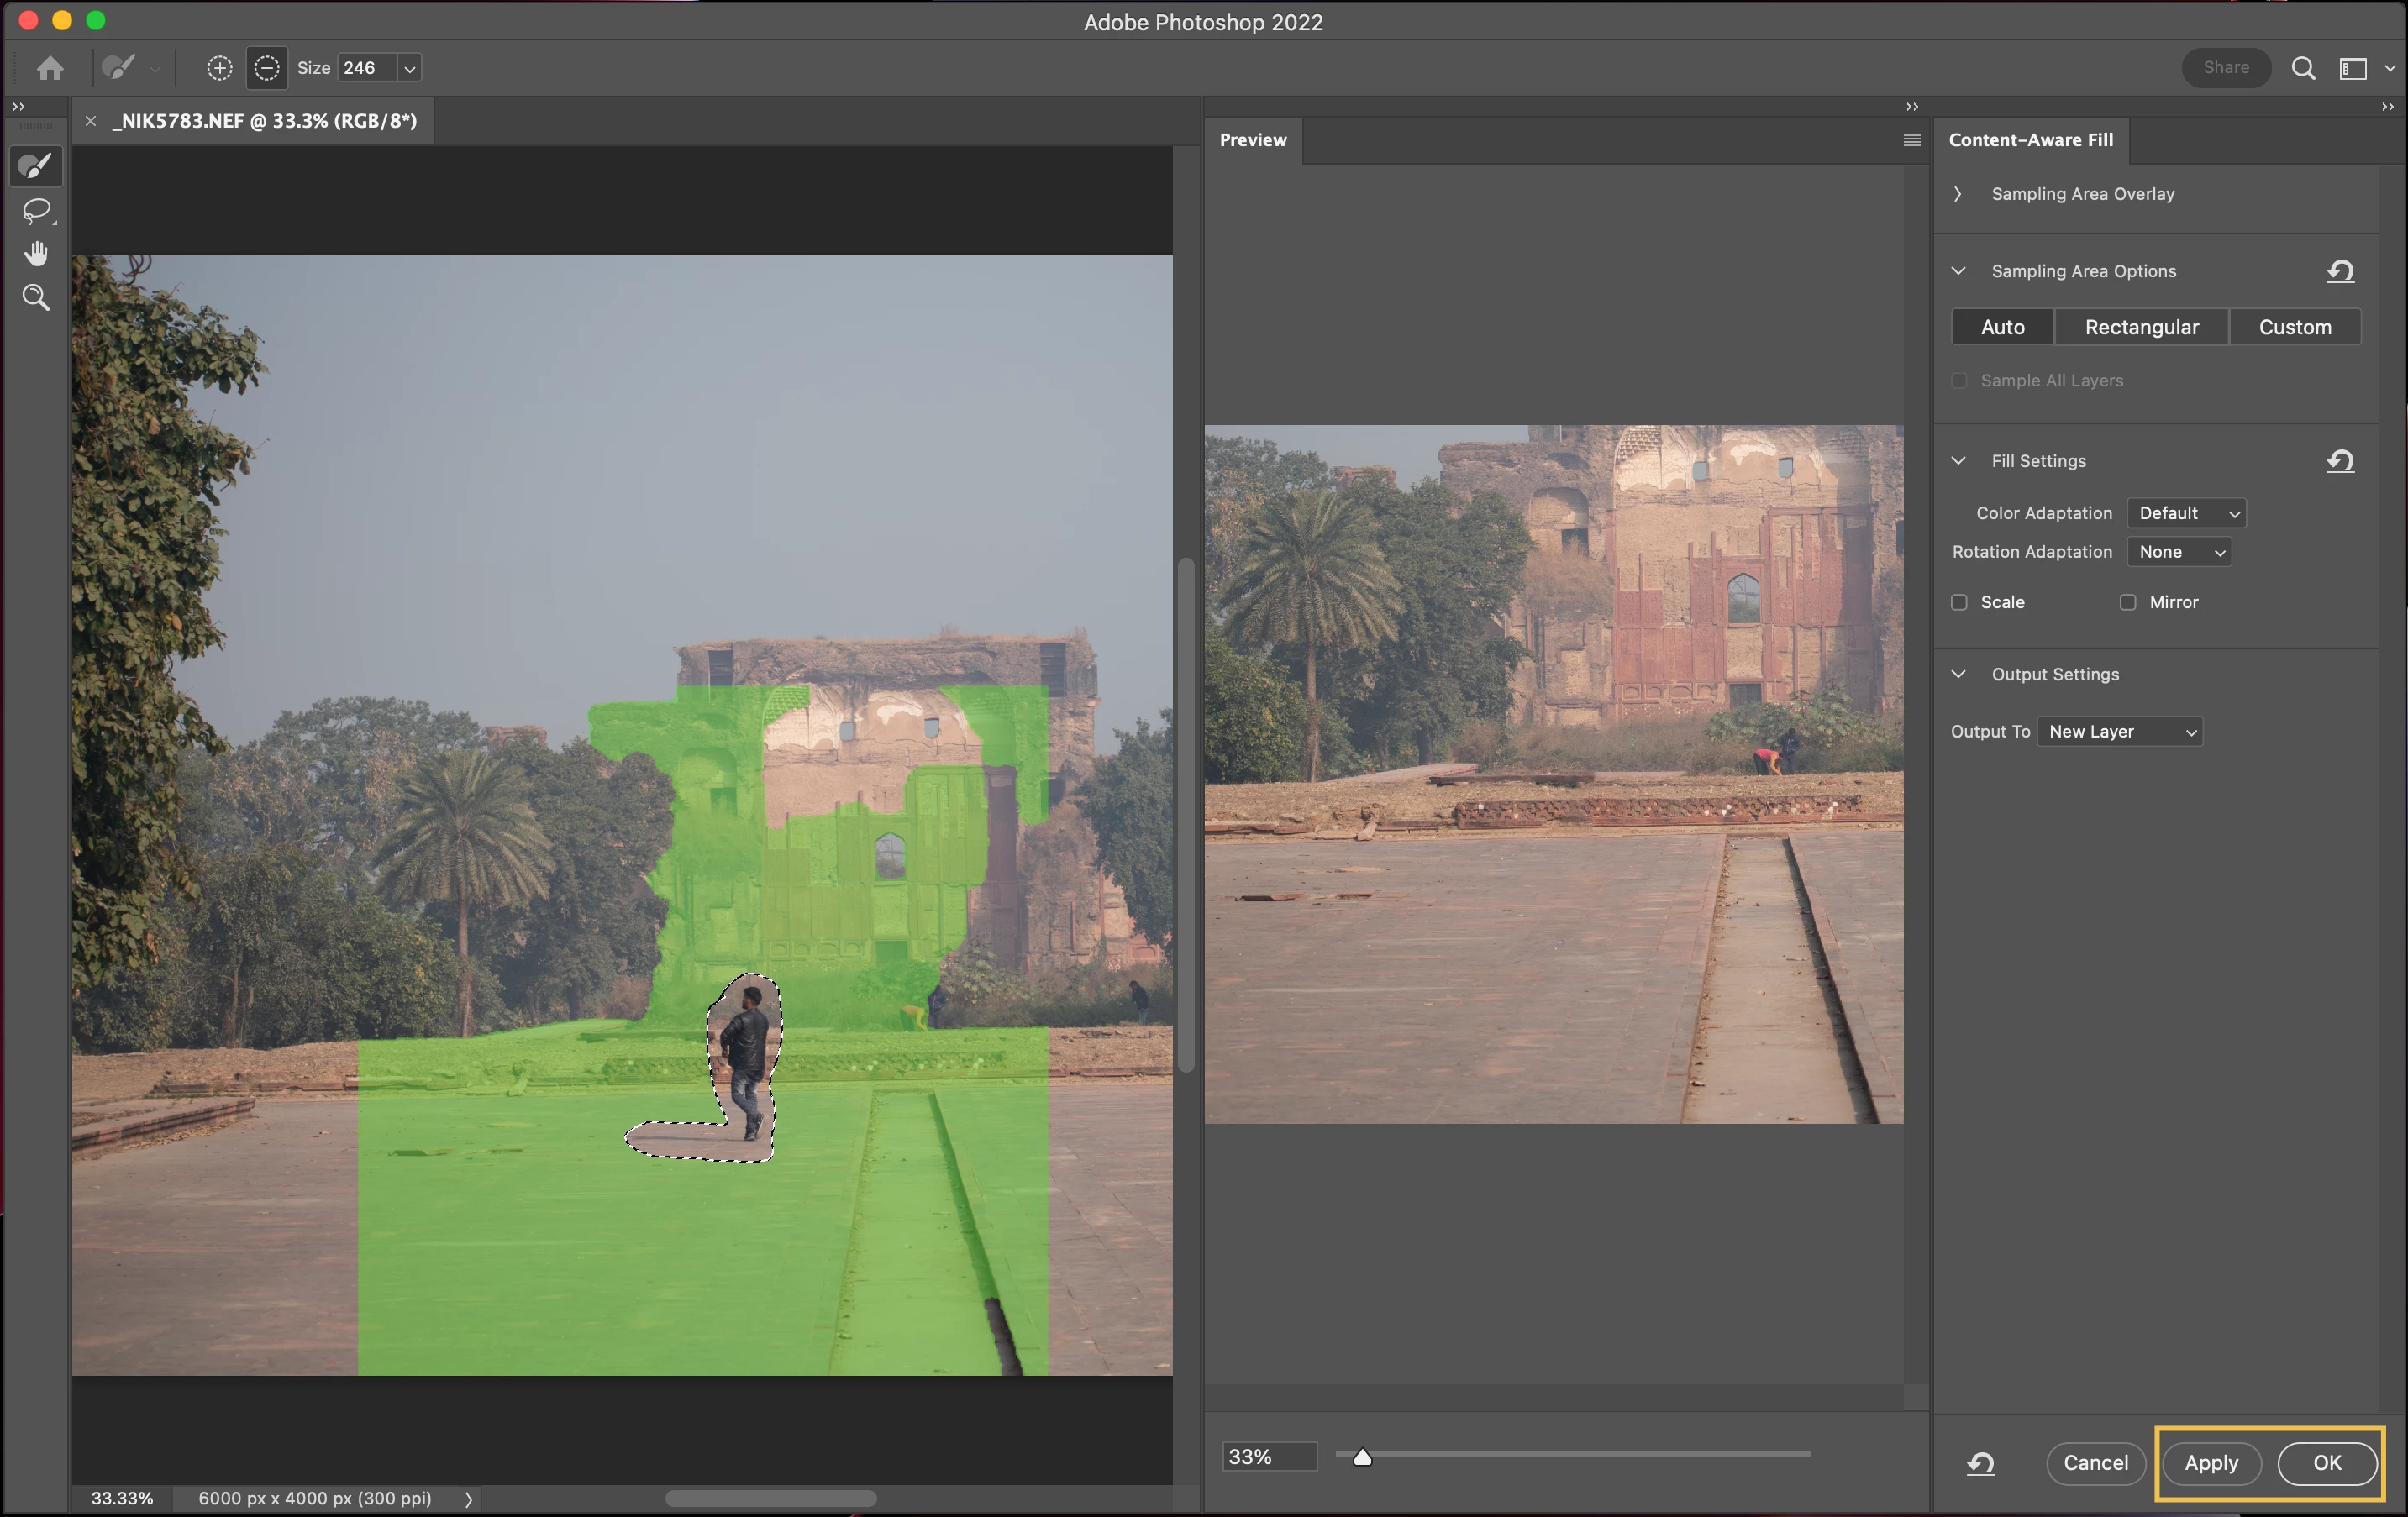
Remove objects from photos with Content-Aware


If you want to learn more about Photoshop in little bite-sized chunks, visit the Quick Tips home page.

TOPICS
macOS , Windows

Views

18.3K

Translate

Translate

Report

Report
Community guidelines
Be kind and respectful, give credit to the original source of content, and search for duplicates before posting. Learn more
community guidelines
Adobe
New Here ,
Oct 07, 2022 Oct 07, 2022

Copy link to clipboard

Copied

LATEST

Very easy, thanks

Votes

Translate

Translate

Report

Report
Community guidelines
Be kind and respectful, give credit to the original source of content, and search for duplicates before posting. Learn more
community guidelines