🔎 Quick Tips: How to easily create a GIF

Create a GIF from a series of photos or a video clip
Have you ever wanted to create a GIF of your own to post on social media? It really isn't hard!
You can easily turn a series of photos or a segment of a video into an animated GIF in a few minutes using Photoshop.
Here's how:
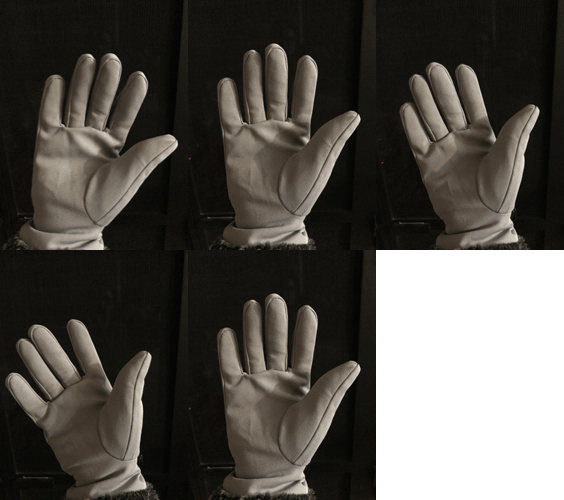
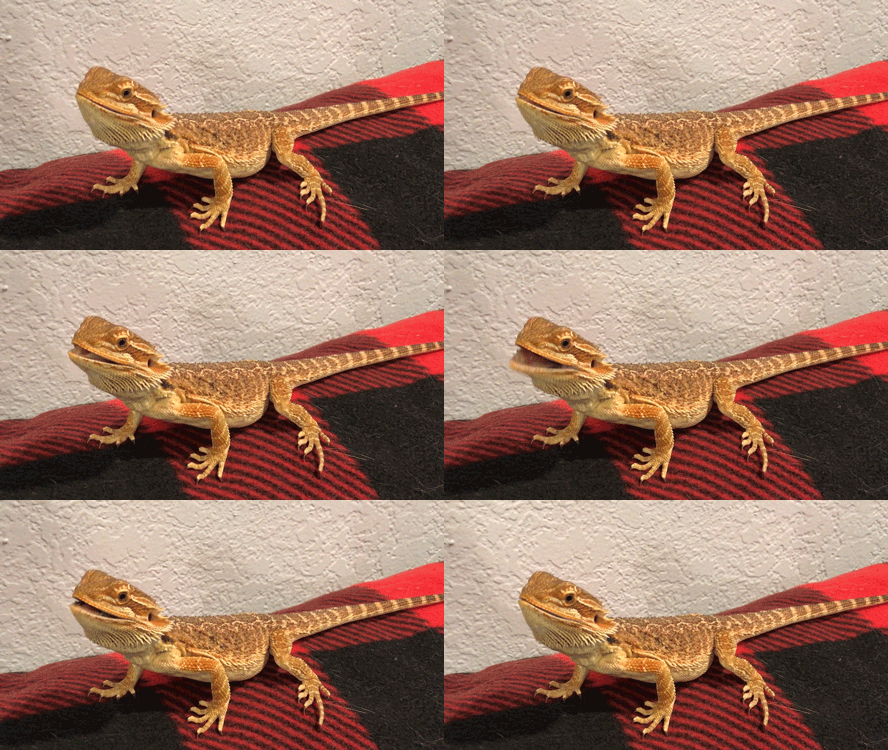
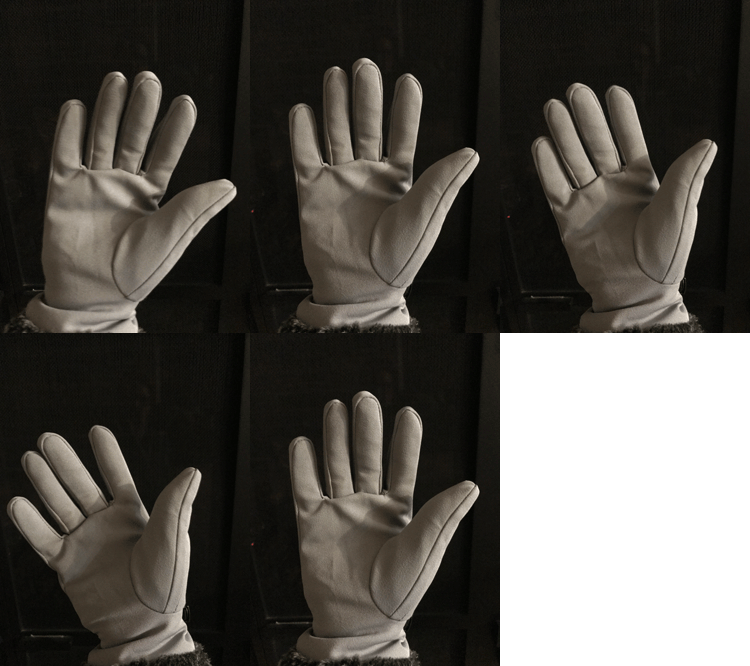
Create a GIF from a series of photos
❶ Import the still photos you want to use to create a GIF
- Identify a series of photos that would make a good GIF
- Open Photoshop and go to File > Scripts > Load Files into Stack
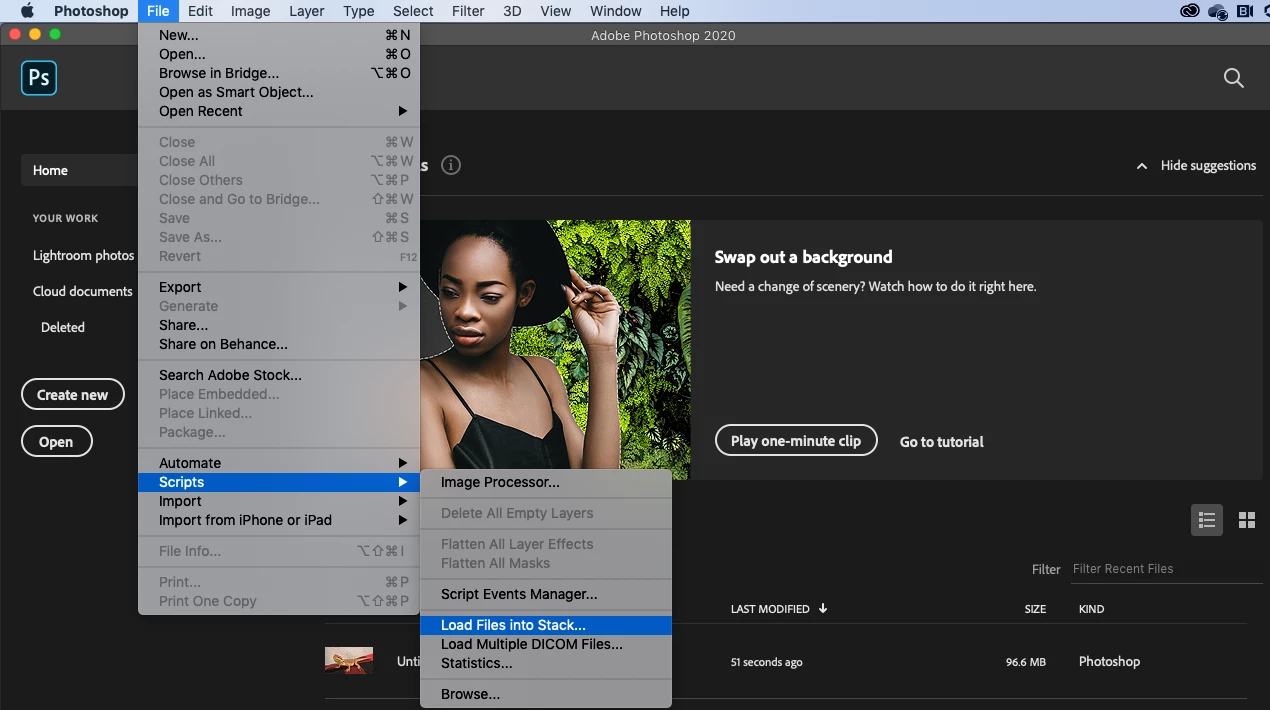
- Click Browse and locate the photos you want to use (Use the Shift key to select more than one file) and click Open
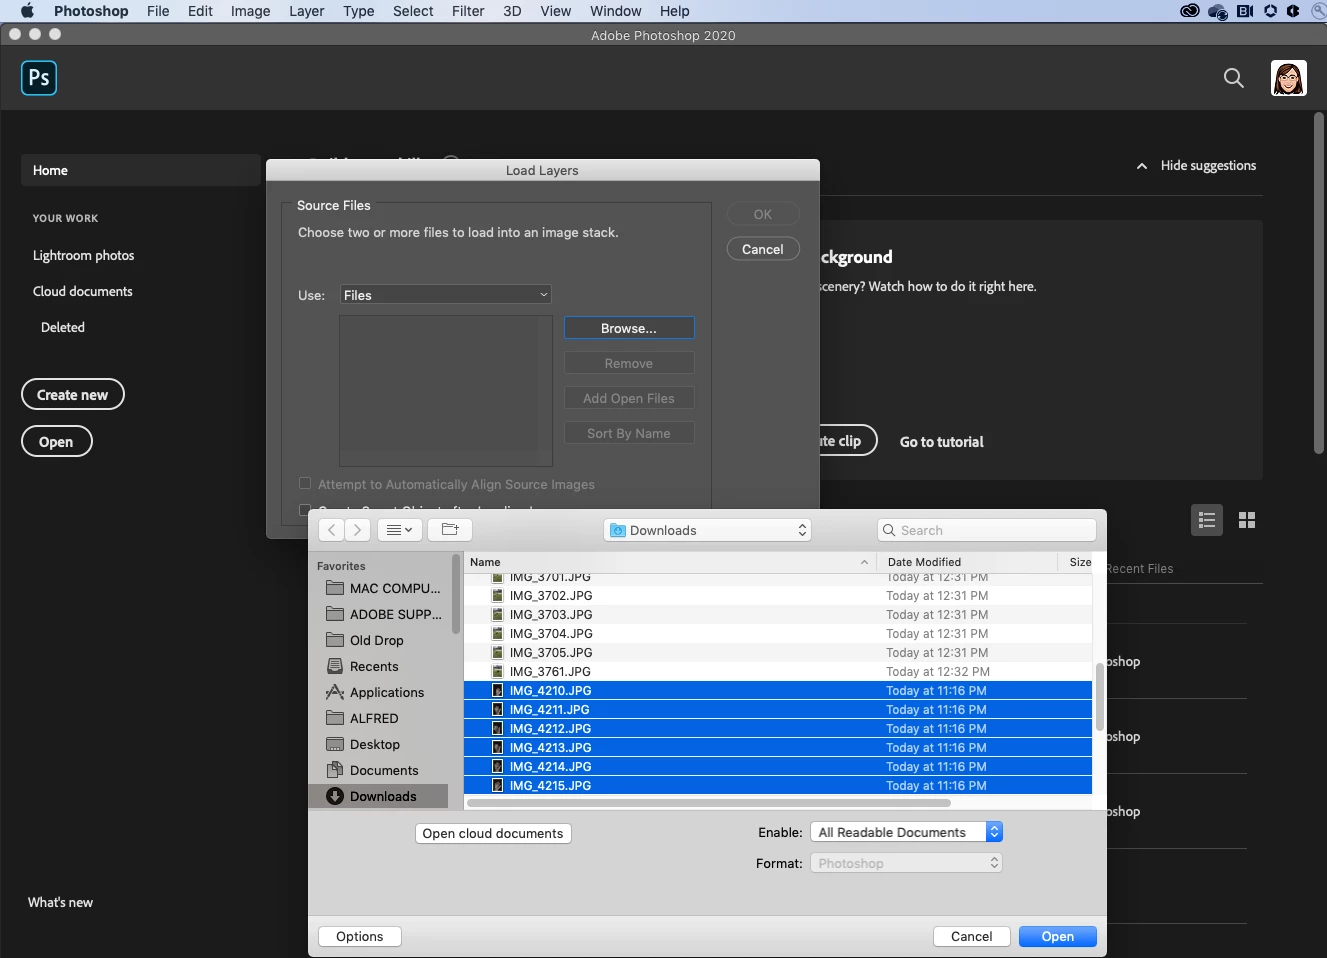
- Click OK to import the photos into layers
- If it is not already open, click on Window > Timeline to open the Timeline panel
- Click the arrow to the right of the Create Frame Animation button in the middle of the Timeline panel and select Create Frame Animation
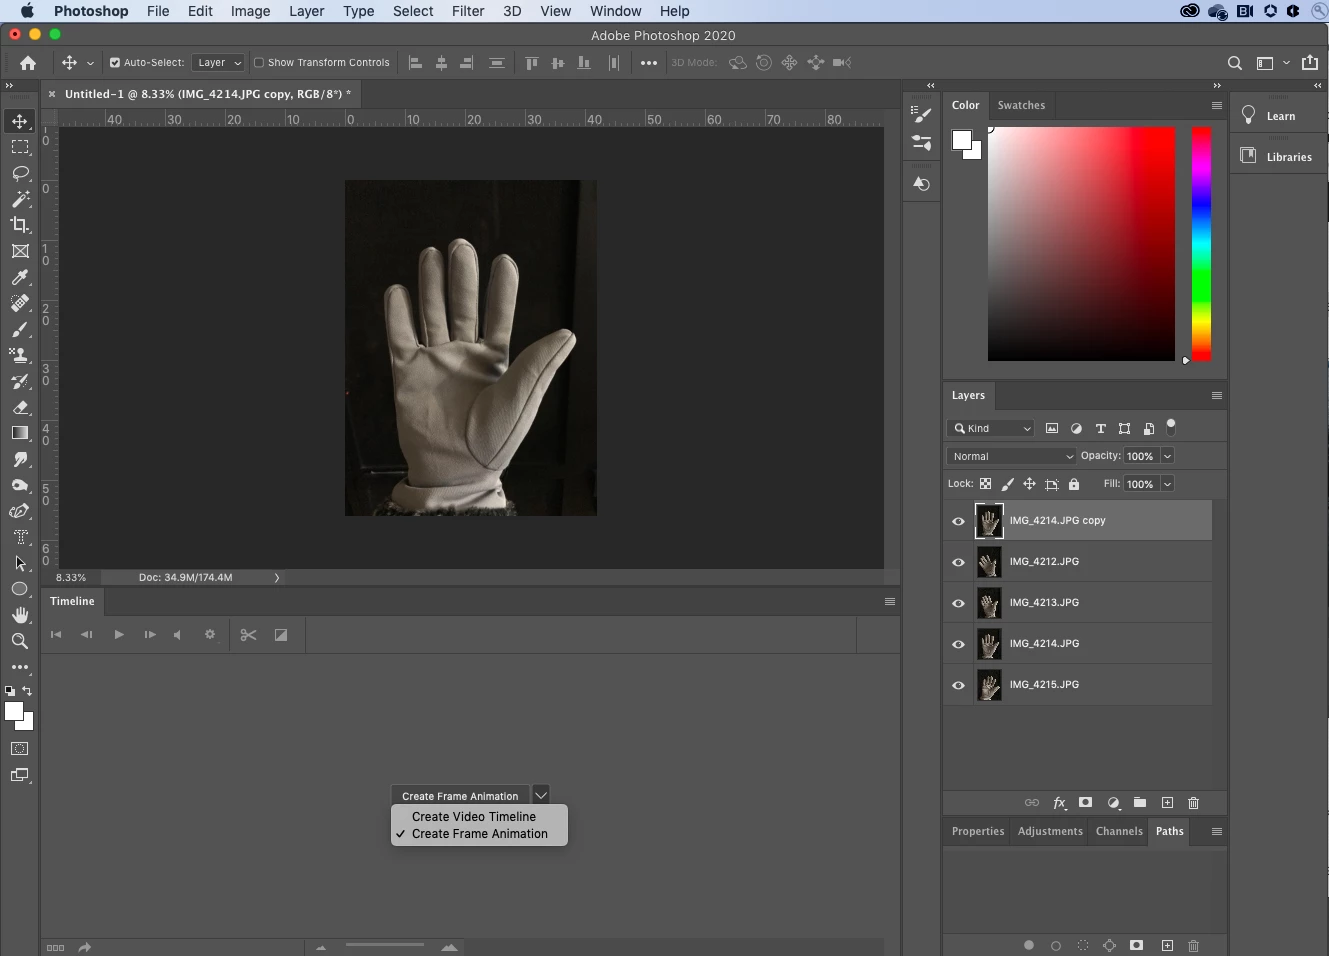
- Now click the Create Frame Animation button to the left of the arrow and it should look something like this
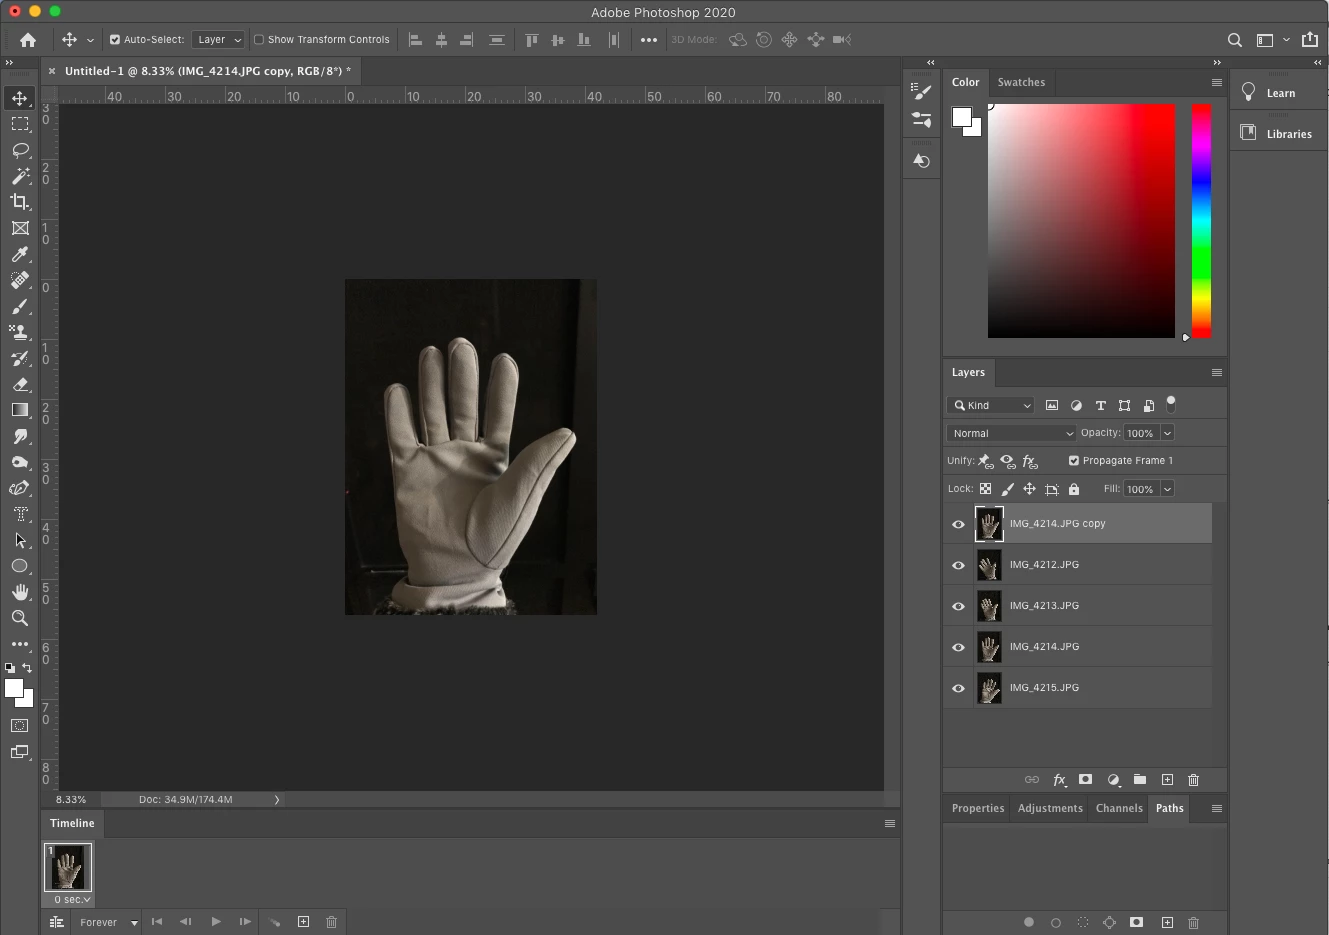
❷ Convert the layers into animation frames
- Click the menu icon from the upper right corner of the Timeline panel and choose Make Frames From Layers
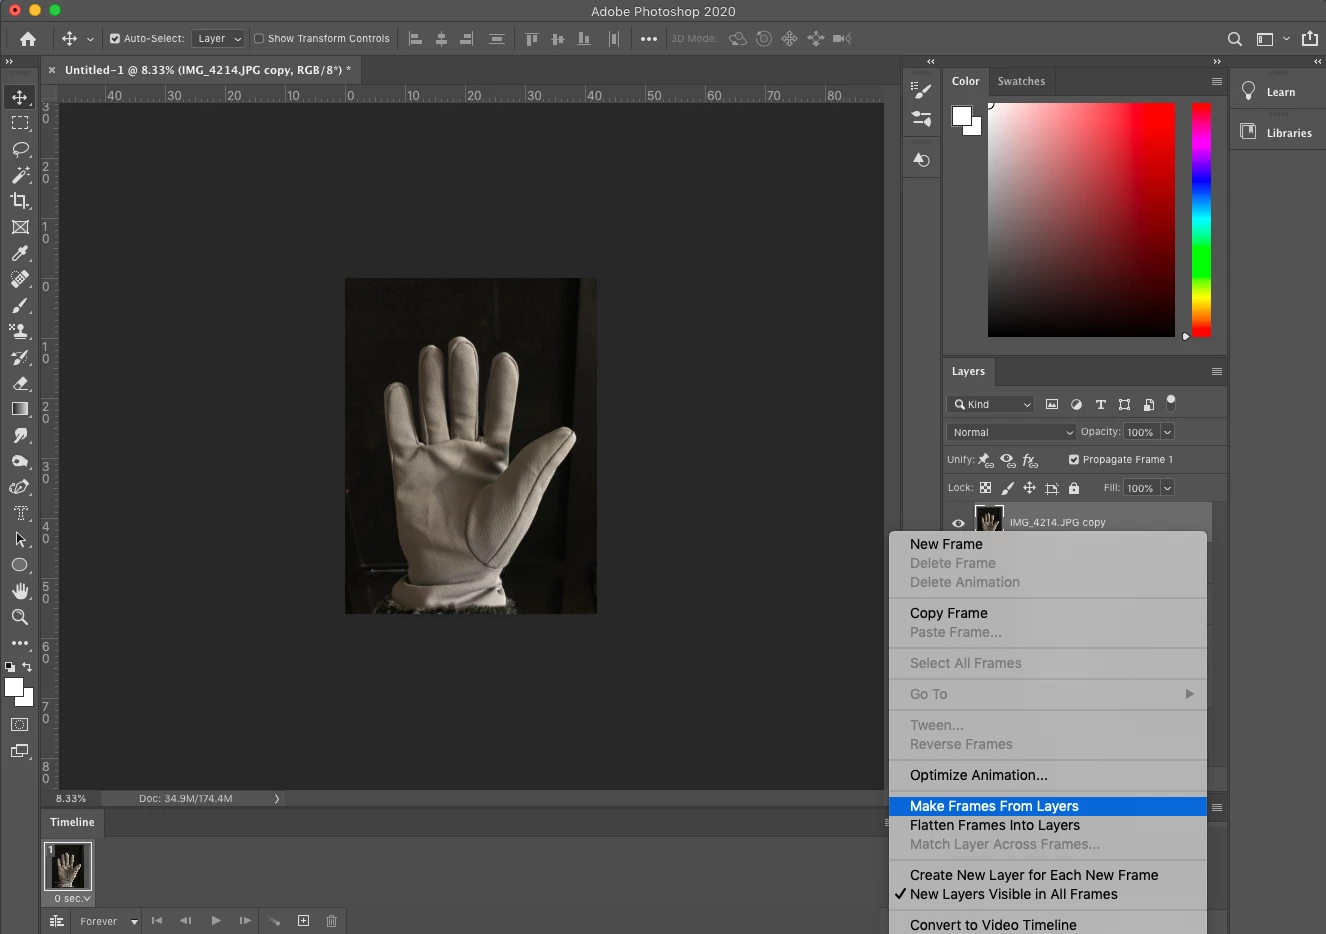
- This will convert all the layers in the Layers panel into individual frames in your animation
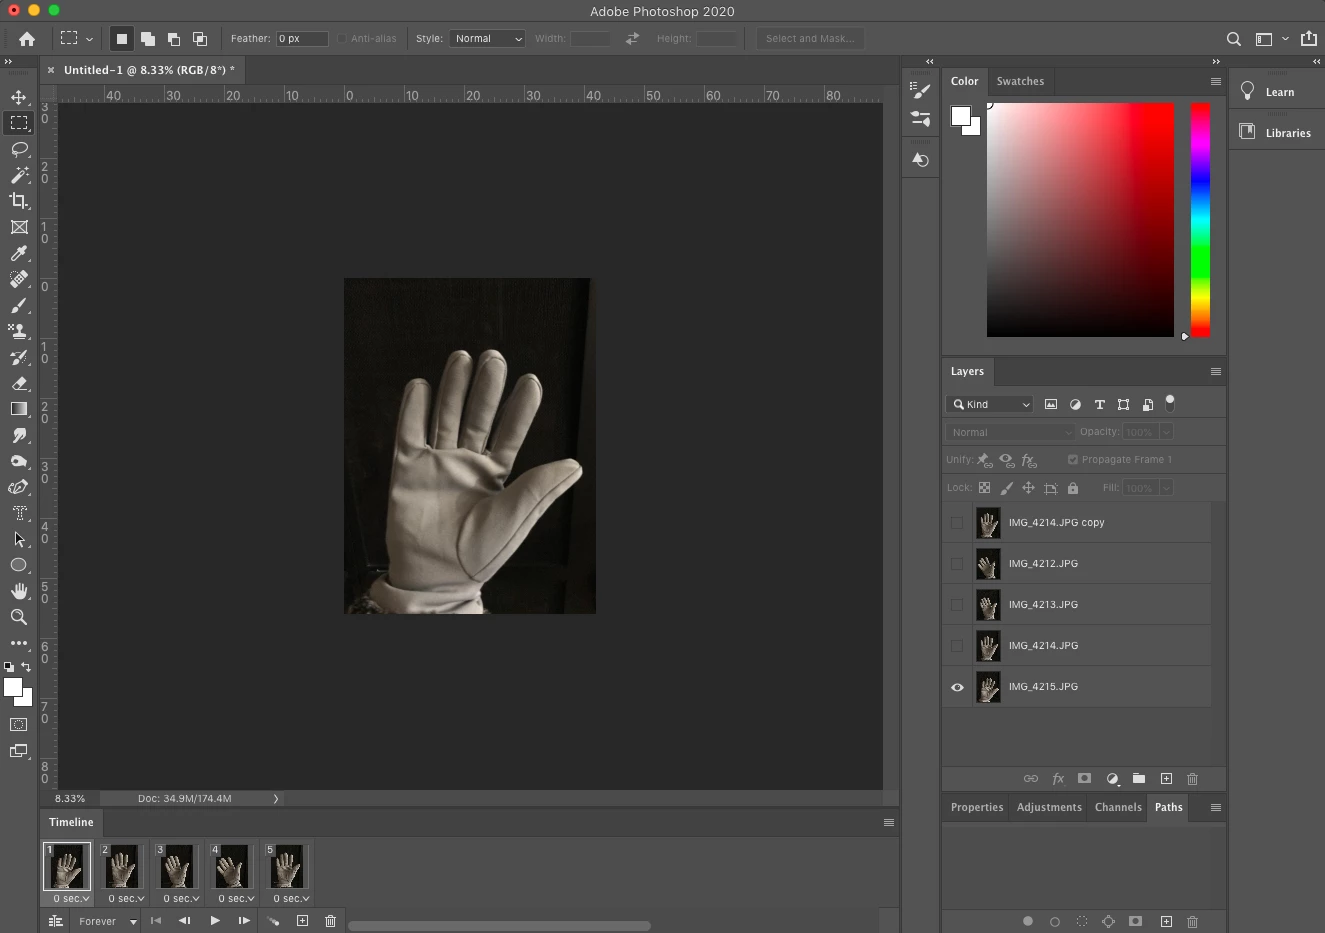
❸ Configure the animation loop
- If you want to reverse the way the animation is playing, click the Timeline menu icon again and select Reverse Frames
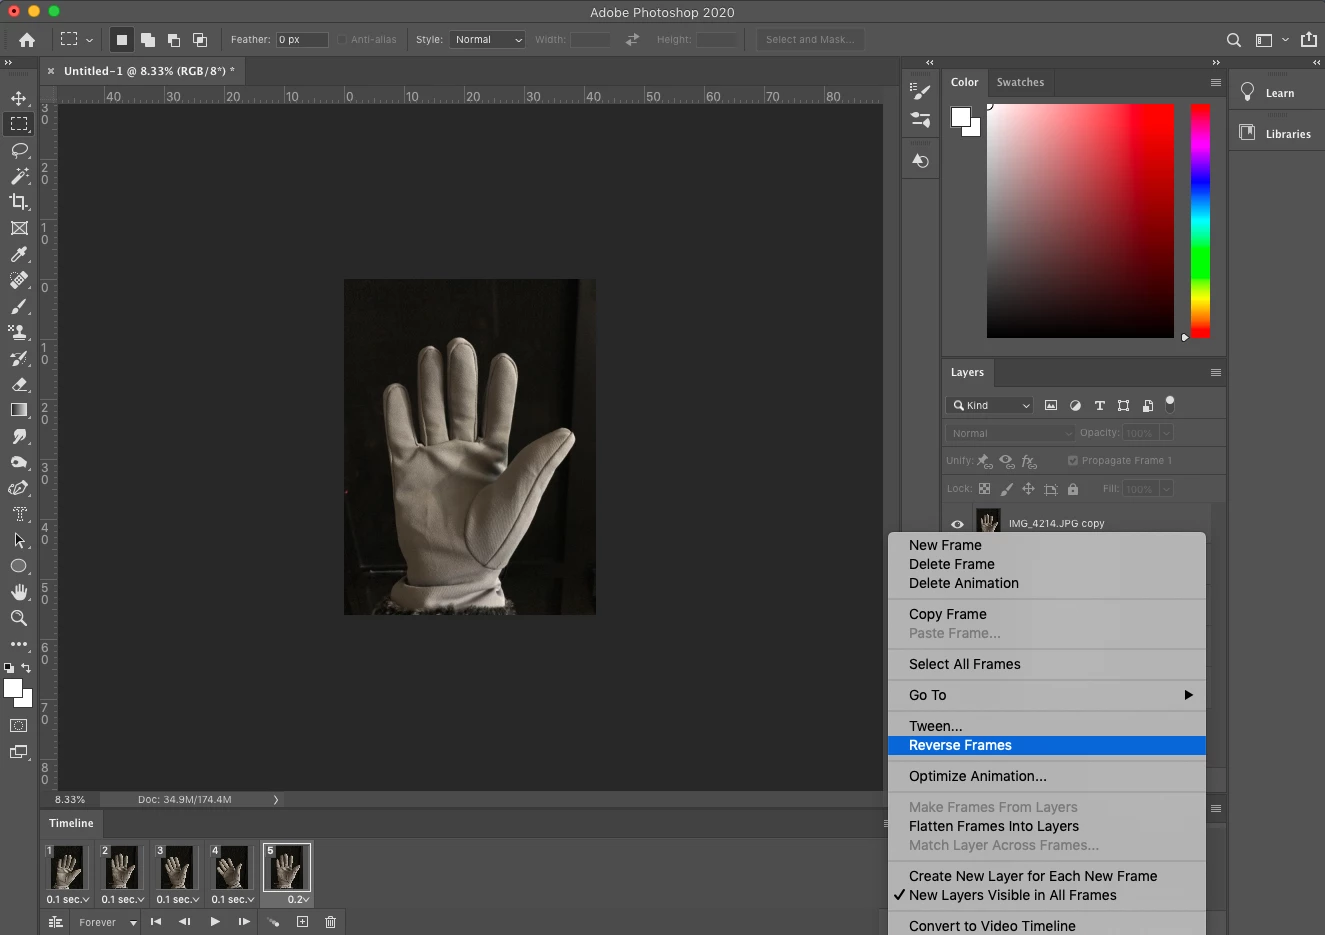
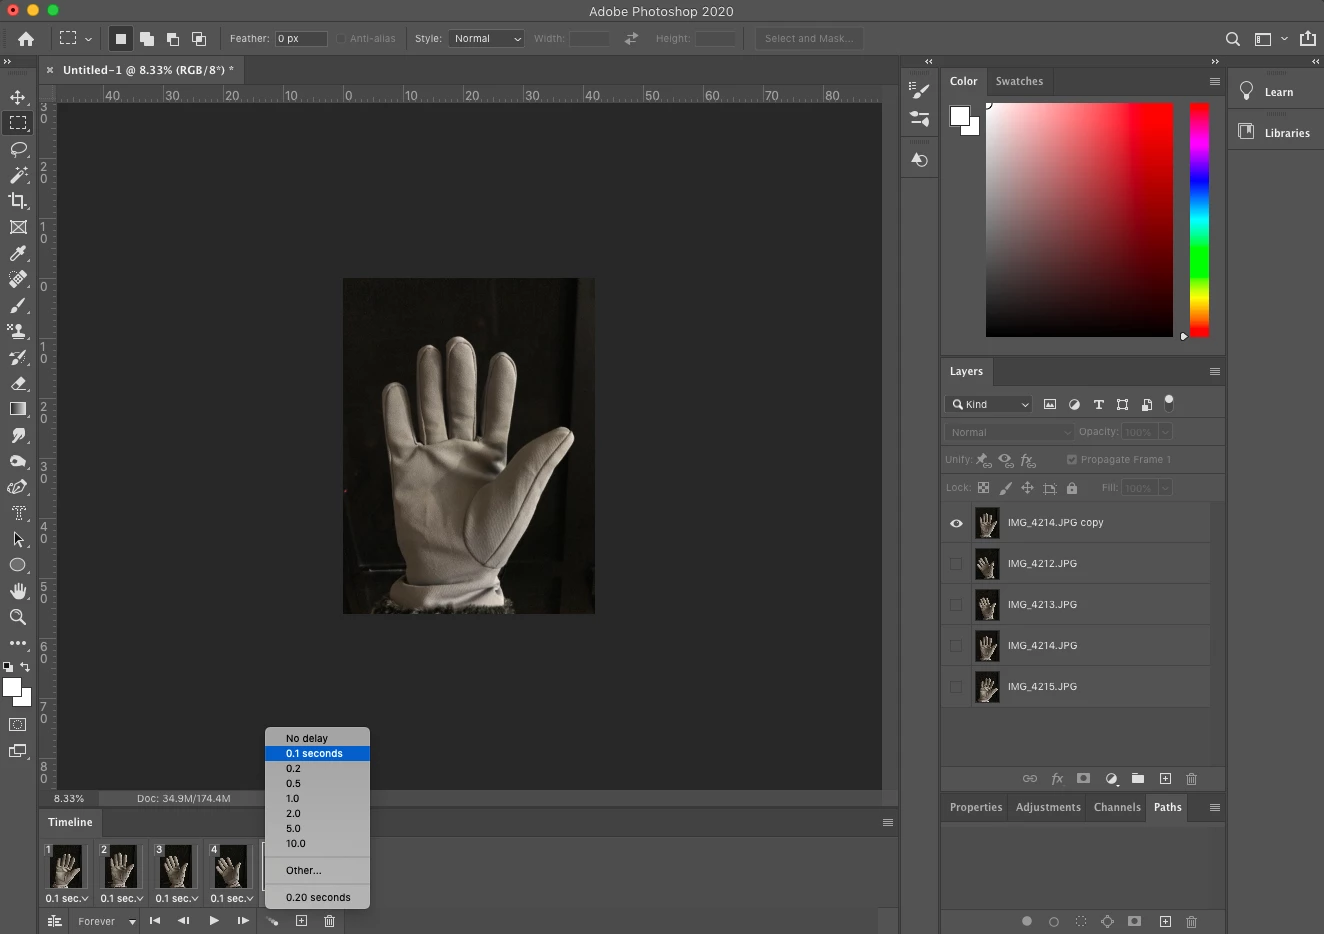
- If you want to change the delay before moving to the next frame, you an click on the time below each frame and change it
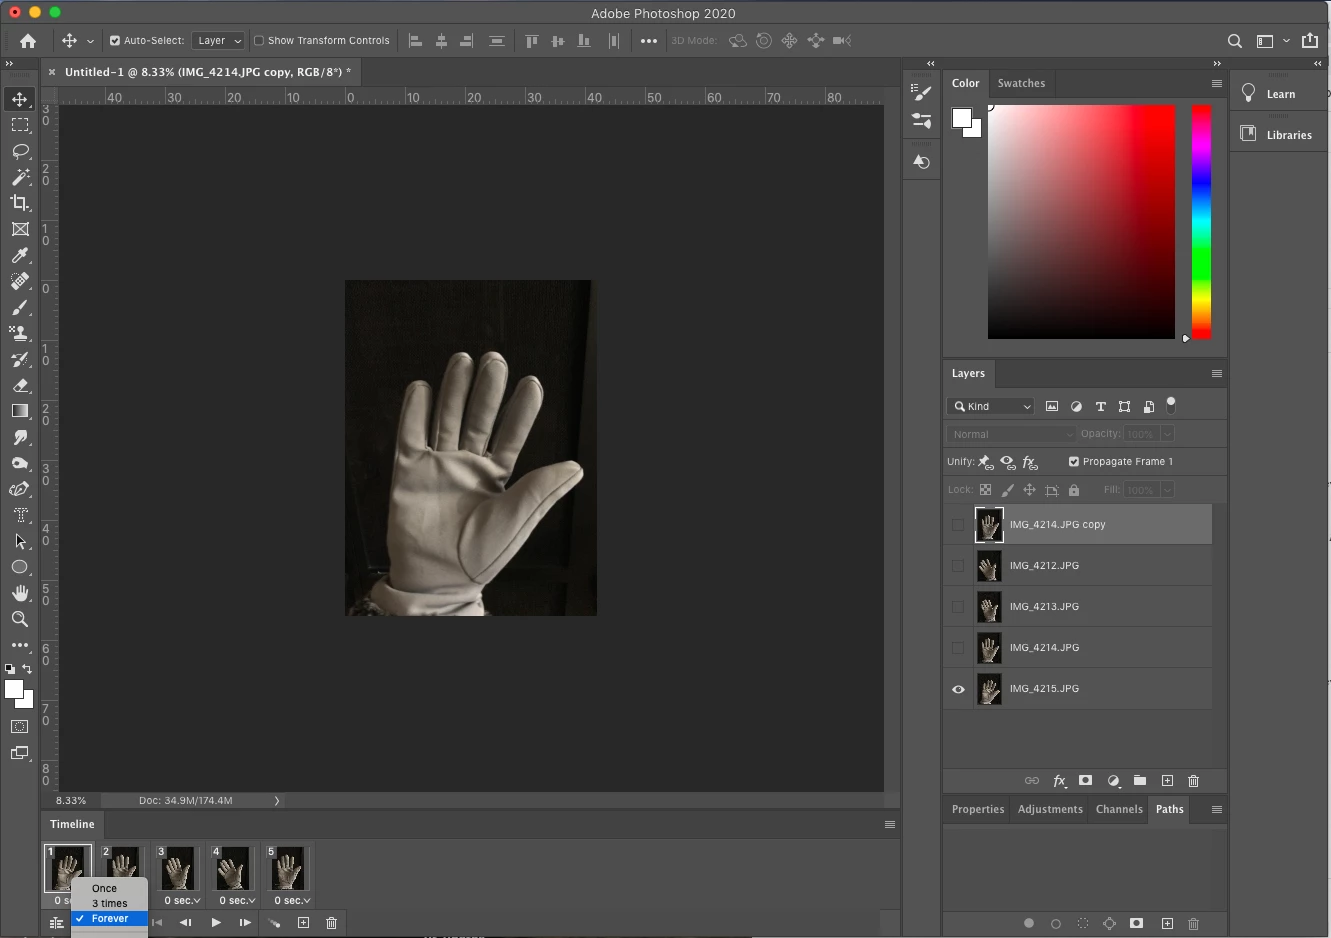
- Click on the triangle next to the word Forever (it might say Forever, Once or x times depending on the setting) at the bottom of the Timeline panel and select Forever if you want to create a looping animation, otherwise set the loop count you desire
- Click the Play button from the bottom of the Timeline panel (or press the spacebar on your keyboard) to preview the animation
- Click the Stop button or press the space bar to stop playing the animation
❹ Export the animation as a GIF
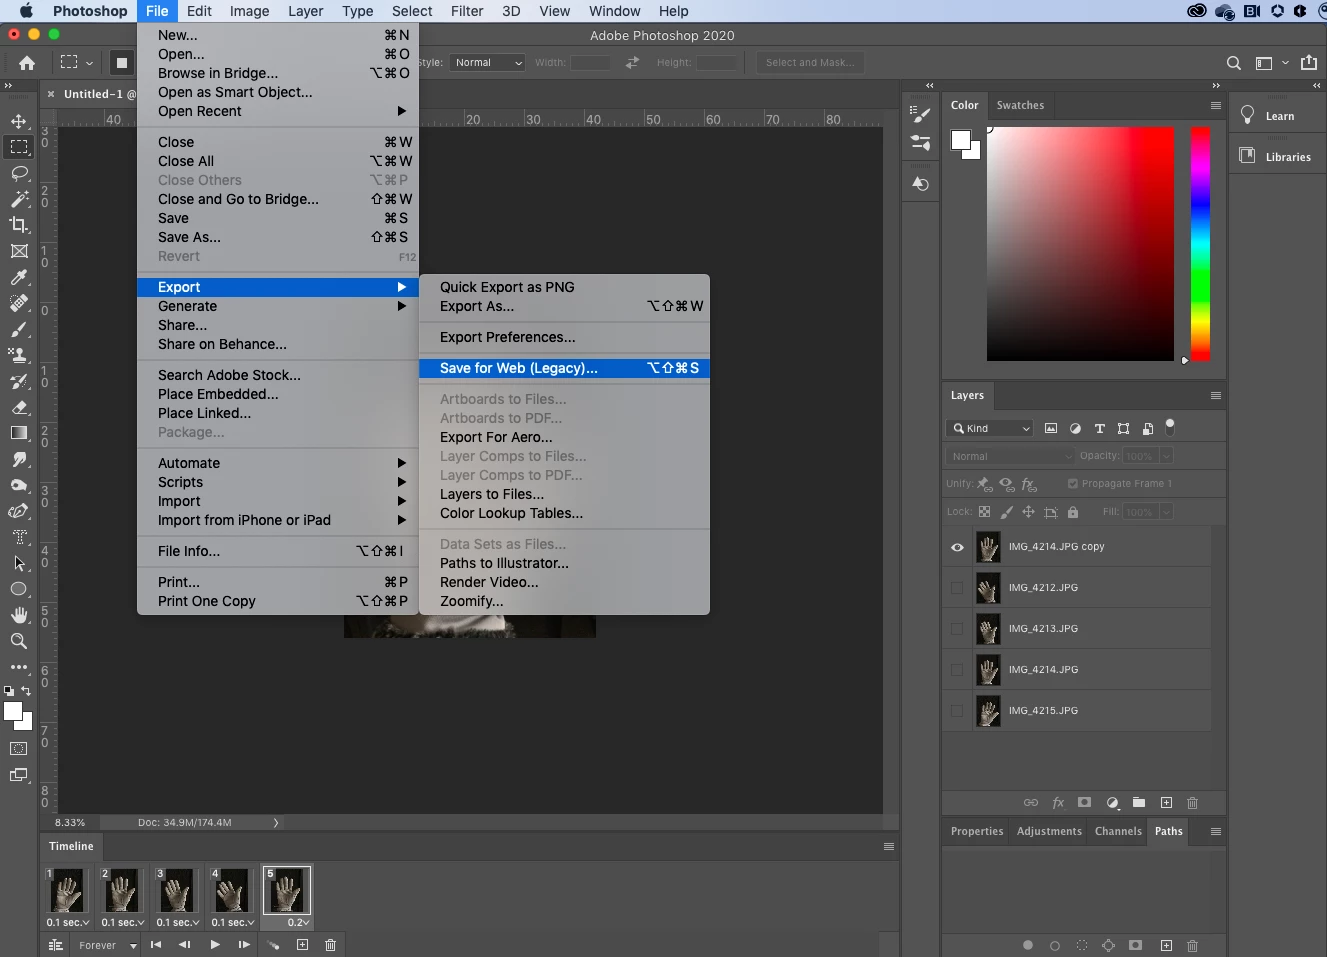
- Go to File > Export > Save for Web (Legacy)
- Select GIF 128 Dithered from the Preset menu and then select 256 from the Colors menu
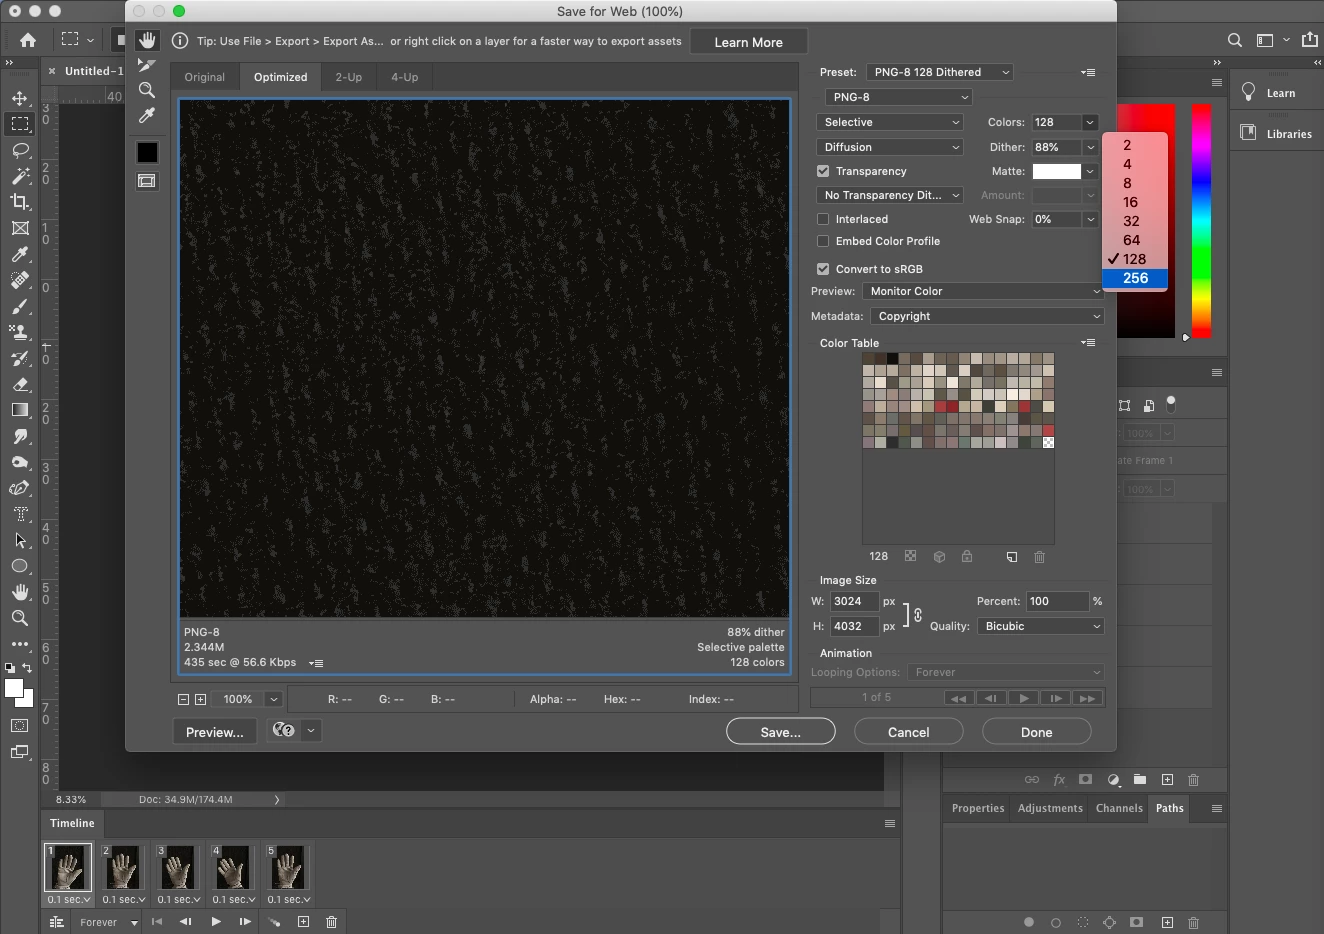
- If you are using the GIF online or want to limit the file size of the animation, you can change the Width and Height fields in the Image Size options (if you keep them linked, you only need to select one and the other will change to keep the proportions)
- Select Forever from the Looping Options menu if you want it to loop continuously, or choose the times you want to loop if you want to change the setting you made earlier
- Click the Preview button in the lower left corner of the Export window to preview your GIF in a web browser
- Click Save and select a destination for your animated GIF file
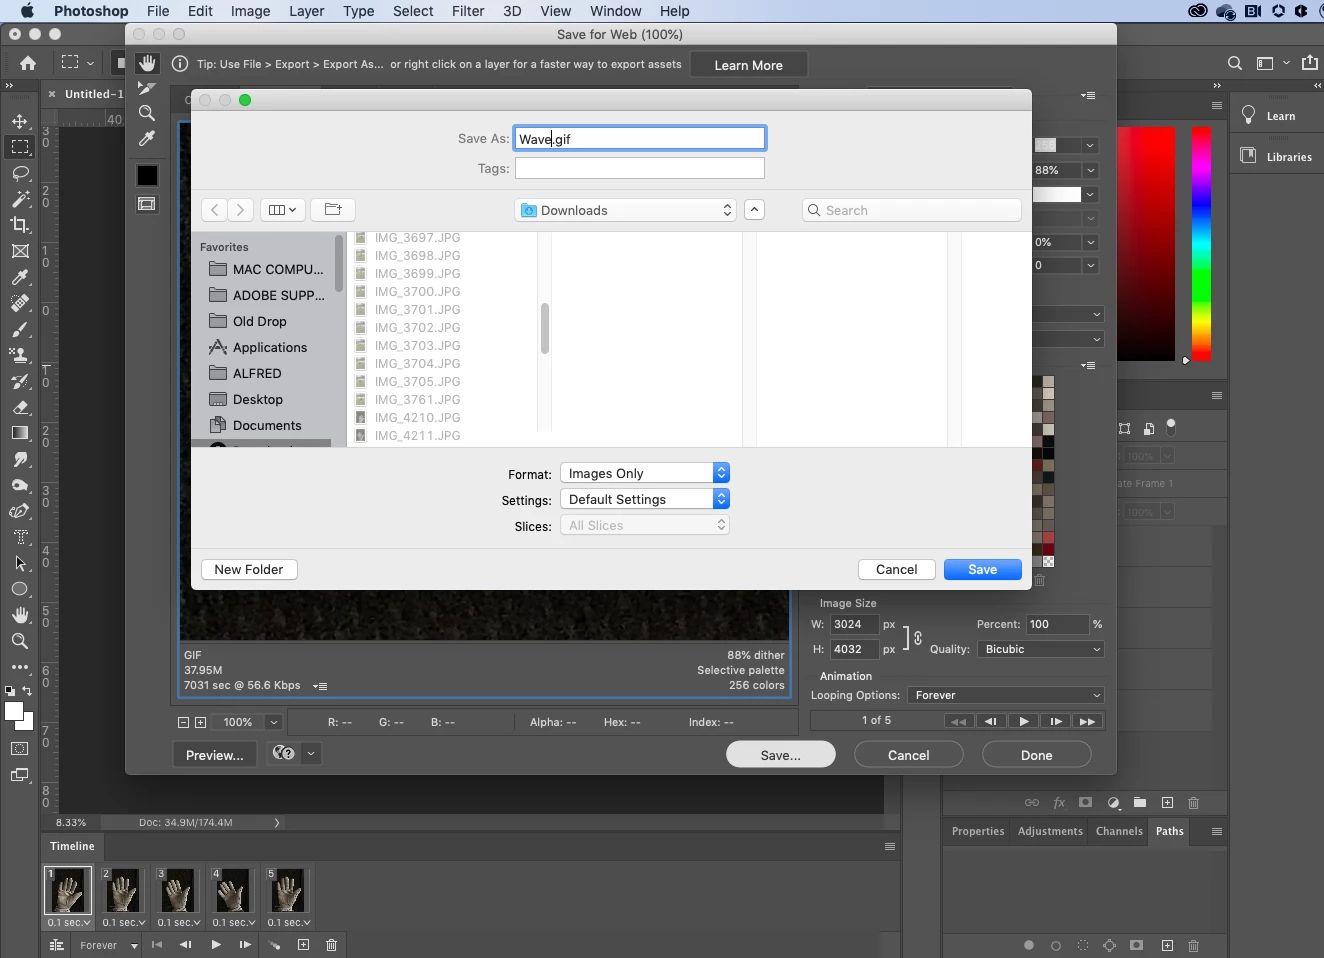
- Click Save again
Contrats! You have successfully created a GIF from still photos.
Create a GIF from a video
❶ Import the video you want to use to create a GIF
In order to keep the GIF short, you might want to clip the video and/or limit the number of frames.
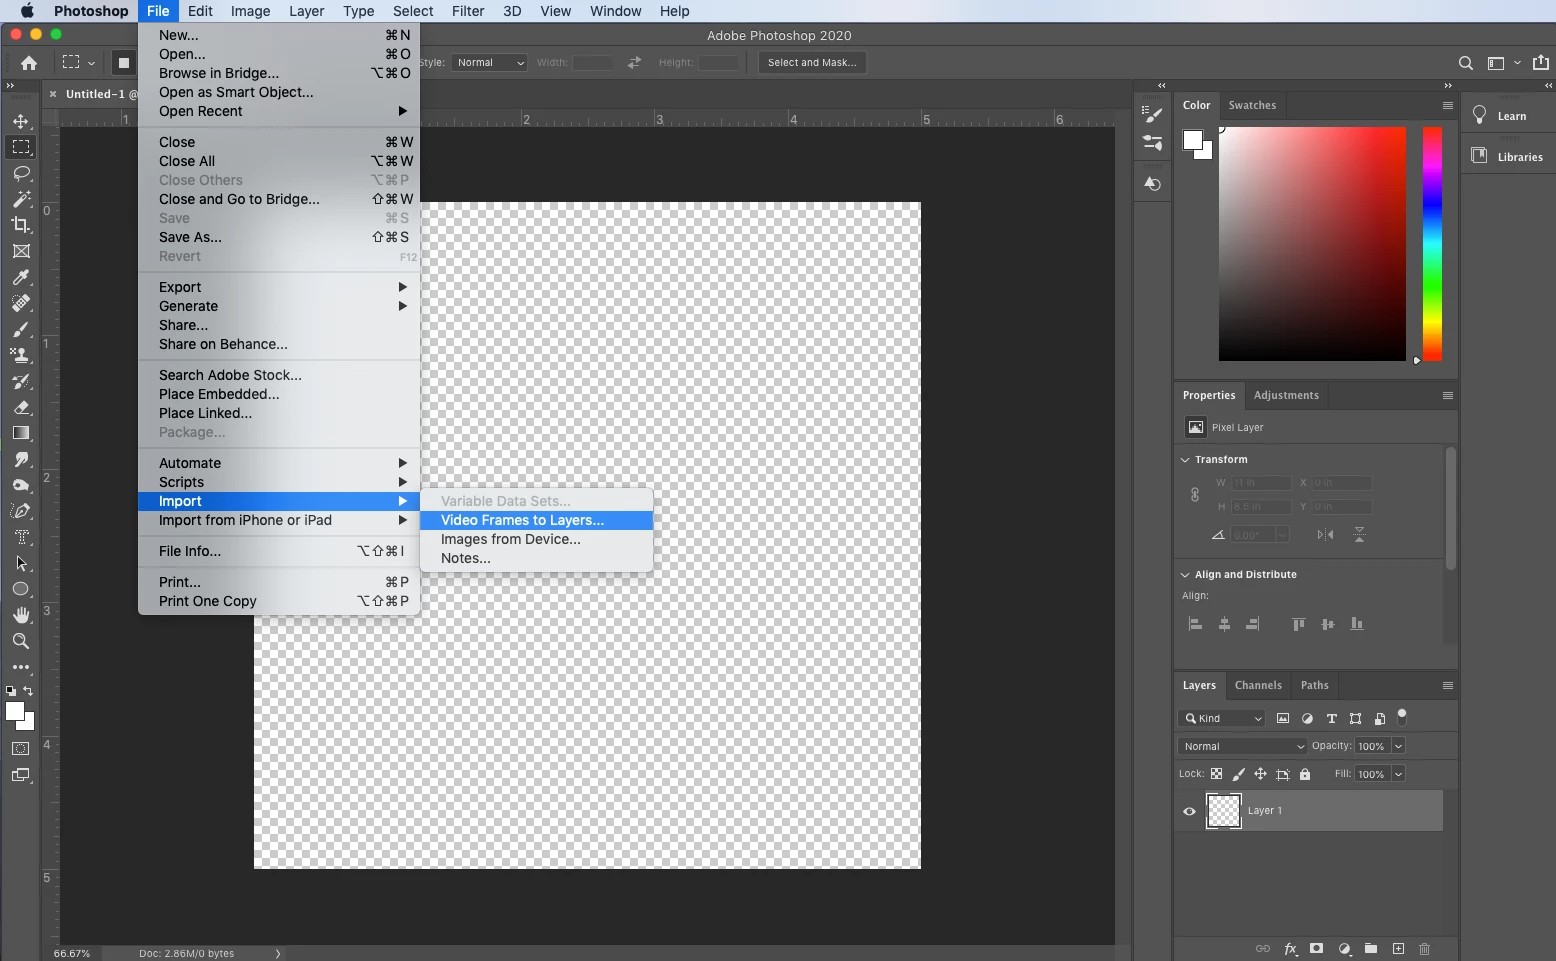
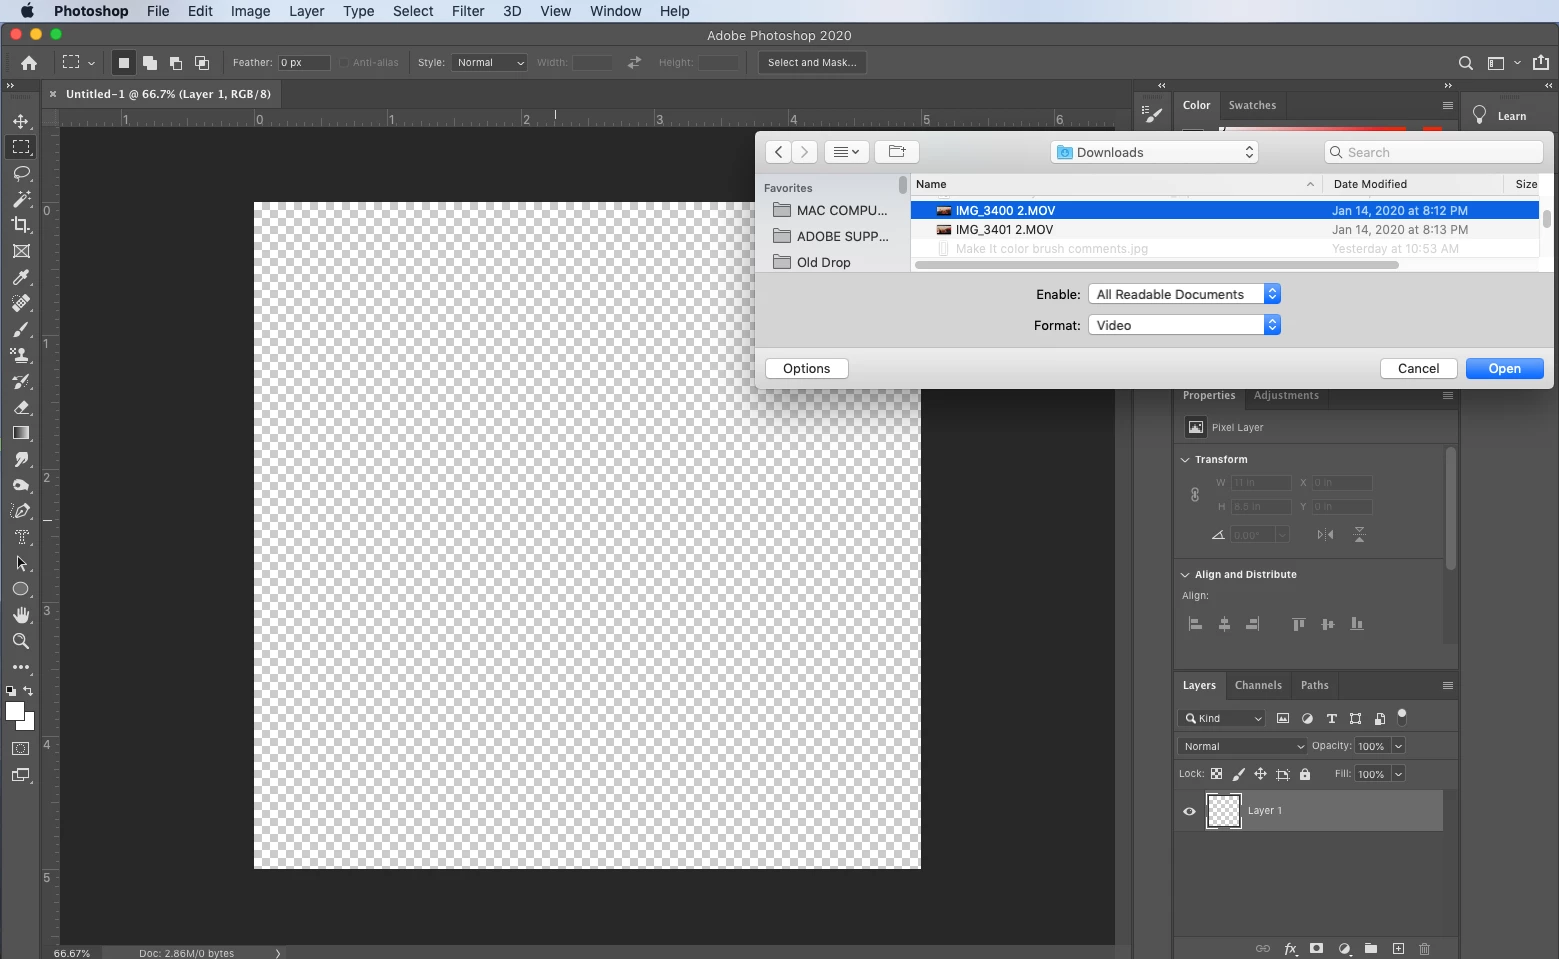
- Click on File > Import > Video Frames to Layers
-
Navigate to the video you want to use, click Open,
-
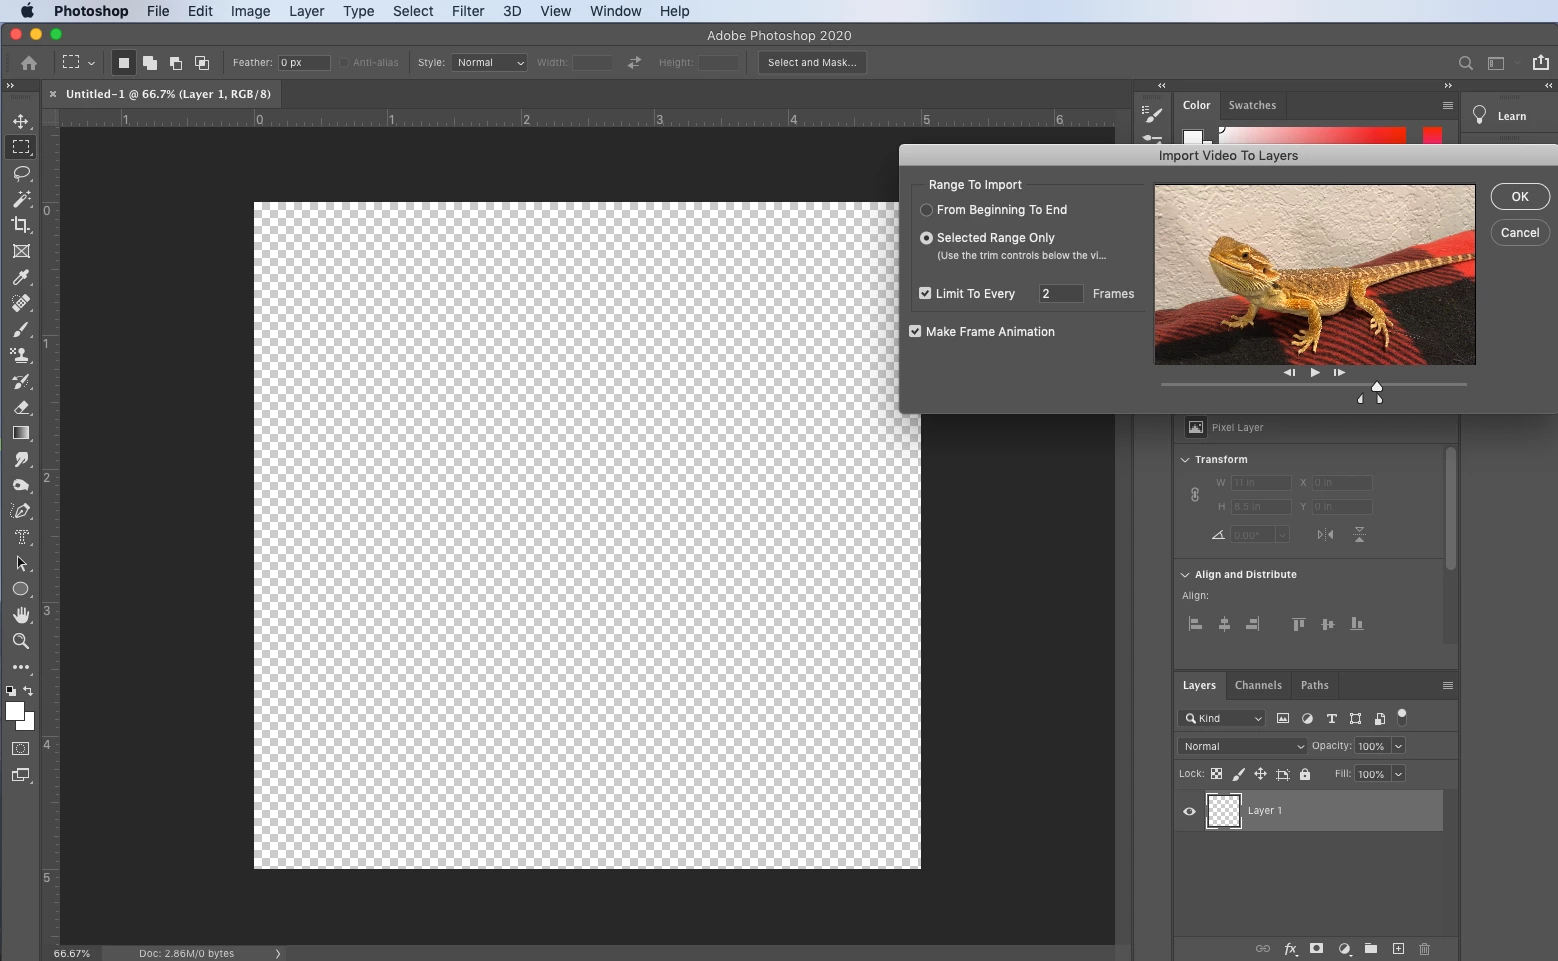
In the Import window, you can clip the video by choosing selected range only and moving the sliders under the video from either side
-
You can also limit the frames you import to an interval, such as every 2 frames
-
I have done both here. Click OK when you are done
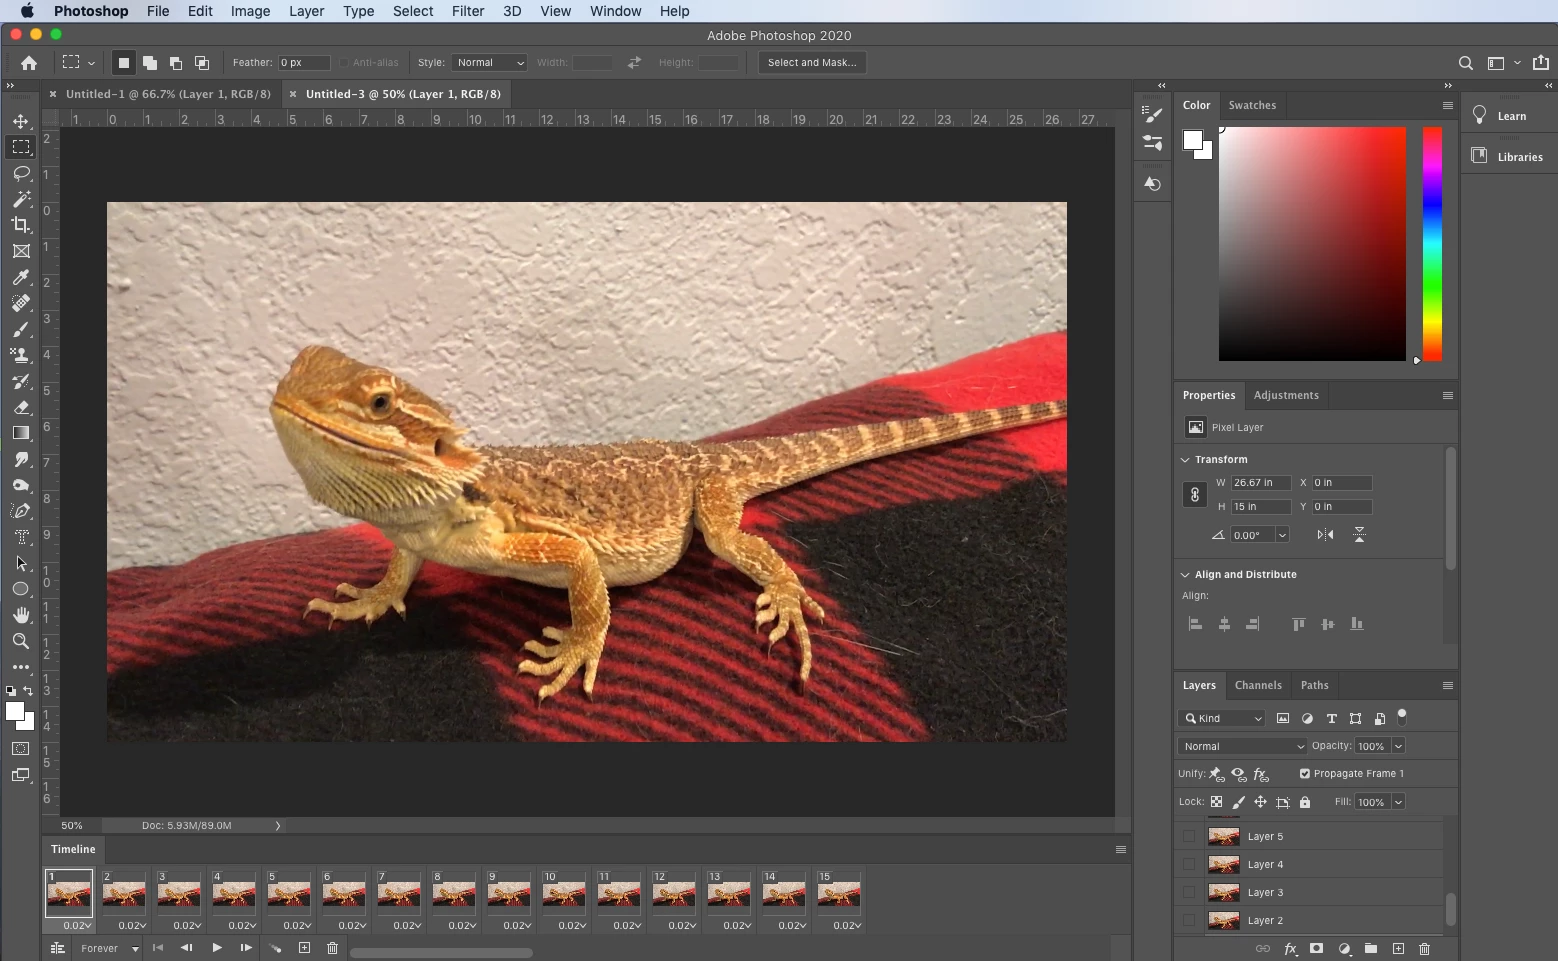
- Now the individual video frames have been imported in to individual layers
- If it is not already open, click on Window > Timeline to open the Timeline panel
❷ Configure the animation loop (as in step 3 above)
- If you want to reverse the way the animation is playing, click the Timeline menu icon again and select Reverse Frames
- If you want to change the delay before moving to the next frame, you an click on the time below the frame and change it
- Click on the triangle next to the word Forever (it might say Forever, Once or x times depending on the setting) at the bottom of the Timeline panel and select Forever if you want to create a looping animation, otherwise set the loop count you desire
- Click the Play button from the bottom of the Timeline panel (or press the Spacebar on your keyboard) to preview the animation
- Click the Stop button or press the space bar to stop playing the animation
❸ Export the animation as a GIF (as in step 4 above)
- Go to File > Export > Save for Web (Legacy)
- Select GIF 128 Dithered from the Preset menu
- Select 256 from the Colors menu
- If you are using the GIF online or want to limit the file size of the animation, you can change the Width and Height fields in the Image Size options (if you keep them linked, you only need to select one and the other will change to keep the proportions)
- Select Forever from the Looping Options menu if you want it to loop continuously, or choose the times you want to loop if you want to change the setting you made earlier
- Click the Preview button in the lower left corner of the Export window to preview your GIF in a web browser
- Click Save and select a destination for your animated GIF file
- Click Save again
- As with many features in photoshop, there is often more than way to accomplish a task. You can read up on another way to save a GIF and other related features in the links at the bottom of this page
Congrats! You have successfully created a GIF from a video clip!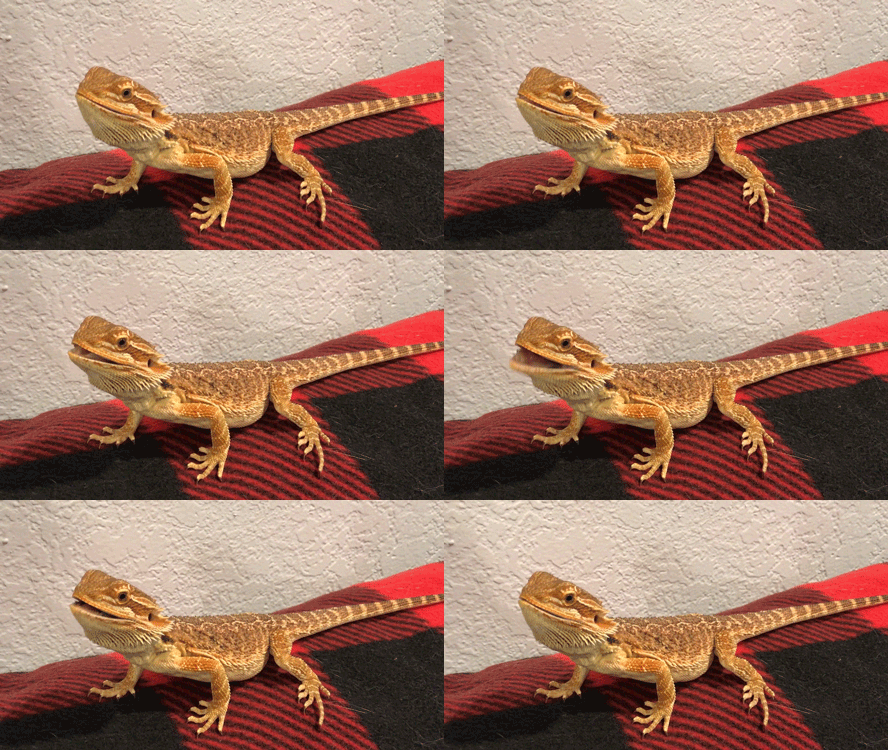
Related Links:
Saving files and graphics - Save in GIF format
Save and export video and animations in Photoshop
