
🔎 Quick Tips: How to Remove backgrounds easily with Photoshop on the iPad

Using the Remove Background Action
Did you know you can remove the background from an image easily and quickly? This can be used when you want to put a different background behind your subject, or it can be used when layering text behind a subject. I'm sure you will find many other creative ways to use this feature once you try it. Watch the video and try it for yourself.
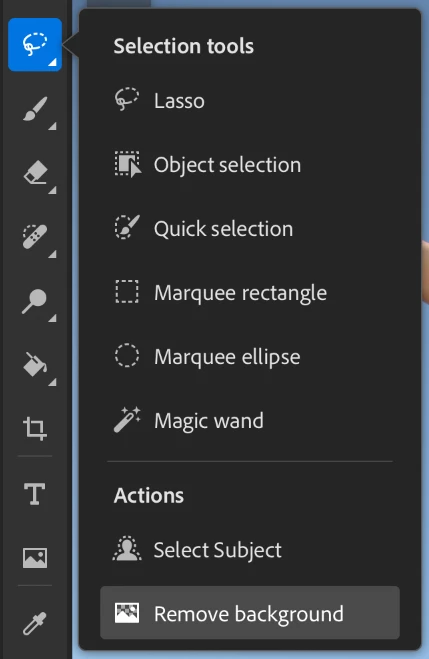
❶ Click on the Remove Background Action
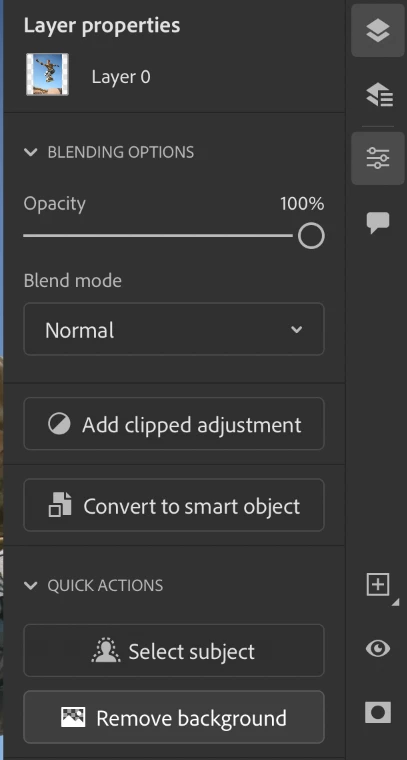
Open an image in Photoshop on your iPad, or add an image to a layer in an existing file. Then, tap on the Selection tool to open the Selection tools panel. Tap on Remove Background at the bottom. This will create a mask so that the background will not show in your image. (First screenshot below) You can also get to the Remove Background Quick Action button from the Layer properties panel. (Second screenshot below)
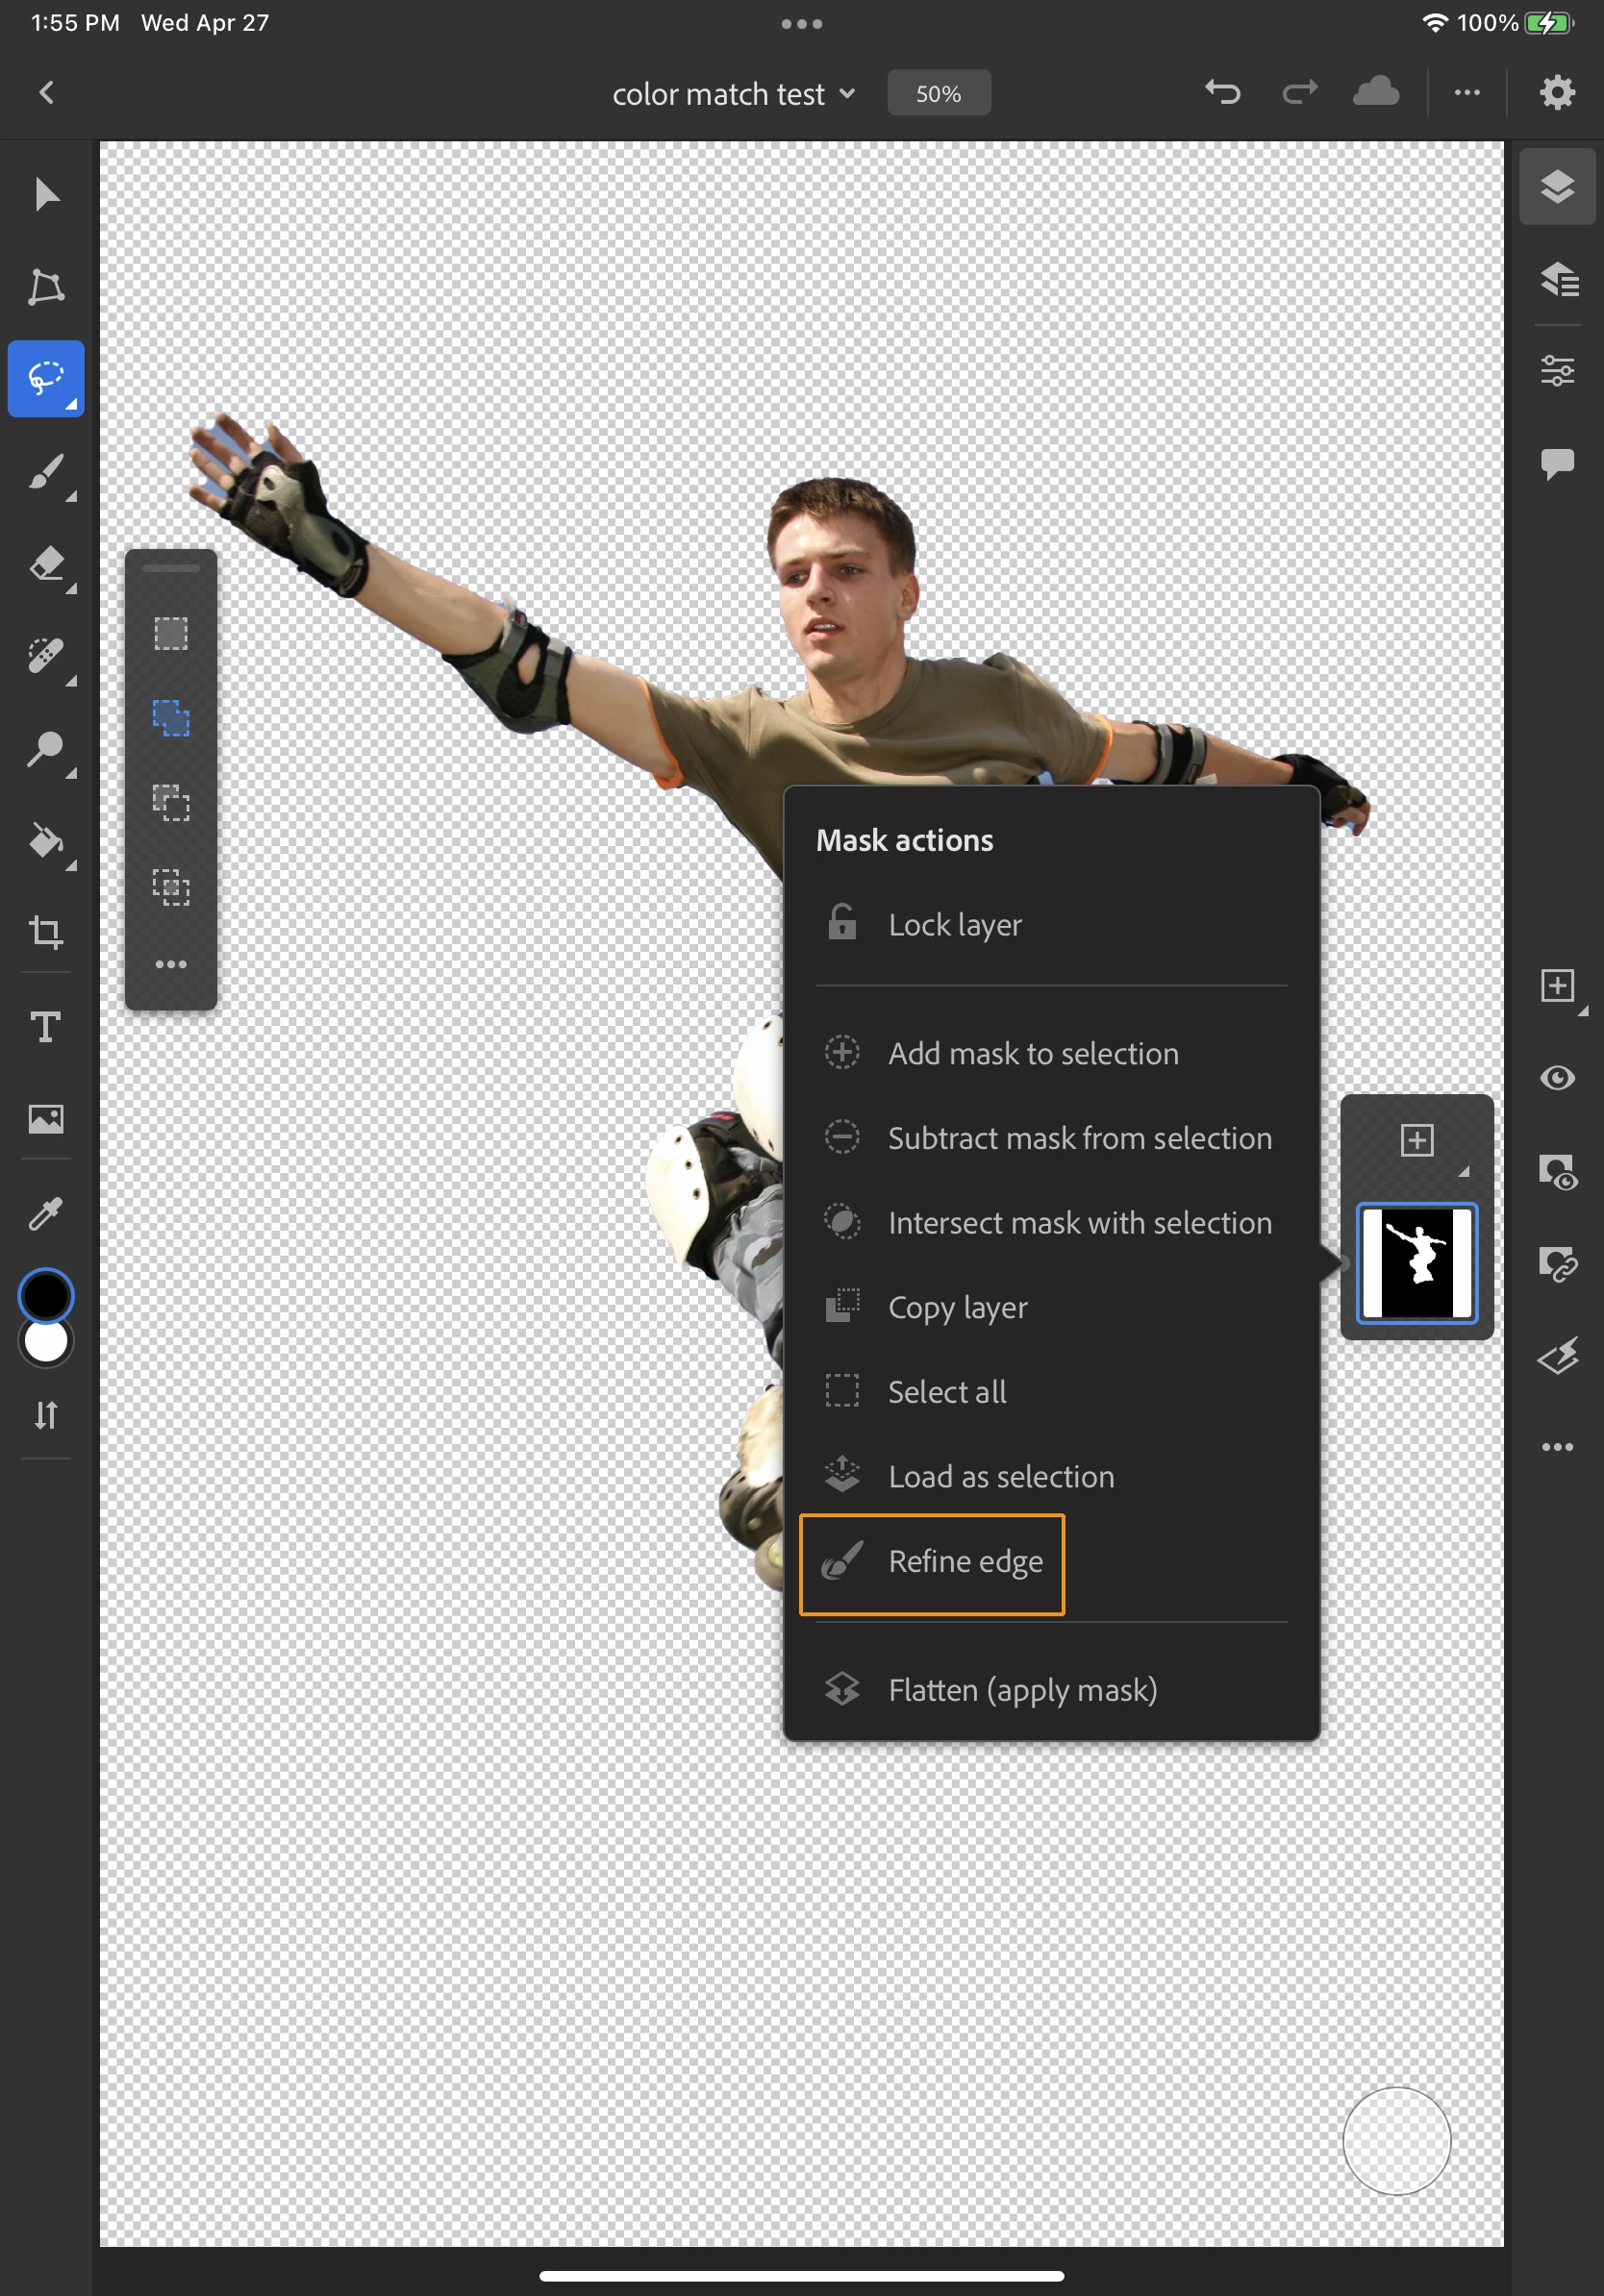
❷ (optional) Edit the mask
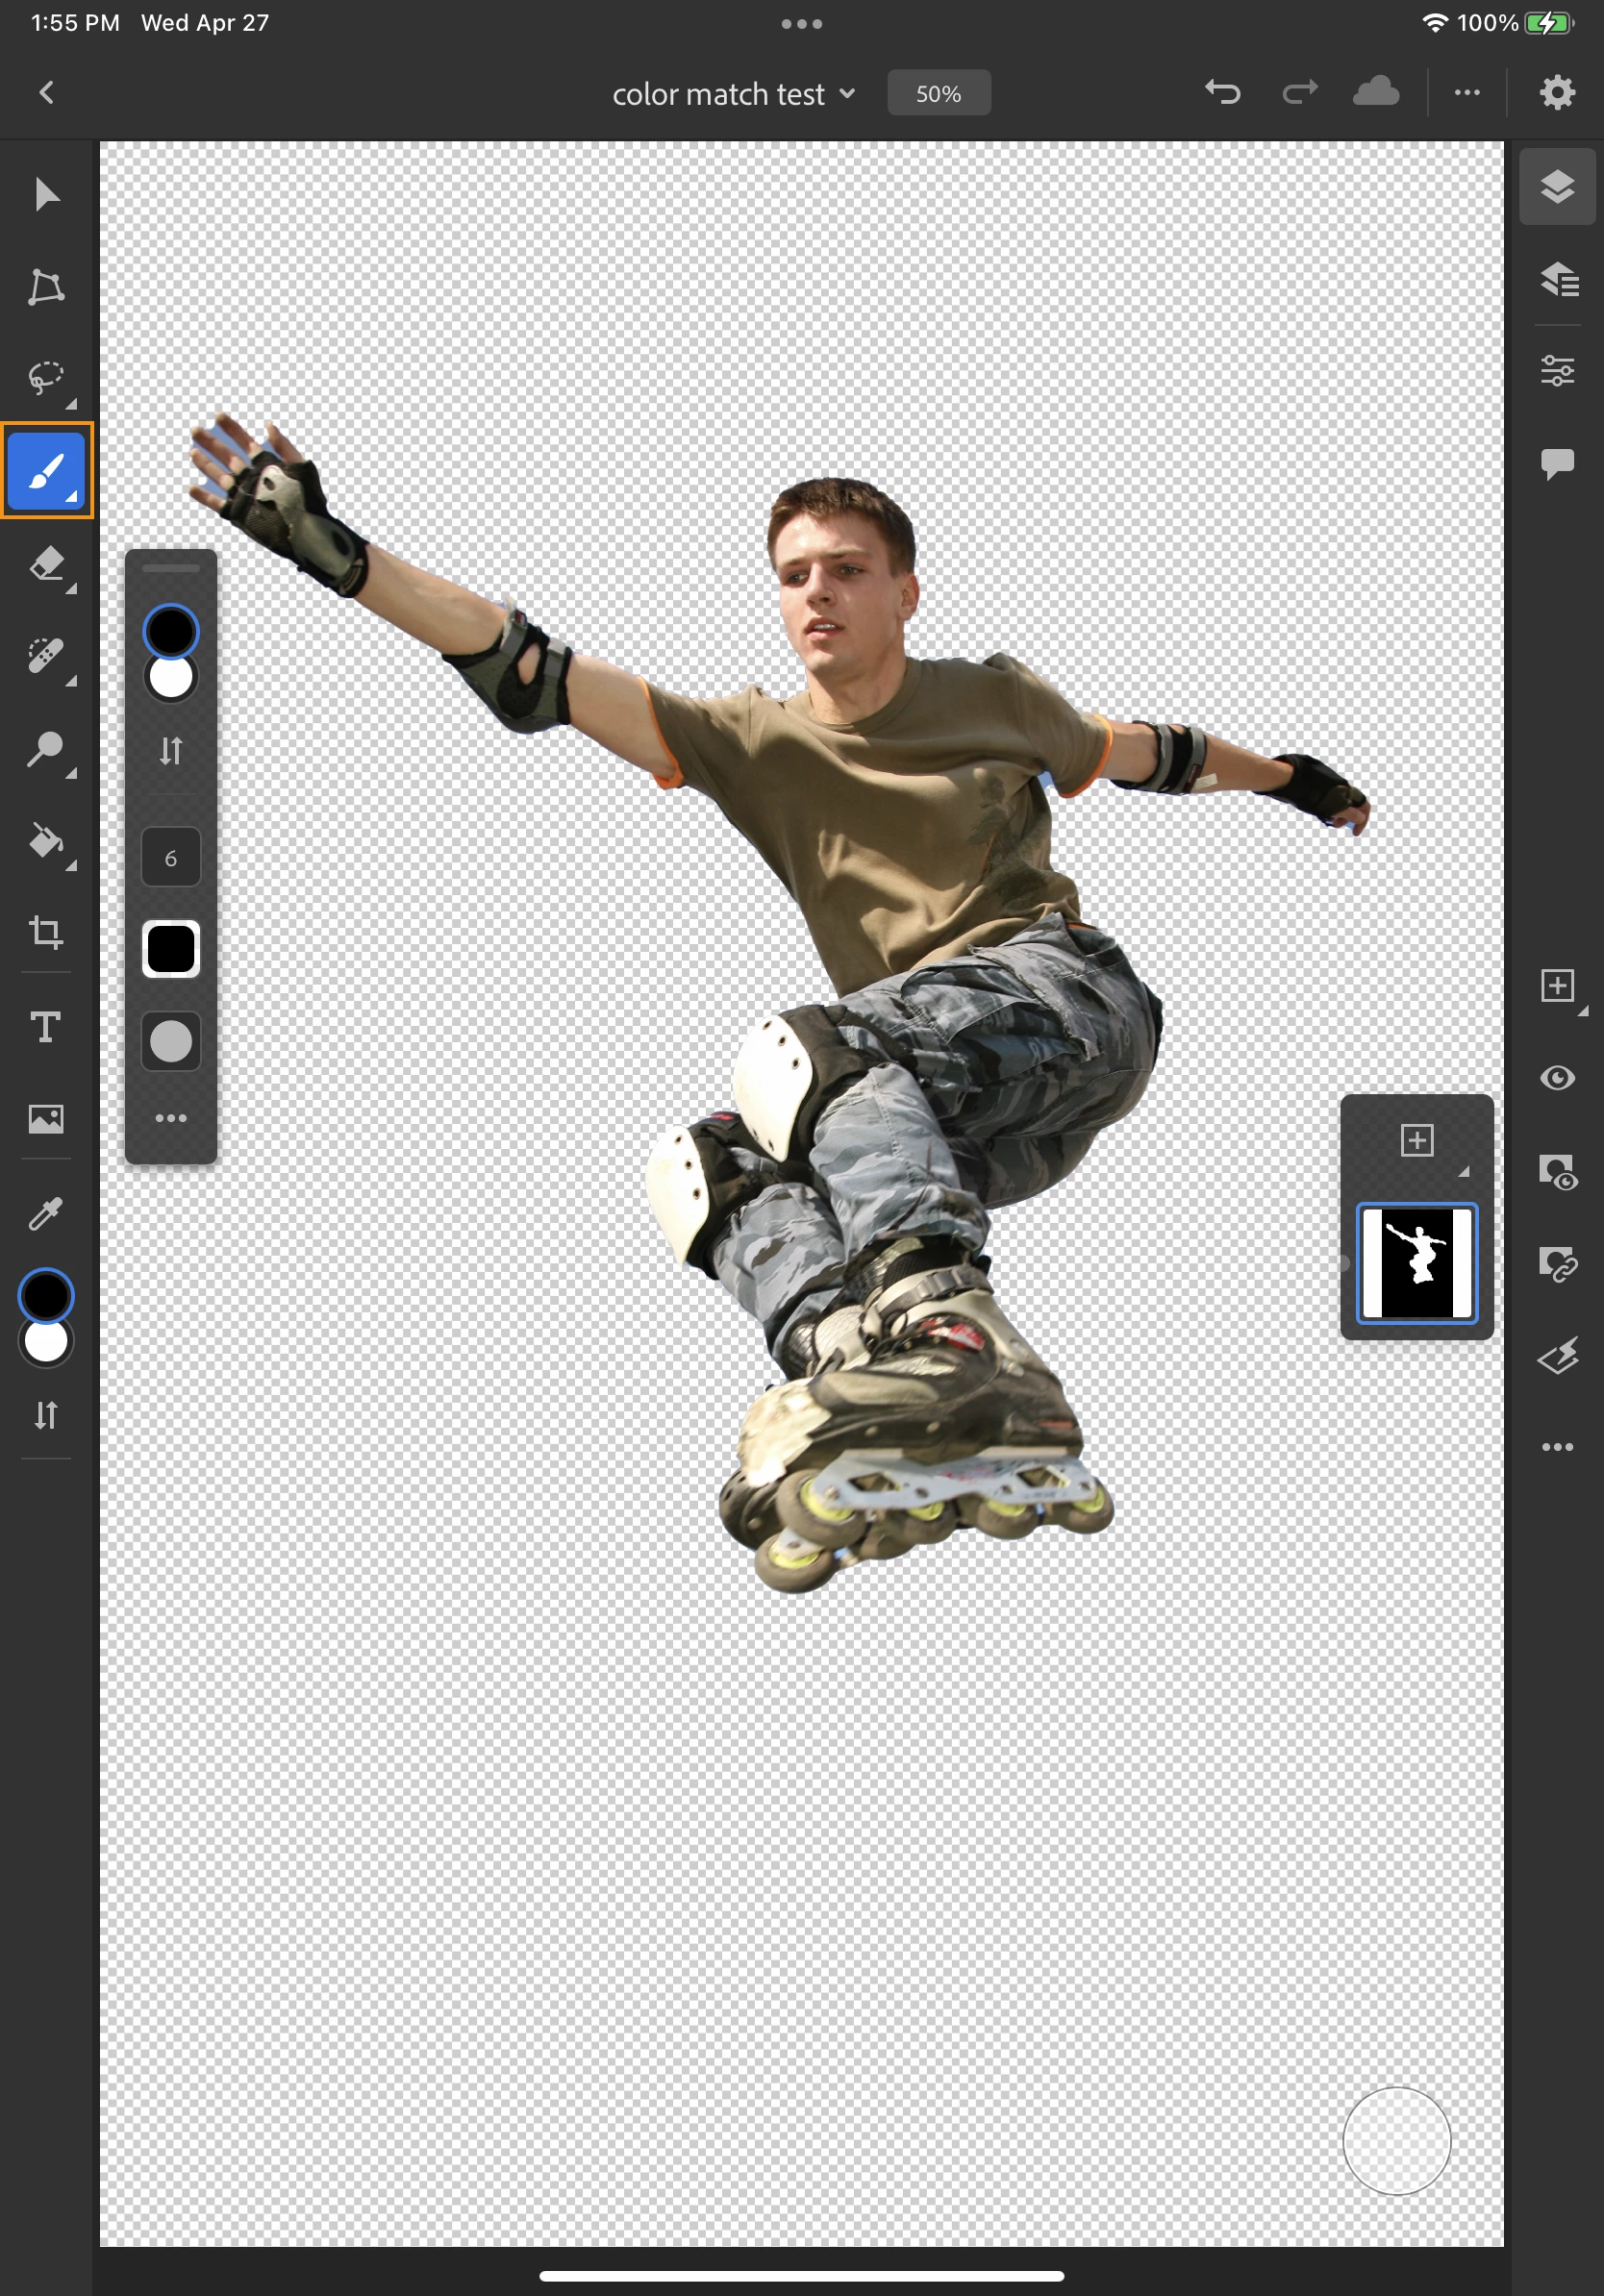
If either the background or subject is complicated or they are too similar in color, you may need to edit the mask to add or remove parts of the image from view to create the perfect mask. The layer mask was automatically created by the Remove Background action. If the layer thumbnail is visible instead of the layer mask, swipe left on the layer thumbnail to see the layer mask. You can use the Refine Edge feature (First screenshot below) or edit the layer mask directly by painting black to mask and white to reveal as shown below. (Second screenshot below) For more information on selections and masking, see the related links at the bottom of this post.
❸ Watch the video to see Remove Background in action
You can also use the Remove Background Quick Action in the desktop version of Photoshop: Remove backgrounds with a single click
If you want to learn more about Photoshop in little bite-sized chunks, visit the Quick Tips home page.
Related links:
Edit a composite with layer masks on your iPad
