- Home
- Photoshop ecosystem
- Discussions
- Quickest way to find "neutral" colour?
- Quickest way to find "neutral" colour?
Quickest way to find "neutral" colour?
Copy link to clipboard
Copied
When I colour correct my film scans I normally use Adobe Camera Raw. I use the eyedropper tool to find and click wherever the RGB values are more or less, if not exactly, the same. It works remarkably well to obtain a neutral colour.
But on some photos it takes quite a while to find a good spot to click on, which has made me wonder if there is a function in Photoshop (I use CS6) to quickly identify spots where the RGB values are the same?
Thanks in advance
Philip
Explore related tutorials & articles
Copy link to clipboard
Copied
Photoshop can't know what is supposed to be neutral (but isn't). Only you can do that.
Copy link to clipboard
Copied
Of course not. But that was not my question. I was simply wondering if there was a way to make Photoshop show parts of the image where the RGB values are the same or very similar.
Copy link to clipboard
Copied
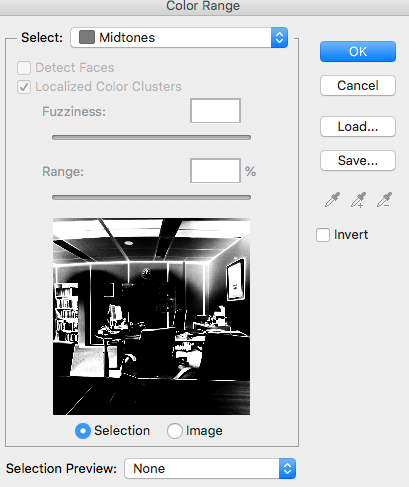
Have you tried using Color Range (Select > Color Range...)? You could set the Select dropdown to "Midtones" and adjust the Range to be very narrow.
Copy link to clipboard
Copied
Thanks Myra. When I try that all the sliders are greyed out. Any idea why?
Copy link to clipboard
Copied
I haven't used CS6 for a while, so it's hard to remember what worked back then. I did find this thread that says the sliders don't work in CS6 with the Highlights (which I would assume would be the same issue with Midtones). Maybe instead, set Select to Sampled Colors and use the eyedropper to sample an area that you would consider a neutral midtone. The pixels similar to the sample will show up in the preview.
Copy link to clipboard
Copied
Hi again Myra, thank you for finding that thread. It does indeed seem to be a CS6 thing. Unfortunately selecting the Sampled Colors won't help me in this case since I'm trying to get Photoshop to tell me where same/similar RGB values are located.
Copy link to clipboard
Copied

Often, the area in the image that is closest to neutral gray is difficult to locate. In that case:
- Add a new Layer to the image. Layer>New>Layer
- Fill it with 50% gray. Edit>Fill: Contents 50% Gray. Blending Mode: Normal
- In the Layers panel, change the Blending Mode to: Difference.
The darkest point in the resulting image is the Gray target.
The next step is to locate and mark that point.
- Create an Adjustment Layer>Threshold
- The Adjustment Layer may automatically default to a Clipping Layer, as evidenced by the down-arrow appearing in the layer. Unclip it.
- Shift the slider to the far left then inch it right to find the first tone.
- Choose the Color Sampler tool. Click on the tone that appeared.
- Cancel the Adjustment Layer and delete the 50% gray layer. The Color Sampler marker will remain.
If you look at the Info panel you will see it has added a segment marked #1 showing the original RGB values of the chosen spot followed by a slash and the new, adjusted values. For a perfect neutral gray, those three adjusted numbers should be alike. (If the #1 panel shows CMYK or Lab values, click on the eyedropper in that panel and choose RGB.)
Use Curves to change those values so they all match, indicating neutral gray.
NOTE: At times, although precise gray makes color rendering more accurate, it is not the most aesthetically pleasing interpretation of the image. It would be prudent not to let numbers overrule taste.
Copy link to clipboard
Copied
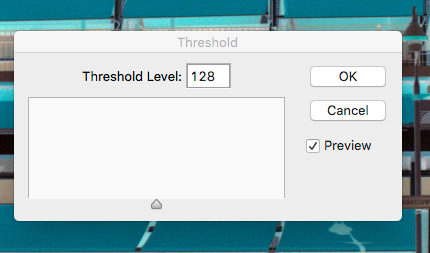
Thank you very much Norman for setting this out in such detail, I really appreciate it. Strangely enough, and provided I've not misunderstood, the Threshold layer seems not to work as you describe on my copy of Photoshop. There is no change in the image when I move the slider, except when it goes from 128 to 129, then the image goes from looking completely inverted to looking completely normal. There's no gradual change. I don't see a down-arrow in the dialog box or in the layers panel, so I guess the layer isn't a clipping layer.
Copy link to clipboard
Copied
You seem to have missed Step 2:
The next step is to locate and mark that point.
- Create an Adjustment Layer>Threshold
- The Adjustment Layer may automatically default to a Clipping Layer, as evidenced by the down-arrow appearing in the layer. Unclip it.
- Shift the slider to the far left then inch it right to find the first tone.
- Choose the Color Sampler tool. Click on the tone that appeared.
- Cancel the Adjustment Layer and delete the 50% gray layer. The Color Sampler marker will remain.
Personal note: Photographers and camera manufacturers refer to this "neutral colour" quality in an image as White balance. I don’t buy it. White Balance more accurately describes the criterion for highlight neutral gray: balancing the whites. Obtaining neutrals elsewhere in the image is more accurately described as establishing Gray Balance. Humor me: call it Gray Balance.
Copy link to clipboard
Copied
The problem is that you should not click on a spot where the RGB values are the same (nothing would change if you did), but on a spot where the RGB values should be the same (after you have corrected the colors).
For most images, the average color of all pixels should be grey. That is how white balance in a digital camera works, for example. Here's a method that uses this principle and often (but not always) works well:
Step 1: Duplicate your image to a new layer
Step 2: Run Filter - Blur - Average on the new layer
Step 3: Add a Curves adjustment layer above this and click with the grey eyedropper anywhere in the layer below
Step 4: Delete the blurred layer (or just turn it off)
Copy link to clipboard
Copied
Thanks for replying Johan, and for showing that workflow.
I should have added in the original post that when I colour correct in Camera Raw, I do that to obtain a starting point for further corrections. I'm just trying to find that starting point faster than having to look around in ACR with the eyedropper. Unfortunately it seems that is the fastest way.
I'm afraid that I disagree with your statement that nothing would change if I click on a spot where the RGB values are the same. There's definitely a change if I do.
Copy link to clipboard
Copied
In that case the RGB values weren't really the same, that is the only possible explanation. Remember that you usually do not sample a single pixel, but 3x3 pixels or 5x5 pixels. That could explain the difference.
When you click on a spot, Photoshop will neutralize that spot. It will make all three channels the same. That's the whole idea and why you are doing this, isn't it? But that means that if you click on a spot that is really 100% neutral already, then nothing will change. You neutralise something that is already neutral. It would be the same as clicking twice. If you click twice, the second click does not do anything anymore.
Copy link to clipboard
Copied
I wonder if a Saturation Map created via a Selective Color Layer (setting all six colors to -100% Black, Whites, Neutrals and Blacks to +100% Black) may not help visualize »neutrality«.
Copy link to clipboard
Copied
I doubt it will without any extra help. A saturation map will show a B&W image, where the brightness corresponds with the saturation. So no saturation (neutral) = black. That means you'll have to see the difference between pure black and 'almost black' to find the neutrals, and that is probably just as difficult. Maybe place a Threshold adjustment layer on top of it? Then drag the threshold slider all the way to the left to find the darkest pixels.
But again; this is a technique that tells you which pixels are neutral right now. What you need to find is which pixels should be neutral after the color is corrected...
Copy link to clipboard
Copied
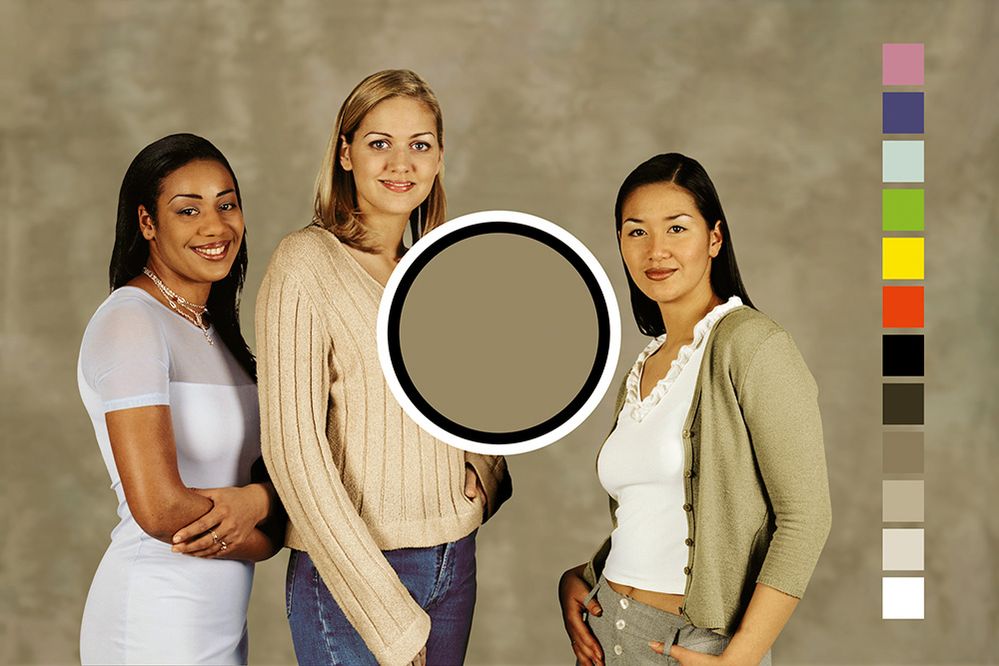
To illustrate why it is important to find the pixels that need to be neutral, and not the pixels that are neutral right now, try color correcting this image by finding the neutrals and then clicking on them with the grey eyedropper (don't cheat, click on the pixels that are neutral right now):
Find more inspiration, events, and resources on the new Adobe Community
Explore Now


